编者注:我们发现了比较有趣的系列文章《30天学习30种新技术》,准备翻译,一天一篇更新,年终礼包。下面是第四天的内容。
今天是“30天学习30种新技术”的第4天。到目前为止我很享受,而且周围开发者反响也很不错。我现在更有动力在30天内完成它了。在这篇文章中,我将介绍如何在Java下使用PredictionIO来简单地构建一个博客推荐引擎。我没找到太多在Java下使用PredictionIO的文档。所以,本文对那些寻找在Java下使用PredictionIO的完整教程的人可能会有用。“30天学习30种新技术”系列文章的目录可以在这里找到。
PredictionIO是什么?
PredictionIO是一个用Scala编写的开源机器学习服务器应用,可以帮助你方便地使用REST API搭建推荐引擎。它同时也提供了客户端SDK,封装了REST API。Java、Python、Ruby和PHP都有客户端SDK。PredictionIO的核心使用Apache Mahout。Apache Mahout是一个可伸缩的机器学习库,它提供众多聚集、分类、过滤算法。Apache Mahout可以在分布式的Hapoop集群上运行这些算法。
作为用户,我们不需要操心这些细节。我们只需安装PredictionIO然后使用它就是了。欲知详情,请读文档。
我为什么要关心PredictionIO?
我决定学习PredictionIO是因为我想使用一个可以帮助我加上机器学习功能的库。PredictionIO有助于实施诸如推荐有意思的内容、发现相似内容之类的功能。
安装PredictionIO
在文档中提及了很多安装PredictionIO的方法。我使用Vagrant,这样我就不会搞乱我的系统,同时不用自己配置所有的东西。
下载适合你的操作系统的最新版的vagrant:http://downloads.vagrantup.com/
下载并安装 VirtualBox。 请参考 https://www.virtualbox.org/wiki/Downloads
下载最新的包含 PredictionIO 的 vagrant包: https://github.com/PredictionIO/PredictionIO-Vagrant/releases
解压缩
PredictionIO-x.x.x.zip。其中包括了设置PredictionIO所需要的脚本。打开命令行终端,转到PredictionIO-x.x.x目录。
vagrant脚本将首先下载Ubuntu vagrant box,接着安装依赖——MongoDB、Java、Hadoop和PredictionIO服务器。这很耗时间(取决于网速)。如果你所在的位置网络不稳定,我建议你使用wget下载。wget命令支持断点续传。使用如下命令将precise64 box下载到适当的位置:
wget -c http://files.vagrantup.com/precise64.box
等待下载完成之后,打开Vagrantfile,修改config.vm.box_url,指向下载目录,例如:
config.vm.box_url = "/Users/shekhargulati/tools/vagrant/precise64.box"
现在只需vagrant up就可以开始安装进程了。取决于你的网速,这会花一些时间。
接着我们将按照文档所言创建一个管理员账户 http://docs.prediction.io/current/installation/install-predictionio-with-virtualbox-vagrant.html#create-an-administrator-account
可以通过 http://localhost:9000/ 访问应用。阅读以下文档了解详情 http://docs.prediction.io/current/installation/install-predictionio-with-virtualbox-vagrant.html#accessing-predictionio-server-vm-from-the-host-machine PredictionIO应用会要求你登录。登录之后,你会见到如下所见的面板。
创建PredictionIO应用
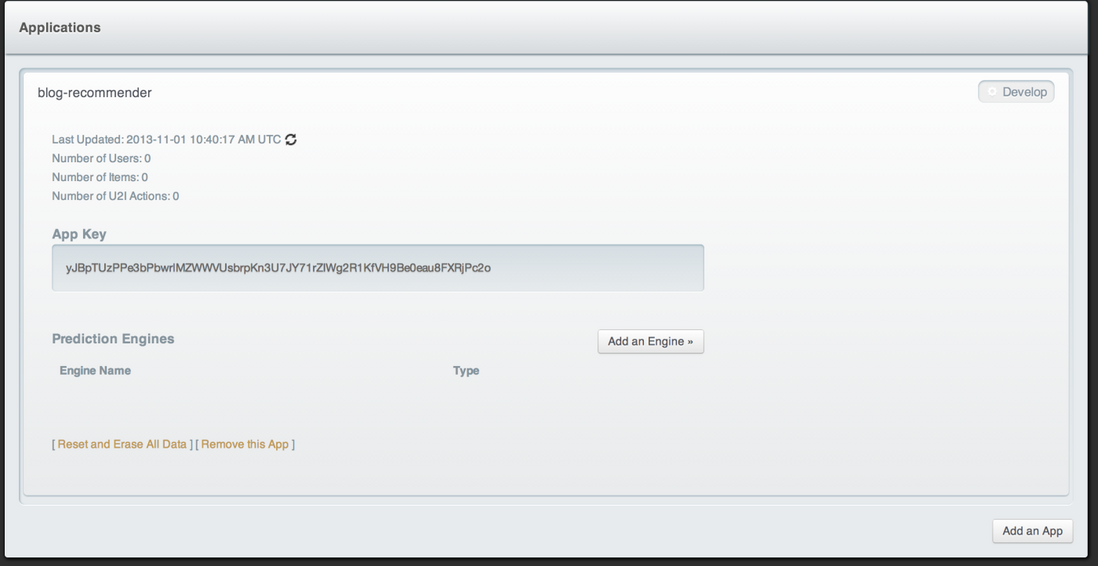
作为开始,我们创建一个博客推荐应用。点击“Add an App”按钮,输入应用名“blog-recommender”。
应用创建后,你可以在如下所示的Applications里看到。
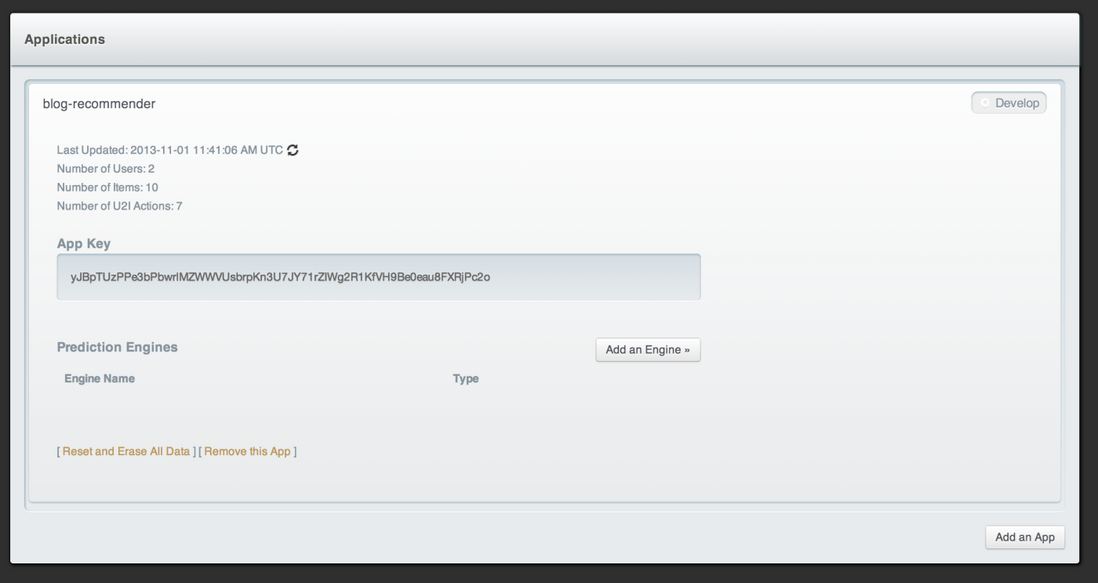
接着点击Develop,你将看到应用的详情。重要的信息是App Key。你编写应用的时候需要这个。
应用案例
我们正要实现的用例和亚马逊的“购买此商品的顾客也同时购买”功能很相似。我们要实现的是“浏览此博客的读者也同时浏览”功能。
开发博客推荐的Java应用
既然我们已经创建了PredictionIO应用,那么该是时候编写我们的Java应用了。我们使用Eclipse来开发这个应用。我使用的是Eclipse Kepler,内建了m2eclipse集成。通过 文件 > 新建 > Maven项目 创建一个基于Maven的项目。选择maven-archetype-quickstart,然后输入Maven项目的详细信息。用下面的内容替换pom.xml。
<project xmlns="http://maven.apache.org/POM/4.0.0" xmlns:xsi="http://www.w3.org/2001/XMLSchema-instance"
  xsi:schemaLocation="http://maven.apache.org/POM/4.0.0 http://maven.apache.org/xsd/maven-4.0.0.xsd">
  <modelVersion>4.0.0</modelversion>
  <groupId>com.shekhar</groupid>
  <artifactId>blog-recommender</artifactid>
  <version>0.0.1-SNAPSHOT</version>
  <packaging>jar</packaging>
  <name>blog-recommender</name>
  <url>http://maven.apache.org</url>
  <properties>
    <project.build.sourceEncoding>UTF-8</project.build.sourceencoding>
  </properties>
  <dependencies>
    <dependency>
  <groupId>io.prediction</groupid>
      <artifactId>client</artifactid>
  <version>0.6.1</version>
    </dependency>
  </dependencies>
  <build>
<plugins>
      <plugin>
        <groupId>org.apache.maven.plugins</groupid>
        <artifactId>maven-compiler-plugin</artifactid>
        <version>3.1</version>
        <configuration>
          <!-- http://maven.apache.org/plugins/maven-compiler-plugin/ -->
          <source>1.7</source>
          <target>1.7</target>
        </configuration>
      </plugin>
    </plugins>
  </build>
</project>
上面的内容中值得注意的是PredictionIO Java API和Maven的依赖关系。
现在我们将编写一个类,在PredictionIO中插入数据。这个类是这样子的。
package com.shekhar.blog_recommender;

import io.prediction.Client;
import io.prediction.CreateItemRequestBuilder;

public class BlogDataInserter {

    private static final String API_KEY = "wwoTLn0FR7vH6k51Op8KbU1z4tqeFGZyvBpSgafOaSSe40WqdMf90lEncOA0SB13";

    public static void main(String[] args) throws Exception {
        Client client = new Client(API_KEY);
        addUsers(client);
        addBlogs(client);
        userItemViews(client);
        client.close();
    }

    private static void addUsers(Client client) throws Exception {
        String[] users = { "shekhar", "rahul"};
        for (String user : users) {
            System.out.println("Added User " + user);
            client.createUser(user);
        }
    }

    private static void addBlogs(Client client) throws Exception {
        CreateItemRequestBuilder blog1 = client.getCreateItemRequestBuilder("blog1", new String[]{"machine-learning"});
        client.createItem(blog1);

        CreateItemRequestBuilder blog2 = client.getCreateItemRequestBuilder("blog2", new String[]{"javascript"});
        client.createItem(blog2);

        CreateItemRequestBuilder blog3 = client.getCreateItemRequestBuilder("blog3", new String[]{"scala"});
        client.createItem(blog3);

        CreateItemRequestBuilder blog4 = client.getCreateItemRequestBuilder("blog4", new String[]{"artificial-intelligence"});
        client.createItem(blog4);

        CreateItemRequestBuilder blog5 = client.getCreateItemRequestBuilder("blog5", new String[]{"statistics"});
        client.createItem(blog5);

        CreateItemRequestBuilder blog6 = client.getCreateItemRequestBuilder("blog6", new String[]{"python"});
        client.createItem(blog6);

        CreateItemRequestBuilder blog7 = client.getCreateItemRequestBuilder("blog7", new String[]{"web-development"});
        client.createItem(blog7);

        CreateItemRequestBuilder blog8 = client.getCreateItemRequestBuilder("blog8", new String[]{"security"});
        client.createItem(blog8);

        CreateItemRequestBuilder blog9 = client.getCreateItemRequestBuilder("blog9", new String[]{"ruby"});
        client.createItem(blog9);

        CreateItemRequestBuilder blog10 = client.getCreateItemRequestBuilder("blog10", new String[]{"openshift"});
        client.createItem(blog10);
    }

    private static void userItemViews(Client client) throws Exception {
        client.identify("shekhar");
        client.userActionItem("view","blog1");
        client.userActionItem("view","blog4");
        client.userActionItem("view","blog5");

        client.identify("rahul");
        client.userActionItem("view","blog1");
        client.userActionItem("view","blog4");
        client.userActionItem("view","blog6");
        client.userActionItem("view","blog7");

    }

}
上面展示的类主要做了这些事:
- 我们创建了一个Client类的实例。Client类封装了PredictionIO的REST API。我们需要将PredictionIO博客推荐应用的
API_KEY提供给它。 - 接着我们利用Client实例创建了两个用户。这两个用户在PredictionIO应用中创建。只有
userId是必须要填上的。 - 在此之后我们利用Clinet实例添加了10个博客。博客同样在PredictionIO应用中创建。当创建一项事物的时候,你只需传递两样东西——
itemId和itemType。blog1,...blog10是itemId,而javascript、scala等是itemType。 - 然后我们对创建的事物施加一些行动。用户
shekhar浏览了blog1、blog2和blog4,而用户rahul则浏览了blog1、blog4、blog6和blog7。 - 最后,我们关闭了cilent实例。
将这个类作为Java应用程序运行。它会在PredictionIO中插入记录,你可以通过查看面板来确认这一点。
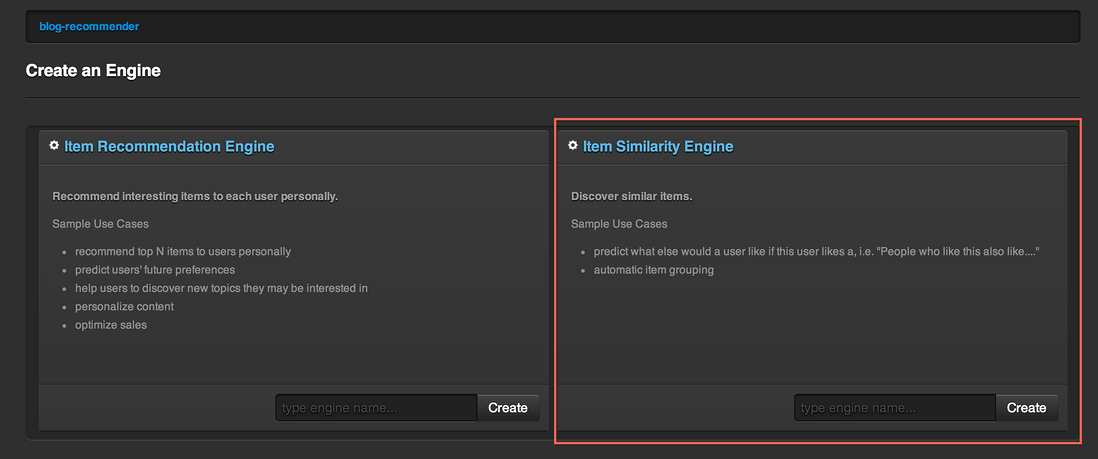
既然数据已经插入了我们的PredictionIO应用了,我们需要在我们的应用中添加引擎。点击Add an Engine按钮。如下所示,选择Item Similarity Engine。
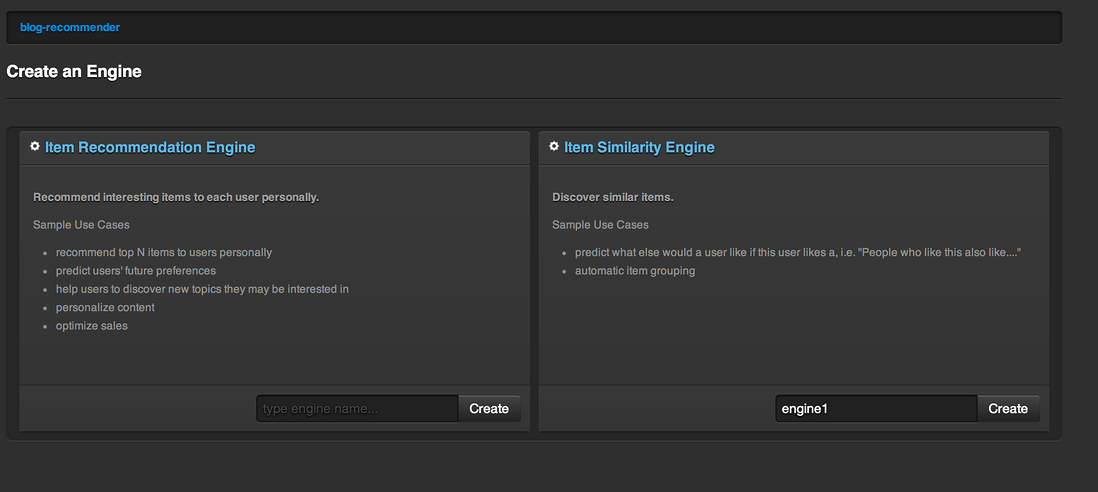
然后创建Item Similarity Engine,输入engine1作为名称。
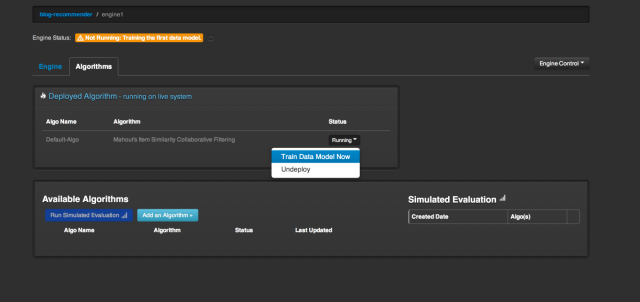
按下Create按钮之后Item Similarity Engine就创建好了。现在你可以改动一些配置,不过我们将使用默认配置。进入Algorithms标签,你会看到引擎尚未运行。点击Train Data Model Now可运行引擎。
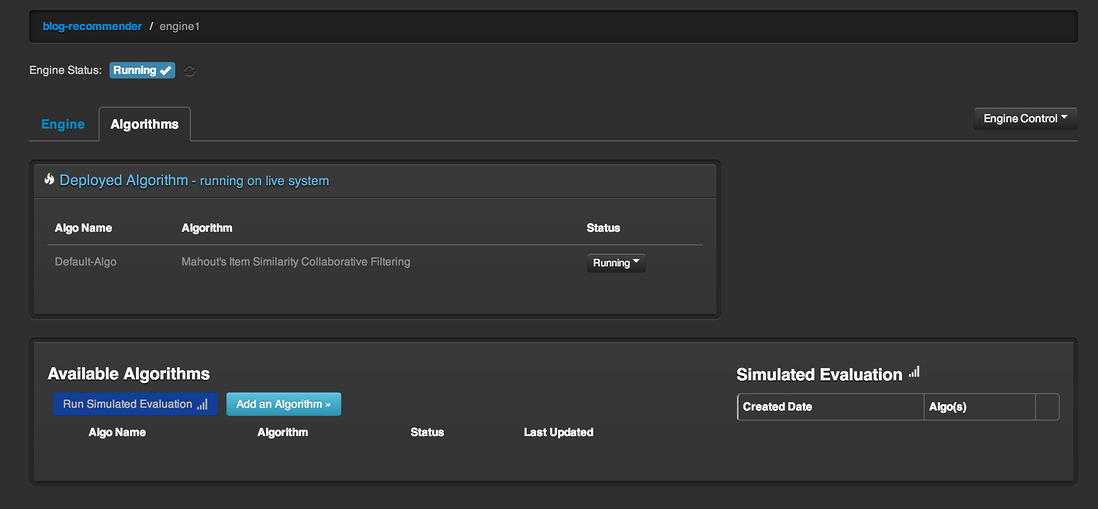
等上一段时间。数据模型训练完成之后,你会看到状态已经变成Running了。
我们要解决的问题是基于用户访问过的博客向用户推荐博客。在下面的代码中,我们获取了对userId shekhar 而言 blog1 的相似项。
import io.prediction.Client;

import java.util.Arrays;

public class BlogrRecommender {

    public static void main(String[] args) throws Exception {

        Client client = new Client("wwoTLn0FR7vH6k51Op8KbU1z4tqeFGZyvBpSgafOaSSe40WqdMf90lEncOA0SB13");
        client.identify("shekhar");
        String[] recommendedItems = client.getItemSimTopN("engine1", "blog1", 5);

        System.out.println(String.format("User %s is recommended %s", "shekhar", Arrays.toString(recommendedItems)));

        client.close();
    }
}
运行此Java程序,你会看到结果:blog4、blog5、blog6和blog7。
正如你在上面的例子中看到的,为应用增加推荐功能很容易。我会在我未来的项目中使用PredictionIO,我也会花更多的时间学习和使用PredictionIO。
这就是今天的内容。请多多回馈。
原文 Day 4: PredictionIO--How to Build A Blog Recommender
翻译 SegmentFault


**粗体** _斜体_ [链接](http://example.com) `代码` - 列表 > 引用。你还可以使用@来通知其他用户。