background
During the internship, there is a requirement that the front-end calls the algorithm model and encapsulates it into an npm package for the video conference group to use, so as to realize the background blur and background replacement functions in the video conference. Some fun features may be added in the follow-up, such as facial special effects (beard, eyebrow), hair color replacement, etc.
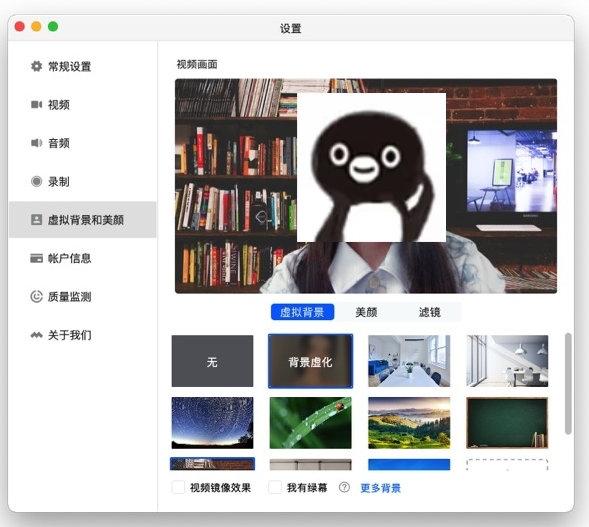
The effect should be similar to the following
Tencent meeting interface:
In order to demonstrate to the demand side, first use google's TensorFlow.js BodyPix 160ed1e7d8b05b model a small background effect, and the background is satisfied.
TensorFlow.js is a JavaScript library. We can use it to directly use JavaScript to create new machine learning models and deploy existing models. It is very friendly for front-end personnel to get started with machine learning.
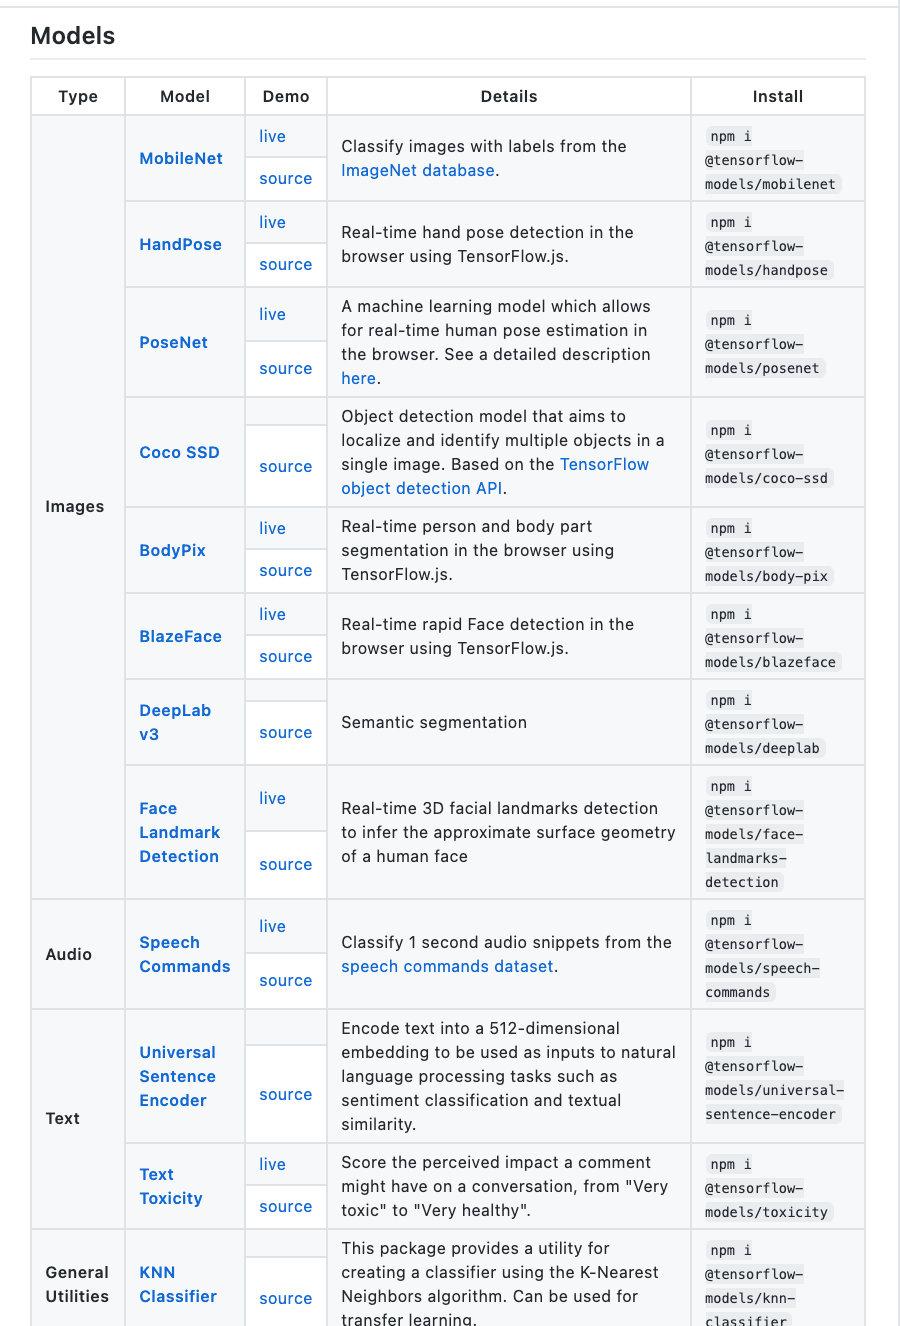
TensorFlow.js provides many pre-trained models out of the box (see figure below):
BodyPix model in the image processing category is selected here
This is BodyPix’s official demo https://storage.googleapis.com/tfjs-models/demos/body-pix/index.html,
The functions in the demo are a bit too complicated for our needs, and there is no background replacement function. Therefore, I wrote a demo for background bokeh and background replacement.
Introduction
- Ideas: open in a browser cameras capture the video stream pictures, call tensorflow.js of body-PIX model way to draw results. The background blurring is relatively easy to implement. You can directly use the
drawBokehEffectmethod provided by the model; the model does not have a ready-made background replacement interface. Use the canvas drawing method totoMaskmethod of the model (by foreground and background color pixels). Point array, in which the foreground color represents the portrait area, and the background color represents other areas) some processing has been performed to realize the background replacement (details will be introduced later). - Technology used: vue+element ui, tensorflow.js (no need to learn specifically, just use the examples in it) and some simple operations of canvas
- The code of this project has been put on github https://github.com/SprinaLF/font-end-body-pix
Achieve effect
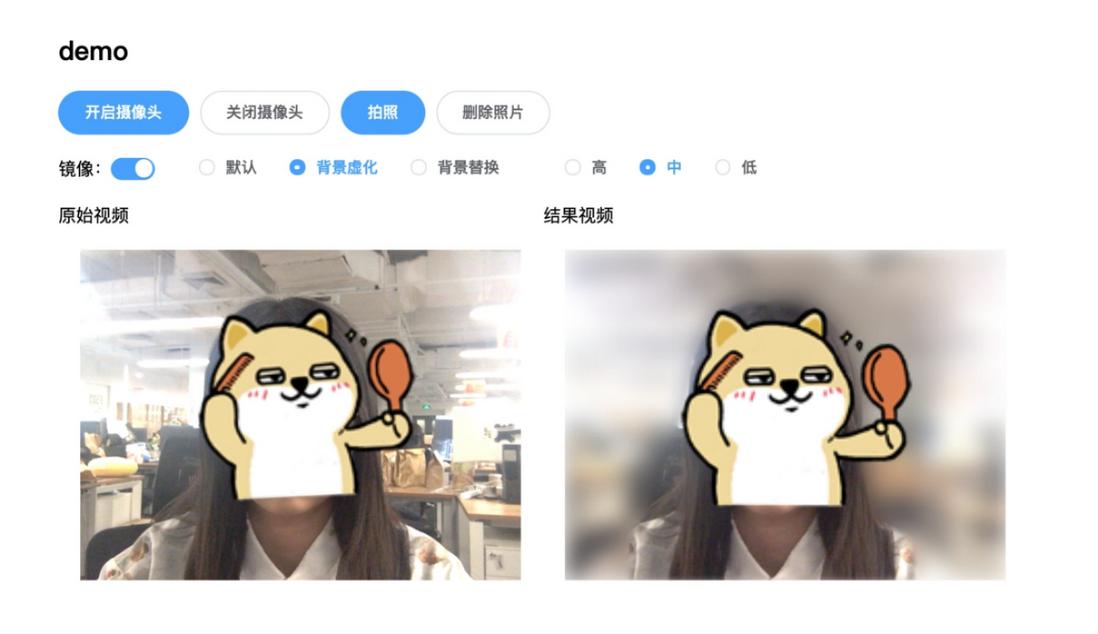
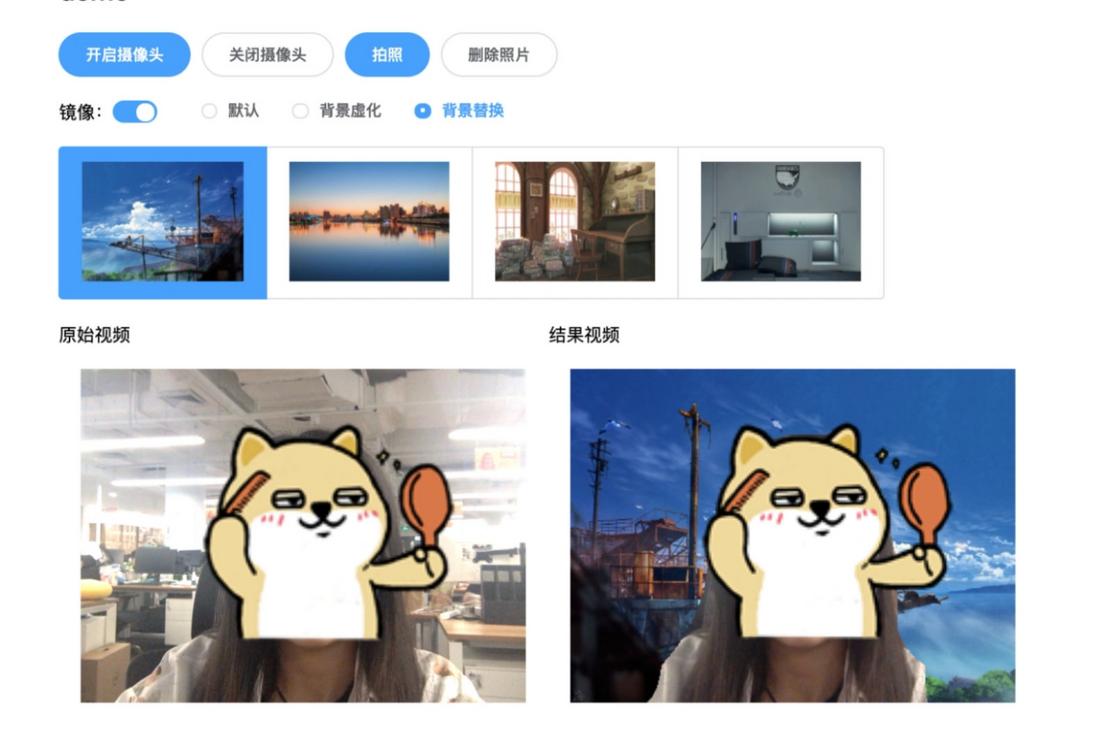
Let’s look at the final result first:
1. Start interface: the video will be displayed below after turning on the camera, and the photos taken will be displayed below the video
- Background blur: choose medium, high and low blur degree
- Background replacement: After the mode is switched to background replacement, the background image list will be displayed, and the background can be switched
Core process
1. Introducing the model
There are two ways
- Introduce script
<!-- Load TensorFlow.js -->
<script src="https://cdn.jsdelivr.net/npm/@tensorflow/tfjs@1.2"></script>
<!-- Load BodyPix -->
<script src="https://cdn.jsdelivr.net/npm/@tensorflow-models/body-pix@2.0"></script>- To install, use the following command (tensorflow.js and bodyPix have been installed in my project, and the dependencies can be installed
yarn install
$ npm install @tensorflow/tfjs 或 yarn add @tensorflow/tfjs
$ npm install @tensorflow-models/body-pix
2. Load the model
body-pix has two algorithm model architectures, MobileNetV1 and ResNet50.
After a local attempt, ResNet50 has a very slow startup speed, a long loading time, and high GPU requirements. It is not suitable for general computers and mobile devices. Only MobileNetV1 is considered here.
Initially call the loadAndPredict method to pre-load the model, and the parameters are preset to:
model: {
          architecture: 'MobileNetV1',
          outputStride: 16,   //8,16  值越小,输出分辨率越大,模型越精确,速度越慢
          multiplier: 0.75,   // 0.5,0.75,1  值越大,层越大,模型越精确,速度越慢
          quantBytes: 2    /* 1,2,4  此参数控制用于权重量化的字节
                             '4. 每个浮点数 4 个字节(无量化)。最高精度&原始模型尺寸',
                             '2. 每个浮点数 2 个字节。精度略低,模型尺寸减小 2 倍',
                             '1. 每个浮点数 1 个字节。精度降低, 模型尺寸减少 4 倍'
                           */
      },
 async loadAndPredict(model) {
   // 加载模型
   this.net = await bodyPix.load(model);
 }
Three. Bokeh
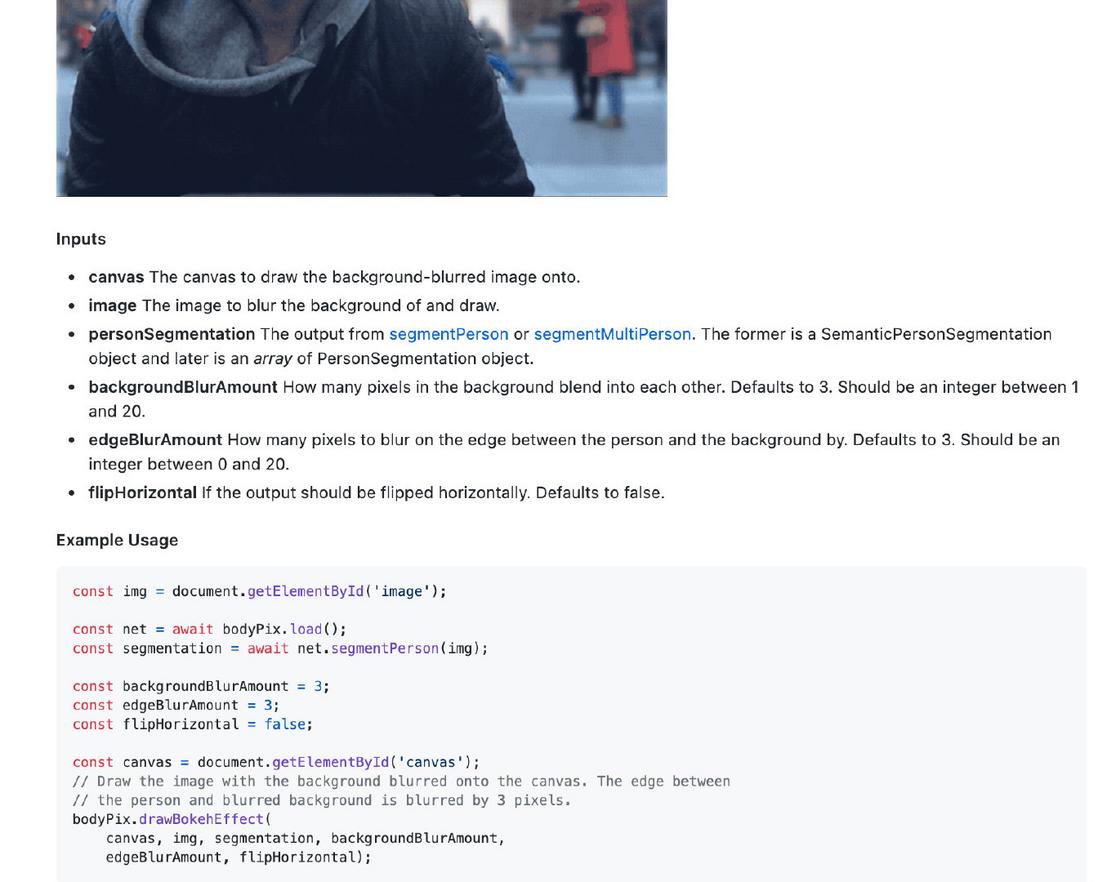
Examples from the official website:
Among them, net.segmentPerson(img) returns the result of image pixel analysis, as shown in the figure below,
Using the existing bodyPix.drawBokehEffect method, pass in the picture to be blurred and the canvas object to be drawn, segmentation and some parameters of the degree of blurred, then the result can be drawn to the incoming canvas.
background code:
 async blurBackground () {
      const img = this.$refs['video']   // 获取视频帧
      const segmentation = await this.net.segmentPerson(img);
      bodyPix.drawBokehEffect(
        this.videoCanvas, img, segmentation, this.backgroundBlurAmount,
        this.edgeBlurAmount, this.flipHorizontal);

      if(this.radio===2) {    // 当选中背景虚化时,用requestAnimationFrame不断调用blurBackground
        requestAnimationFrame(
          this.blurBackground
        )
      } else this.clearCanvas(this.videoCanvas)

      // this.timer = setInterval(async() => {
      //   this.segmentation = await this.net.segmentPerson(img);
      //   bodyPix.drawBokehEffect(
      //     this.videoCanvas, img, this.segmentation, 3,
      //     this.edgeBlurAmount, this.flipHorizontal);
      // }, 60)
   },
supplement:
Here you need to continuously process the video frames and draw them to the canvas to ensure a smooth experience.
A timer was initially set up, and the corresponding method was executed every 60ms, but the effect was not good, and the stuttering was obvious, and the performance was not good. So I took a look at the demo code of window.requestAnimationFrame instead of the timer. After changing the timer to this method, the performance and fluency have been greatly improved.
Four. Background replacement
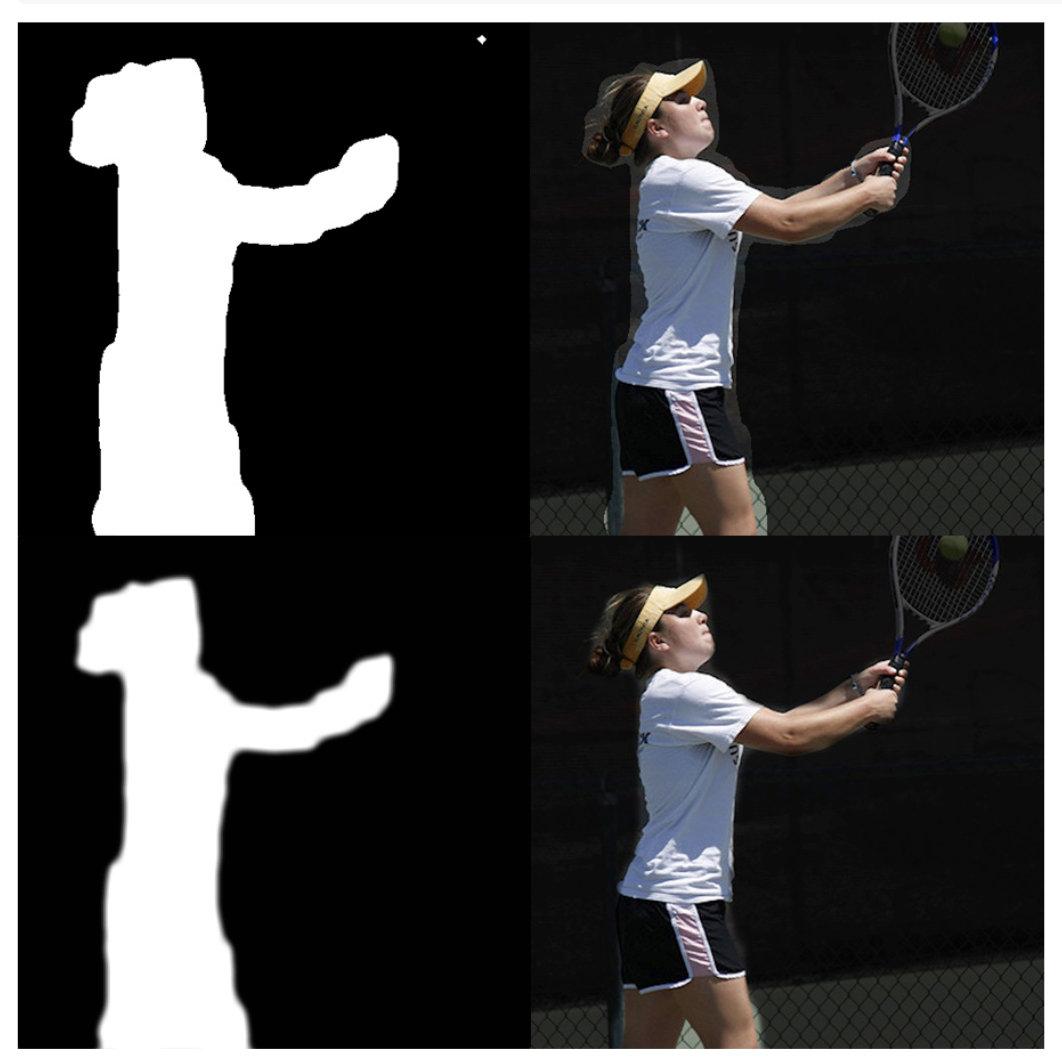
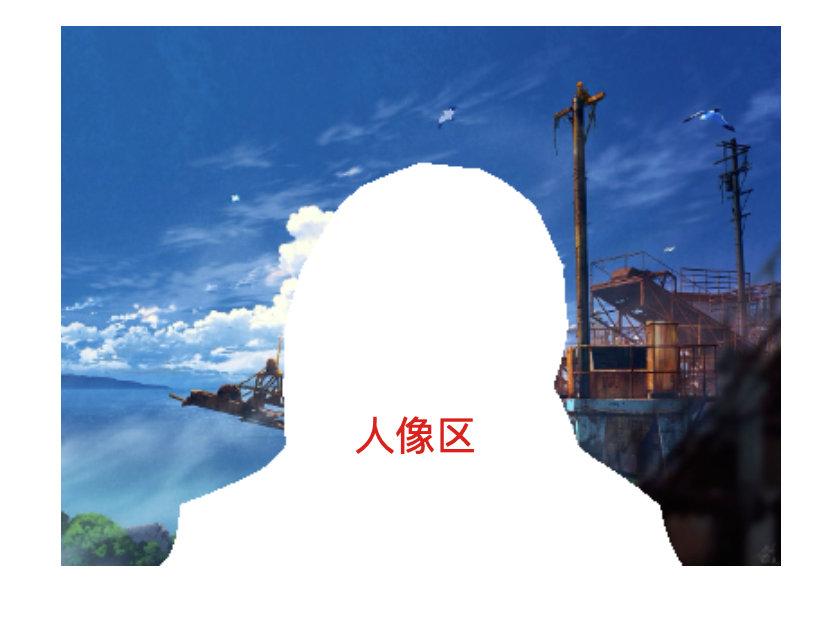
bodyPix does not provide a ready-made background replacement method, but one method is to return a mask object, the portrait part is the incoming foreground color, and the background part is the incoming background color (see the picture below)
You can use the globalCompositeOperation properties of the canvas to set the type of composition operation to be applied when drawing a new shape, and process the mask to achieve the purpose of replacing the background.
globalCompositeOperation has a lot of types for us to set up the operation of new graphics on the previous canvas (such as parallel operation, drawing level, color and brightness retention), the default value is source-over , in the existing Draw new graphics on top of the canvas context.
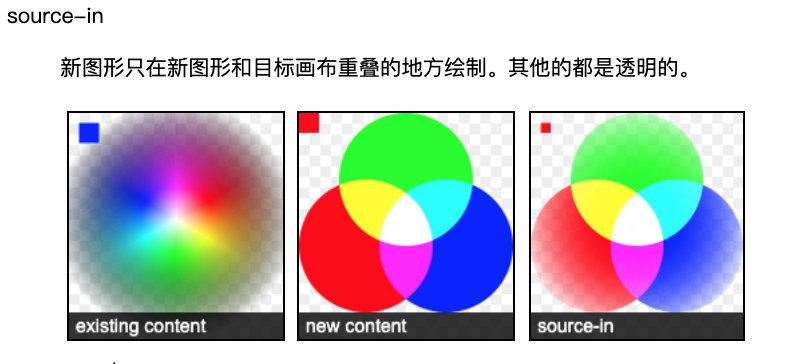
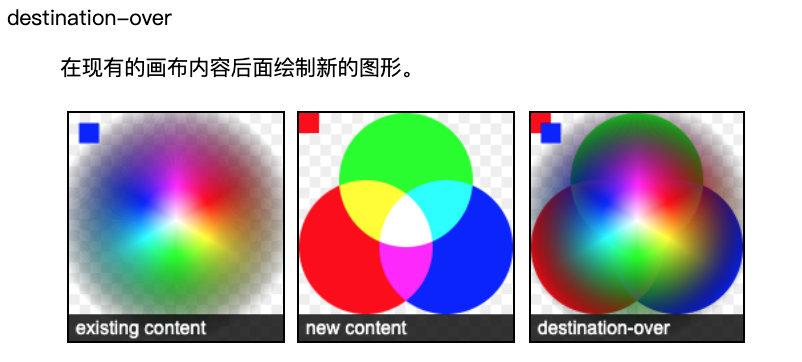
source-in and destination-over are used here
- draw background image
souce-in is used to draw a new background image to be replaced.
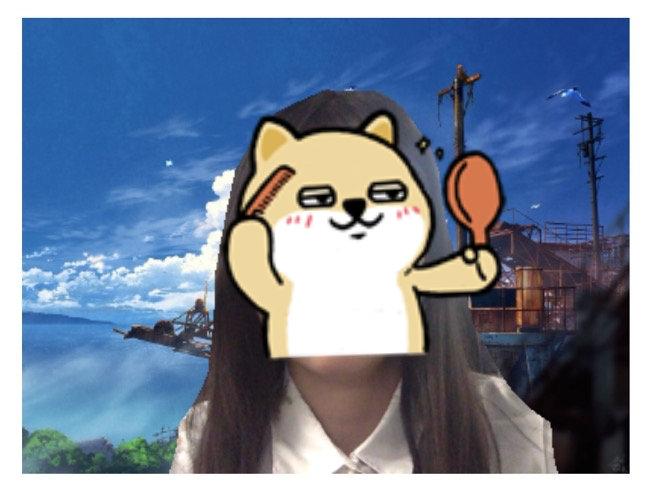
Set the portrait part (foreground color) to be transparent in advance, and when the globalCompositeOperation is source-in type, the background image will only be drawn in the background color area, as shown in the following figure:
- Drawing portrait
Then just switch to destination-over and draw the portrait behind the existing contents of the canvas. This way the background will block the previous background, and the portrait will be displayed.
background replacement code:
  async replaceBackground() {
    if(!this.isOpen) return
    const img = this.$refs['video']
    const segmentation = await this.net.segmentPerson(img);

    const foregroundColor = { r: 0, g: 0, b: 0, a: 0 }    // 前景色  设为完全透明
    const backgroundColor = { r: 0, g: 0, b: 0, a: 255 }   // 背景色
    let backgroundDarkeningMask = bodyPix.toMask(
      segmentation,
      foregroundColor,
      backgroundColor
    )
    if (backgroundDarkeningMask) {
      let context = this.videoCanvas.getContext('2d')
      // 合成
      context.putImageData(backgroundDarkeningMask, 0, 0)
      context.globalCompositeOperation = 'source-in' // 新图形只在重合区域绘制
      context.drawImage(this.backgroundImg, 0, 0, this.videoCanvas.width, this.videoCanvas.height)
      context.globalCompositeOperation = 'destination-over' // 新图形只在不重合的区域绘制
      context.drawImage(img, 0, 0, this.videoCanvas.width, this.videoCanvas.height)
      context.globalCompositeOperation = 'source-over' // 恢复
    }
    if(this.radio===3) {
      requestAnimationFrame(
        this.replaceBackground
      )
    } else {
      this.clearCanvas(this.videoCanvas)
    }
  },
Other: Mirror
Mirroring does not use the bodyPix method, although it provides us with such an operation
Directly through css3, with the help of vue's v-bind to dynamically switch classes
<canvas v-bind:class="{flipHorizontal: isFlipHorizontal}" id="videoCanvas" width="400" height="300"></canvas>

.flipHorizontal {
    transform: rotateY(180deg);
  }
reference
Turn on the camera: https://www.cnblogs.com/ljx20180807/p/10839713.html
TensorFlow.js model: https://github.com/tensorflow/tfjs-models
canvas:https://developer.mozilla.org/zh-CN/docs/Web/API/CanvasRenderingContext2D/globalCompositeOperation
JS statistical function execution time: https://blog.csdn.net/K346K346/article/details/113445710
Turn on the camera: https://www.cnblogs.com/ljx20180807/p/10839713.html
bodyPix implements real-time camera background blur/background replacement https://www.tytion.net/archives/81/



**粗体** _斜体_ [链接](http://example.com) `代码` - 列表 > 引用。你还可以使用@来通知其他用户。