
This article is shared by Zhang Yuhang, the front-end engineer of the WeDoctor Cloud technical team. The original title "Create a WebRTC application from 0 to 1" has revisions and changes.
1 Introduction
At the beginning of last year, the sudden new crown pneumonia epidemic almost cut off offline medical treatment channels. In this context, the online consultation mode quickly solved the urgent needs of a large number of patients in urgent need of medical treatment. As an important part of the online consultation-the video consultation between doctors and patients is realized by the application of real-time audio and video technology.
It is well known that the threshold for real-time audio and video chat technology is very high. It is quite difficult for ordinary companies to fill in the technical shortcomings from zero in a short period of time. The open source audio and video project WebRTC provides such a shortcut (including the author). The company’s products are also based on WebRTC technology to achieve).
Based on the practical experience of WebRTC technology in the online consultation product developed by the author, this article will describe how to develop a real-time audio and video chat function from scratch based on WebRTC. This article will start with the basic knowledge and technical principles of WebRTC, and demonstrate how to build a WebRTC real-time audio and video chat function based on open source technology.

Learning Exchange:
- Introduction to Mobile IM Development: "One entry is enough for novices: Develop mobile IM from scratch"
- Open source IM framework source code: https://github.com/JackJiang2011/MobileIMSDK
(This article was published simultaneously at: http://www.52im.net/thread-3680-1-1.html)
2. Source code of this article
Download the complete source code attachment: http://www.52im.net/thread-3680-1-1.html
cdwebrtc-server
yarn
npm start
Quote
cdwebrtc-static
yarn
npm start
3. Knowledge preparation
3.1 Theoretical basis of audio and video
Before understanding the WebRTC technology, if you do not yet understand the basic theory of audio and video technology, it is recommended to learn from the following introductory articles first.
"Zero Foundation, Introduction to the Most Popular Video Coding Technology in History" (* required reading)
"An Introduction to Real-time Audio and Video Technology for Xiaobai"
"Introduction to Zero Basics: A Comprehensive Inventory of Basic Knowledge of Real-time Audio and Video Technology"
"Necessary for real-time audio and video viewing: quickly master 11 basic concepts related to video technology" (* required reading)
"IQIYI Technology Sharing: Easy and humorous, explaining the past, present and future of video codec technology"
3.2 What is WebRTC
▲ The picture is quoted from "The Great WebRTC: Ecology is getting better and better, or real-time audio and video technology will become cabbage."

WebRTC (Web Real-Time Communication) is the GIPS engine that Google acquired VoIP software developer Global IP Solutions for US$68.2 million in 2010, and renamed it "WebRTC" in 2011. It was open sourced to build an Internet browser. A platform for real-time communication between audio, video and data. For more information about WebRTC, please refer to "The Great WebRTC: The Ecosystem Is Improving, Or Turn Real-time Audio and Video Technology into Cabbage", this article will not go into details.
So what can WebRTC do?
In addition to the real-time audio and video calls in traditional IM social software such as WeChat, DingTalk, and QQ that we all use every day, the author’s products involve online consultations/remote clinics/remote consultations in the medical field. Download more popular interactive live broadcast, online education and other scenes. In addition, with the rapid construction of 5G, WebRTC also provides good technical support for cloud gaming.
3.3 WebRTC learning resources
WebRTC official resources:
"WebRTC Open Source Project Official Website"
"WebRTC open source project source code hosting address"
"WebRTC Standard API Online Document"
Other WebRTC learning resources:
"Concise Compilation Tutorial of Open Source Real-time Audio and Video Technology WebRTC under Windows"
"Introduction to the overall architecture of WebRTC real-time audio and video technology"
"Conscience Sharing: WebRTC Zero-based Developer Tutorial (Chinese) [Attachment Download]"
4. WebRTC technology composition
The overall technical composition diagram from the WebRTC official website:

The entire WebRTC can be roughly divided into the following 3 parts:
1) The API provided by purple for web front-end development;
2) The blue solid line provides APIs used by major browser manufacturers;
3) The blue dotted line includes 3 parts: audio engine, video engine, and network transmission (Transport), all of which can be customized.
Due to limited space, this section will not discuss in depth. If you are interested, you can read "Introduction to the Overall Architecture of WebRTC Real-time Audio and Video Technology".
5. P2P communication principle of WebRTC
5.1 Technical difficulties of P2P communication
P2P communication is point-to-point communication.
What are the difficulties in real-time audio and video communication between two clients (possibly different web browsers or mobile apps) in different network environments (with microphones and camera devices), and what problems need to be solved?
To sum up, it is mainly the following three questions:
1) How to know each other's existence is how to discover each other?
2) How to communicate with each other's audio and video codec capabilities?
3) How to transmit audio and video data, how can the other party see themselves?
Below we will discuss these three issues one by one.
5.2 How to know each other's existence (that is, how to find each other)?
Regarding question 1: Although WebRTC supports end-to-end communication, this does not mean that WebRTC no longer needs a server.
In the process of P2P communication, the two parties need to exchange some metadata such as media information, network data and so on. We usually call this process "signaling".
The corresponding server is a "signaling server", which is usually called a "room server" because it can not only exchange each other's media information and network information, but also manage room information.
for example:
1) Notify each other who has joined the room;
2) who left the room
3) Tell the third party whether the number of people in the room is full or not to join the room.
In order to avoid redundancy and maximize compatibility with existing technologies, the WebRTC standard does not specify signaling methods and protocols. In the practice chapters later in this article, Koa and Socket.io technologies will be used to implement a signaling server.
5.3 How to communicate with each other's audio and video codec capabilities?
For question 2: The first thing we need to know is that different browsers have different audio and video encoding and decoding capabilities.
For example: Peer-A end supports H264, VP8 and other encoding formats, while Peer-B end supports H264, VP9 and other formats. In order to ensure that both parties can encode and decode correctly, the easiest way is to take the intersection of the formats supported by them-H264.

In WebRTC: There is a special protocol called Session Description Protocol (SDP), which can be used to describe the above-mentioned information.
Therefore: the two parties involved in the audio and video communication want to know the media format supported by the other party, they must exchange SDP information. The process of exchanging SDP is usually called media negotiation.
5.4 How to transmit audio and video data and how to make the other party see itself?
Regarding question 3: It is essentially a process of network negotiation, that is, both parties involved in real-time audio and video communication must understand each other's network conditions, so that it is possible to find a mutual communication link.
The ideal network situation is that each browser computer has its own private public network IP address, so that it can be connected directly.
But in fact: due to the consideration of network security and insufficient IPV4 addresses, our computer and the computer are both large and small in a local area network, and NAT ("Network Address Translation," Chinese translated as "Network Address Translation" is required. ). In WebRTC, we use the ICE mechanism to establish a network connection.
So what is ICE?
ICE (Interactive Connecctivity Establishment, interactive connection establishment), ICE is not a protocol, but a framework that integrates STUN and TURN.
Among them: STUN (Sesssion Traversal Utilities for NAT, NAT session traversal application), which allows clients behind NAT (or multiple NAT) to find out their corresponding public IP address and port, which is commonly known as P2P "hole punching" ".
But: If the NAT type is symmetric, then the hole cannot be successfully punched. At this time TURN comes in handy. TURN (Traversal USing Replays around NAT) is an extended protocol of STUN/RFC5389 with the addition of Replay (relay) function.
Simply put: its purpose is to solve the problem that symmetric NAT cannot be traversed. After STUN fails to allocate the public IP address, the TURN server can request the public IP address as a relay address.
There are three types of ICE candidates in WebRTC. They are:
1) Host candidate: It means the IP address and port in the local area network. It is the highest priority among the three candidates, which means that at the bottom of WebRTC, it will first try to establish a connection within the local area network;
2) Reflection candidate: It means to obtain the external IP address and port of the host in the NAT. Its priority is lower than that of host candidates. That is to say, when WebRTC tries to connect locally, it will try to connect by reflecting the IP address and port obtained by the candidate;
3) Relay candidate: It indicates the IP address and port of the relay server, that is, the media data is transferred through the server. When the two parties of WebRTC client communication cannot traverse the P2P NAT, in order to ensure that the two parties can communicate normally, at this time, the only way to ensure the quality of service is through the server relay.
From the above figure, we can see that in the non-local LAN, WebRTC obtains its own external network IP and port through the STUN server, and then exchanges network information with the remote WebRTC through the signaling server, and then both parties can try to establish a P2P connection. When the NAT traversal is unsuccessful, the relay server (TURN) will be used for transfer.
It is worth mentioning that network information in WebRTC is usually described by candidate, and the STUN server and Replay server in the above figure can also be the same server. The practical chapter at the end of the article is an open source project coturn that integrates STUN (hole punching) and TURN (relay) functions.
To sum up the explanation of the three issues, we can use the following figure to illustrate the basic principles of WebRTC point-to-point communication.

In short: the media information SDP and network information candidate of each end are obtained through the API provided by WebRTC, and exchanged through the signaling server, thereby establishing a connection channel between both ends to complete a real-time video and voice call.
PS: For related knowledge of P2P, you can study the article in depth:
"Detailed Explanation of P2P Technology (1): Detailed Explanation of NAT-Detailed Principles, Introduction to P2P"
"Detailed explanation of P2P technology (2): Detailed explanation of the NAT traversal (hole punching) scheme in P2P (Basic Principles)"
"Detailed explanation of P2P technology (3): Detailed explanation of the NAT traversal (hole punching) scheme in P2P (advanced analysis)"
"P2P technology detailed explanation (4): P2P technology STUN, TURN, ICE detailed explanation"
"Easy to understand: Quickly understand the principle of NAT penetration in P2P technology"
6. Several important APIs of WebRTC
6.1 Audio and video capture API
Audio and video capture API, namely MediaDevices.getUserMedia().
Sample code:
const constraints = {
        video: true,
        audio: true
};
// navigator.mediaDevices will return undefined in non-secure mode (not https/localhost)
try{
        const stream = await navigator.mediaDevices.getUserMedia(constraints);
        document.querySelector('video').srcObject = stream;
    }   catch(error) {
        console.error(error);
    }
6.2 Get the input and output list of audio and video equipment
Get the audio and video device input and output list API, namely MediaDevices.enumerateDevices().
Sample code:
try{
        const devices = await navigator.mediaDevices.enumerateDevices();
        this.videoinputs = devices.filter(device => device.kind === 'videoinput');
        this.audiooutputs = devices.filter(device => device.kind === 'audiooutput');
        this.audioinputs = devices.filter(device => device.kind === 'audioinput');

      } catch(error) {
        console.error(error);
      }
6.3 RTCPeerConnection
RTCPeerConnection, as an API for creating point-to-point connections, is the key to our real-time audio and video communication.
In the practical chapters of this article, the following methods are mainly used.
Media negotiation method:
createOffer
createAnswer
localDesccription
remoteDesccription
important events:
onicecandidate
onaddstream
In the description of the previous chapter, we can know that the most important link in P2P communication is the exchange of media information.
Principles of media negotiation:

From the above figure, it is not difficult to find that the entire media negotiation process can be simplified into three steps corresponding to the above four media negotiation methods.
specifically is:
1) The caller Amy creates an Offer (createOffer) and sends the offer message (content is the SDP information of the caller Amy) to the receiver Bob through the signaling server, and calls setLocalDesccription to save the Offer containing the local SDP information;
2) The receiver Bob calls the setRemoteDesccription method after receiving the offer information from the opposite end to save the Offer containing the SDP information of the opposite end, and creates an Answer (createAnswer) and sends the Answer message (content is the SDP information of the receiving end Bob) through the signaling server Send it to the caller Amy;
3) The caller Amy calls the setRemoteDesccription method after receiving the Answer from the opposite end to save the Answer containing the SDP information of the opposite end.
After the above three steps, the media negotiation part of the P2P communication process is completed.
In fact: calling setLocalDesccription on the calling side and the receiving side also starts to collect each side’s own network information (candidate), and then each side collects their respective candidates through the monitoring event onicecandidate and transmits them to the opposite side through the signaling server to get through The network channel of P2P communication, and the video stream of the other party is obtained by monitoring the onaddstream event to complete the entire video call process.
7. Hands-on coding practice
Tip: For the complete source code involved in this section, please download it from the attachment in the "2. Source code of this article" section of this article.
7.1 Construction of coturn server
Note: If it is only a local LAN test, there is no need to set up a [url=%5Burl= https://github.com/coturn/%5Dcoturn[/url]]coturn[/url] server. If you need external network access, set up coturn Before the server, you need to purchase a cloud host and bind a domain name that supports https access. The following is the process of the author's own construction, and those who are interested can refer to their own practice once.
The coturn server is built to solve the problem that NAT cannot be traversed.
Its installation is also relatively simple:
- git clone [url=https://github.com/coturn/coturn.git]https://github.com/coturn/coturn.git[/url]
- cdcoturn/
- ./configure--prefix=/usr/local/coturn
- make-j 4
- makeinstall
//Generate key- openssl req -x509 -newkey rsa:2048 -keyout /etc/turn_server_pkey.pem -out /etc/turn_server_cert.pem -days 99999 -nodes
7.2 coturn service configuration
My configuration is as follows:
vim /usr/local/coturn/etc/turnserver.conf
listening-port=3478
external-ip=xxx.xxx //Your host public network IP
user=xxx:xxx //Account: Password
realm=xxx.com //Your domain name
7.3 Start coturn service
My startup process:
- cd/usr/local/coturn/bin/
- ./turnserver-c ../etc/turnserver.conf
//Note: Both TCP and UDP port 3478 in the cloud host must be opened
7.4 Practice code
Before writing the code, combined with the basic principles of WebRTC point-to-point communication in the above chapters, the following flow chart can be drawn.
It is not difficult to see from the figure, suppose PeerA is the initiator and PeerB is the receiver. To realize WebRTC point-to-point real-time audio and video communication, a signal server is necessary to manage room information and forward network information and media information.
In this article, a signaling server built using koa and socket.io:
// server side server.js
const Koa = require('koa');
const socket = require('socket.io');
const http = require('http');
const app = newKoa();
const httpServer = http.createServer(app.callback()).listen(3000, ()=>{});
socket(httpServer).on('connection', (sock)=>{// ....});
Quote
// client side socket.js
import io from 'socket.io-client';
const socket = io.connect(window.location.origin);
export defaultsocket;
After setting up the signaling server, combined with the flowchart, there are the following steps.
Step 1: PeerA and PeerB are respectively connected to the signaling server, and the signaling server records the room information:
// server 端 server.js
socket(httpServer).on('connection', (sock)=>{
    // 用户离开房间
    sock.on('userLeave',()=>{
        // ...
    });

    // 检查房间是否可加入
    sock.on('checkRoom',()=>{
        // ...
    });
    // ....
});
// client 端 Room.vue
import socket from '../utils/socket.js';

// 服务端告知用户是否可加入房间
socket.on('checkRoomSuccess',()=>{
        // ...
});
// 服务端告知用户成功加入房间
socket.on('joinRoomSuccess',()=>{
        // ...
});
//....
Step 2: End A as the initiator initiates a video invitation to the receiver B. After B agrees to the video request, both parties will create a local RTCPeerConnection and add a local video stream. The sender will create an offer to set the local sdp information description, and pass The signaling server sends its own SDP information to the peer
socket.on('answerVideo', async (user) => {
        VIDEO_VIEW.showInvideoModal();
        // 创建本地视频流信息
        const localStream = await this.createLocalVideoStream();
        this.localStream = localStream;
        document.querySelector('#echat-local').srcObject = this.localStream;
        this.peer = newRTCPeerConnection();
        this.initPeerListen();
        this.peer.addStream(this.localStream);
        if(user.sockId === this.sockId) {
          // 接收方
        } else{
          // 发送方 创建 offer
          const offer = await this.peer.createOffer(this.offerOption);
          await this.peer.setLocalDescription(offer);
          socket.emit('receiveOffer', { user: this.user, offer });
        }
 });
Step 3: As mentioned earlier, in fact, when calling setLocalDescription, it will also start collecting network information (candidate) on its own side. If it is not successful in a non-LAN or network "hole", it will also try to initiate a request to the Stun/Turn server. That is to collect "relay candidates", so when creating RTCPeerConnection, we also need to monitor the events of ICE network candidates:
init PeerListen () {
      // 收集自己的网络信息并发送给对端
      this.peer.onicecandidate = (event) => {
        if(event.candidate) { socket.emit('addIceCandidate', { candidate: event.candidate, user: this.user }); }
      };
      // ....
    }
Step 4: When the receiver B gets the offer information containing SDP from the sender A through the signaling server, it will call setRemoteDescription to store the SDP information of the opposite end, create and set the local SDP information, and send it through the signaling server Answer with local SDP information:
socket.on('receiveOffer', async (offer) => {
        await this.peer.setRemoteDescription(offer);
        const answer = await this.peer.createAnswer();
        await this.peer.setLocalDescription(answer);
        socket.emit('receiveAnsewer', { answer, user: this.user });
 });
Step 5: After the initiator A receives the answer information of the receiver B through the signaling server, it will also call setRemoteDescription, so that the two parties complete the exchange of SDP information:
socket.on('receiveAnsewer', (answer) => {
        this.peer.setRemoteDescription(answer);
      });
Step 6: When the SDP information exchange between the two parties is completed and the monitoring icecandidate collects the network candidates to exchange through the signaling server, they will get each other's video streams:
socket.on('addIceCandidate', async (candidate) => {
await this.peer.addIceCandidate(candidate);
});
this.peer.onaddstream = (event) => {
// 拿到对方的视频流
document.querySelector('#remote-video').srcObject = event.stream;
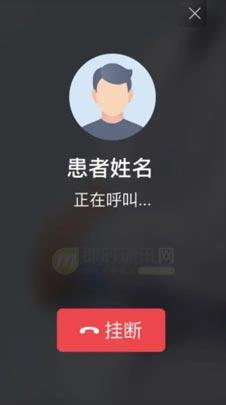
};7.5 Running effect


8. Summary of this article
After the 6 steps in the previous chapter, you can complete a complete P2P video real-time call function based on WebRTC (code can be passed: the complete source code involved in this section, please download from the attachment of the "2. Source code" section of this article) .
It’s worth mentioning that: VIDEO_VIEW in the code is a JS SDK focused on the video UI layer, including initiating video Modal, receiving video Modal, and video Modal, which is the JS SDK used by the author’s online web video consultation product Pulled out.
This article simply introduces the basic principles of WebRTC P2P communication and simple code practices. In fact, the SDK used in our production environment not only supports point-to-point communication, but also supports multi-person video calls, screen sharing and other functions. These are all based on WebRTC. .
9. Reference materials
[1] WebRTC standard API online documentation
[2] WebRTC in the real world: STUN, TURN and signaling
[3] WebRTC signaling control and STUN/TURN server construction
[4] The great WebRTC: The ecology is getting better and better, or real-time audio and video technology will become a cabbage
[5] Concise compilation tutorial of open source real-time audio and video technology WebRTC under Windows
[6] Introduction to the overall architecture of WebRTC real-time audio and video technology
[7] Conscience Sharing: WebRTC Zero-based Developer Tutorial (Chinese) [Attachment Download]
[8] Detailed explanation of P2P technology (2): Detailed explanation of the NAT traversal (hole punching) scheme in P2P (Basic Principles)
[9] P2P technology detailed explanation (4): P2P technology STUN, TURN, ICE detailed explanation
[10] Easy to understand: Quickly understand the principle of NAT penetration in P2P technology
This article has been simultaneously published on the official account of "Instant Messaging Technology Circle".
The synchronous publishing link is: http://www.52im.net/thread-3680-1-1.html


**粗体** _斜体_ [链接](http://example.com) `代码` - 列表 > 引用。你还可以使用@来通知其他用户。