Preface
WeChat authorized login is a topic that has always been inevitable in the development of WeChat official accounts, and the realization of the entire authorized login process requires the cooperation of the front and back ends. In the past when the front-end and the back-end were not yet separated, perhaps our front-end did not need to care too much about the specific implementation of authorization. However, it is now in 2021, and the architecture of separation of front and back ends is popular. How to achieve WeChat authorized login with the separation of front and back ends has become a key issue to be discussed today.
Prepare
First of all, we still need to sort out the whole process of WeChat authorization. Here I will directly bring the official documents:
If the user accesses a third-party webpage in the WeChat client, the official account can obtain the user's basic information through the WeChat webpage authorization mechanism, and then realize the business logic.
...
Explanation of the difference between the two scopes of web page authorization
1. The webpage authorization initiated with snsapi_base as the scope is used to obtain the openid of the user who enters the page, and is silently authorized and automatically jumps to the callback page. What the user perceives is to directly enter the callback page (usually a business page)
2. Web page authorization initiated with snsapi_userinfo as the scope is used to obtain basic user information. However, this kind of authorization requires the user to manually agree, and because the user has agreed, the user's basic information can be obtained after authorization without paying attention.
...
Specifically, the webpage authorization process is divided into four steps:
1. Guide the user to enter the authorization page to agree to the authorization and obtain the code
2. Exchange the code for web authorization access_token (different from the access_token in the basic support)
3. If necessary, the developer can refresh the webpage to authorize the access_token to avoid expiration
4. Obtain basic user information through web page authorization access_token and openid (support UnionID mechanism)
Here attached micro-channel micro-channel public number of authorized official documentation developed .
The above are some of the more critical information extracted by the author. Of course, there are more explanations. I hope that novice readers should carefully read the official documents first.
Here I will add that, in the 4 steps of the above process, in addition to the first step, the other three steps need to be completed on the server side. The core of the front-end is actually how to check and judge the user's login status and maintain the login status.
Realization ideas
Everyone knows that Vue is a product of the front-end and back-end separation technology solution. It is a pure front-end application (except for server-side rendering). Usually we need to request server-side data asynchronously when the user opens the page and executes the js script to the page, and then performs related logic processing and judgment. The prerequisite for us to implement WeChat authorized login is to first determine whether the user needs to log in (cookie or token). When the user is not logged in, we only need to go through the authorized login process. After the authorized login is successful, we also need to record the login status on the front end, so that when the page is switched, there is no need to trigger the authorized login again. Through the analysis, we can see that what the front-end can actually do is to obtain the code given to us by the WeChat server, and then give the code to our back-end, so that the back-end can complete the subsequent steps and generate the user after obtaining the user information. Then I will sort out the whole process as follows:
- (Front end) Check whether the user is logged in;
- (Front-end) If you are not logged in, guide the user to the authorization page to agree to the authorization and get the code
- (Front end) Submit the obtained code to the back end
- (Back-end) Exchange the user credential openid through code
- (Backend) Check whether the user exists through openid, whether it is necessary to register a new user, and obtain the user id
- (Back-end) Return user information;
- (Front end) Record the user login status and jump back to the pre-login page;
In this process, I drew a picture as follows:

Upload code
Based on the above ideas, now we start the coding process. The author uses Vue3. Developers of Vue2 should also make appropriate adjustments according to the situation.
In order to facilitate the user authorization login logic, the author intends to seal the authorized login as a login page. The advantage of this is that we can directly jump to the login page through the push method of Vue Router wherever we determine that we need to log in.
Under normal circumstances, not all pages of our application need to be accessed after logging in. Only when a specific page is accessed, a user is required to log in. Then we need to identify which pages require login authentication. Here we can use the meta attribute of Vue Router for identification. The official document explains the meta as follows:
Sometimes, you may want to attach arbitrary information to the route, such as the transition name, who can access the route, etc. These things can be achieved by receiving the meta attribute of the attribute object, and it can be accessed on both the routing address and the navigation guard.It just happens that Vue Router has an official example, as follows:
const routes = [
  {
    path: '/posts',
    component: PostsLayout,
    children: [
      {
        path: 'new',
        component: PostsNew,
        // 需要登录后才能访问的页面
        meta: { requiresAuth: true }
      },
      {
        path: ':id',
        component: PostsDetail,
        // 任何人都可访问的页面
        meta: { requiresAuth: false }
      }
    ]
  }
]
Next, we can get this meta information in the global guard beforeEach of Vue Router to do the login jump.
router.beforeEach((to, from) => {
  // 而不是去检查每条路由记录
  // to.matched.some(record => record.meta.requiresAuth)
  if (to.meta.requiresAuth && !userStore.isLogin) {
    // 此路由需要授权,请检查是否已登录
    // 如果没有,则重定向到登录页面
    return {
      path: '/login',
      // 保存我们所在的位置,以便以后再来
      query: { redirect: to.fullPath },
    }
  }
})
What needs to be added is the implementation of userStore.isLogin. This is related to the login state maintenance program we actually use. If the token method is adopted, it is to check whether the token already exists. The author uses vuex to save the token, and then uses a plug-in to persist the data in the Store to localStorage.
Next we look at the specific implementation:login.vue : Login component
<template>
  <div class="login"></div>
</template>

<script lang="ts">
import { defineComponent } from 'vue'

import { jump2Auth, getUserInfo } from '@/hooks/useWechatAuth'
import { userStore } from '@/store/modules/user'
import { redirectTo, getRouteQuery } from '@/hooks/usePage'

export default defineComponent({
  name: 'Login',
  setup() {
    let code = getRouteQuery().code as string
    // 3.如果有code,则已经授权
    if (code) {
      getUserInfo(code as string).then((res: any) => {
        // 记录token
        userStore.saveToken(res.access_token)
        const redirect = userStore.userState.landPageRoute || '/'
        // 跳转到授权前访问的页面
        redirectTo(redirect)
      })
    } else {
      // 1.记录上一个页面的地址
      const { redirect } = getRouteQuery()
      if (redirect) {
        userStore.setLandPage(redirect as string)
      }
      // 2.跳转授权
      const callbackUrl = window.location.origin + window.location.pathname
      jump2Auth(callbackUrl)
    }
  },
})
</script>
As you can see, the login page does not actually contain any content. After jumping to this page, we will be directly redirected to the page authorized by WeChat. After the authorization callback is returned, we will return to the page. At this time, we will obtain routing parameters. Get the code parameter.@/hooks/usePage.ts : This file mainly encapsulates common methods related to router
import router from '@/router'
import { cloneDeep } from 'lodash'
import { toRaw } from 'vue'

/**
 * 重定向
 * @param path 路径
 */
export function redirectTo(path: string) {
  const { replace } = router
  replace({
    path,
  })
}

/**
 * 获取路由上query参数
 */
export function getRouteQuery() {
  const { currentRoute } = router
  const { query } = currentRoute.value
  return cloneDeep(query)
}
@/hooks/useWechatAuth.ts : This file encapsulates the request for WeChat authorization to interact with the backend
import { useAxios } from '@/hooks/useAxios'

/**
 * 获取微信授权的跳转地址
 * @param callbackUrl 授权后回调链接
 * @returns
 */
export function jump2Auth(callbackUrl: string) {
  useAxios({
    url: '/api/wechat/auth',
    params: {
      redirect_url: callbackUrl,
    },
  }).then((authUrl: any) => {
    if (process.env.NODE_ENV === 'development') {
      window.location.href = callbackUrl + '?code=test'
    } else {
      window.location.href = authUrl
    }
  })
}

/**
 * 提交code进行登录
 * @param code
 * @returns
 */
export async function getUserInfo(code: string) {
  const userInfo = await useAxios({
    method: 'POST',
    url: '/api/wechat/auth',
    params: {
      code,
    },
  })
  return userInfo
}
@/store/modules/user.ts : Global state storage, mainly to record tokens and access pages before login
import { Module, VuexModule, Mutation, getModule, Action } from 'vuex-module-decorators'
import store from '@/store'
import { initialUnencryptedStorage } from '../globals'

interface UserState {
  token: string
  landPageRoute: string
}

const NAME = 'user'
// name: 模块名字
// namespaced 表示开启命名空间
// dynamic设置为true时,表示创建动态模块,运行时将模块注册到存储中
// preserveState 如果数据有持久化,该变量为true时可以从storage中拿取初始值
@Module({
  namespaced: true,
  name: NAME,
  dynamic: true,
  store,
  preserveState: Boolean(initialUnencryptedStorage[NAME]),
})
export class User extends VuexModule {
  userState: UserState = {
    token: '',
    /** 登录前访问页面 */
    landPageRoute: '',
  }

  get isLogin(): boolean {
    return !!this.userState.token
  }


  @Mutation
  saveToken(token: string): void {
    this.userState.token = token
  }

  @Mutation
  setLandPage(route: string): void {
    this.userState.landPageRoute = route
  }
}

export const userStore = getModule<User>(User)
The author uses the vuex-persistedstate plug-in to store the data in the store in localStorage. The advantage of this is that after the user closes the page, the user does not need to re-trigger the WeChat authorization process, which greatly optimizes the user experience.
See effect
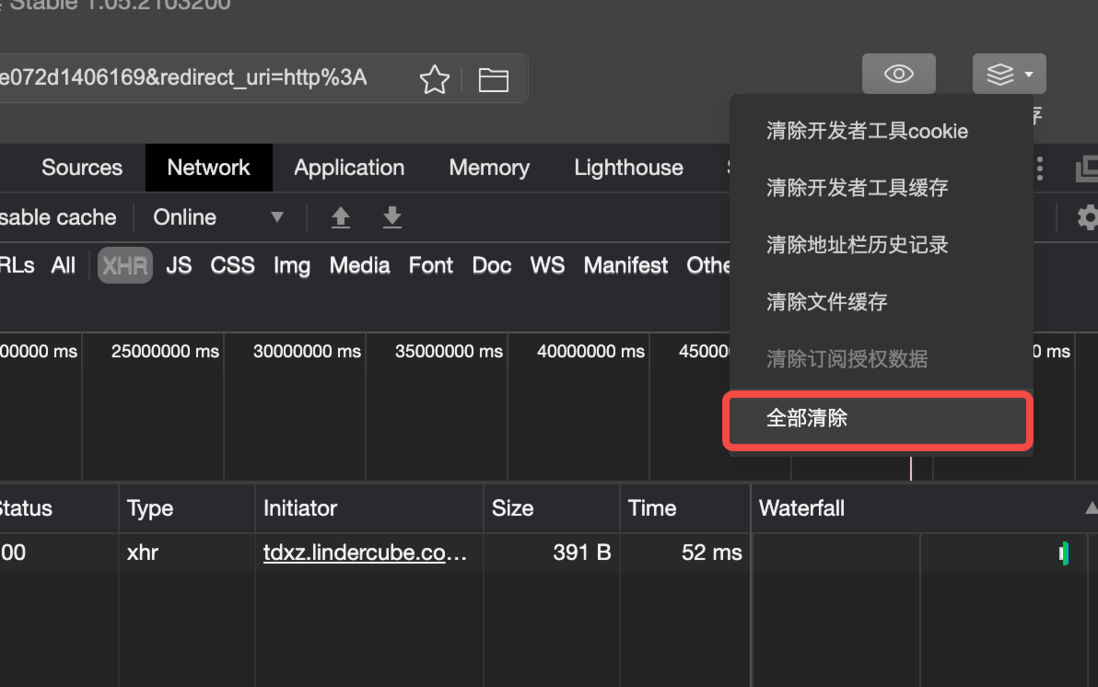
The following author uses the official account application developed by himself on the WeChat developer tool to demonstrate the effect. First, clear all caches to simulate the effect of new user login.
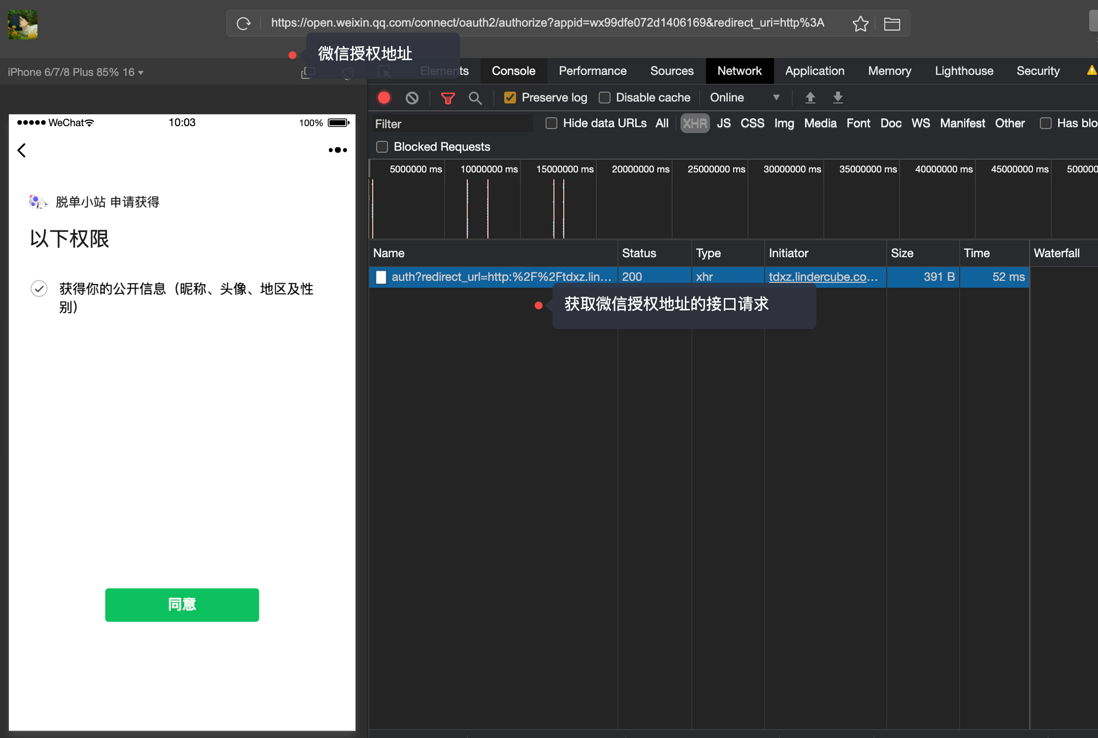
Then open the author's official account application to trigger page jump authentication
Click agree, trigger WeChat authorization callback, submit code to log in
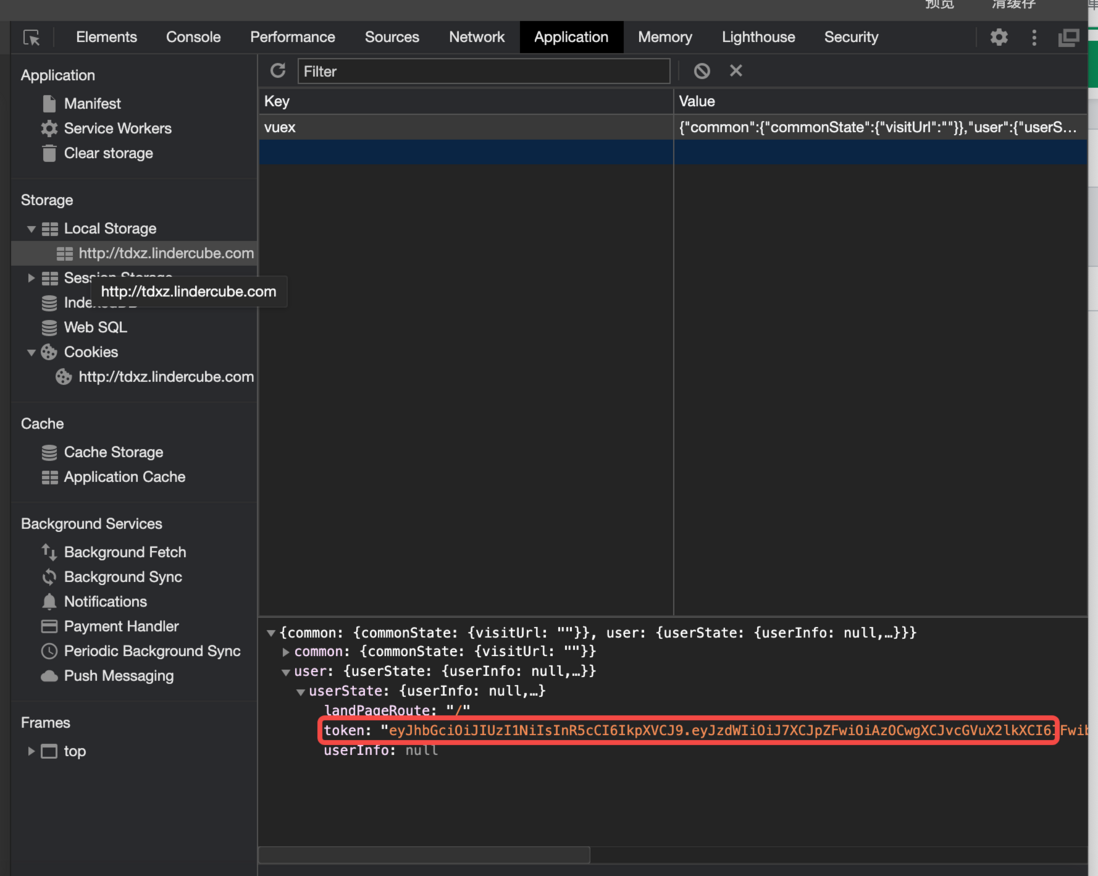
At the same time, you can see that the user token after login has been successfully written to localStorage
You can search the WeChat official account "Takeoff Station" and experience it yourself (look for bugs).
In addition, the complete implementation code of authorized login has been hosted on github, click to view
Summarize
I have to say that Vue3 is a lot more comfortable to write in terms of code abstraction and reuse. I hope everyone will also try to decouple and extract more logic codes and generate hooks one by one according to official practice. It looks much more elegant. After the author tried to demonstrate the program, whether it is the clean and elegant code, or the realization of business requirements, it is almost perfect (please let me install a wave of b). Of course, there may be bugs or pain points that I haven't found. After all, there has never been a perfect architecture. Here, the judges are also welcome to discuss with me and provide better solutions and ideas.
Write at the end
Recently, I have been a little idle. I plan to use Vue3+ts+vant to complete an official account application from 0 and share the development process. It can be regarded as a way to motivate myself to continue learning. If you have ideas and suggestions, please come to me for discussion.
At the same time, in order to facilitate everyone to better discuss the related technology of WeChat official account development, the author has also established a WeChat group, welcome to join and learn and grow together. You can scan the QR code in WeChat to apply for joining the group


**粗体** _斜体_ [链接](http://example.com) `代码` - 列表 > 引用。你还可以使用@来通知其他用户。