article contains online demonstration effects, please visit Mo
warehouse link , click a free star, thank you very much.
has been used to build the GitHub page
Automatically deploy github page according to github action to hexo configuration
Go to Mo Shuying's personal website to view the pure version
1. Set the access key for the warehouse
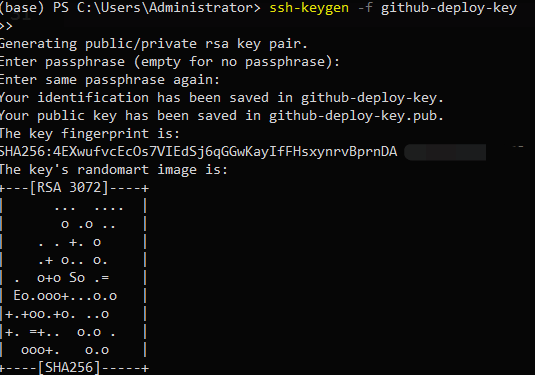
The first step is to generate a key, open the command line and generate a set of keys
ssh-keygen -f github-deploy-key -C "HEXO CD"<!-- more -->
Remember to skip the password or something, just press enter three times here
Then we will get two key files, these two will be used later
2. Upload the private key
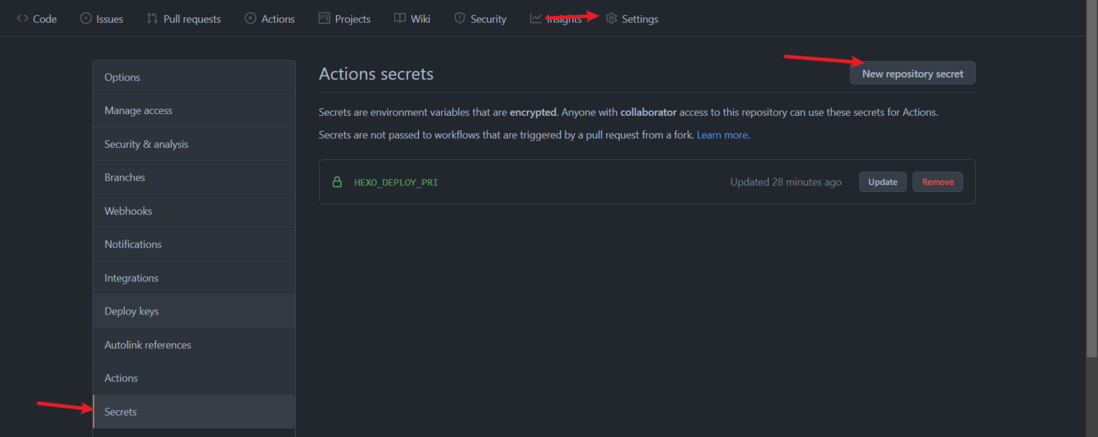
github warehouse address → Settings → Secrets → New secret
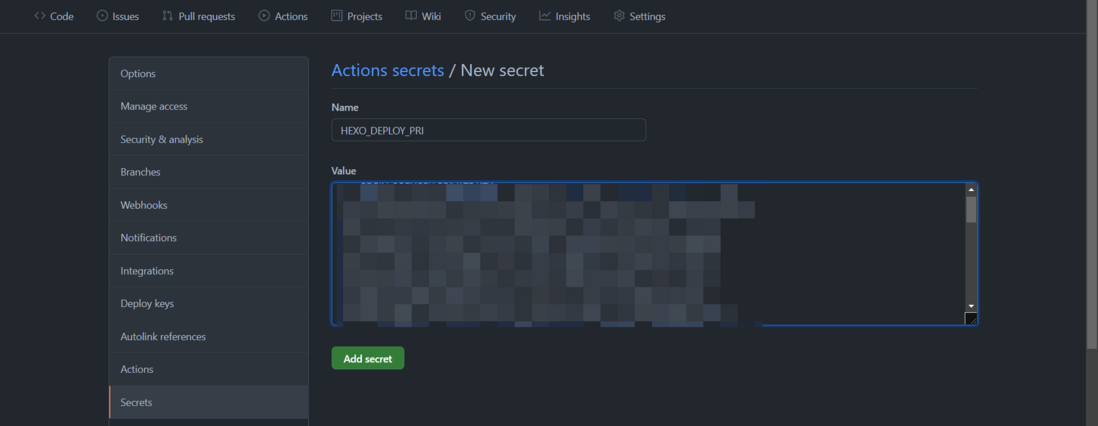
Click new repository secret create a new warehouse key
Name HEXO_DEPLOY_PRI
Content github-deploy-key All content in the file
reveal your private key
3. Upload the public key
Here to distinguish your warehouse -> page format , the warehouse where the public key is uploaded represents the warehouse to be deployed, github does not support uploading the same (deployed) public key to multiple warehouses
Different warehouses
If your hexo code and the page to be deployed are not in the same warehouse
For example, you have some content that is temporarily inconvenient to disclose, or you do not want to disclose your Hexo code, but only want to deploy static pages (text, images, various styles and scripts used by the website theme) to the github page. Other content will not be available. Include
At this point you need to upload the public key to the warehouse you want to deploy
Name`HEXO_DEPLOY_PUB
Content github-deploy-key.pub All content in the file
Remember to check to allow write permissions
Same warehouse
Similar to the previous step, except that the uploaded warehouse address is the same as your code warehouse address, but you must make sure you have a branch with the correct number in the configuration
Configure github action
Here you can click on GitHub Action -> new workflow -> set up a workflow yourself just pick a template content into them, can also be in the code repository .github/workflow add a hexo-ci.yml then the following into the file.
Remember to blog_source_branch , username , username@email.address with your own
name: HEXO CI

on:
  push:
    branches:
    - <blog_source_branch>

jobs:
  build:
    runs-on: ubuntu-latest
    strategy:
      matrix:
        node-version: [14.x]

    steps:
      - uses: actions/checkout@v1

      - name: Use Node.js ${{ matrix.node-version }}
        uses: actions/setup-node@v1
        with:
          node-version: ${{ matrix.node-version }}

      - name: Configuration environment
        env:
          HEXO_DEPLOY_PRI: ${{secrets.HEXO_DEPLOY_PRI}}
        run: |
          mkdir -p ~/.ssh/
          echo "$HEXO_DEPLOY_PRI" > ~/.ssh/id_rsa
          chmod 600 ~/.ssh/id_rsa
          ssh-keyscan github.com >> ~/.ssh/known_hosts
          git config --global user.name "<username>"
          git config --global user.email "<username@email.address>"
      - name: Install dependencies
        run: |
          npm i -g hexo-cli
          npm i
      - name: Deploy hexo
        run: |
          hexo clean && hexo generate && hexo deploy
Then submit this change
Configure Hexo deploy
_config.yml in the code warehouse
Change the git repository from http form to ssh form.
The branch that publishes the deployment file should be the same as the branch configured in the warehouse
deploy:
  type: git
  repo: git@github.com:moshuying/moshuying.github.io.git
  # example, https://github.com/hexojs/hexojs.github.io
  branch: master
You have completed all operations! Push once to see the effect.


**粗体** _斜体_ [链接](http://example.com) `代码` - 列表 > 引用。你还可以使用@来通知其他用户。