Preface
In this era when the 161c210136b0f4 volume is Vue fish who is only proficient in 061c210136b0ed has been beaten many times, and was questioned in the interview: "You don't know how to React?" I was speechless and choked, I don't know what to say.This article attempts to
Vuesome common functions inReactin 061c210136b181. If you happen to beVuetoReact, orReacttoVue, I hope to help you.If you are a
ReactandVueGuiqiu light spray (manual survival)
has a corresponding Vue and React version implementation, as well as corresponding screenshots or screen recordings.
1. v-if
Let’s start with the most common display and hiding. Vue usually usesv-iforv-showto handle the display and hiding of an element, butv-ifis a "real" conditional rendering. The event listeners and subcomponents in the conditional block will be changed during the switching process. Properly destroyed and rebuilt. Thev-showis simple, just the control on the css style.
Vue
<template>
  <div class="v-if">
    <button @click="onToggleShow">切换</button>
    <div v-if="isShow">前端胖头鱼 显示出来啦</div>
  </div>
</template>

<script>
export default {
  name: 'vif',
  data () {
    return {
      isShow: true
    }
  },
  methods: {
    onToggleShow () {
      this.isShow = !this.isShow
    }
  }
}
</script>
React
import React, { useState } from "react"

export default function Vif (){
  const [ isShow, setIsShow ] = useState(true)
  const onToggleShow = () => {
    setIsShow(!isShow)
  }

  return (
    <div className="v-if">
      <button onClick={ onToggleShow }>切换</button>
      {/* 也可以用三目运算符 */}
      {/* { isShow ? <div>前端胖头鱼 显示出来啦</div> : null } */}
      {
        isShow && <div>前端胖头鱼 显示出来啦</div>
      }
    </div>
  )
}
Preview
2. v-show
Same as above, this time we use v-show to realize the display and hide function, while observing the style changes of the DOM Note: is not set to block when displayed here because some elements themselves are not block-level elements, if forcibly set to block may lead to wrong styles.
Vue
<template>
  <div class="v-show">
    <button @click="onToggleShow">切换</button>
    <div v-show="isShow">前端胖头鱼 显示出来啦</div>
  </div>
</template>

<script>
export default {
  name: 'vshow',
  data () {
    return {
      isShow: true
    }
  },
  methods: {
    onToggleShow () {
      this.isShow = !this.isShow
    }
  }
}
</script>
React
import React, { useState } from "react"

export default function VShow (){
  const [ isShow, setIsShow ] = useState(true)
  const onToggleShow = () => {
    setIsShow(!isShow)
  }

  return (
    <div className="v-show">
      <button onClick={ onToggleShow }>切换</button>
      {
        <div style={{ display: isShow ? '' : 'none' }}>前端胖头鱼 显示出来啦</div>
      }
    </div>
  )
}
Preview
3. v-for
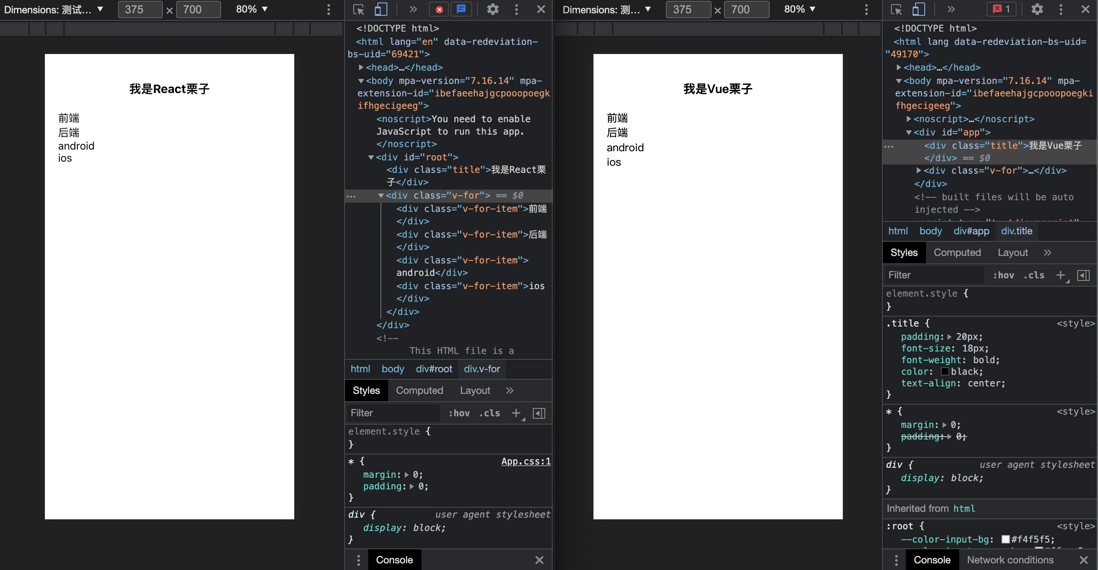
Generally, rendering a listVueusev-forinstruction, v-for instruction requiresitem in itemsspecial syntax form, whereinitemssource data array,itemis aliased iterative array element. Of course, each element needs to set a uniquekey
Vue
<template>
  <div class="v-for">
    <div
      class="v-for-item"
      v-for="item in list"
      :key="item.id"
    >
      {{ item.name }}
    </div>
  </div>
</template>

<script>
export default {
  name: 'vfor',
  data () {
    return {
      list: [
        {
          id: 1,
          name: '前端',
        },
        {
          id: 2,
          name: '后端',
        },
        {
          id: 3,
          name: 'android',
        },
        {
          id: 4,
          name: 'ios',
        },
      ]
    }
  }
}
</script>
React
Reactnov-forinstruction in 061c210136b5d9, we can usemaptraverse to achieve similar functions
import React, { useState } from "react"

export default function VFor (){
  const [ list, setList ] = useState([
    {
      id: 1,
      name: '前端',
    },
    {
      id: 2,
      name: '后端',
    },
    {
      id: 3,
      name: 'android',
    },
    {
      id: 4,
      name: 'ios',
    },
  ])

  return (
    <div className="v-for">
      {
        list.map((item) => {
          return <div className="v-for-item" key={ item.id }>{ item.name }</div>
        })
      }
    </div>
  )
}
Preview
4. computed
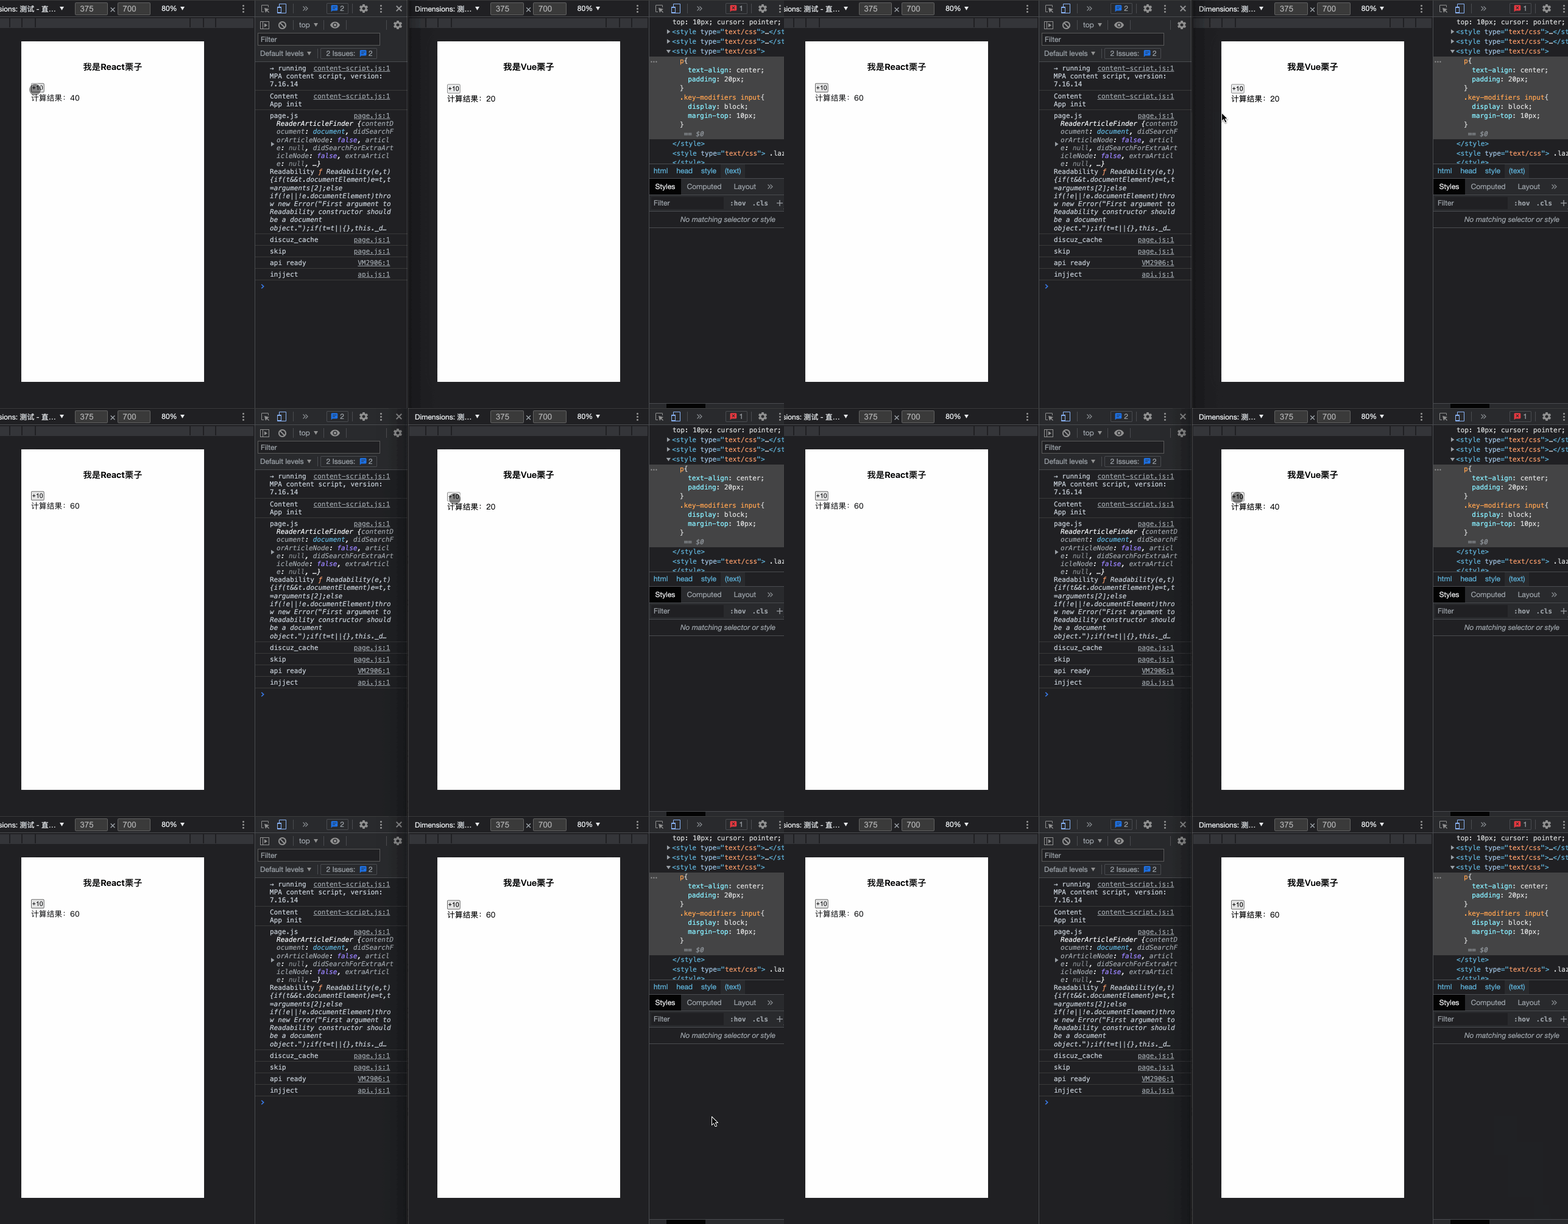
When a variable needs to rely on other variables to evaluate, it is very convenient to use calculated attributes, and Vue are cached based on their responsive dependencies. The dependent value has not changed and will not be recalculated to achieve the effect of caching. .We look at an example of a simple addition: num3 a num1 and num2 obtained by adding, at the same time point every time the button num1 plus 10, num3 will follow continuously added 10
Vue
computed source code click here
<template>
  <div class="computed">
    <button @click="onAdd">+10</button>
    <div>计算结果:{{ num3 }}</div>
  </div>
</template>

<script>
export default {
  name: 'computed',
  data () {
    return {
      num1: 10,
      num2: 10,
    }
  },
  computed: {
    num3 () {
      return this.num1 + this.num2
    }
  },
  methods: {
    onAdd () {
      this.num1 += 10
    }
  }
}
</script>
React
Reactnot calculated property, but we canuseMemoto achieve this hook, andVuecomputed not the same place that we must manual maintenance depend
computed source code click here
import React, { useMemo, useState } from "react"

export default function Computed (){
  const [ num1, setNum1 ] = useState(10)
  const [ num2, setNum2 ] = useState(10)

  const num3 = useMemo((a, b) => {
    return num1 + num2
  }, [ num1, num2 ])

  const onAdd = () => {
    setNum1(num1 + 10)
  }

  return (
    <div className="computed">
      <button onClick={ onAdd }>+10</button>
      <div>计算结果:{ num3 }</div>
    </div>
  )
}
Preview
5. watch
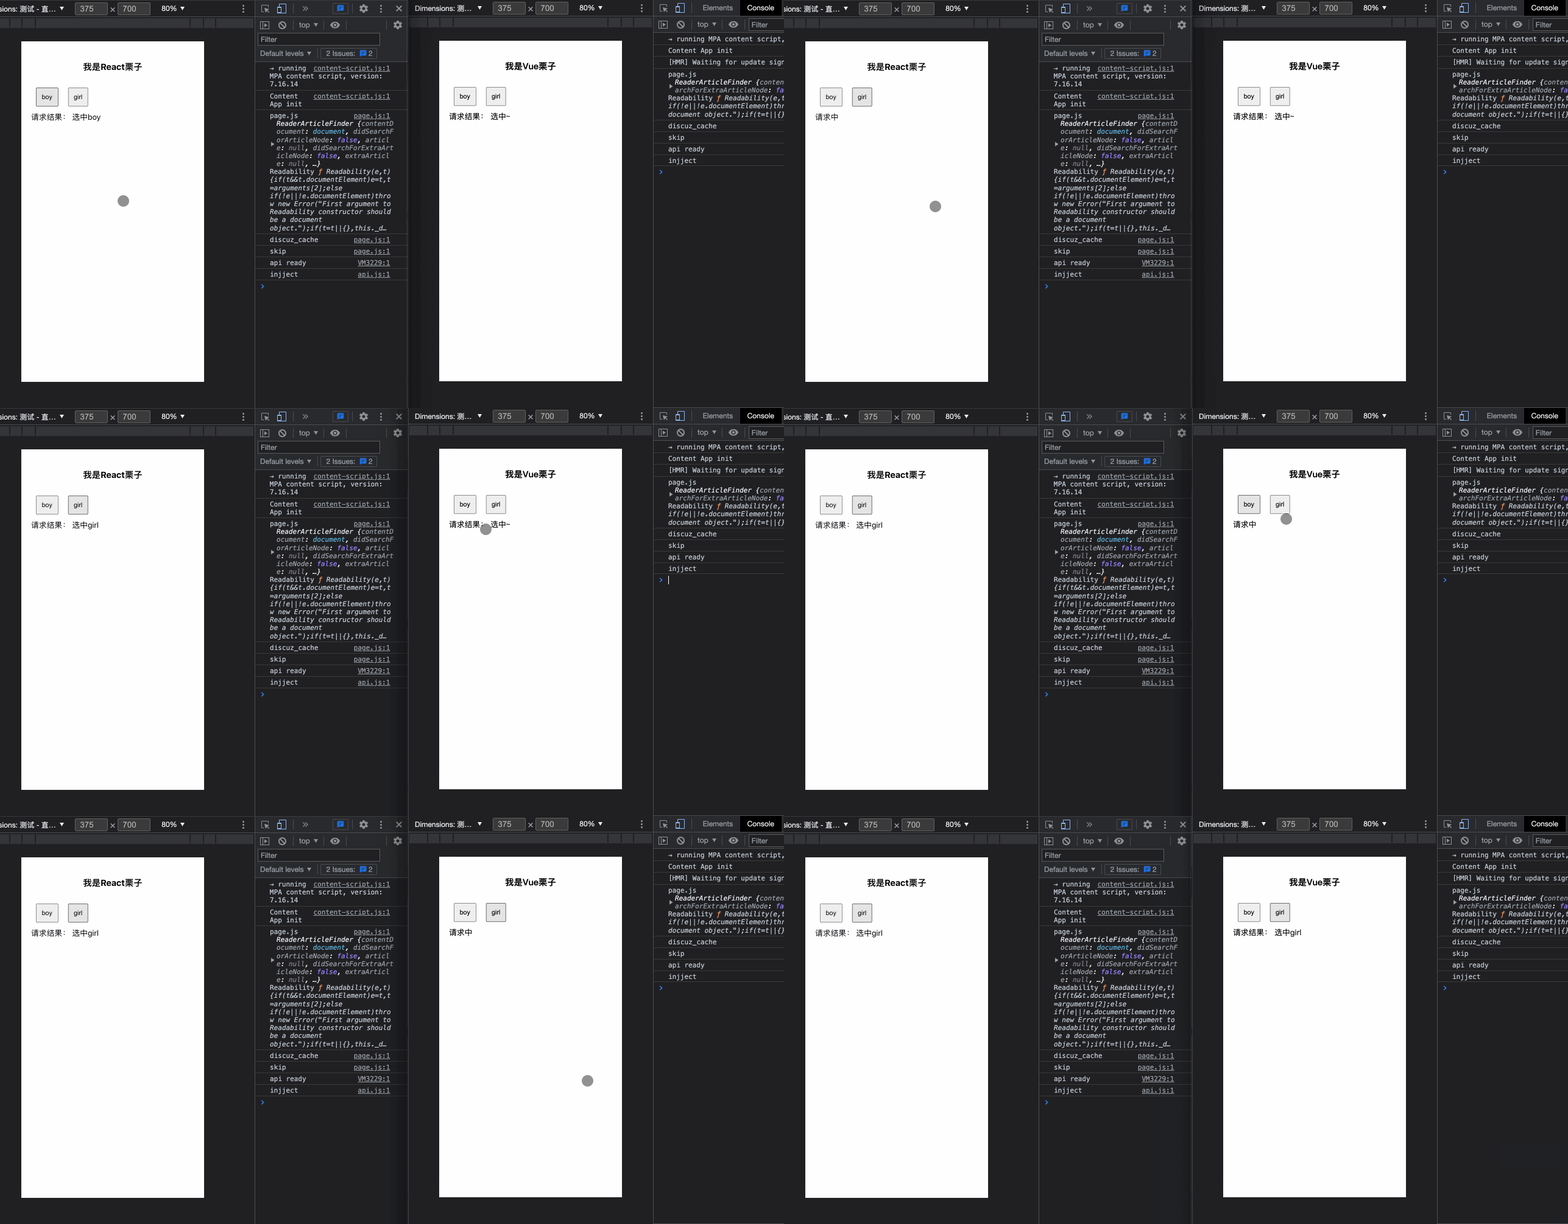
Sometimes we need to monitor data changes and then perform asynchronous behaviors or expensive operations, we can use watch in Vue to achieveLet's simulate a scenario like this and watch : select boy or girl , send a request after selection, and display the result of the request. (Here through setTimeout to simulate the asynchronous request process)
Vue
<template>
  <div class="watch">
    <div class="selects">
      <button
        v-for="(item, i) in selects"
        :key="i"
        @click="onSelect(item)"
      >
        {{ item }}
      </button>
    </div>
    <div class="result">
      {{ result }}
    </div>
  </div>
</template>

<script>
export default {
  name: 'watch',
  data () {
    return {
      fetching: false,
      selects: [
        'boy',
        'girl'
      ],
      selectValue: ''
    }
  },
  computed: {
    result () {
      return this.fetching ? '请求中' : `请求结果: 选中${this.selectValue || '~'}`
    }
  },
  watch: {
    selectValue () {
      this.fetch()
    }
  },
  methods: {
    onSelect (value) {
      this.selectValue = value
    },
    fetch () {
      if (!this.fetching) {
        this.fetching = true

        setTimeout(() => {
          this.fetching = false
        }, 1000)
      }
    }
  }
}
</script>
React
ReactuseEffectto monitor certain data changes and execute the response action.
import React, { useState, useMemo, useEffect } from "react"
import './watch.css'

export default function Watch() {
  const [fetching, setFetching] = useState(false)
  const [selects, setSelects] = useState([
    'boy',
    'girl'
  ])
  const [selectValue, setSelectValue] = useState('')

  const result = useMemo(() => {
    return fetching ? '请求中' : `请求结果: 选中${selectValue || '~'}`
  }, [ fetching ])

  const onSelect = (value) => {
    setSelectValue(value)
  }
  const fetch = () => {
    if (!fetching) {
      setFetching(true)

      setTimeout(() => {
        setFetching(false)
      }, 1000)
    }
  }

  useEffect(() => {
    fetch()
  }, [ selectValue ])

  return (
    <div className="watch">
      <div className="selects">
        {
          selects.map((item, i) => {
            return <button key={ i } onClick={ () => onSelect(item) }>{ item }</button>
          })
        }
      </div>
      <div className="result">
        { result }
      </div>
    </div>
  )
}
Preview
6. style
Sometimes it is inevitable to dynamically add styles to elementsstyle,VueandReactall provide us with a convenient way to use.
Basically the same in use:
:
CSS property names can be named in camelCase or separated by dashes (kebab-case, remember to enclose them in quotation marks)
different:
- Vue can bind multiple style objects through array syntax, React is mainly in the form of a single object (this is also possible with Vue)
- React will automatically add "px" ( this point Vue will not automatically process ) suffix to the attribute whose inline style is a number, other units need to be manually specified manually
- The React style will not automatically fill in the prefix. If you need to support older browsers, you need to manually add the corresponding style attributes. In Vue, when v-bind:style uses CSS properties that require a browser engine prefix, such as transform, Vue.js will automatically detect and add the corresponding prefix.
Vue
<template>
  <div class="style" :style="[ style, style2 ]"></div>
</template>

<script>
export default {
  name: 'style',
  data () {
    return {
      style: {
        width: '100%',
        height: '500px',
      },
      style2: {
        backgroundImage: 'linear-gradient(120deg, #84fab0 0%, #8fd3f4 100%)',
        borderRadius: '10px',
      }
    }
  }
}
</script>
React
import React from "react"

export default function Style (){
  const style = {
    width: '100%',
    height: '500px',
  }
  const style2 = {
    backgroundImage: 'linear-gradient(120deg, #84fab0 0%, #8fd3f4 100%)',
    borderRadius: '10px',
  }

  return (
    <div className="style" style={ { ...style, ...style2 } } ></div>
  )
}
Preview
7. class
How to dynamically add classes to elements? In Vue, I prefer to use the syntax of arrays (and of course the writing of objects). In React, you can also use some third-party packages such as classnames to make adding classes more convenient.
Let’s take a look at how to achieve the effect of button selection without using any library.
Vue
<template>
  <button :class="buttonClasses" @click="onClickActive">{{ buttonText }}</button>
</template>

<script>
export default {
  name: 'class',
  data () {
    return {
      isActive: false,
    }
  },
  computed: {
    buttonText () {
      return this.isActive ? '已选中' : '未选中'
    },
    buttonClasses () {
      // 通过数组形式维护class动态列表
      return [ 'button', this.isActive ? 'active' : '' ]
    }
  },
  methods: {
    onClickActive () {
      this.isActive = !this.isActive
    }
  }
}
</script>

<style scoped>
.button{
  display: block;
  width: 100px;
  height: 30px;
  line-height: 30px;
  border-radius: 6px;
  margin: 0 auto;
  padding: 0;
  border: none;
  text-align: center;
  background-color: #efefef;
}

.active{
  background-image: linear-gradient(120deg, #84fab0 0%, #8fd3f4 100%);
  color: #fff
}

</style>
React
import React, { useMemo, useState } from "react"

import './class.css' // 此处样式与上面是一样的


export default function Class (){
  const [ isActive, setIsActive ] = useState(false)
  const buttonText = useMemo(() => {
    return isActive ? '已选中' : '未选中'
  }, [ isActive ])
  const buttonClass = useMemo(() => {
    // 和Vue中不太一样的是我们需要手动join一下,变成'button active'形式
    return [ 'button', isActive ? 'active' : '' ].join(' ')
  }, [ isActive ])

  const onClickActive = () => {
    setIsActive(!isActive)
  }

  return (
    <div className={ buttonClass } onClick={onClickActive}>{ buttonText }</div>
  )
}
Preview
8.provide/inject
Both Vue and React have their own good solutions for global state management, such asVuexreduxandMobxReact. Of course, the introduction of these in small projects is overkill and use there other solutions?
provide/inject can be used in Vue
In React, you can use Context
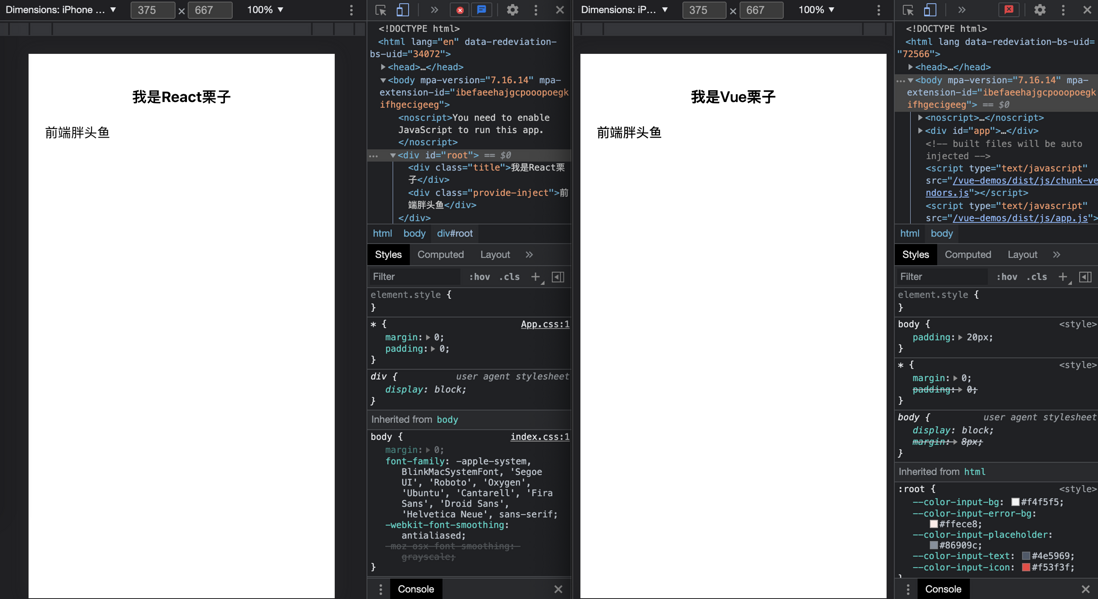
assumes that there is a userInfo variable globally, which needs to be easily accessed in each component. How to implement it in Vue and React?
Vue
Vueborrowingprovide/injectthe top-level state can be transferred to any child node. Suppose we declare auserInfodata in app.vue
provide source code click here
app.vue
<template>
  <div id="app">
    <div class="title">我是Vue栗子</div>
    <router-view/>
  </div>
</template>
<script>

export default {
  name: 'app',
  // 声明数据
  provide () {
    return {
      userInfo: {
        name: '前端胖头鱼'
      }
    }
  }
}
</script>
provide.vue
<template>
  <div class="provide-inject">{{ userInfo.name }}</div>
</template>

<script>
export default {
  name: 'provideInject',
  // 使用数据
  inject: [ 'userInfo' ]
}
</script>
React
React in order to achieve similar functions, can use the Context , the global shared state for any child nodeprovide source code click here
context/index.js
import { createContext } from "react";

export const UserInfoContext = createContext({
  userInfo: {
    name: ''
  }
})
app.js
import { UserInfoContext } from './context/index'

function App() {
  return (
    <BrowserRouter>
      // 注意这里
      <UserInfoContext.Provider
        value={{ userInfo: { name: '前端胖头鱼' } }}
      >
        <div className="title">我是React栗子</div>
        <Routes>
          <Route path="/v-if" element={<Vif />} />
          <Route path="/v-show" element={<VShow />} />
          <Route path="/v-for" element={<VFor />} />
          <Route path="/computed" element={<Computed />} />
          <Route path="/watch" element={<Watch />} />
          <Route path="/style" element={<Style />} />
          <Route path="/class" element={<Class />} />
          <Route path="/slot" element={<Slot />} />
          <Route path="/nameSlot" element={<NameSlot />} />
          <Route path="/scopeSlot" element={<ScopeSlot />} />
          <Route path="/provide" element={<Provide />} />
        </Routes>
      </UserInfoContext.Provider>
    </BrowserRouter>
  );
}
provide.js
import React, { useContext } from "react"
import { UserInfoContext } from '../context/index'


export default function Provide() {
  // 通过userContext,使用定义好的UserInfoContext
  const { userInfo } = useContext(UserInfoContext)

  return (
    <div class="provide-inject">{ userInfo.name }</div>
  )
}
Preview
9. slot (default slot)
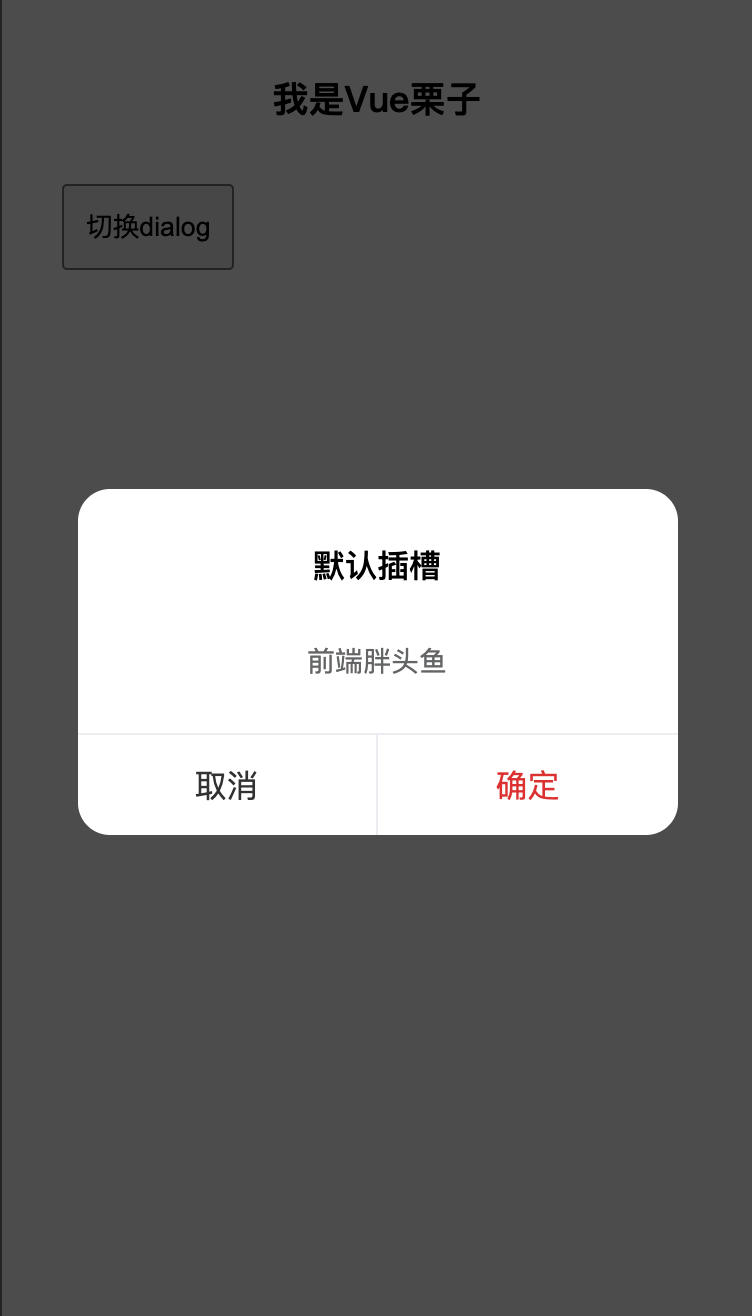
Slot is aVue. I understand it as a "pit", waiting for you to fill it from the outside, and this "pit" can be divided intodefault pit,named pit, and. Domain pits, let's take a practical example to see how to achieve the same function inReact
Suppose we want to implement a simple dialog component. The basic function is that the title can be passed a string, and the content part can be completely customized. How should it be implemented?
Vue
dialog
<template>
  <div class="dialog" v-show="visible">
    <div class="dialog-mask" @click="onHide"></div>
    <div class="dialog-body">
      <div class="dialog-title" v-if="title">{{ title }}</div>
      <div class="dialog-main">
        // 注意这里放了一个默认插槽坑位
        <slot></slot>
      </div>
      <div class="dialog-footer">
        <div class="button-cancel" @click="onHide">取消</div>
        <div class="button-confirm" @click="onHide">确定</div>
      </div>
    </div>
  </div>
</template>

<script>
export default {
  name: "dialog",
  props: {
    title: {
      type: String,
      default: "",
    },
    visible: {
      type: Boolean,
      default: false,
    },
  },
  methods: {
    onHide () {
      this.$emit('update:visible', false)
    }
  }
};
</script>
slot
<template>
  <div class="slot">
    <button @click="onToggleVisible">切换dialog</button>
    <Dialog
      :visible.sync="visible"
      title="默认插槽"
    >
      // 这里会替换到<slot></slot>的位置处
      <div class="slot-body">前端胖头鱼</div>
    </Dialog>
  </div>
</template>

<script>
import Dialog from './components/dialog.vue'

export default {
  name: 'slot',
  components: {
    Dialog,
  },
  data () {
    return {
      visible: false
    }
  },
  methods: {
    onToggleVisible () {
      this.visible = !this.visible
    }
  }
}
React
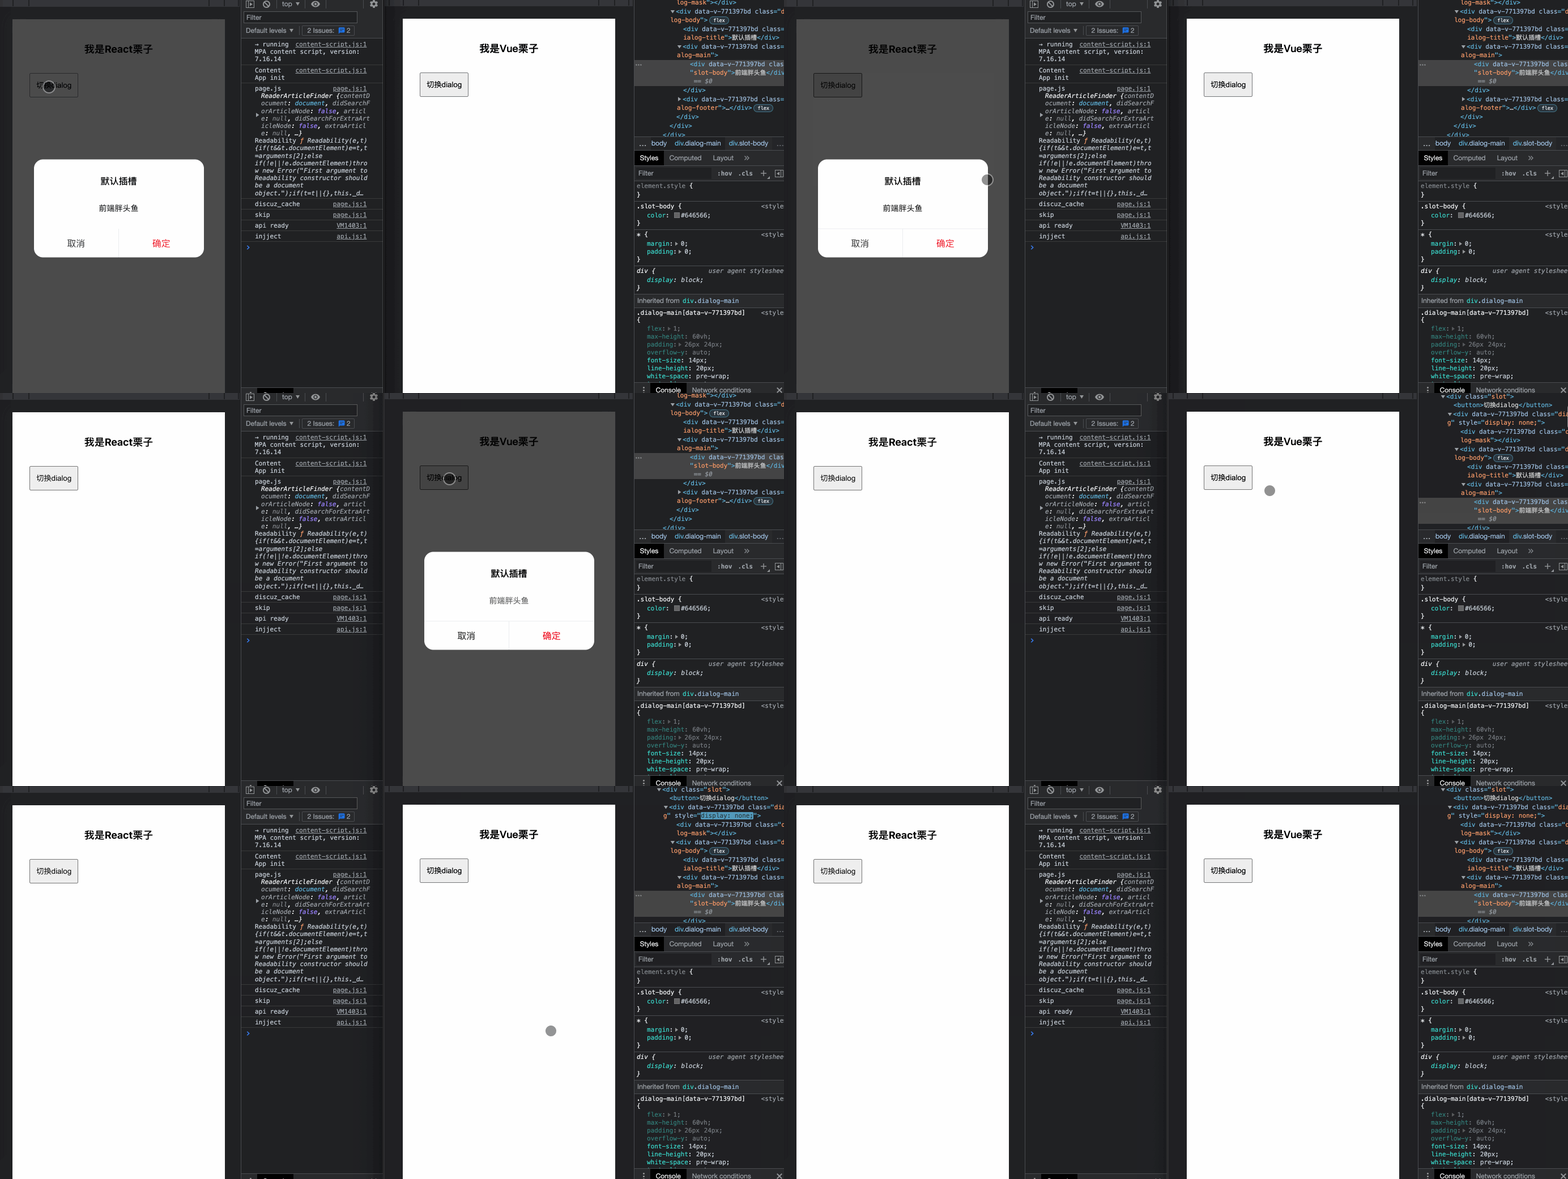
What should we do if we want to implement the above functions in React?Reacthas no slots! Don’t worry, althoughReactis no slot concept inprops.children, the sub-elements inside the component can be obtained through 061c210136bee1, and the default slot function can be realized through this
Dialog
import React, { useState, useEffect } from "react"

import './dialog.css'

export default function Dialog(props) {
  // 原谅我用visible -1这种傻叉的方式先实现了, 重点不是在这里
  const { children, title = '', visible = -1 } = props
  const [visibleInner, setVisibleInner] = useState(false)

  const onHide = () => {
    setVisibleInner(false)
  }

  useEffect(() => {
    setVisibleInner(visible > 0)
  }, [ visible ])

  return (
    <div className="dialog" style={ { display: visibleInner ? 'block' : 'none' }}>
      <div className="dialog-mask" onClick={ onHide }></div>
      <div className="dialog-body">
        { title ? <div className="dialog-title">{ title }</div> : null }
        <div className="dialog-main">
          {/* 注意这里,通过children实现默认插槽功能 */}
          {children}
        </div>
        <div className="dialog-footer">
          <div className="button-cancel" onClick={ onHide }>取消</div>
          <div className="button-confirm" onClick={ onHide }>确定</div>
        </div >
      </div >
    </div >
  )
}
slot
import React, { useState, useEffect } from "react"
import Dialog from './components/dialog'

export default function Slot() {
  const [visible, setVisible] = useState(-1)

  const onToggleVisible = () => {
    setVisible(Math.random())
  }

  return (
    <div className="slot">
      <button onClick={ onToggleVisible }>切换dialog</button>
      <Dialog
        visible={visible}
        title="默认插槽"
      >
        {/* 注意这里,会被Dialog组件的children读取并且替换掉 */}
        <div className="slot-body">前端胖头鱼</div>
      </Dialog>
    </div>
  )
}
Preview
10. name slot
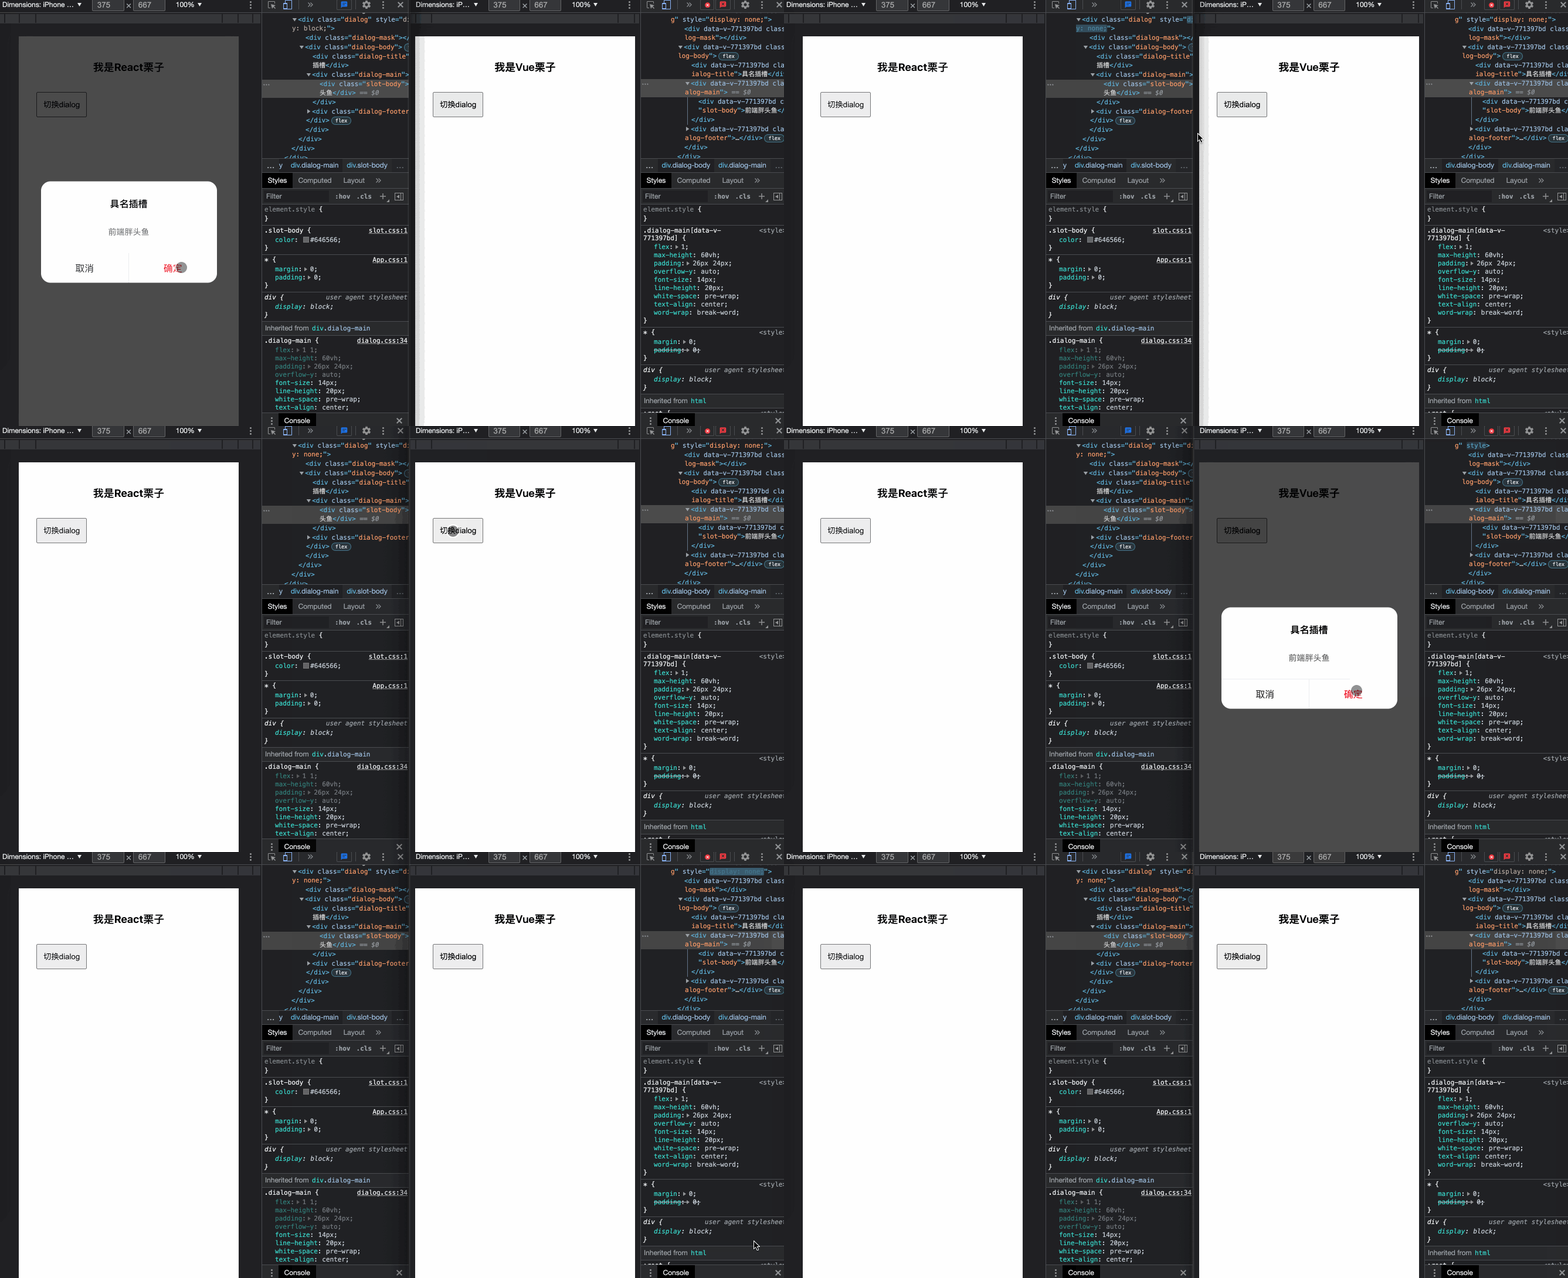
When there are multiple dynamic contents inside the component that need to be filled externally, a default slot is no longer enough. We need to name the , so that the outside can "step by step" to the designated location.
Let's enrich the Dialog component, assuming that title can also support dynamic content delivery?
Vue
Vue uses the<slot name="main"></slot>format to declare the slot first, and then uses thev-slot:mainformat to fill in a carrot and a pit.
nameSlot source code click here
Dialog transformation
<template>
  <div class="dialog" v-show="visible">
    <div class="dialog-mask" @click="onHide"></div>
    <div class="dialog-body">
      <div class="dialog-title" v-if="title">{{ title }}</div>
      <!-- 注意这里,没有传title属性,时候通过插槽进行内容承接 -->
      <slot name="title" v-else></slot>
      <div class="dialog-main">
        <!-- 声明main部分 -->
        <slot name="main"></slot>
      </div>
      <div class="dialog-footer">
        <div class="button-cancel" @click="onHide">取消</div>
        <div class="button-confirm" @click="onHide">确定</div>
      </div>
    </div>
  </div>
</template>
// ... 其他地方和上面试一样的
nameSlot
<template>
  <div class="slot">
    <button @click="onToggleVisible">切换dialog</button>
    <Dialog
      :visible.sync="visible"
    >
      <template v-slot:title>
        <div class="dialog-title">具名插槽</div>
      </template>
      <template v-slot:main>
        <div class="slot-body">前端胖头鱼</div>
      </template>
    </Dialog>
  </div>
</template>

<script>
import Dialog from './components/dialog.vue'

export default {
  name: 'nameSlot',
  components: {
    Dialog,
  },
  data () {
    return {
      visible: false
    }
  },
  methods: {
    onToggleVisible () {
      this.visible = !this.visible
    }
  }
}
</script>
React
The content in the component label that can be read through theprops.childrenVue, but how to realize the named slot?Reactfun points of 061c210136c0ef, I think it is that attributes can be passed,string,number,function,even DOM can also be passed. So it’s easy to implement named slots, just pass them as attributes.
nameSlot source code click here
Dialog transformation
import React, { useState, useEffect } from "react"

import './dialog.css'

export default function Dialog(props) {
  // 原谅我用visible -1这种傻叉的方式先实现了, 重点不是在这里
  const { title, main, visible = -1 } = props
  const [visibleInner, setVisibleInner] = useState(false)

  const onHide = () => {
    setVisibleInner(false)
  }

  useEffect(() => {
    setVisibleInner(visible > 0)
  }, [ visible ])

  return (
    <div className="dialog" style={ { display: visibleInner ? 'block' : 'none' }}>
      <div className="dialog-mask" onClick={ onHide }></div>
      <div className="dialog-body">
        {/* { title ? <div className="dialog-title">{ title }</div> : null } */}
        {/* 注意这里,直接渲染title就可以了 */}
        { title }
        <div className="dialog-main">
          {/* 注意这里,通过children实现默认插槽功能 */}
          {/* {children} */}
          {/* 这一这里不是children了,是main */}
          { main }
        </div>
        <div className="dialog-footer">
          <div className="button-cancel" onClick={ onHide }>取消</div>
          <div className="button-confirm" onClick={ onHide }>确定</div>
        </div >
      </div >
    </div >
  )
}
nameSlot
import React, { useState } from "react"
import Dialog from './components/dialog'

import './slot.css'

export default function NameSlot() {
  const [visible, setVisible] = useState(-1)

  const onToggleVisible = () => {
    setVisible(Math.random())
  }

  return (
    <div className="slot">
      <button onClick={ onToggleVisible }>切换dialog</button>
      <Dialog
        visible={visible}
        // 注意这里,直接传递的DOM
        title={ <div className="dialog-title">默认插槽</div> }
        // 注意这里,直接传递的DOM
        main={ <div className="slot-body">前端胖头鱼</div> }
      >
      </Dialog>
    </div>
  )
}
Preview
You can see the named slot, React directly uses the attribute instead, it is more concise11. Scope slot
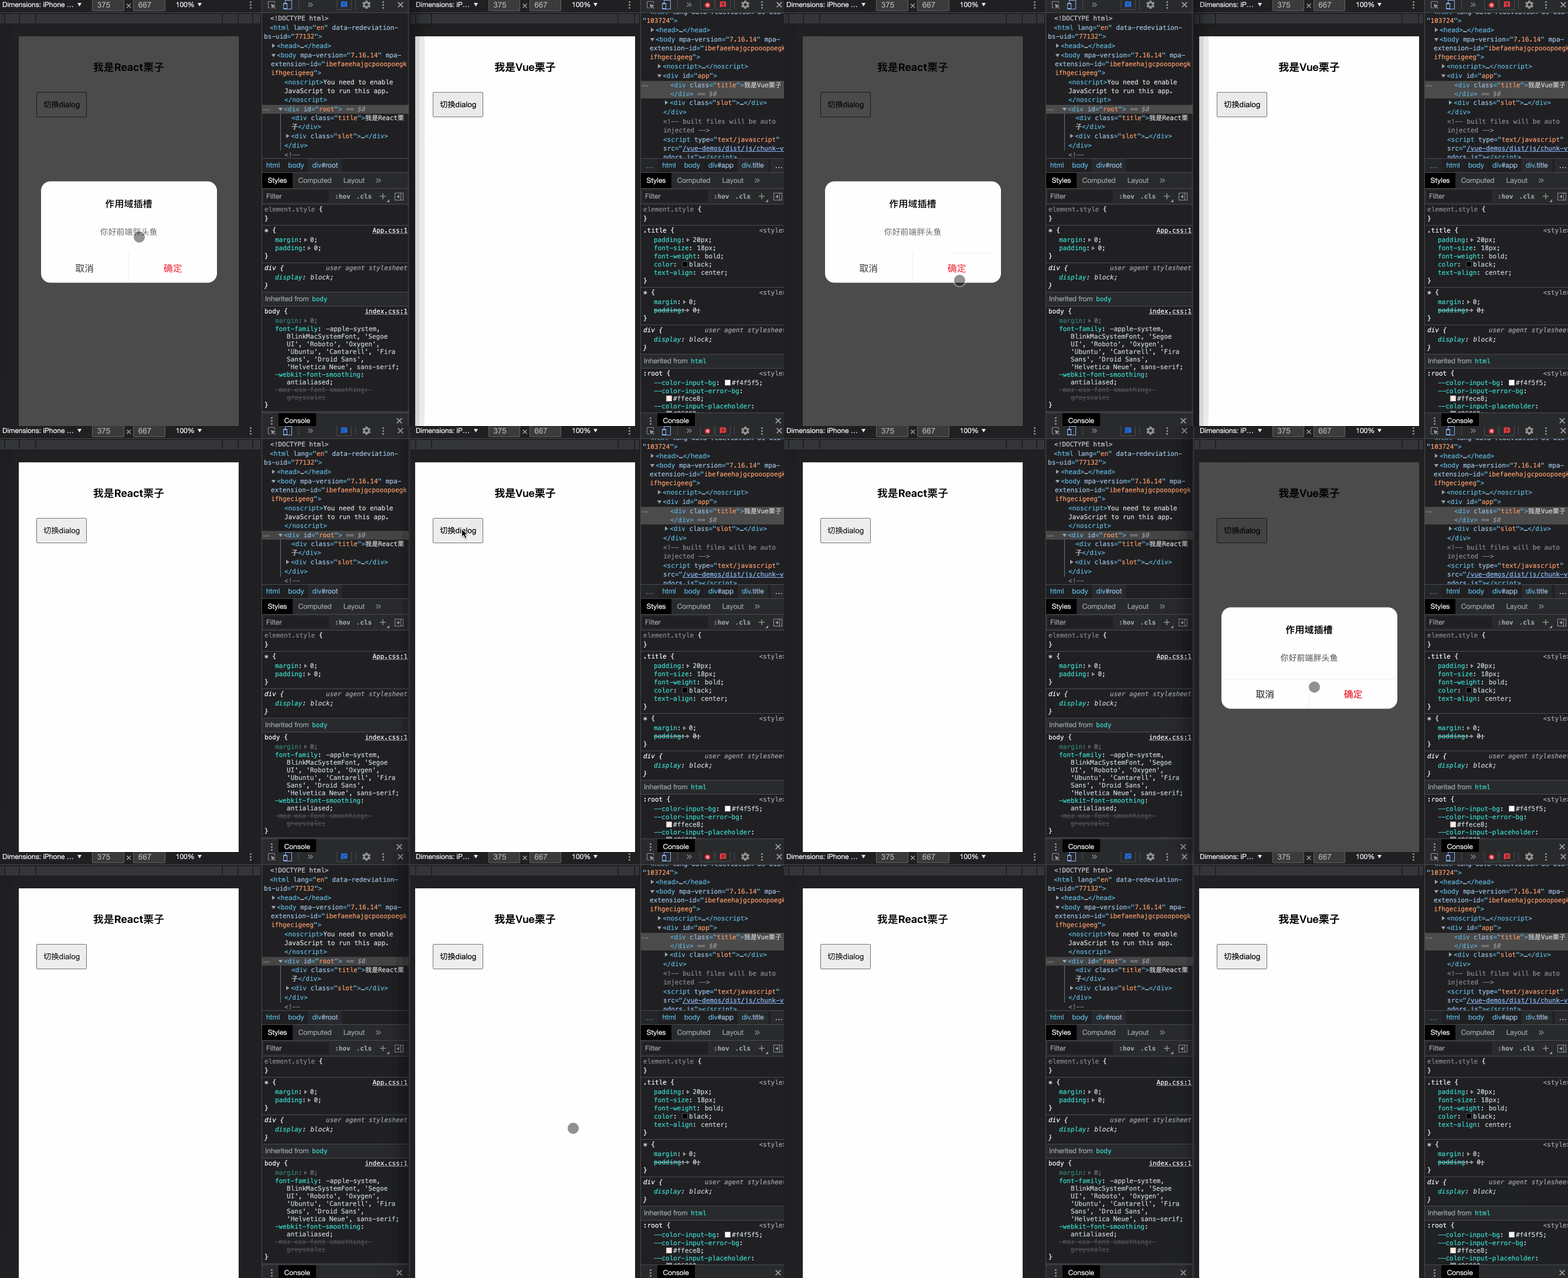
With the default slot, the named slot, of course, the scoped slot is indispensable! Sometimes it is useful for the contents of the slot to be able to access the data only in the subcomponent. This is also the meaning of the scoped slotSuppose: Dialog internal component has a the userInfo: {name: 'distal Pangtou'} data object, it is desirable to use Dialog components external to the slot can be accessed, how to do it?
Vue
scopeSlot source code click here
Dialog
<template>
  <div class="dialog" v-show="visible">
    <div class="dialog-mask" @click="onHide"></div>
    <div class="dialog-body">
      <div class="dialog-title" v-if="title">{{ title }}</div>
      <!-- 注意这里,通过绑定userInfo外部可以进行使用 -->
      <slot name="title" :userInfo="userInfo" v-else></slot>
      <div class="dialog-main">
        <!-- 注意这里,通过绑定userInfo外部可以进行使用 -->
        <slot name="main" :userInfo="userInfo"></slot>
      </div>
      <div class="dialog-footer">
        <div class="button-cancel" @click="onHide">取消</div>
        <div class="button-confirm" @click="onHide">确定</div>
      </div>
    </div>
  </div>
</template>

<script>
export default {
  name: "dialog",
  // ...
  data () {
    return {
      userInfo: {
        name: '前端胖头鱼'
      }
    }
  },
  // ...
};
</script>
scopeSlot
<template>
  <div class="slot">
    <button @click="onToggleVisible">切换dialog</button>
    <Dialog
      :visible.sync="visible"
    >
      <template v-slot:title>
        <div class="dialog-title">作用域插槽</div>
      </template>
      <!-- 注意这里 -->
      <template v-slot:main="{ userInfo }">
        <!-- 注意这里userInfo是Dialog组件内部的数据 -->
        <div class="slot-body">你好{{ userInfo.name }}</div>
      </template>
    </Dialog>
  </div>
</template>
React
Again, in all Jieke React pass, to achieve a similar slot we named the DOM transmitted directly, we can pass the same function, theDialoginternal componentsuserInfodata transmission function by way of reference to the use of an external
scopeSlot source code click here
Dialog transformation
import React, { useState, useEffect } from "react"

import './dialog.css'

export default function Dialog(props) {
  // 原谅我用visible -1这种傻叉的方式先实现了, 重点不是在这里
  const { title, main, visible = -1 } = props
  const [visibleInner, setVisibleInner] = useState(false)
  const [ userInfo ] = useState({
    name: '前端胖头鱼'
  })

  const onHide = () => {
    setVisibleInner(false)
  }

  useEffect(() => {
    setVisibleInner(visible > 0)
  }, [ visible ])

  return (
    <div className="dialog" style={ { display: visibleInner ? 'block' : 'none' }}>
      <div className="dialog-mask" onClick={ onHide }></div>
      <div className="dialog-body">
        {/* 作用域插槽,当函数使用,并且把数据传递进去 */}
        { title(userInfo) }
        <div className="dialog-main">
          {/* 作用域插槽,当函数使用,并且把数据传递进去 */}
          { main(userInfo) }
        </div>
        <div className="dialog-footer">
          <div className="button-cancel" onClick={ onHide }>取消</div>
          <div className="button-confirm" onClick={ onHide }>确定</div>
        </div >
      </div >
    </div >
  )
}
scopeSlot
import React, { useState } from "react"
import Dialog from './components/dialog'

import './slot.css'

export default function ScopeSlot() {
  const [visible, setVisible] = useState(-1)

  const onToggleVisible = () => {
    setVisible(Math.random())
  }

  return (
    <div className="slot">
      <button onClick={ onToggleVisible }>切换dialog</button>
      <Dialog
        visible={visible}
        // 通过函数来实现插槽
        title={ () => <div className="dialog-title">作用域插槽</div> }
        // 接收userInfo数据
        main={ (userInfo) => <div className="slot-body">你好{ userInfo.name }</div> }
      >
      </Dialog>
    </div>
  )
}





**粗体** _斜体_ [链接](http://example.com) `代码` - 列表 > 引用。你还可以使用@来通知其他用户。