

1. Introduction to Micro Frontend
Micro frontend is an architecture similar to microservices, which applies the concept of microservices to the browser side, that is, transforms a web application from a single monolithic application to an application that aggregates multiple small front-end applications into one. Each front-end application can run independently, develop independently, and deploy independently.
benefits of micro frontends
application autonomy. It is only necessary to follow a unified interface specification or framework so that the systems can be integrated together, and there is no dependency between them.Single duty. Each front-end application can only focus on the functions it needs to complete.technology stack has nothing to do. You can use React and Vue at the same time as Angular.
micro frontends
- The split basis of applications depends on the construction of the infrastructure. Once a large number of applications depend on the same infrastructure, maintenance becomes a challenge.
- The smaller the splitting granularity, the more complex the architecture and the higher the maintenance cost.
- Once the technology stack is diversified, it means the technology stack is chaotic
micro front end consist of?
The current micro front-end mainly adopts the combined application routing scheme. The core of the scheme is the "master-slave" idea, that is, includes a base (MainApp) application and several micro (MicroApp) applications, most base applications are A front-end SPA project is mainly responsible for application registration, route mapping, message delivery, etc., while micro-applications are independent front-end projects. These projects are not limited to React, Vue, Angular or JQuery development. Each micro-application is registered in the base application. , managed by the base, but it can be accessed separately if it is detached from the base. The basic process is shown in the following figure
Whether to use the micro front end
The best usage scenarios of micro-frontends are some B-side management systems, which are compatible with integrating historical systems and integrating new systems without affecting the original interactive experience.
2. Micro front-end combat

The existing landing schemes of micro-frontends can be divided into three categories: self-organizing mode, base mode and module loading mode
2.1 SingleSpa combat
Official website https://zh-hans.single-spa.js.org/docs/configuration
Applicable scenarios: The project is huge, and multiple sub-projects are integrated into a large project. Even if the technology stacks used in sub-projects are different, such as vue, react, angular have corresponding single-spa wheels, which can be integrated
1. Build the sub-app
First create a vue sub-application and export the necessary life cycle single-spa-vue
vue create spa-vue
npm install single-spa-vue
// main.js
import singleSpaVue from 'single-spa-vue';
const appOptions = {
el: '#vue',
router,
render: h => h(App)
}
// 在非子应用中正常挂载应用
if(!window.singleSpaNavigate){
delete appOptions.el;
new Vue(appOptions).$mount('#app');
}
const vueLifeCycle = singleSpaVue({
Vue,
appOptions
});
// 子应用必须导出以下生命周期:bootstrap、mount、unmount
export const bootstrap = vueLifeCycle.bootstrap;
export const mount = vueLifeCycle.mount;
export const unmount = vueLifeCycle.unmount;
export default vueLifeCycle;// router.js
// 配置子路由基础路径
const router = new VueRouter({
mode: 'history',
base: '/vue', //改变路径配置
routes
})
2. Package the submodule into a class library
//vue.config.js
module.exports = {
    configureWebpack: {
    // 把属性挂载到window上方便父应用调用 window.singleVue.bootstrap/mount/unmount
        output: {
            library: 'singleVue',
            libraryTarget: 'umd'
        },
        devServer:{
            port:10000
        }
    }
}
3. Main application build
<div id="nav">
    <router-link to="/vue">vue项目<router-link>

    <!--将子应用挂载到id="vue"标签中-->
    <div id="vue">div>
div>
import Vue from 'vue'
import App from './App.vue'
import router from './router'
import {registerApplication,start} from 'single-spa'
Vue.config.productionTip = false
async function loadScript(url) {
return new Promise((resolve,reject)=>{
let script = document.createElement('script')
script.src = url
script.onload = resolve
script.onerror = reject
document.head.appendChild(script)
})
}
// 注册应用
registerApplication('myVueApp',
async ()=>{
console.info('load')
// singlespa问题
// 加载文件需要自己构建script标签 但是不知道应用有多少个文件
// 样式不隔离
// 全局对象没有js沙箱的机制 比如加载不同的应用 每个应用都用同一个环境
// 先加载公共的
await loadScript('http://localhost:10000/js/chunk-vendors.js')
await loadScript('http://localhost:10000/js/app.js')
return window.singleVue // bootstrap mount unmount
},
// 用户切换到/vue下 我们需要加载刚才定义的子应用
location=>location.pathname.startsWith('/vue'),
)
start()
new Vue({
router,
render: h => h(App)
}).$mount('#app')4. Dynamically set sub-application publicPath
if(window.singleSpaNavigate){
  __webpack_public_path__ = 'http://localhost:10000/'
}
2.2 qiankun combat
Document https://qiankun.umijs.org/en/guide
- qiankun is a single-spa-based micro-frontend implementation library, designed to help you build a production-ready micro-frontend architecture system more easily and painlessly.
- qiankun was incubated from Ant Financial Technology's unified access platform for cloud products based on the micro-frontend architecture. After full testing and polishing of a batch of online applications, we extracted and open-sourced its micro-frontend kernel, hoping to help the community at the same time. It is more convenient for the required system to build its own micro-front-end system, and at the same time, it is hoped that with the help of the community, qiankun will be more mature and perfect.
- At present, qiankun has served more than 200+ online applications in Ant. It is absolutely trustworthy in terms of ease of use and completeness.
1. Main application build
<template>
  <!--注意这里不要写app 否则跟子应用的加载冲突
  <div id="app">-->
  <div>
    <el-menu :router="true" mode="horizontal">
      <!-- 基座中可以放自己的路由 -->
      <el-menu-item index="/">Home</el-menu-item>

      <!-- 引用其他子应用 -->
      <el-menu-item index="/vue">vue应用</el-menu-item>
      <el-menu-item index="/react">react应用</el-menu-item>
    </el-menu>
    <router-view />

    <!-- 其他子应用的挂载节点 -->
    <div id="vue" />
    <div id="react" />
  </div>
</template>
2. Register the sub-application
import { registerMicroApps,start } from 'qiankun'
// 基座写法
const apps = [
  {
    name: 'vueApp', // 名字
    // 默认会加载这个HTML,解析里面的js动态执行 (子应用必须支持跨域)
    entry: '//localhost:10000',
    container: '#vue', // 容器
    activeRule: '/vue', // 激活的路径 访问/vue把应用挂载到#vue上
    props: { // 传递属性给子应用接收
      a: 1,
    }
  },
  {
    name: 'reactApp',
    // 默认会加载这个HTML,解析里面的js动态执行 (子应用必须支持跨域)
    entry: '//localhost:20000',
    container: '#react',
    activeRule: '/react' // 访问/react把应用挂载到#react上
  },
]

// 注册
registerMicroApps(apps)
// 开启
start({
  prefetch: false // 取消预加载
})
3. Child Vue app
// src/router.js

const router = new VueRouter({
  mode: 'history',
  // base里主应用里面注册的保持一致
  base: '/vue',
  routes
})
Don't forget the hook export of the child app.
// main.js

import Vue from 'vue'
import App from './App.vue'
import router from './router'

Vue.config.productionTip = false

let instance = null
function render() {
  instance = new Vue({
    router,
    render: h => h(App)
  }).$mount('#app') // 这里是挂载到自己的HTML中 基座会拿到挂载后的HTML 将其插入进去
}

// 独立运行微应用
// https://qiankun.umijs.org/zh/faq#%E5%A6%82%E4%BD%95%E7%8B%AC%E7%AB%8B%E8%BF%90%E8%A1%8C%E5%BE%AE%E5%BA%94%E7%94%A8%EF%BC%9F
if(!window.__POWERED_BY_QIANKUN__) {
  render()
}

// 如果被qiankun使用 会动态注入路径
if(window.__POWERED_BY_QIANKUN__) {
  // qiankun 将会在微应用 bootstrap 之前注入一个运行时的 publicPath 变量,你需要做的是在微应用的 entry js 的顶部添加如下代码:
  __webpack_public_path__ = window.__INJECTED_PUBLIC_PATH_BY_QIANKUN__;
}

// 子应用的协议 导出供父应用调用 必须导出promise
export async function bootstrap(props) {} // 启动可以不用写 需要导出方法
export async function mount(props) {
  render()
}
export async function unmount(props) {
  instance.$destroy()
}
4. Configure vue.config.js
// vue.config.js

module.exports = {
    devServer:{
        port:10000,
        headers:{
            'Access-Control-Allow-Origin':'*' //允许访问跨域
        }
    },
    configureWebpack:{
        // 打umd包
        output:{
            library:'vueApp',
            libraryTarget:'umd'
        }
    }
}
5. Child React app
Using react as a sub-app
// app.js

import logo from './logo.svg';
import './App.css';
import {BrowserRouter,Route,Link} from 'react-router-dom'

function App() {
  return (
    // /react跟主应用配置保持一致
    <BrowserRouter basename="/react">
      <Link to="/">首页</Link>
      <Link to="/about">关于</Link>

      <Route path="/" exact render={()=>(
        <div className="App">
          <header className="App-header">
            <img src={logo} className="App-logo" alt="logo" />
            <p>
              Edit <code>src/App.js</code> and save to reload.
            </p>
            <a
              className="App-link"
              href="https://reactjs.org"
              target="_blank"
              rel="noopener noreferrer"
            >
              Learn React
            </a>
          </header>
        </div>
      )} />

      <Route path="/about" exact render={()=>(
        <h1>About Page</h1>
      )}></Route>
    </BrowserRouter>
  );
}

export default App;
// index.js
import React from 'react';
import ReactDOM from 'react-dom';
import './index.css';
import App from './App';
import reportWebVitals from './reportWebVitals';
function render() {
ReactDOM.render(
<React.StrictMode>
<App />
</React.StrictMode>,
document.getElementById('root')
);
}
// If you want to start measuring performance in your app, pass a function
// to log results (for example: reportWebVitals(console.log))
// or send to an analytics endpoint. Learn more: https://bit.ly/CRA-vitals
reportWebVitals();
// 独立运行
if(!window.__POWERED_BY_QIANKUN__){
render()
}
// 子应用协议
export async function bootstrap() {}
export async function mount() {
render()
}
export async function unmount() {
ReactDOM.unmountComponentAtNode(document.getElementById("root"));
}Rewrite the webpack configuration file in react (config-overrides.js)
yarn add react-app-rewired --save-devModify the package.json file
// react-scripts 改成 react-app-rewired
"scripts": {
    "start": "react-app-rewired start",
    "build": "react-app-rewired build",
    "test": "react-app-rewired test",
    "eject": "react-app-rewired eject"
  },
Create a new configuration file in the root directory
// 配置文件重写
touch config-overrides.js
// config-overrides.js
module.exports = {
webpack: (config) => {
// 名字和基座配置的一样
config.output.library = 'reactApp';
config.output.libraryTarget = "umd";
config.output.publicPath = 'http://localhost:20000/'
return config
},
devServer: function (configFunction) {
return function (proxy, allowedHost) {
const config = configFunction(proxy, allowedHost);
// 配置跨域
config.headers = {
"Access-Control-Allow-Origin": "*",
};
return config;
};
},
};configuration .env file
Create a new root directory .env
PORT=30000
# socket发送端口
WDS_SOCKET_PORT=30000
routing configuration
import { BrowserRouter, Route, Link } from "react-router-dom"

const BASE_NAME = window.__POWERED_BY_QIANKUN__ ? "/react" : "";

function App() {
  return (
    <BrowserRouter basename={BASE_NAME}><Link to="/">首页Link><Link to="/about">关于Link><Route path="/" exact render={() => <h1>hello homeh1>}>Route><Route path="/about" render={() => <h1>hello abouth1>}>Route>BrowserRouter>
  );
}
2.3 Feibing micro front-end actual combat
Official Access Guide https://micro-frontends.ice.work/docs/guide
- icestark is a micro-frontend solution for large-scale systems, suitable for the following business scenarios:
- The background is relatively scattered, and the experience is very different. Because of frequent jumps, the operation efficiency is low. It is hoped that the system can be unified and closed.
- The single-page application is very large, the cost of multi-person collaboration is high, the development/build time is long, and the cost of dependency upgrade and regression is high
- The system has two-party/three-party access requirements
On the basis of ensuring the operating experience of a system, icestark realizes the independent development and release of each micro-application. The main application manages the registration and rendering of micro-applications through icestark, which completely decouples the entire system.
1. The react main application is written
$ npm init ice icestark-layout @icedesign/stark-layout-scaffold
$ cd icestark-layout
$ npm install
$ npm start
// src/app.jsx中加入
const appConfig: IAppConfig = {
...
icestark: {
type: 'framework',
Layout: FrameworkLayout,
getApps: async () => {
const apps = [
{
path: '/vue',
title: 'vue微应用测试',
sandbox: false,
url: [
// 测试环境
// 请求子应用端口下的服务,子应用的vue.config.js里面 需要配置headers跨域请求头
"http://localhost:3001/js/chunk-vendors.js",
"http://localhost:3001/js/app.js",
],
},
{
path: '/react',
title: 'react微应用测试',
sandbox: true,
url: [
// 测试环境
// 请求子应用端口下的服务,子应用的webpackDevServer.config.js里面 需要配置headers跨域请求头
"http://localhost:3000/static/js/bundle.js",
],
}
];
return apps;
},
appRouter: {
LoadingComponent: PageLoading,
},
},
};// 侧边栏菜单
// src/layouts/menuConfig.ts 改造
const asideMenuConfig = [
{
name: 'vue微应用测试',
icon: 'set',
path: '/vue'
},
{
name: 'React微应用测试',
icon: 'set',
path: '/react'
},
]2. Vue sub-application access
# 创建一个子应用
vue create vue-child
// 修改vue.config.js
module.exports = {
devServer: {
open: true, // 设置浏览器自动打开项目
port: 3001, // 设置端口
// 支持跨域 方便主应用请求子应用资源
headers: {
'Access-Control-Allow-Origin' : '*',
'Access-Control-Allow-Methods': 'GET, POST, PUT, DELETE, PATCH, OPTIONS',
'Access-Control-Allow-Headers': 'X-Requested-With, content-type, Authorization',
}
},
configureWebpack: {
// 打包成lib包 umd格式
output: {
library: 'icestark-vue',
libraryTarget: 'umd',
},
}
}src/main.js Retrofitimport { createApp } from 'vue'
import App from './App.vue'
import router from './router'
import store from './store'
import {
isInIcestark,
getMountNode,
registerAppEnter,
registerAppLeave,
setLibraryName
} from '@ice/stark-app'
let vue = createApp(App)
vue.use(store)
vue.use(router)
// 注意:`setLibraryName` 的入参需要与 webpack 工程配置的 output.library 保持一致
// 重要 不加不生效 和 vue.config.js中配置的一样
setLibraryName('icestark-vue')
export function mount({ container }) {
// 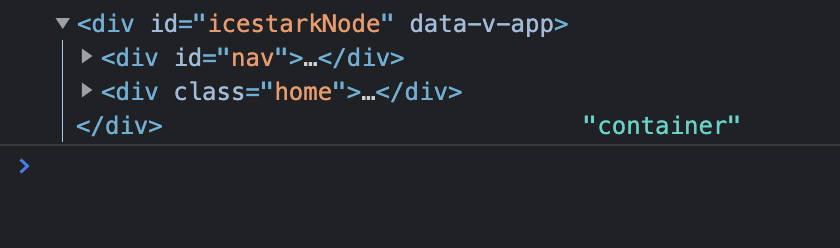
console.log(container,'container')
vue.mount(container);
}
export function unmount() {
vue.unmount();
}
if (!isInIcestark()) {
vue.mount('#app')
}router Retrofitimport { getBasename } from '@ice/stark-app';
const router = createRouter({
// 重要 在主应用中的基准路由
base: getBasename(),
routes
})
export default router3. The react sub-application accesses
create-react-app react-child// src/app.js
import { isInIcestark, getMountNode, registerAppEnter, registerAppLeave } from '@ice/stark-app';
export function mount(props) {
ReactDOM.render(<App />, props.container);
}
export function unmount(props) {
ReactDOM.unmountComponentAtNode(props.container);
}
if (!isInIcestark()) {
ReactDOM.render(<App />, document.getElementById('root'));
}
if (isInIcestark()) {
registerAppEnter(() => {
ReactDOM.render(<App />, getMountNode());
})
registerAppLeave(() => {
ReactDOM.unmountComponentAtNode(getMountNode());
})
} else {
ReactDOM.render(<App />, document.getElementById('root'));
}npm run eject, transformconfig/webpackDevServer.config.js
hot: '',
port: '',
...

// 支持跨域
headers: {
  'Access-Control-Allow-Origin' : '*',
  'Access-Control-Allow-Methods': 'GET, POST, PUT, DELETE, PATCH, OPTIONS',
  'Access-Control-Allow-Headers': 'X-Requested-With, content-type, Authorization',
},
Micro frontend deployment
Micro front-end deployment practice summary
More dry goods are shared on the public account "Front-end Advanced Journey"

**粗体** _斜体_ [链接](http://example.com) `代码` - 列表 > 引用。你还可以使用@来通知其他用户。