1. Brief introduction
Graphviz is a visual graphics tool open sourced by AT&T Research and Lucent Bell Labs, which can be easily used to draw structured graph networks and supports multiple output formats. Graphviz input is a drawing script written in dot language. By parsing the input script, it analyzes the points, edges and subgraphs in it, and then draws according to the attributes. Graphviz layouts describe graphs in a simple text language and make diagrams in useful formats such as images and SVG for web pages; PDF and Postscript for placement in other documents or for display in an interactive graph browser.
2. Installation
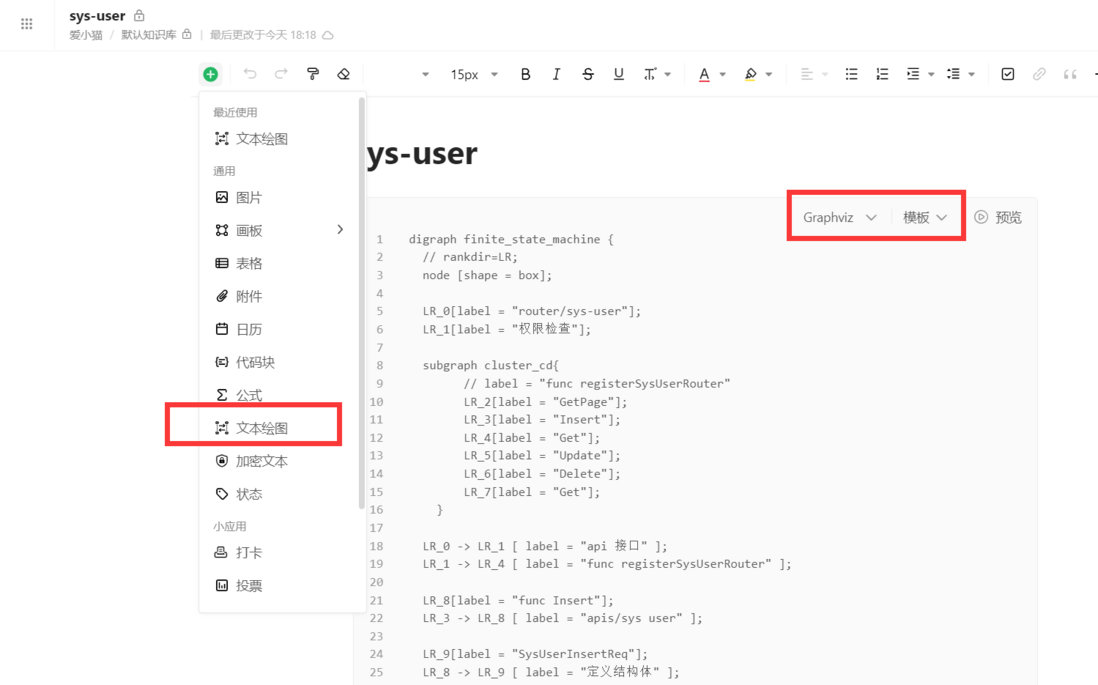
- I was using language bird document comes with text in a drawing to use Graphviz.
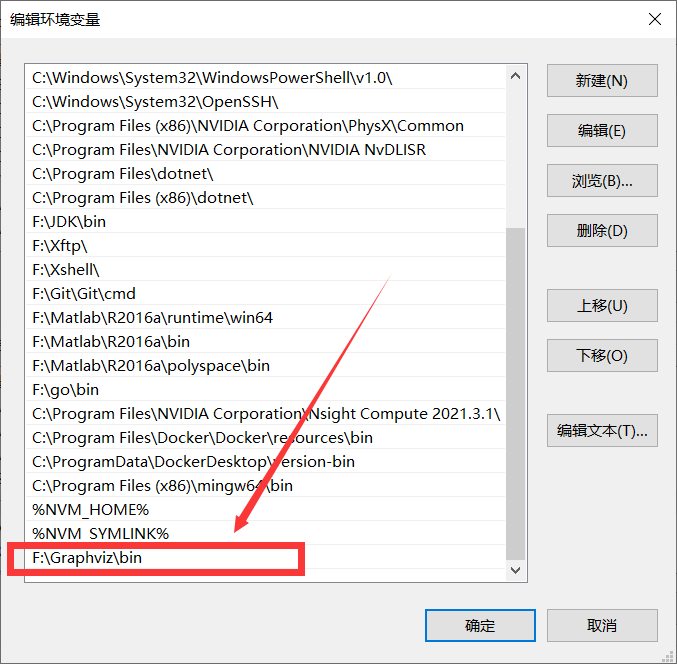
- If you want to learn about Graphviz tools, you can also go to Graphviz official website download. After installing according to the installation wizard, remember to add the bin directory of the Graphviz tool to the environment variable PATH. For example
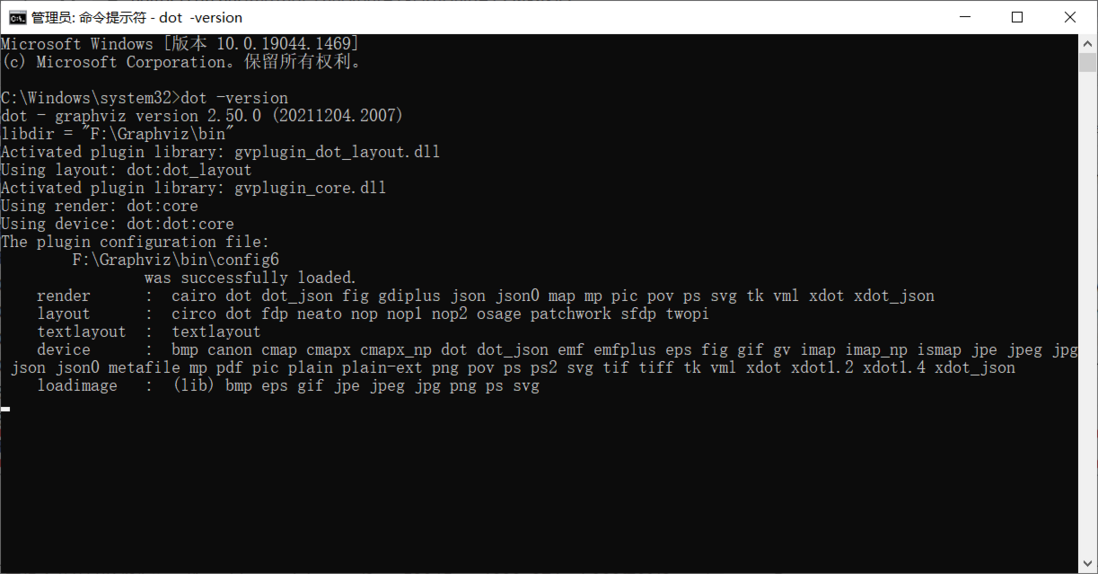
Next, test whether the installation is successful, open the cmd command window, enter the commanddot -version, the following figure appears to prove that the installation was successful
3. Use
Next is the use of Graphviz language bird
This is the detailed Grapviz usage syntax introduction
3.1. Simple use
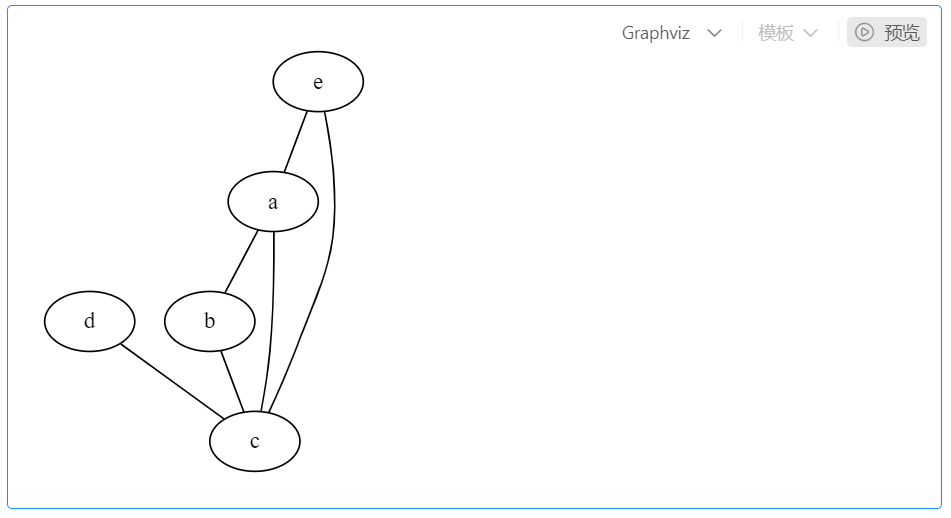
3.1.1 Undirected graphs
graph {
    a -- b;
    b -- c;
    a -- c;
    d -- c;
    e -- c;
    e -- a;
  }
Effect picture:
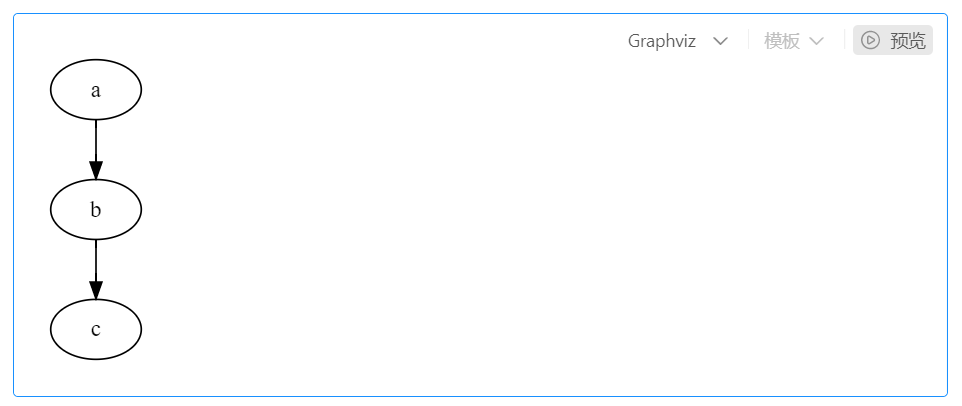
3.1.2 Directed Graph
digraph {
    a -> b;
    b -> c;
}
3.2. Slightly more complicated usage
3.2.1 With labels
digraph {
    player[label = "player"];
    game[label = "game"];
    player -> game[label = "play"]
}
Effect picture:
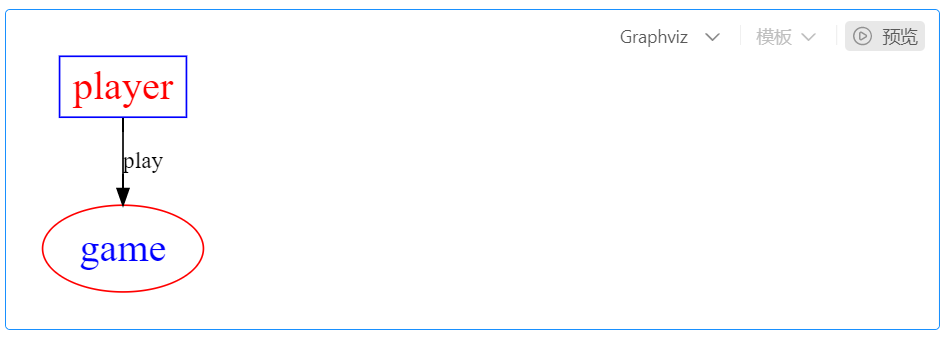
3.2.2 Different colors
digraph {
    player[label = "player", color = Blue, fontcolor = Red, fontsize = 24, shape = box];
    game[label = "game", color = Red, fontcolor = Blue, fontsize = 24, shape = ellipse];
    player -> game[label = "play"]
}
Effect picture:
3.2.3 Shape
For details, see official document
3.2.4 Insert picture
digraph {
    c[shape = none, image = "./pic.png"]
    a -> b -> c;
    c -> d;
}
Effect picture:
3.2.5 Unify Nodes and Connections
digraph {
    node[shape = box]
    edge[style = "dashed"]
    c[shape = none]
    a -> b -> c;
    c -> d;
}
Effect picture:
3.2.6 Subviews
digraph {
    label = visitNet
    rankdir = LR
    node[color = Red, fontsize = 24, shape = box]
    edge[color = Blue, style = "dashed"]
    user[style = "filled", color = "yellow", fillcolor = "chartreuse"]
    subgraph cluster_cd{
        label = "server and browser"
        bgcolor = yellow;
        browser -> server
    }
    user -> computer;
    computer -> browser;
}
Effect picture:
3.2.7 Structure View
digraph {
node[shape = record];
struct1[label = "<f0> left|<f1> mid\ dle|<f2> right"];
struct2[label = "<f0> one|<f1> two"];
struct3[label = "hello\nworld | {b|{c|<here> d|e}|f}|g|h"];
struct1:f1 -> struct2:f0;
struct1:f2 -> struct3:here;
}Effect picture:
3.2.8 Tree structure
digraph tree {
  fontname = "PingFang-SC-Light"
  fontsize = 24
  node[shape = "plaintext"]

  1 -> 2;
  1 -> 3;
  2 -> 4;
  2 -> 5;
  3 -> 6;
  3 -> 7;
  4 -> 8;
  4 -> 9;
  5 -> 10;
  5 -> 11;
  6 -> 12;
  6 -> 13;
  7 -> 14;
  7 -> 15;
}
Effect picture:
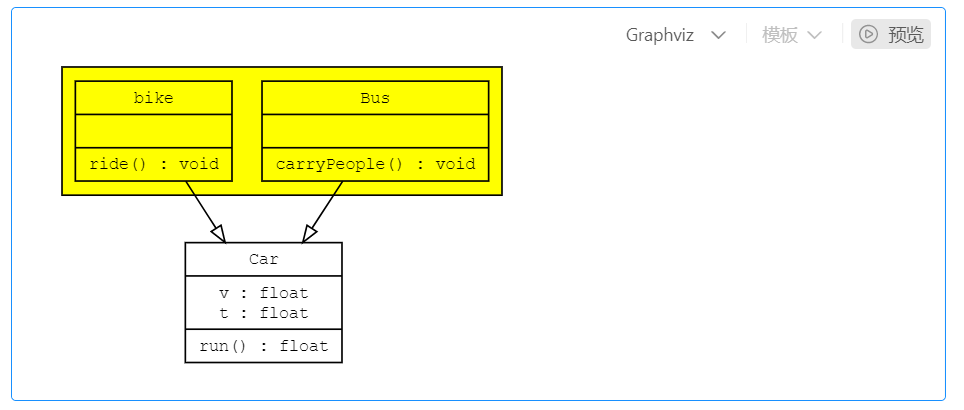
3.2.9 Inheritance
digraph UML {

    node[fontname = "Courier New", fontsize = 10, shape = record];
    edge[fontname = "Courier New", fontsize = 10, arrowhead = "empty"];

    Car[label = "{Car | v : float\nt : float | run() : float}"]

    subgraph clusterSome{
        bgcolor = "yellow";
        Bus[label = "{Bus | | carryPeople() : void}"];
        Bike[label = "{bike | | ride() : void}"];
    }
    Bus -> Car
    Bike -> Car
}
Effect picture:
3.2.10 Timing Diagram
digraph time {

    rankdir = "LR";
    node[shape = "point", width = 0, height = 0];
    edge[arrowhead = "none", style = "dashed"];

    {
        rank = "same"
        edge[style = "solided"];
        APP[shape = "plaintext"];
        APP -> step00 -> step01 -> step02 -> step03 -> step04 -> step05;
    }

    {
        rank="same";
        edge[style="solided"];
        SDK[shape="plaintext"];
        SDK -> step10 -> step11 -> step12 -> step13 -> step14 -> step15;
    }
    {
        rank="same";
        edge[style="solided"];
        AliPay[shape="plaintext"];
        AliPay -> step20 -> step21 -> step22 -> step23 -> step24 -> step25;
    }
    {
        rank="same";
        edge[style="solided"];
        Server[shape="plaintext"];
        Server -> step30 -> step31 -> step32 -> step33 -> step34 -> step35;
    }

    step00 -> step10 [label="sends order info", arrowhead="normal"];
    step11 -> step21 [label="open AliPay", arrowhead="normal"];
    step22 -> step12 [label="pay success", arrowhead="normal"];
    step13 -> step03 [label="pay success", arrowhead="normal"];
    step24 -> step34 [label="pay success", arrowhead="normal"];
}
Effect picture:
4. Reference
Attachment: If there are any deficiencies or omissions, please point out. I can learn from them and supplement them.





**粗体** _斜体_ [链接](http://example.com) `代码` - 列表 > 引用。你还可以使用@来通知其他用户。