First public account: MarkerHub
Author: Lu Yiming
Original link: https://www.zhuawaba.com/post/124
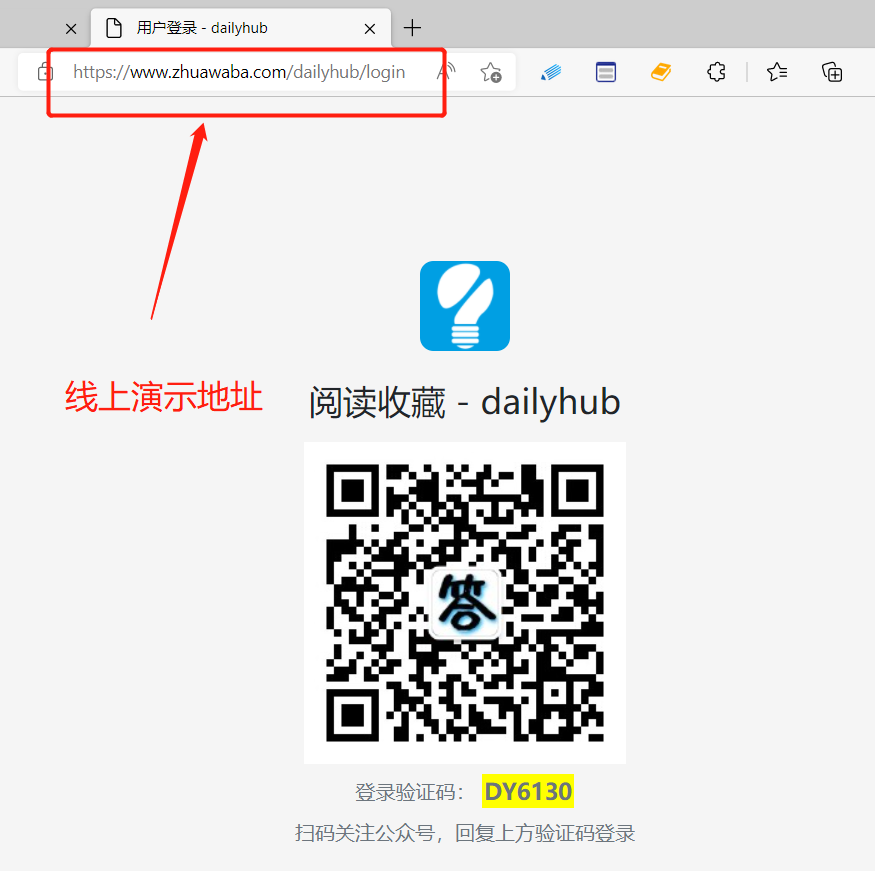
Online demo address: https://www.zhuawaba.com/dailyhub
Video explanation: https://www.bilibili.com/video/BV1Jq4y1w7Bc/
Source address: Please pay attention to the public number: Java Questions and Answers Society, reply [678] to get
1 Introduction
We often browse many web pages, and when we see some web pages that we find useful or interesting, we usually bookmark them. However, when there are more and more bookmark collections and more and more categories, it is more troublesome to find the previous collection. Although there is also a search function, it needs to click a lot of operations.
The most important thing is that when I bookmark web pages, I often need to record some browsing experiences as my browsing footprints and memories. In fact, for me, the classification of collections is not particularly important. It is a brain-consuming process, because many web pages can be placed in multiple folders. At this time, it is difficult to choose. There are various web pages. Create a category for each web page. Kind of redundant to me.
So I plan to develop a system that takes time as the record line, and can quickly record the URL and title of the web page I am currently browsing when the website is not opened, and then I can record my experience. Also need a very powerful search engine, fast search records. In this way, I can check the web pages I browse every day, and then I can share it to more netizens on the collection square.
So, next, follow me to complete the development of this project.
Project function
- Official account scan code to log in and register
- Favorite web pages quickly
- Favorites list
- Favorite retrieval
technology stack
Backend: springboot, spring data jpa, mysql, redis, elasticsearch, canal, mapstruct
Frontend: bootstrap 5
In fact, I used a search function in the eblog project before. At that time, rabbitmq was used to synchronize data to es. This time, in order to reduce the amount of code development, I used canal to synchronize data to es based on binlog, which involves the process of building services. , I will explain them one by one later.
2. Online demo
https://www.zhuawaba.com/dailyhub
3. Create a new springboot project and integrate jpa and freemarker
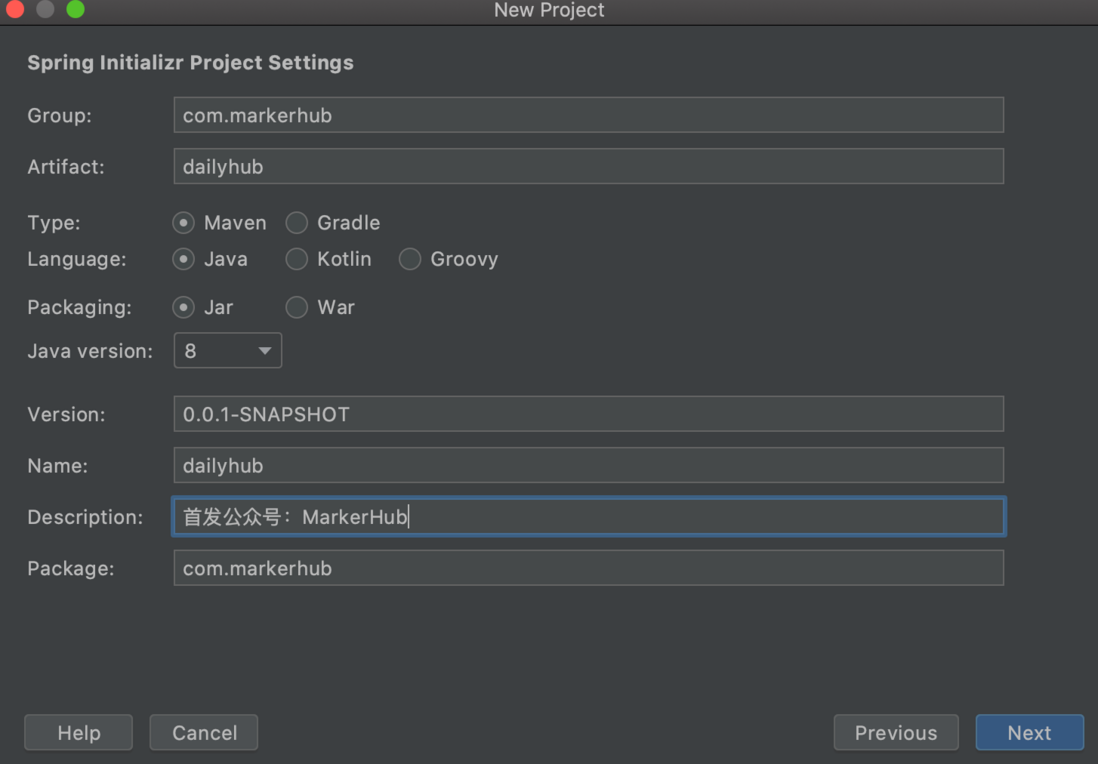
Open the IDEA development tool, let's first create a new springboot project, which is a very common operation, the project name is dailyhub, and we directly import the required jars, such as jpa, redis, mysql, lombok, and dev debugging.
New Project
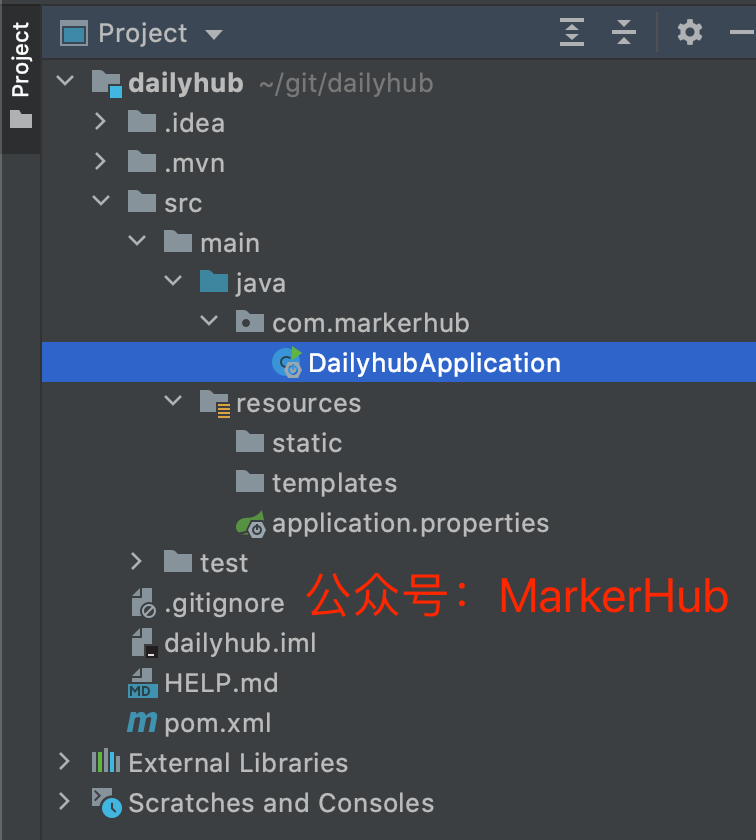
Maven imports related jars. Originally, I wanted to do a front-end and back-end separation project. Later, I thought that I spent too much time on the front end, and I didn't think about it anymore, so I used freemarker as the template engine.
Initial construction of the project
By the way, because I often use some tool classes, I like to use hutool, so remember to introduce it in advance:
- pom.xml
<dependency>
    <groupId>cn.hutool</groupId>
    <artifactId>hutool-all</artifactId>
    <version>5.7.16</version>
</dependency>
Next, we integrate jpa and freemarker, so that the project can access the database and display page content.
integrated jpa
The integration of jpa is very simple, we only need to configure the information of the data source, connect to the database, and other integration work has already been configured for us.
- application.yml
spring:
  datasource:
    driver-class-name: com.mysql.cj.jdbc.Driver
    url: jdbc:mysql://localhost/dailyhub?useSSL=false&characterEncoding=utf8&serverTimezone=GMT%2B8
    username: root
    password: admin
  jpa:
    database: mysql
    show-sql: true
    hibernate:
      ddl-auto: update
In the above configuration, remember to create a new dailyhub database, because subsequent user names may have special characters such as avatars, so remember to use the utf8mb4 format for the new database character set.
Then because it is jpa, table and field information will be automatically created with the bean class attribute information you define when the project starts. So we don't need to manually create the table.
For testing, let's define the user table information first. I plan to complete the login by scanning the QR code, so there is not much information recorded, and I don't need to collect too much user information, so the fields are very simple.
com.markerhub.entity.User
@Data
@Entity
@Table(name = "m_user")
public class User implements Serializable {
  @Id
  @GeneratedValue(strategy = GenerationType.IDENTITY)
  private Long id;
  private String username;
  // 头像
  private String avatar;

  // 微信用户身份id
  @JsonIgnore
  private String openId;

  // 上次登录
  private LocalDateTime lasted;
  private LocalDateTime created;

  private Integer statu;
}
Then create a new UserRepository next, of course, because we are project combat, so you need a little knowledge of jpa. UserRepository inherits JpaRepository, which is a very powerful basic interface provided by SpringBoot Data JPA, with basic CRUD functions and paging functions.
- com.markerhub.repository.UserRepository
public interface UserRepository extends JpaRepository<User, Long> {
    User findByOpenId(String openId);
}
Then let's define a test controller, because of the small project, I don't want to test in the test.
- com.markerhub.controller.TestController
@Controller
public class TestController {
    @Autowired
    UserRepository userRepository;

    @ResponseBody
    @GetMapping("/test")
    public Object test() {
        return userRepository.findAll();
    }
}
After the project is started, the system will automatically create table information, and then we manually add a piece of data into it. Then call the http://localhost:8080/test interface, and we can return all the data in the user table.
Because I added @JsonIgnore to the openid field, we cannot see it in the returned json serial number string. This is also to hide key sensitive information.
So here, we have successfully integrated jpa, and then let's talk about freemarker.
Integrate Freemarker
In the new version of freemarker, the suffix has been changed to .ftlh. For convenience and habit, I changed it back to .ftl, and then an error will be reported when the page has a null value, so it is necessary to set the classic_compatible information, then the configuration is as follows:
application.yml
spring:
freemarker:
  suffix: .ftl
  settings:
    classic_compatible: true
Then create a new test.ftl file in the templates directory:
templates/test.ftl
<p>你好,${user.username}, 这里是dailyhub!</p>In the backend, we need to pass the user's information, so define the backend interface:
com.markerhub.controller.TestController#ftl
@GetMapping("/ftl")
public String ftl(HttpServletRequest req) {
  req.setAttribute("user", userRepository.getById(1L));
  return "test";
}
Visit http://localhost:8080/ftl , the result is as follows:
4. Unified result encapsulation
Every time we do a project, we can't get around the util class and the result encapsulation. In order to make the data requested by ajax have a unified format, we need to encapsulate a unified result class, and we can see at a glance whether the request result is normal, etc. .
com.markerhub.base.lang.Result
@Data
public class Result<T> implements Serializable {

  public static final int SUCCESS = 0;
  public static final int ERROR = -1;

  private int code;
  private String mess;
  private T data;

  public Result(int code, String mess, T data) {
      this.code = code;
      this.mess = mess;
      this.data = data;
  }

  public static <T> Result<T> success() {
      return success(null);
  }
  public static <T> Result<T> success(T data) {
      return new Result<>(SUCCESS, "操作成功", data);
  }
  public static <T> Result<T> failure(String mess) {
      return new Result<>(ERROR, mess, null);
  }
}
Here I use generics, but also to limit the return of a certain type when returning results, rather than an arbitrary Object, to avoid problems such as inconsistent data return.
5. Global exception handling
In the two projects of vueblog and vueadmin, I like to use the annotation @ControllerAdvice+@ExceptionHandler to handle exceptions in global exception handling. This time we use another method. We can also handle global exceptions by inheriting HandlerExceptionResolver and overriding resolveException. abnormal.
com.markerhub.base.exception.GlobalExceptionHandler
@Slf4j
@Component
public class GlobalExceptionHandler implements HandlerExceptionResolver {
  @Override
  public ModelAndView resolveException(HttpServletRequest request, HttpServletResponse response, Object handler, Exception ex) {
      if (ex instanceof IllegalArgumentException || ex instanceof IllegalStateException) {
          log.error(ex.getMessage());
      } else {
          log.error(ex.getMessage(), ex);
      }
      // ajax请求
      String requestType = request.getHeader("X-Requested-With");
      if ("XMLHttpRequest".equals(requestType)) {
          try {
              response.setContentType("application/json;charset=UTF-8");
              response.getWriter().print(JSONUtil.toJsonStr(Result.failure(ex.getMessage())));
          } catch (IOException e) {
              // do something
          }
          return new ModelAndView();
      } else {
          request.setAttribute("message", "系统异常,请稍后再试!");
      }
      return new ModelAndView("error");
  }
}
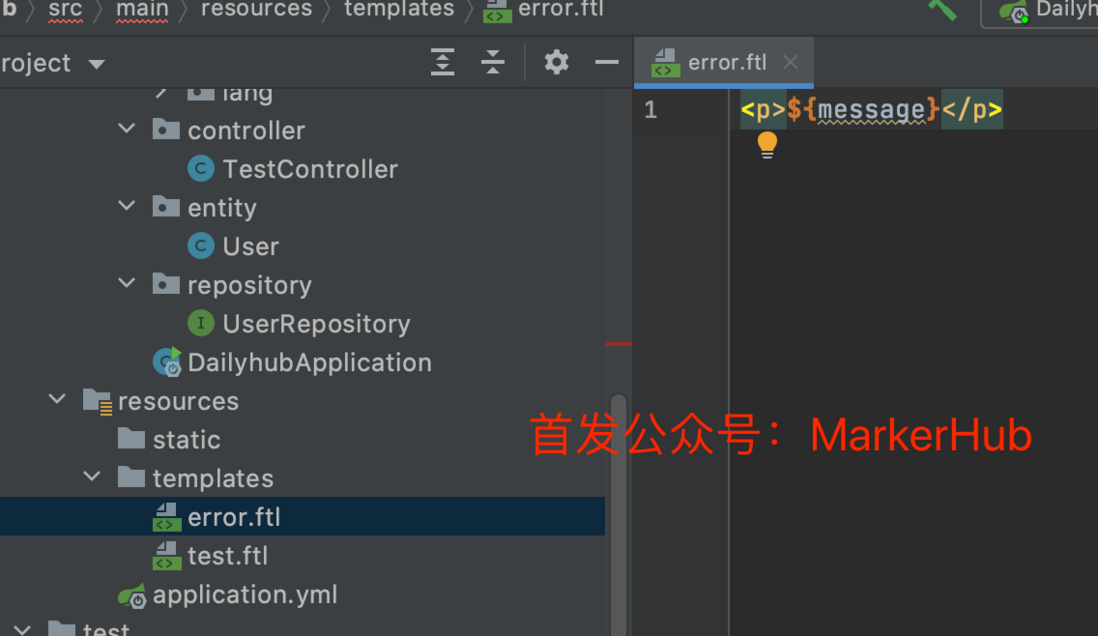
Note that information such as IllegalArgumentException is usually the business verification information is normal, so generally we do not print the specific information of the exception in the log, just print the exception message directly. Then when we encounter an ajax request, we return a json string that encapsulates the result uniformly. Otherwise, it returns to the error.ftl page and outputs the error message. So we create a new error.ftl page in the templates directory, and we can rewrite the error page later. Now we can make it simple:
- templates/error.ftl
6. Official account scan code login function development
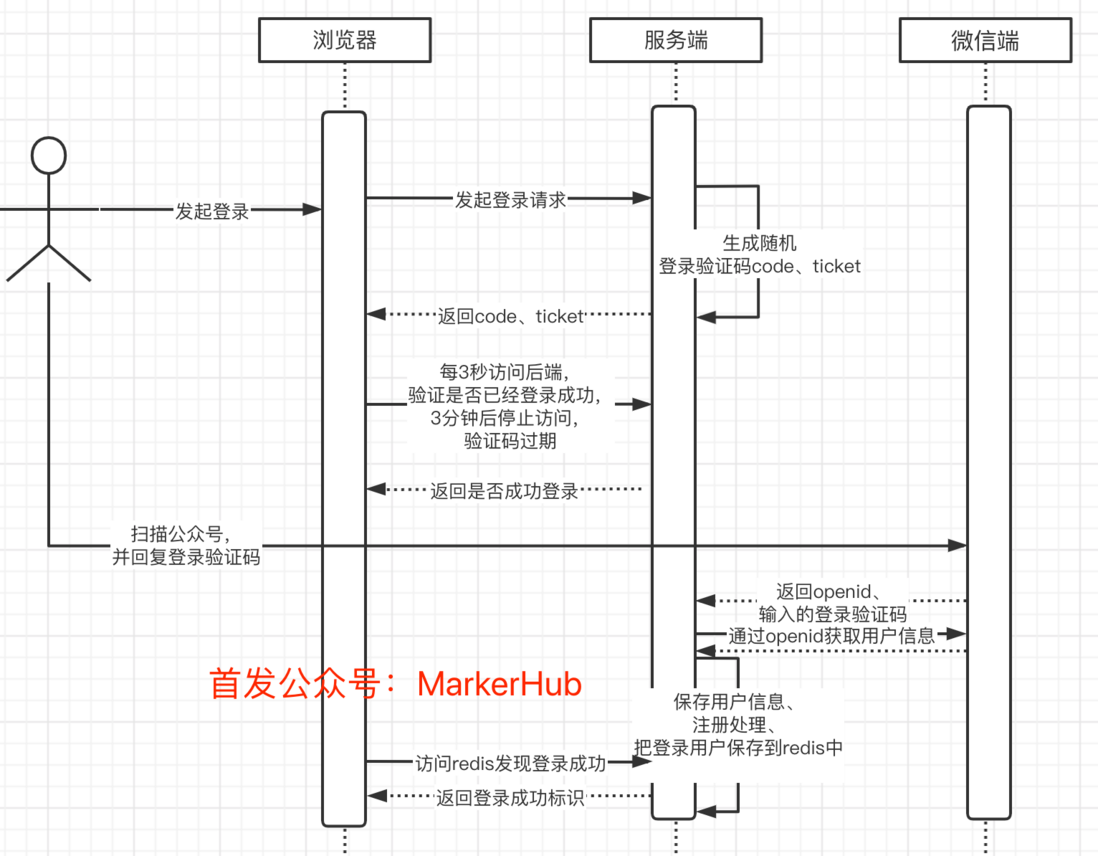
Scanning principle
principle description :
- User initiates a login request
- The server generates code, and the ticket returns to the front end
- The front end starts to loop through the back end every 3 seconds, carrying code and tickets
- The user scans the official account and replies to the code on the official account
- The WeChat terminal receives the keyword input by the user, returns the keyword and openid to the specified configuration backend interface
- The backend receives the callback from WeChat, uses openid to obtain user information, registers the user (new user), and then stores the user information in redis with code as the key.
When the front-end loop accesses, it is found that there is already user information in the back-end redis, whether the verification code code matches the ticket, and after the matching is successful, the back-end stores the user information in the session, the user logs in successfully, and the front-end jumps to the home page.
log in page
Because it is not a project separated from the front and back ends, I generally like to write the page first, and then fill in the data I need, so as to omit some interface debugging time. I use the page style framework of bootstrap 5, pay attention to synchronization.
According to the above code scanning logic, what we need on the login page is the QR code of a public account and the verification code for login, so the page is relatively simple.
- templates/login.ftl
<body class="text-center">
<main class="form-signin">
    <form>
        <img class="mb-4"
             src="/images/logo.jpeg"
             alt="" width="72" height="72"  style="border-radius: 15%;">

        <h1 class="h3 mb-3 fw-normal">阅读收藏 - dailyhub</h1>
        <img src="/images/javawenda.jpeg" alt="公众号:Java问答社">

        <div class="mt-2 mb-2 text-muted">
            登录验证码:
            <strong style="background-color: yellow; padding: 2px; font-size: 18px;" id="qrcodeeeee">
                ${code}
            </strong>
        </div>

        <p class="text-muted">扫码关注公众号,回复上方验证码登录</p>
    </form>
</main>


    var dingshi = setInterval(function () {
        $.get('/login-check' ,{
            code: '${code}',
            ticket: '${ticket}',
        }, function (res) {
            console.log(res)
            if(res.code == 0) {
                location.href = "/";
            }
        });
    }, 3000);

    setTimeout(function () {
        clearInterval(dingshi);
        console.log("已关闭定时器~")
        $("#qrcodeeeee").text("验证码过期,请刷新!");
    }, 180000);


</body>
</body>
</html>
final effect:
Because the login verification code has an expiration date, I defined a js timer to automatically switch the verification code to an expired state when it exceeds 3 minutes. In addition, in order to verify whether the user has waited, visit the server every 3 seconds. I did not use websocket here. Although this request is frequent, it does not need to check the database, and the pressure on the server is not particularly large. Of course, you can also use the ws method.
Verification code expiration effect:
Get login verification code
Then in the service segment, it is actually relatively simple, just generate the login verification code and pass it to the front end:
- com.markerhub.controller.LoginController#login
/**
 * 1、获取验证码
 */
@GetMapping(value = "/login")
public String login(HttpServletRequest req) {
    String code = "DY" + RandomUtil.randomNumbers(4);
    while (redisUtil.hasKey(code)) {
        code = "DY" + RandomUtil.randomNumbers(4);
    }
    String ticket = RandomUtil.randomString(32);
    // 5 min
    redisUtil.set(code, ticket, 5 * 60);

    req.setAttribute("code", code);
    req.setAttribute("ticket", ticket);
    log.info(code + "---" + ticket);
    return "login";
}
Randomly generate the login verification code starting with DY and the ticket for verification (to prevent others from forging the login verification code brute force access), save it in redis, and then return to the front end.
The front end displays the login verification code to the user, the user scans the QR code of the official account, and then enters the login verification code.
After receiving the keyword input by the user, the WeChat terminal returns the content input by the user as is, and also calls back the openid and some user-related information. When calling back the link, we set it in the public account settings in advance.
openid will be used as the user's key information. Later, we will determine who the user is through openid, so be sure to keep it properly. In fact, for privacy, the repository can be encrypted.
Loop request login result
When the user opens the login page, the page will initiate a login result request every 3 seconds for 3 minutes. When it is found that the user has sent the login verification code to the official account, it will automatically jump to the home page.
- com.markerhub.controller.LoginController#loginCheck
/**
 * 验证code是否已经完成登录
 */
@ResponseBody
@GetMapping("/login-check")
public Result loginCheck(String code, String ticket) {

    if(!redisUtil.hasKey("Info-" + code)) {
        return Result.failure("未登录");
    }

    String ticketBak = redisUtil.get(code).toString();
    if (!ticketBak.equals(ticket)) {
        return Result.failure("登录失败");
    }

    String userJson = String.valueOf(redisUtil.get("Info-" + code));
    UserDto user = JSONUtil.toBean(userJson, UserDto.class);

    req.getSession().setAttribute(Const.CURRENT_USER, user);
    return Result.success();
}
It can be seen that the price comparison of this check business is simple, just check whether there is a corresponding key in redis, and then obtain the corresponding login user information through the key, and then store it in the session to realize user login.
Integrate WxJava
For the convenience of subsequent public account business processing, we introduce a public account development integration package WxJava here.
In fact, scanning code login has already involved the development of public accounts, so we use a tool to help us simplify some development tools. Here we choose to use WxJava.
- Code cloud: https://gitee.com/binary/weixin-java-tools
- GitHub:https://github.com/wechat-group/WxJava
Corresponding to the documents related to the development of the : 161ef75ce82761 https://github.com/Wechat-Group/WxJava/wiki/The official account development document The first thing we need to deal with is the interface for synchronously replying to messages.
Now the version update is very fast, I used to use version 3.2.0, I will not use the latest version here.
- pom.xml
<!--微信公众号开发 https://github.com/Wechat-Group/WxJava-->
<dependency>
    <groupId>com.github.binarywang</groupId>
    <artifactId>weixin-java-mp</artifactId>
    <version>3.2.0</version>
</dependency>
Then we need to configure the key information of the WeChat public account, and then initialize the two classes, WxMpConfigStorage and WxMpService, so that we can use all the APIs of wxjava normally.
- WxMpService : Service of WeChat API
- WxMpConfigStorage : Official account client configuration storage
Create a config package, and then create a new com.markerhub.config.WeChatMpConfig configuration class.
- com.markerhub.config.WeChatMpConfig
@Data
@Slf4j
@Configuration
@ConfigurationProperties(prefix = "wechat")
public class WeChatMpConfig {

    private String mpAppId;
    private String mpAppSecret;
    private String token;

    @Bean
    public WxMpService wxMpService() {
        WxMpService wxMpService = new WxMpServiceImpl();
        wxMpService.setWxMpConfigStorage(wxMpConfigStorage());
        return wxMpService;
    }
    /**
     * 配置公众号密钥信息
     * @return
     */
    @Bean
    public WxMpConfigStorage wxMpConfigStorage() {
        WxMpInMemoryConfigStorage wxMpConfigStorage = new WxMpInMemoryConfigStorage();
        wxMpConfigStorage.setAppId(mpAppId);
        wxMpConfigStorage.setSecret(mpAppSecret);
        wxMpConfigStorage.setToken(token);
        return wxMpConfigStorage;
    }
    /**
     * 配置消息路由
     * @param wxMpService
     * @return
     */
    @Bean
    public WxMpMessageRouter router(WxMpService wxMpService) {
        WxMpMessageRouter router = new WxMpMessageRouter(wxMpService);
        // TODO 消息路由
        return router;
    }
}- WxMpMessageRouter : WeChat message router, through the coded configuration, the message from WeChat is handed over to the handler for processing
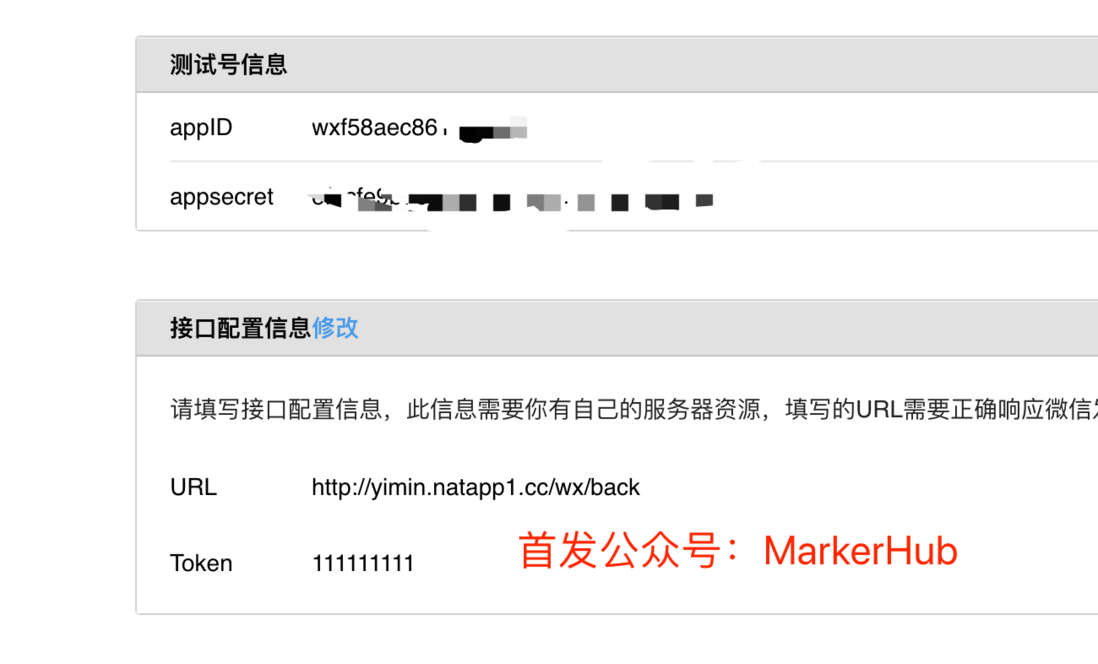
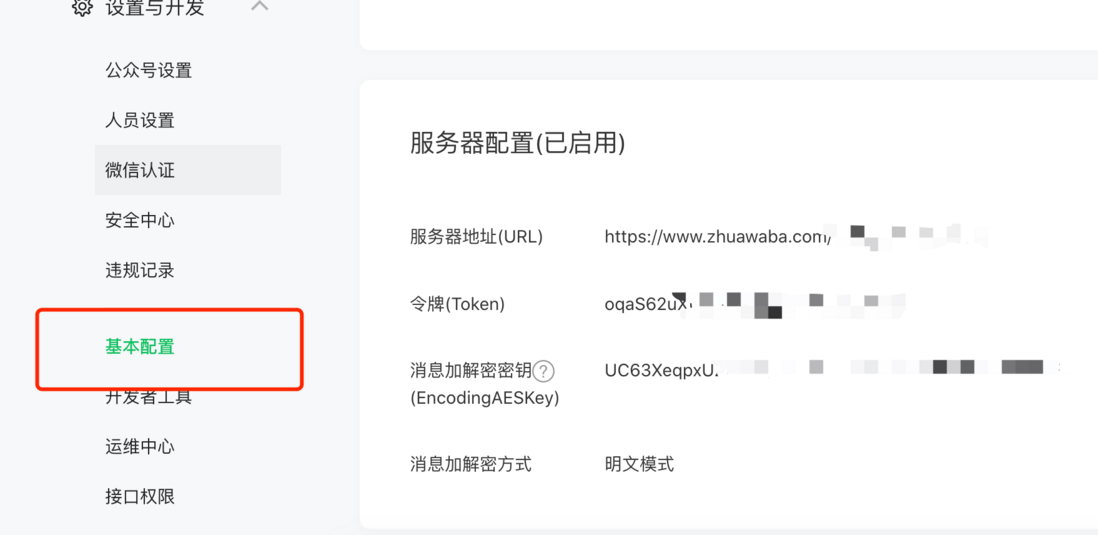
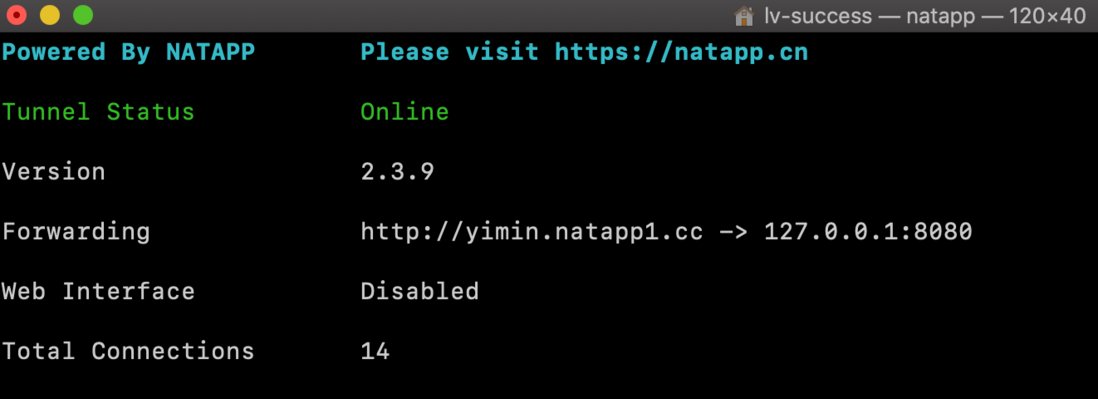
account. If you do not have an official account, we can go to the WeChat public platform interface to test the account application, URL: 161ef75ce8297e https://mp.weixin.qq.com/ debug/cgi-bin/sandbox?t=sandbox/login After logging in, you can get the mpAppId and mpAppSecret information related to the test number, and then the token and URL need to be set by yourself. The Token can be used at will, just keep the code and the URL needs an intranet penetration tool. I use the tool natapp.cn, which is mapped to the local port 8080, so that the peripheral can access my local interface. - Test environment configuration:
- Online environment configuration:
Then we configure the key information into the application.yml file:
- application.yml
wechat:
  mpAppId: wxf58aec8********5
  mpAppSecret: efacfe9b7c1b*************c954
  token: 111111111
WeChat message callback
When we enter the content message in the configured public account, the public platform will call back our configuration link and send the content entered by the user to our background, so we need to receive and process the content here, and then return the processing result to the public platform.
- com.markerhub.controller.LoginController#wxCallback
/**
 * 服务号的回调
 */
@ResponseBody
@RequestMapping(value = "/wx/back")
public String wxCallback(HttpServletRequest req, HttpServletResponse resp) throws IOException {
    String signature = req.getParameter("signature");
    String timestamp = req.getParameter("timestamp");
    String nonce = req.getParameter("nonce");
    String echoStr = req.getParameter("echostr");//用于验证服务器配置

    if (StrUtil.isNotBlank(echoStr)) {
        log.info("---------------->验证服务器配置");
        return echoStr;
    }
    if (!wxService.checkSignature(timestamp, nonce, signature)) {
        // 消息不合法
        log.error("------------------> 消息不合法");
        return null;
    }

    String encryptType = StringUtils.isBlank(req.getParameter("encrypt_type")) ?
            "raw" : req.getParameter("encrypt_type");
    WxMpXmlMessage inMessage = null;
    if ("raw".equals(encryptType)) {
        // 明文传输的消息
        inMessage = WxMpXmlMessage.fromXml(req.getInputStream());
    } else if ("aes".equals(encryptType)) {
        // 是aes加密的消息
        String msgSignature = req.getParameter("msg_signature");
        inMessage = WxMpXmlMessage.fromEncryptedXml(req.getInputStream(), wxMpConfigStorage, timestamp, nonce, msgSignature);
    } else {
        log.error("-------------> 不可识别的加密类型 {}" + encryptType);
        return "不可识别的加密类型";
    }

    // 路由到各个handler
    WxMpXmlOutMessage outMessage = wxMpMessageRouter.route(inMessage);

    log.info("返回结果 ----------------> " + outMessage);
    String result =  outMessage == null ? "" : outMessage.toXml();
    return result;
}
As can be seen from the above code, it is not very complicated. It is all to verify whether the message is legal. The really useful code is this line:
// 路由到各个handler
WxMpXmlOutMessage outMessage = wxMpMessageRouter.route(inMessage);
For this, we use the routing concept of wxjava. We need to configure the routing rules in advance. For example, when the user inputs text, pictures, voice, etc., we need to route to different processors to process the message content. Let's set up the routing and processor.
string processor
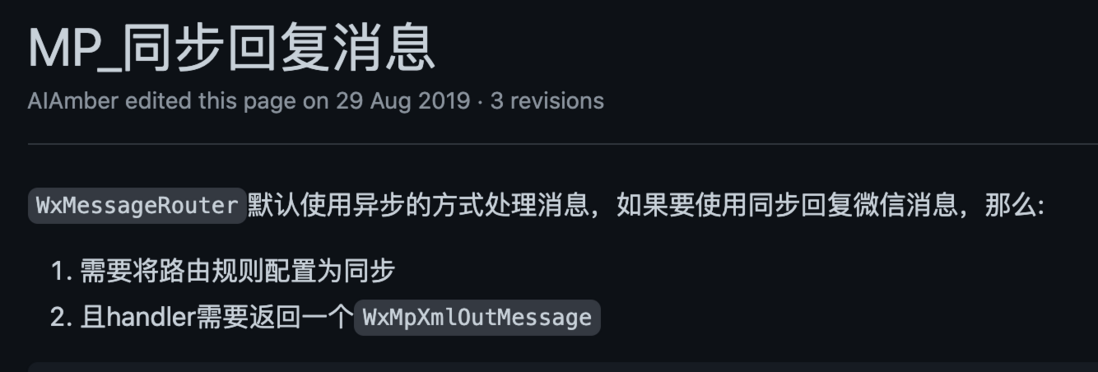
Then according to the instructions on the wxjava official website:
The main thing we need to deal with is text messages, so we configure a processor TextHandler in the route to process text messages.
So, we add a synchronous text message route in WeChatMpConfig:
- com.markerhub.config.WeChatMpConfig#router
@Autowired
TextHandler textHandler;

@Bean
public WxMpMessageRouter router(WxMpService wxMpService) {
    WxMpMessageRouter router = new WxMpMessageRouter(wxMpService);
    // TODO 消息路由
    router
            .rule()
            .async(false)
            .msgType(WxConsts.XmlMsgType.TEXT)
            .handler(textHandler)
            .end();
    return router;
}
With the above configuration, when the user replies to a text-type string on the official account, it will be routed to the textHandler to process the information. And set the time synchronization reply.
Then we define TextHandler, we need to implement the WxMpMessageHandler interface to override the handle interface.
We define the login string in the format of [DY + 4 random numbers], so when the official account receives a string starting with DY, we treat it as the user login credentials. At this time, we define a separate LoginHandler class, and focus on writing the business of login processing in it. Avoid too much code when doing more business later.
- com.markerhub.handler.TextHandler
@Slf4j
@Component
public class TextHandler implements WxMpMessageHandler {

    private final String UNKNOWN =  "未识别字符串!";

    @Autowired
    LoginHandler loginHandler;

    @Override
    public WxMpXmlOutMessage handle(WxMpXmlMessage wxMessage, Map<String, Object> context, WxMpService wxMpService, WxSessionManager wxSessionManager) throws WxErrorException {
        String openid = wxMessage.getFromUser();
        String content = wxMessage.getContent();

        String result = UNKNOWN;

        if (StrUtil.isNotBlank(content)) {
            content = content.toUpperCase().trim();

            // 处理登录字符串
            if (content.indexOf("DY") == 0) {
                result = loginHandler.handle(openid, content, wxMpService);
            }
        }

        return WxMpXmlOutMessage.TEXT()
                .content(result)
                .fromUser(wxMessage.getToUser())
                .toUser(wxMessage.getFromUser())
                .build();
    }
}
It can be seen that when the login string at the beginning of DY is encountered, it is handed over to the LoginHandler to process other messages, which will all return unrecognized.
- LoginHandler
@Slf4j
@Component
public class LoginHandler {

    @Value("${server.domain}")
    String serverDomain;
    @Autowired
    RedisUtil redisUtil;
    @Autowired
    UserService userService;

    public String handle(String openid, String content, WxMpService wxMpService) {

        String result;
        if (content.length() != 6 || !redisUtil.hasKey(content)) {
            return "登录验证码过期或不正确!";
        }

        // 解决手机端登录
        String token = UUID.randomUUID().toString(true);
        String url = serverDomain + "/autologin?token=" + token ;

        WxMpUser wxMapUser = new WxMpUser();

        result = "欢迎你!" + "\n\n" +
                    "<a href='" + url + "'>点击这里完成登录!</a>";

        // 注册操作
        UserDto user = userService.register(wxMapUser);

        // 用户信息存在redis中5分钟
        redisUtil.set("Info-" + content, JSONUtil.toJsonStr(user), 5 * 60);
        // 手机端登录
        redisUtil.set("autologin-" + token, JSONUtil.toJsonStr(user), 48 * 60 * 60);

        return result;
    }
}
LoginHandler mainly does several things:
- Verify that the login verification code exists and is normal
- Use openid to get user information
- User registration
- Save user information to redis
- Generate random tonken to facilitate mobile phone login operation
In the user registration register method, we need to do the following inventory processing:
- com.markerhub.service.impl.UserServiceImpl#register
@Service
public class UserServiceImpl implements UserService {

    @Autowired
    UserRepository userRepository;

    @Autowired
    UserMapper userMapper;

    @Override
    @Transactional
    public UserDto register(WxMpUser wxMapUser) {
        String openId = wxMapUser.getOpenId();
        User user = userRepository.findByOpenId(openId);

        if (user == null) {
            user = new User();

            String avatar = "https://image-1300566513.cos.ap-guangzhou.myqcloud.com/upload/images/5a9f48118166308daba8b6da7e466aab.jpg";
            user.setAvatar(avatar);
            user.setUsername("Hub-" + RandomUtil.randomString(5));

            user.setCreated(new Date());
            user.setLasted(new Date());
            user.setOpenId(openId);
            user.setStatu(Const.STATUS_SUCCESS);

        } else {
            user.setLasted(new Date());
        }

        userRepository.save(user);
        log.info("用户注册成:------{}", user.getUsername());

        UserDto userDto = userMapper.toDto(user);
        return userDto;
    }
}
Beginning on December 27, 2021, the official account of the official account adjusted the user information interface, and the avatar and nickname information have not been obtained, so I will write it to death here, and then I can provide a modification information page for users to modify by themselves, which is quite simple.
- com.markerhub.base.dto.UserDto
@Data
public class UserDto implements Serializable {

    private Long id;
    private String username;
    private String avatar;

    private LocalDateTime lasted;
    private LocalDateTime created;
}
use mapstruct
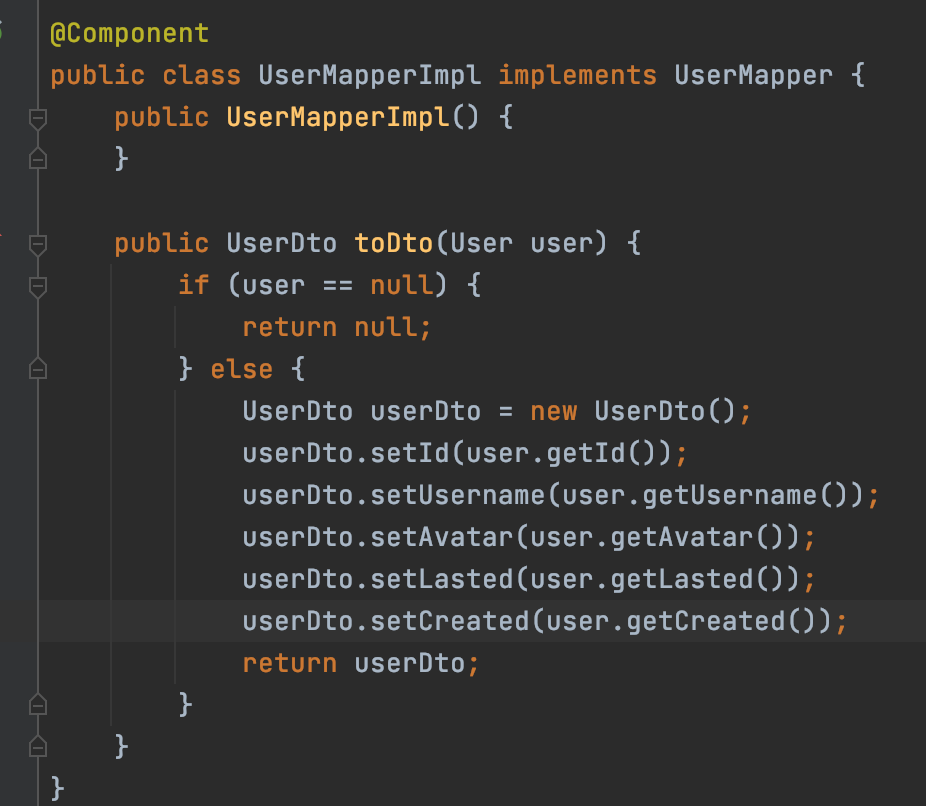
After saving the user information and returning to User, it needs to be converted to UserDto. Here I use a framework mapstruct, which is really easy to use.
For its introduction, you can go to the official website to take a look: https://mapstruct.org/
The principle of MapStruct is to generate the same code that we write ourselves, which means that the values are copied from the source class to the target class through simple getter/setter calls instead of reflection or similar. This makes the performance of MapStruct better than the dynamic framework. This is actually a bit similar to lombok.
First we need to import the mapstruct package. It should be noted that if lombok is introduced in the project, the conflict problem needs to be solved, and the plugin can be configured like me.
- pom.xml
<dependency>
   <groupId>org.mapstruct</groupId>
   <artifactId>mapstruct</artifactId>
   <version>1.4.2.Final</version>
</dependency>

// plugins中添加下面
<plugin>
   <groupId>org.apache.maven.plugins</groupId>
   <artifactId>maven-compiler-plugin</artifactId>
   <version>3.8.1</version>
   <configuration>
      <source>1.8</source> <!-- depending on your project -->
      <target>1.8</target> <!-- depending on your project -->
      <annotationProcessorPaths>
         <path>
            <groupId>org.mapstruct</groupId>
            <artifactId>mapstruct-processor</artifactId>
            <version>1.4.2.Final</version>
         </path>

         <!--为了解决lombok冲突问题-->
         <path>
            <groupId>org.projectlombok</groupId>
            <artifactId>lombok-mapstruct-binding</artifactId>
            <version>0.2.0</version>
         </path>
         <path>
            <groupId>org.projectlombok</groupId>
            <artifactId>lombok</artifactId>
            <version>1.18.22</version>
         </path>

         <!-- other annotation processors -->
      </annotationProcessorPaths>
   </configuration>
</plugin>
Then we need to do the conversion between User and UserDto, we can create a new UserMapper, and then
- com.markerhub.mapstruct.UserMapper
@Mapper(componentModel = "spring", unmappedTargetPolicy = ReportingPolicy.IGNORE)
public interface UserMapper {
    UserDto toDto(User user);
}
Then the fields with the same attributes can be mapped. If the attributes are different, they can be adjusted through annotations, which we will use later.
Then we can take a look at the generated mapping code:
Mobile phone login verification
In order to enable the mobile phone to log in before, we generated a token as the key to store the current user's login information, and then we need to return this token to the user's mobile phone.
The specific operation is that when the user enters the login verification code, we return the login link on the mobile phone to the user, and the web page on the PC side automatically jumps to the home page to achieve automatic login.
Visit the login page and reply to the login verification code in the official account. The results are as follows:
Then the login page on the PC side will automatically jump to the home page. The link to the home page has not been configured yet, we will get it later.
Then on the mobile phone, we can click the prompt [Click here to complete the login] to realize the login operation on the mobile phone. In fact, the link is as follows: http://localhost:8080/autologin?token=4eee0effa21149c68d4e95f8667cef49
The server has bound the token and the current user's information, so you can use the token to log in.
- com.markerhub.controller.LoginController#autologin
/**
 * 手机端登录
 */
@GetMapping("/autologin")
public String autologin(String token) {
    log.info("-------------->" + token);
    String userJson = String.valueOf(redisUtil.get("autologin-" + token));

    if (StringUtils.isNotBlank(userJson)) {
        UserDto user = JSONUtil.toBean(userJson, UserDto.class);
        req.getSession().setAttribute(Const.CURRENT_USER, user);
    }
    return "redirect:/index";
}

// 注销
@GetMapping("/logout")
public String logout() {
    req.getSession().removeAttribute(Const.CURRENT_USER);
    return "redirect:/index";
}
Intranet penetration
Well, after completing the above code, we can scan the code to log in. Remember to configure the penetration of the intranet mapping tool. For example mine:
My callback address is also set to http://yimin.natapp1.cc/wx/back , only in this way can the WeChat callback access my local test environment.
7. Login and permission interception
Custom @Login annotation
Not all links can be accessed at will, so a login authentication is required. Here, for convenience and to make the project architecture lighter, I did not use permission frameworks such as shiro or spring security. Instead, I plan to use an interceptor directly. After all, I only need to do a simple login interception here, and it does not involve the issue of permissions.
In fact, it is also possible not to write a @Login annotation, but considering that you do not forget to configure login authentication when adding an interface in the future, it is simply added. The annotation is very simple, and it is enough to mark the annotation above the interface that requires login authentication to access.
- com.markerhub.base.annotation.Login
@Documented
@Retention(RetentionPolicy.RUNTIME)
@Target(ElementType.METHOD)
public @interface Login {
}
Write a login interceptor
The logic of the login interceptor is very simple. First, it is necessary to determine whether the user has logged in, and then determine whether the requested interface has the @Login annotation. If so and the user is not logged in, it will be redirected to the login interface; otherwise, it will be released.
- com.markerhub.interceptor.AuthInterceptor
@Slf4j
public class AuthInterceptor implements HandlerInterceptor {
    @Override
    public boolean preHandle(HttpServletRequest request, HttpServletResponse response, Object handler) throws Exception {
        UserDto userDto = (UserDto)request.getSession().getAttribute(Const.CURRENT_USER);
        if (userDto == null) {
            userDto = new UserDto();
            userDto.setId(-1L);
        }
        request.setAttribute("current", userDto);

        Login annotation;
        if(handler instanceof HandlerMethod) {
            annotation = ((HandlerMethod) handler).getMethodAnnotation(Login.class);
        }else{
            return true;
        }

        if(annotation == null){
            // 没有@Login注解,说明是公开接口,直接放行
            return true;
        }

        if (userDto.getId() == null || userDto.getId() == -1L) {
            response.sendRedirect("/login");
            return false;
        }
        log.info("欢迎您:{}", userDto.getUsername());
        return true;
    }
}
Then we need to configure the interceptor and inject it into springboot. This is relatively simple. Anyone who has studied springboot should understand:
- com.markerhub.config.WebConfig
@Configuration
public class WebConfig implements WebMvcConfigurer {

    @Override
    public void addInterceptors(InterceptorRegistry registry) {
        registry.addInterceptor(new AuthInterceptor()).addPathPatterns("/**")
                .excludePathPatterns(
                        "/js/**"
                        , "/css/**"
                        , "/images/**"
                        , "/layui/**"
                        );
    }
}
@Login acts on the method, just add this annotation where login authentication is required. I won't show the effect in screenshots, you should be able to imagine it.
Author: Lu Yiming
Original link: https://www.zhuawaba.com/post/124
Online demo address: https://www.zhuawaba.com/dailyhub
Video explanation: https://www.bilibili.com/video/BV1Jq4y1w7Bc/
Source address: https://github.com/MarkerHub/dailyhub
8. My Favorites
physical design
Let's first design an entity class, which is used to store the corresponding collection records. In fact, this entity is still very simple. The main attributes of the collection are:
- id
- userId - favorite user
- title - the title
- url - the link corresponding to the bookmark
- note - Notes, Collection Ideas
- personal - whether only the person is visible
Then we add some necessary creation time and that's it. Because it is spring data jpa, we need these one-to-many relationships, and collections are many-to-one relationships for users. So the entity class can be designed like this:
- com.markerhub.entity.Collect
@Data
@Entity
@Table(name = "m_collect")
public class Collect implements Serializable {

    @Id
    @GeneratedValue(strategy = GenerationType.IDENTITY)
    private Long id;

    private String title;
    private String url;

    @ManyToOne
    @JoinColumn(name = "user_id")
    private User user;

    // 笔记想法
    private String note;

    // 是否公开,0公开,1私有,默认公开
    private Integer personal = 0;

    // 收藏日期,不存时间部分
    private LocalDate collected;

    private LocalDateTime created;
Then after the project is started, the table structure will be automatically generated. The Dto corresponding to the page can be like this:
- com.markerhub.base.dto.CollectDto
@Data
public class CollectDto implements Serializable {

    private Long id;
    private String title;
    private String url;
    private String note;

    // 是否公开,0公开,1私有,默认公开
    private Integer personal = 0;

    // 收藏日期
    private LocalDate collected;
    private LocalDateTime created;

    private UserDto user;
}
Extract from public pages
Next, we complete the main business function of the system, the collection function. First of all, I still like to complete the page first. My collection is the home page of the entire system. So I create a new index.ftl page under templates. Because each page has a common reference or the same component part, we use the concept of freemarker's macro to define the module content of each page and extract the common part.
So the extracted public template content is as follows:
- /inc/layout.ftl
<#macro layout title>
    <!DOCTYPE html>
    <html lang="en">
    <head>
        <meta charset="UTF-8">
        <title>${title} - dailyhub</title>

        ...js 和 css

    </head>
    <body>
    <div class="container" style="max-width: 960px;">
        <#include "/inc/header.ftl" />
        <#nested>
    </div>


        $(function () {
            layui.config({
                version: false
                , debug: false
                , base: ''
            });
        });

    </body>
    </html>
</#macro>
The macro tag is used to define macros
nested refers to the content body location of the label.
Let's look at the body part in the middle. Include introduces the header.ftl page. I won't post the code for this page and post a picture, which is the logo, top navigation, search box, and login button or user avatar information.
- /inc/header.ftl
The head effect is as follows:
page layout
In fact, my css is not very strong, so I like to find templates https://v5.bootcss.com/
For the home page: the layout of my collections, my idea is like this, the top is the navigation, the bottom left is the date list of all the user's favorites, and the right is the favorites list.
The favorite date list on the left is different for everyone. It should be a non-repetitive date list integrated from all your favorite lists, so it needs to be queried from the library and deduplicated.
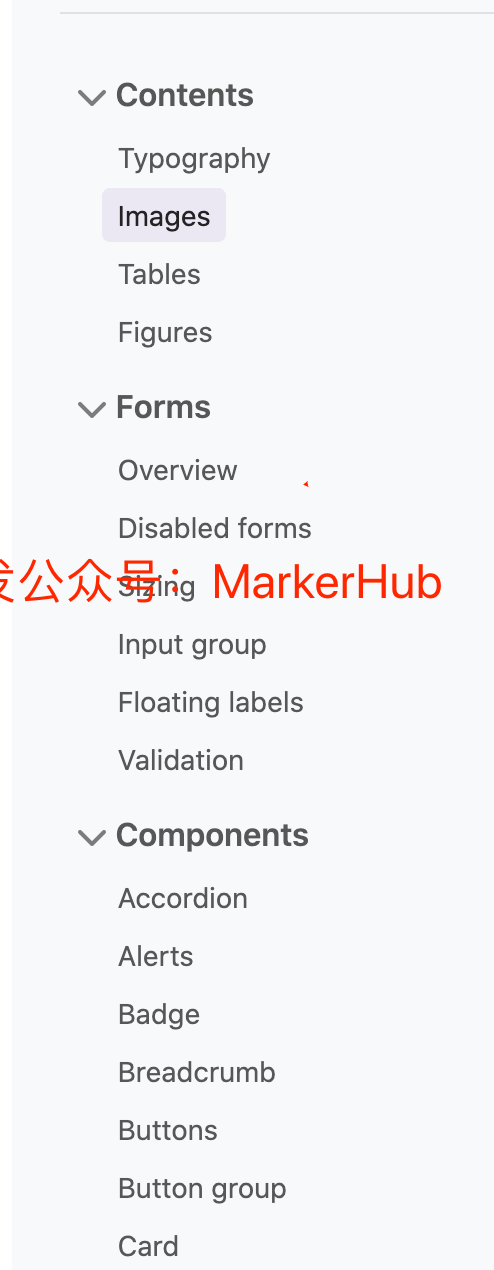
I plan to use a list on the left. I took a fancy to this in bootstrap5 https://v5.bootcss.com/docs/examples/cheatsheet/ , so I directly extracted the content.
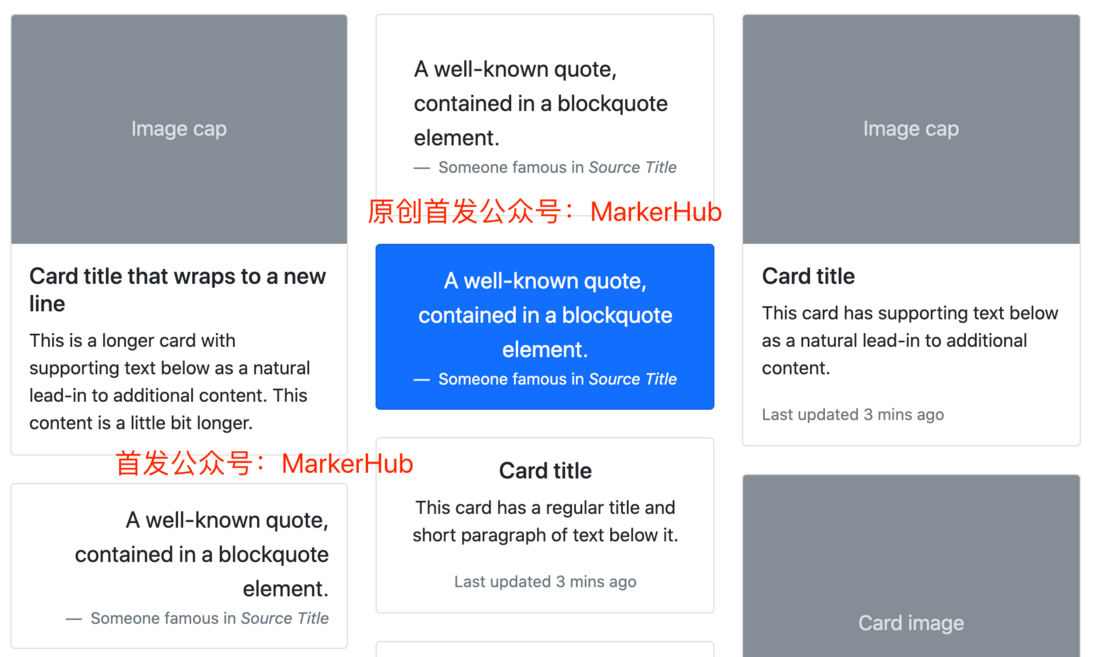
On the right, you can use a waterfall card, I like this one: https://v5.bootcss.com/docs/examples/masonry/ . The effect is this:
After integration, the resulting page code is as follows:
- index.ftl
<#import 'inc/layout.ftl' as Layout>
<@Layout.layout "我的收藏">
    <div id="app" class="row justify-content-md-center">
        <#--侧边日期-->
        <div class="col col-3">
            <div class="flex-shrink-0 p-3 bg-white" style="width: 280px;">
                <ul class="list-unstyled ps-0">
                    <#list datelines as dateline>
                        <li class="mb-1">

                            <button class="dateline btn btn-toggle align-items-center rounded collapsed"
                                    data-bs-toggle="collapse"
                                    data-bs-target="#collapse-${dateline.title}" aria-expanded="true">
                                ${dateline.title}
                            </button>

                            <div class="collapse show" id="collapse-${dateline.title}">
                                <ul class="btn-toggle-nav list-unstyled fw-normal pb-1 small">
                                    <#list dateline.children as child>
                                        <li><a href="hendleDateline('${child.title}')" class="link-dark rounded">${child.title}</a></li>
                                    </#list>
                                </ul>
                            </div>

                        </li>
                    </#list>
                </ul>
            </div>
        </div>
        <!---->
        <div class="col col-9" id="collects-col">
            <#include "/inc/collect-tpl.ftl">
            <div class="row" id="masonry"></div>
        </div>
    </div>

    // ...js

</@Layout.layout>
Because the collection card needs to be used in many places, it is extracted as a separate module, and then because I want to make it into a js waterfall mode later, I need to define a template. Hence this card template.
- /inc/collect-tpl.ftl
    {{# layui.each(d.content, function(index, item){ }}
    <div class="col-sm-6 col-lg-6 mb-4 masonry-item" id="masonry-item-{{item.id}}">
        <div class="card p-3">
            <div class="card-body">
                <blockquote class="blockquote">

                    {{# if(item.personal == 1){ }}
                    <span class="badge bg-info text-dark">私有</span>
                    {{# } }}

                    <a target="_blank" class="text-decoration-none" href="{{item.url}}"><span
                                class="card-title text-black">{{ item.title }}</span></a>
                </blockquote>

                <p class="card-text text-muted">
                    <img src="{{item.user.avatar}}" alt="mdo" width="32" height="32" class="rounded-circle">
                    <span>{{ item.user.username }}</span>
                    {{# if(item.user.id == ${current.id}){ }}
                    <a class="text-reset" href="/collect/edit?id={{item.id}}">编辑</a>
                    <a class="text-reset" href="handleDel({{item.id}})">删除</a>
                    {{# } }}
                </p>

                <p class="card-text text-muted">{{ item.note }}</p>
                <figcaption class="blockquote-footer mb-0 text-muted text-end">
                    {{ item.collected }}
                </figcaption>
            </div>
        </div>
    </div>
    {{# }); }}
The writing and rendering of page templates are based on the format of layui, so you can go to layui's website in advance to learn about layui's definition of page templates.
Date sidebar loading
The first is that you need a controller to jump to the page, you need to write IndexController
- com.markerhub.controller.IndexController
@Slf4j
@Controller
public class IndexController extends BaseController{

    @Login
    @GetMapping(value = {"", "/"})
    public String index() {
        // 时间线
        List<DatelineDto> datelineDtos = collectService.getDatelineByUserId(getCurrentUserId());
        req.setAttribute("datelines", datelineDtos);

        // 为了搜索自己的收藏
        req.setAttribute("userId", getCurrentUserId());
        return "index";
    }

}
Among them, DatelineDto has a superior and inferior relationship, so it is written as follows:
- com.markerhub.base.dto.DatelineDto
@Data
public class DatelineDto {
    private String title;
    private List<DatelineDto> children = new ArrayList<>();
}
Then collectService.getDatelineByUserId is to filter out the date collection of all collections of the user. The steps to get a list of user favorite dates are as follows:
- Query the database, get all the dates of all the user's favorites, and remove duplicates.
- The date is in the format of (XX, XX, XX, XXXX), and the superior format is (XX, XX, XXXX)
- Automatically arrange dates with the same month together
- com.markerhub.service.impl.CollectServiceImpl
@Service
public class CollectServiceImpl implements CollectService {

    @Autowired
    CollectRepository collectRepository;

    /**
     * 获取用户的收藏日期列表
     */
    @Override
    public List<DatelineDto> getDatelineByUserId(long userId) {
        List<Date> collectDates = collectRepository.getDateLineByUserId(userId);
        List<DatelineDto> datelineDtos = new ArrayList<>();

        for (Date date : collectDates) {
            // 获取上级、当前日期的标题
            String parent = DateUtil.format(date, "yyyy年MM月");
            String title = DateUtil.format(date, "yyyy年MM月dd日");

            datelineDtos = handleDateline(datelineDtos, parent, title);
        }
        return datelineDtos;
    }

    /**
     * 如果上级存在就直接添加到子集中,如果不存在则新建父级再添加子集
     */
    private List<DatelineDto> handleDateline(List<DatelineDto> datelineDtos, String parent, String title) {
        DatelineDto dateline = new DatelineDto();
        dateline.setTitle(title);
        // 查找是否有上级存在
        Optional<DatelineDto> optional = datelineDtos.stream().filter(vo -> vo.getTitle().equals(parent)).findFirst();
        if (optional.isPresent()) {
            optional.get().getChildren().add(dateline);

        } else {
            // 没有上级,那么就新建一个上级
            DatelineDto parentDateline = new DatelineDto();
            parentDateline.setTitle(parent);

            // 并且把自己添加到上级
            parentDateline.getChildren().add(dateline);

            // 上级添加到列表中
            datelineDtos.add(parentDateline);
        }
        return datelineDtos;
    }
}
- com.markerhub.repository.CollectRepository
public interface CollectRepository extends JpaRepository<Collect, Long>, JpaSpecificationExecutor<Collect> {

    @Query(value = "select distinct collected from m_collect where user_id = ? order by collected desc", nativeQuery = true)
    List<Date> getDateLineByUserId(long userId);
}
Note that distinct deduplication. The result is as follows:
Waterfall data loading
Then in the middle content part, we use layui's waterfall data to load.
- Unofficial site description: http://bmxpx.com/modules/flow.html
The js part of the page: - /index.ftl
    var userId = '${userId}'
    if (userId == null || userId == '') {
        userId = '${current.id}'
    }

    var laytpl, flow
    // 初始化layui的模板和瀑布流模块
    layui.use(['laytpl', 'flow'], function () {
        laytpl = layui.laytpl;
        flow = layui.flow;
    });

    // layui的瀑布流加载数据
    function flowLoad(dateline) {
        flow.load({
            elem: '#masonry'
            , isAuto: false
            , end: '哥,这回真的没了~'
            , done: function (page, next) {

                $.get('${base}/api/collects/' + userId + '/'+ dateline, {
                    page: page,
                    size: 10
                }, function (res) {
                    var lis = [];

                    var gettpl = $('#collect-card-tpl').html();
                    laytpl(gettpl).render(res.data, function (html) {
                        $(".layui-flow-more").before(html);
                    });

                    next(lis.join(''), page < res.data.totalPages);
                })

            }
        });
    }
    // 点击时间筛选,重新刷新瀑布流数据
    function hendleDateline(dateline) {
        $('#masonry').html('');
        flowLoad(dateline)
    }
    // 删除操作
    function handleDel(id) {
        layer.confirm('是否确认删除?', function (index) {
            $.post('${base}/api/collect/delete?id=' + id, function (res) {
                if (res.code == 0) {
                    $('#masonry-item-' + id).remove()
                }
                layer.msg(res.mess)
            })
            layer.close(index);
        });
    }
    $(function () {
        // 初始化加载,all表示全部
        flowLoad('all')
    });
When the page is loaded, flowload('all') is executed to load all the data of the current user.
Next, let's complete the data loading of the main part of the content. In js, we use the data waterfall method, so pay attention to paging when defining the interface.
@Slf4j
@Controller
public class CollectController extends BaseController{

    @Login
    @ResponseBody
    @GetMapping("/api/collects/{userId}/{dateline}")
    public Result userCollects (@PathVariable(name = "userId") Long userId,
                              @PathVariable(name = "dateline") String dateline) {
        Page<CollectDto> page = collectService.findUserCollects(userId, dateline, getPage());
        return Result.success(page);
    }

}
In addition to the paging information, the corresponding parameters include user ID and collection date as parameters to query the collection list of a certain date corresponding to the user. When the date parameter is all, query all the user's records, and when the investigated user is himself , you can find private collections.
The getPage method in BaseController is sorted by collection date by default:
- com.markerhub.controller.BaseController#getPage
Pageable getPage() {
    int page = ServletRequestUtils.getIntParameter(req, "page", 1);
    int size = ServletRequestUtils.getIntParameter(req, "size", 10);

    return PageRequest.of(page - 1, size,
            Sort.by(Sort.Order.desc("collected"), Sort.Order.desc("created")));
}
Let's focus on the findUserCollects method.
- com.markerhub.service.impl.CollectServiceImpl#findUserCollects
/**
 * 查询某用户的某个日期的收藏
 */
@Override
public Page<CollectDto> findUserCollects(long userId, String dateline, Pageable pageable) {
    Page<Collect> page = collectRepository.findAll((root, query, builder) -> {
        Predicate predicate = builder.conjunction();

        // 关联查询
        Join<Collect, User> join = root.join("user", JoinType.LEFT);
        predicate.getExpressions().add(builder.equal(join.get("id"), userId));

        // all表示查询全部
        if (!dateline.equals("all")) {
            // 转日期格式
            LocalDate localDate = LocalDate.parse(dateline, DateTimeFormatter.ofPattern("yyyy年MM月dd日"));
            predicate.getExpressions().add(
                    builder.equal(root.<Date>get("collected"), localDate));
        }

        UserDto userDto = (UserDto)httpSession.getAttribute(Const.CURRENT_USER);
        boolean isOwn = (userDto != null && userId == userDto.getId().longValue());

        // 非本人,只能查看公开的
        if (!isOwn) {
            predicate.getExpressions().add(
                    builder.equal(root.get("personal"), Const.collect_opened));
        }

        return predicate;
    }, pageable);

    // 实体转Dto
    return page.map(collectMapper::toDto);
}
Here, there is an associated query, and the relationship between collections and users is many-to-one, so it is relatively simple. You only need to left join the user table, and then let the id of the user table be the specified user ID.
Collection date Here, the parameter format passed in is as follows: yyyy year MM month dd day, so the format needs to be converted so that the database can recognize and compare.
Then non-me can only view the public here, you need to check the current user's information from HttpSession, compare whether the ID is the same person, non-me can only view the public collection.
Finally, we need to find out that the content in the page is the list of the entity Collect, we need to use the CollectDto for the Collect special session. At this time, we need to use the mapstruct again.
- com.markerhub.mapstruct.CollectMapper
@Mapper(componentModel = "spring", uses = {UserMapper.class}, unmappedTargetPolicy = ReportingPolicy.IGNORE)
public interface CollectMapper {

    CollectDto toDto(Collect collect);
    List<CollectDto> toDto(List<Collect> collects);
}
It should be noted that there is UserDto in CollectDto, so we need to add UserMapper.class to the @Mapper annotation for the correspondin









**粗体** _斜体_ [链接](http://example.com) `代码` - 列表 > 引用。你还可以使用@来通知其他用户。