background
Everyone's code style is different. For example, some people like to use Tab for code indentation, and some people like to use Space; some people add a semicolon after the code statement, and some people don't. And different people use different development tools, some people like to use WebStorm, some people like to use VSCode. . .
If it is developed independently by one person, of course, there is no problem with these, and you can write whatever you want. The benefits of normalizing code may not be immediately apparent either. And on the contrary, it may seem to some people a bondage.
But if it is developed collaboratively by a team, the benefits of code standardization are obvious. For example, unify the code style of team members, facilitate later maintenance, avoid disturbing Git Diff, and so on.
In response to the above problems, this article will introduce how to implement basic code specification configuration in a Vue project.
ideas
Different people may use different development tools, and different development tools have different default configurations. For this problem, here we use the development tool configuration tool EditorConfig to unify the default configurations of these development tools.
Sometimes it is inevitable to write some syntax errors and other problems during development, such as using undeclared variables, writing less break in switch statements, etc., and these problems will not be discovered until compilation or runtime. In response to this problem, here we use the code inspection tool Eslint to check these code problems, expose and fix these problems in advance, rather than wait until the compilation or runtime prompts an error to find out.
In addition, everyone's code style is different. For example, some people like to use Tab for code indentation, some people like to use Space, some people set a line width of 80 characters, and some people set 120 or more characters, etc., In response to this problem, here we use the code formatting tool Prettier to unify these code styles.
accomplish
Considering that some Vue projects are built with Vue CLI, and some are built with Webpack or other tools, so next I will use VSCode development tools to implement code specifications according to different building tools.
Vue project created with Vue CLI
Add code specs to new projects
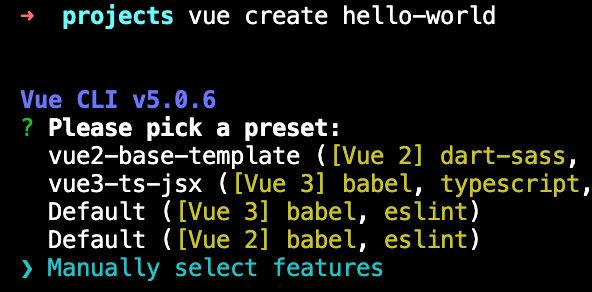
When we use the vue create command to create a new project, the command line interface will ask us whether to choose Linter / Formatter, which is the code specification tool provided by Vue CLI, which needs to be selected here.
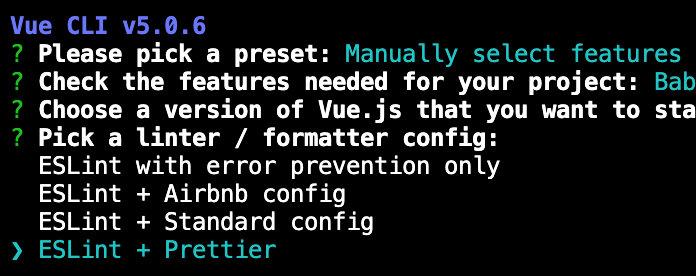
Choose Eslint + Prettier
Once selected, the command line will then ask us which Eslint configuration to choose. The list is more popular configuration, you can choose according to your needs. Here we choose Eslint + Prettier .
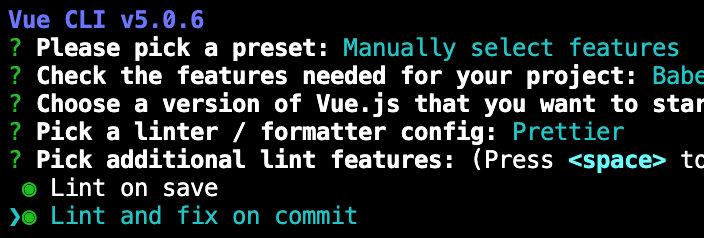
Automate lint rule configuration
Next, the command line will also ask when to automatically execute lint. Here we need to select both. After selecting, whether to save the file or use Git to submit code, lint will be automatically executed and errors will be automatically fixed (submit code Time).
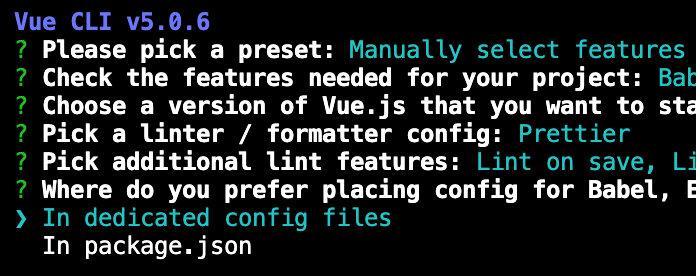
Choose Standalone Profile
Finally, the command line will also ask whether to put these configurations in separate files, or all of them in package.json , considering the clarity and later maintenance of the module, here we choose In dedicated config files .
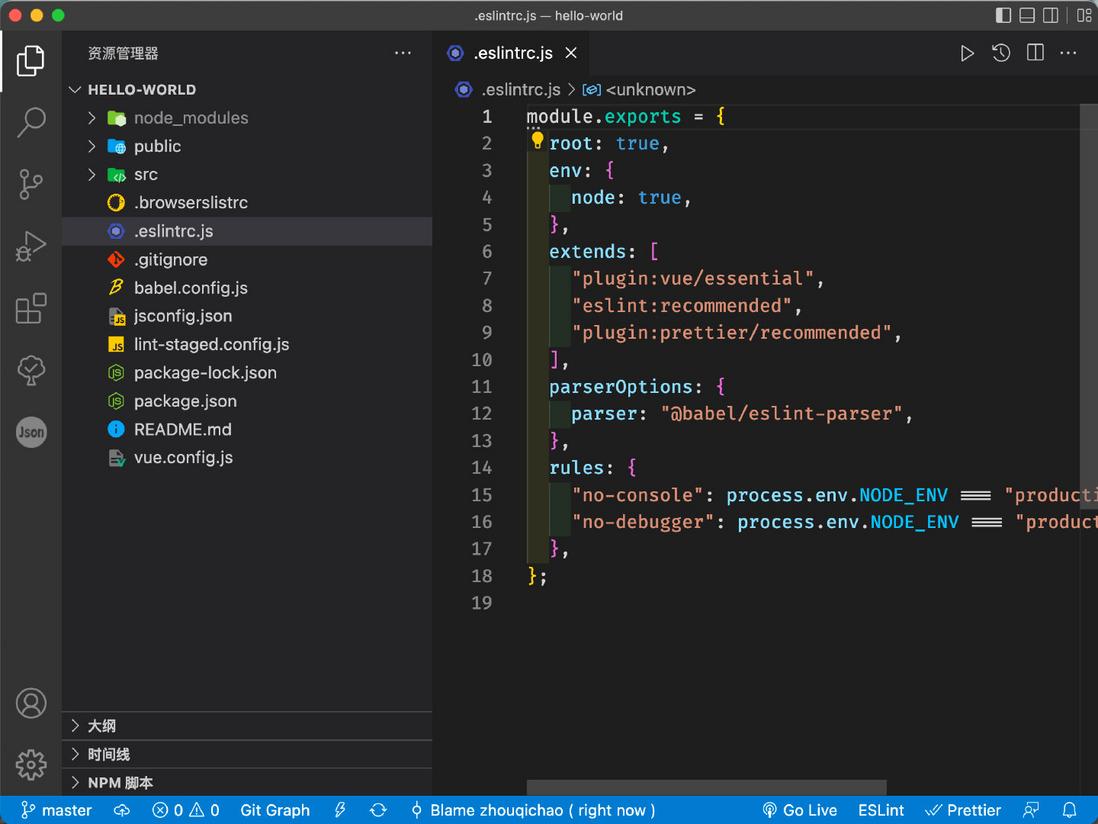
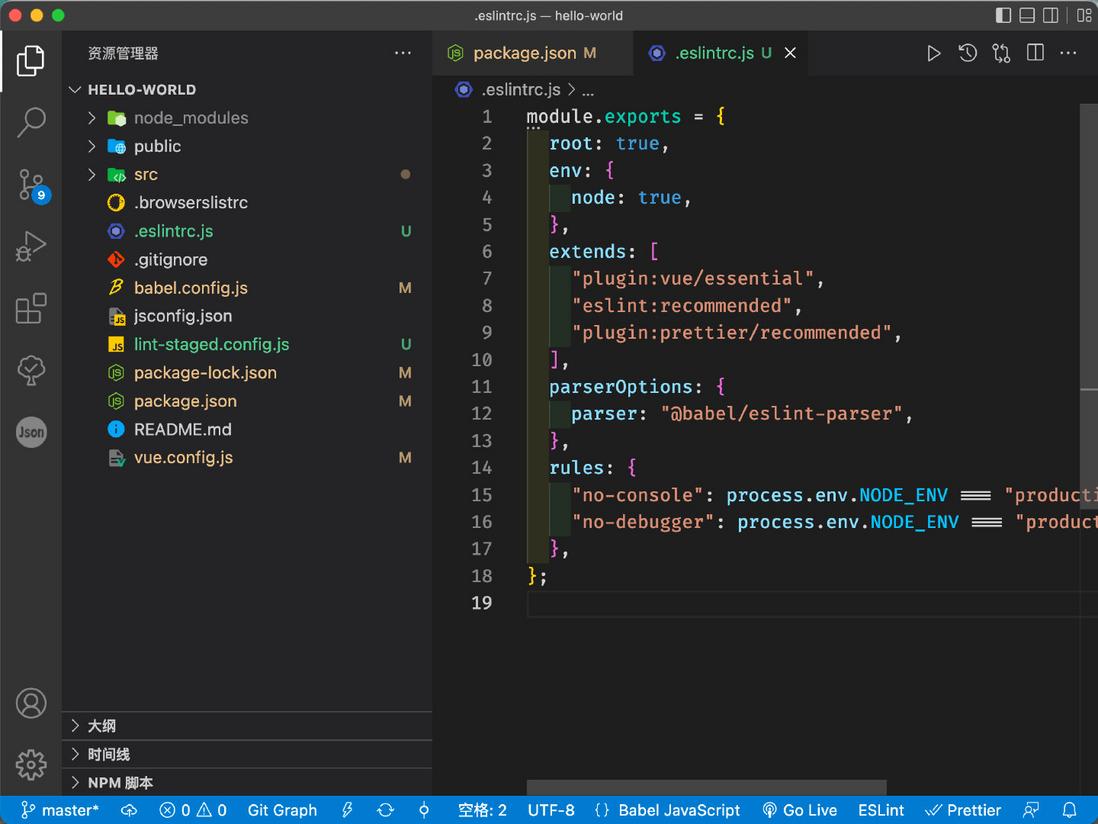
Finally, after the initialization of the project is completed, we use the development tool to open the project, and we will find that there is an .eslintrc.js file in the root directory of the project.
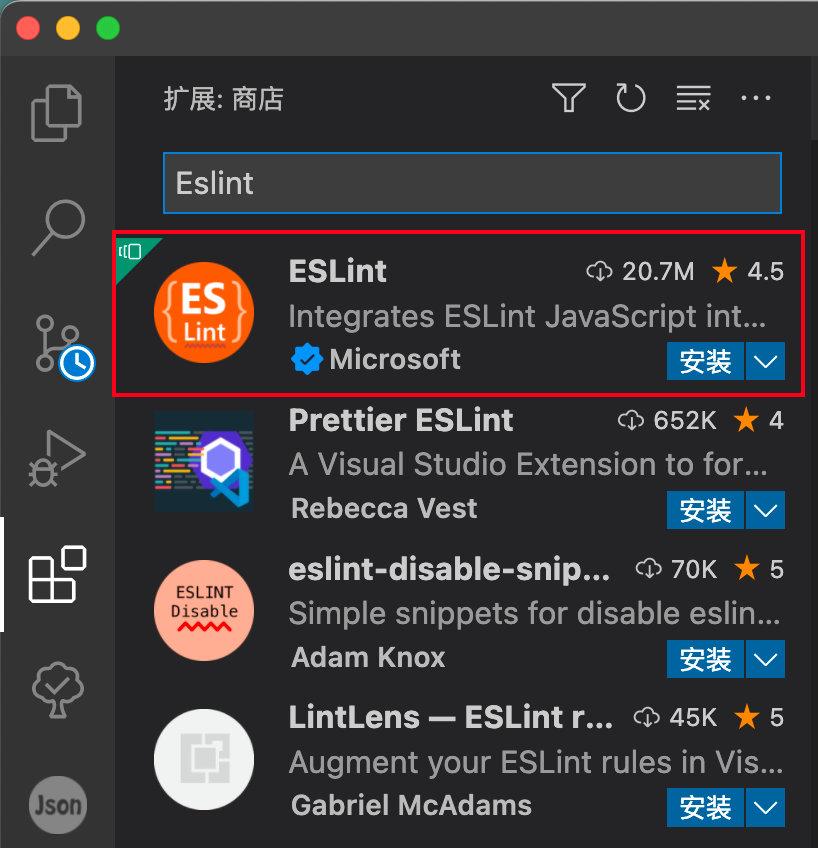
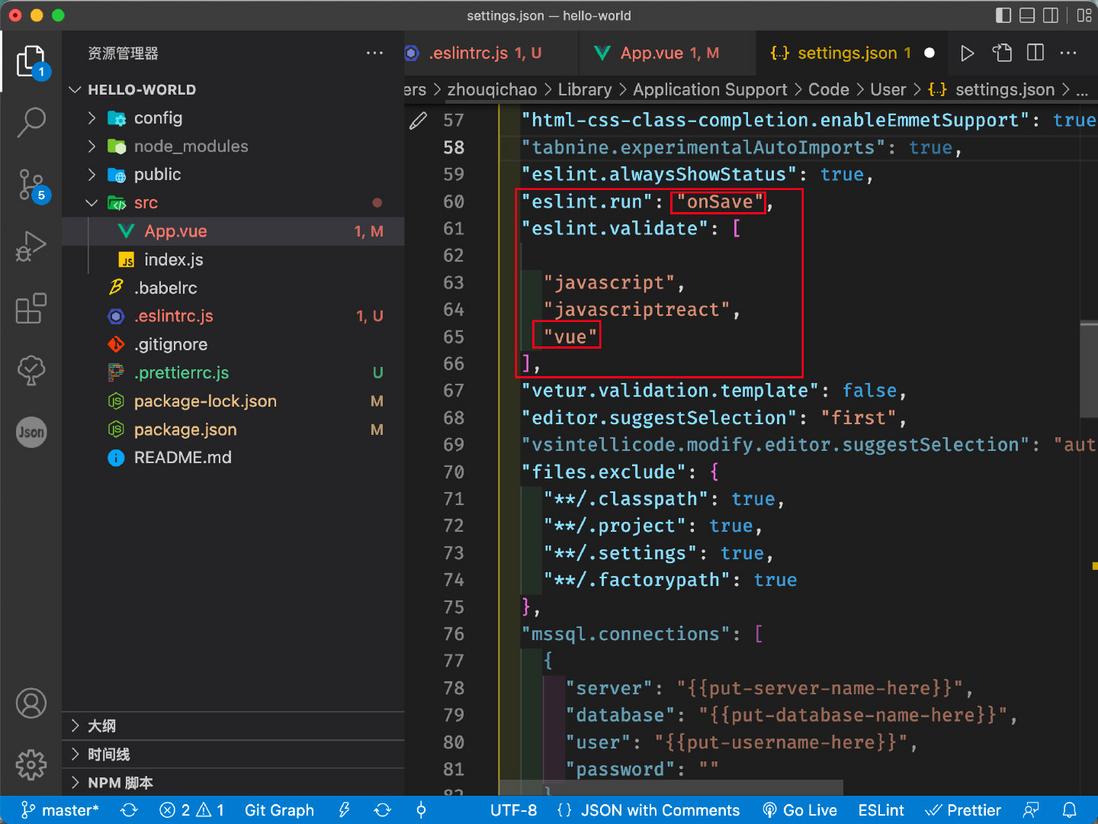
This is the Eslint configuration file, you can refer to the Eslint official configuration document to learn more. By the way, the development tool also needs to install the Eslint plugin and configure it, so that Eslint will take effect.
Configure Prettier
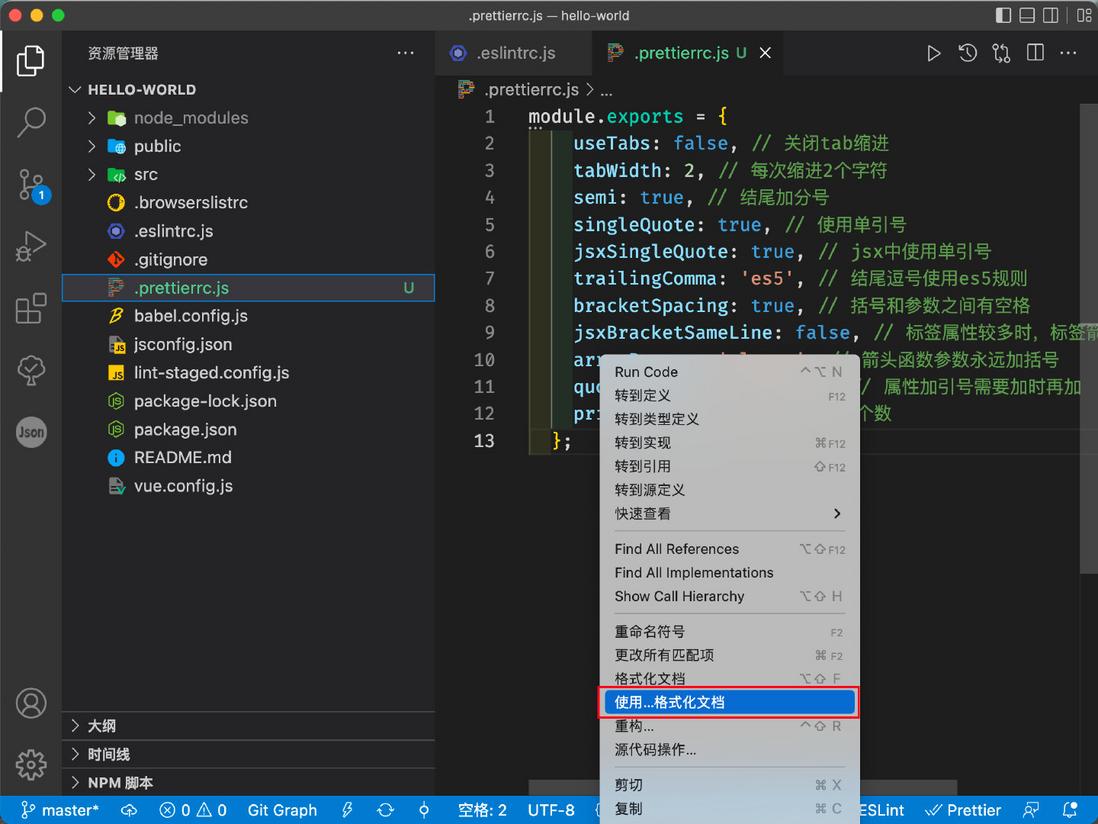
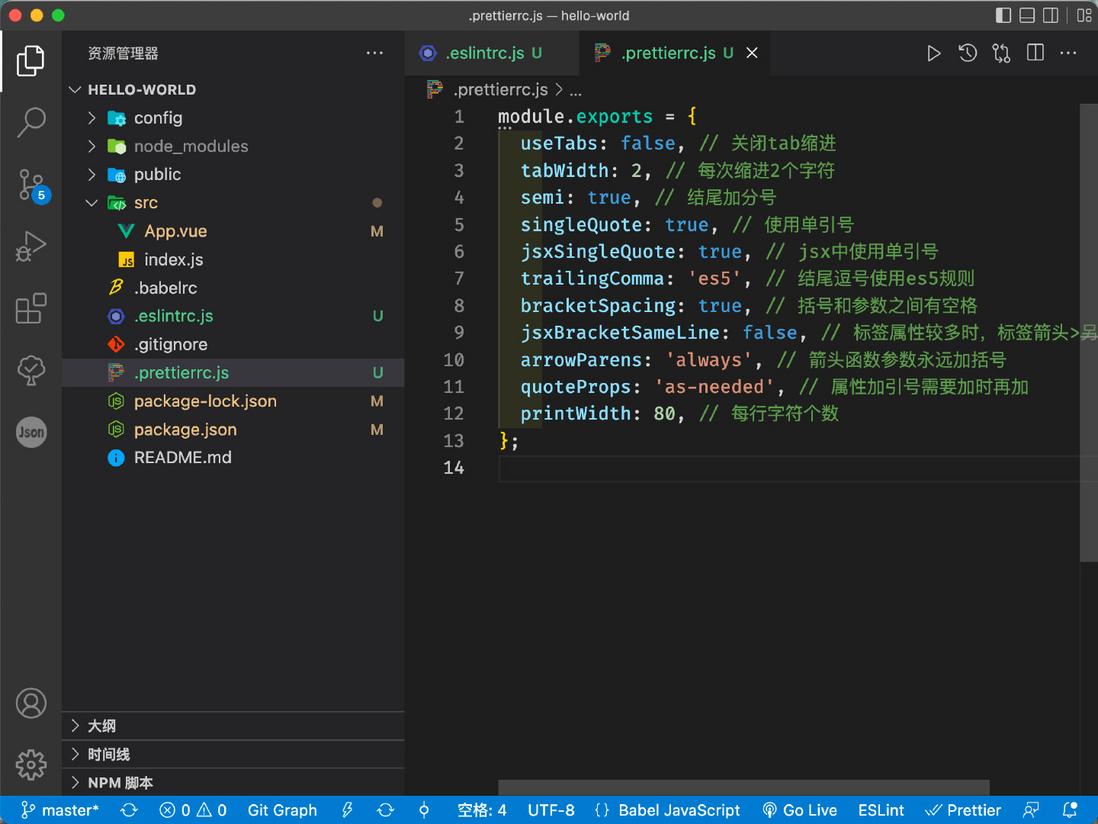
First, we need to create a new file in the root directory of the project .prettierrc.js , and then refer to the official Prettier configuration document to configure some common items. Here are the configurations I often use, and you can adjust them according to your needs.
 // .prettierrc.js
module.exports = {
  useTabs: false, // 关闭tab缩进,使用Space缩进
  tabWidth: 2, // 每次缩进2个字符
  semi: true, // 结尾加分号
  singleQuote: true, // 使用单引号
  jsxSingleQuote: true, // jsx中使用单引号
  trailingComma: 'es5', // 结尾逗号使用es5规则
  bracketSpacing: true, // 括号和参数之间有空格
  jsxBracketSameLine: false, // 标签属性较多时,标签箭头>另起一行
  arrowParens: 'always', // 箭头函数参数永远加括号
  quoteProps: 'as-needed', // 属性加引号需要加时再加
  printWidth: 80, // 每行字符个数
};
Second, we also need to do some configuration for the development tool, so that the development tool recognizes the Prettier configuration we just added.
Taking the VSCode development tool as an example, first, we need to find and install the Prettier plugin in the extension store
Second, we also need to set the default formatting tool in the development tool to Prettier
Then, select "Configure Default Formatter"
Then, select Prettier so that the dev tools will use Prettier as the default formatter.
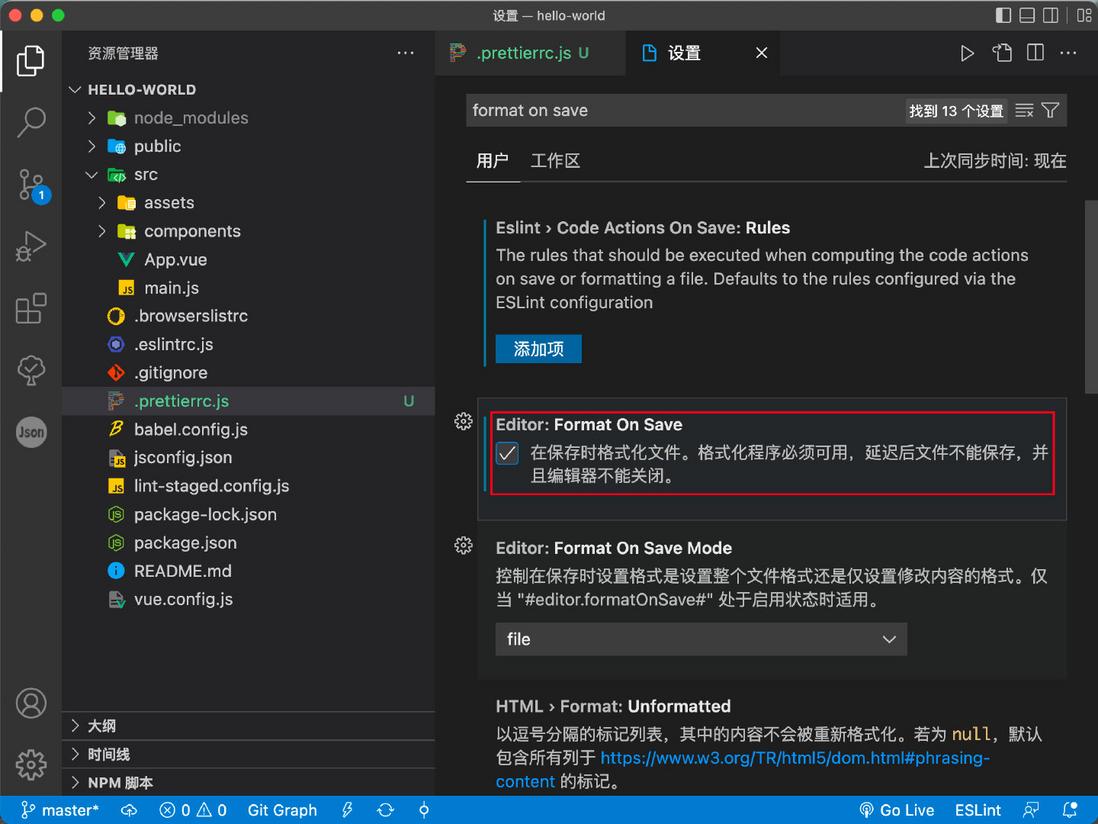
Finally, we also need to check the Format On Save setting in the development tool. In this way, when we save the file, the development tool will automatically use the default formatting tool Prettier set before to format the code, and the file will be automatically saved after formatting.
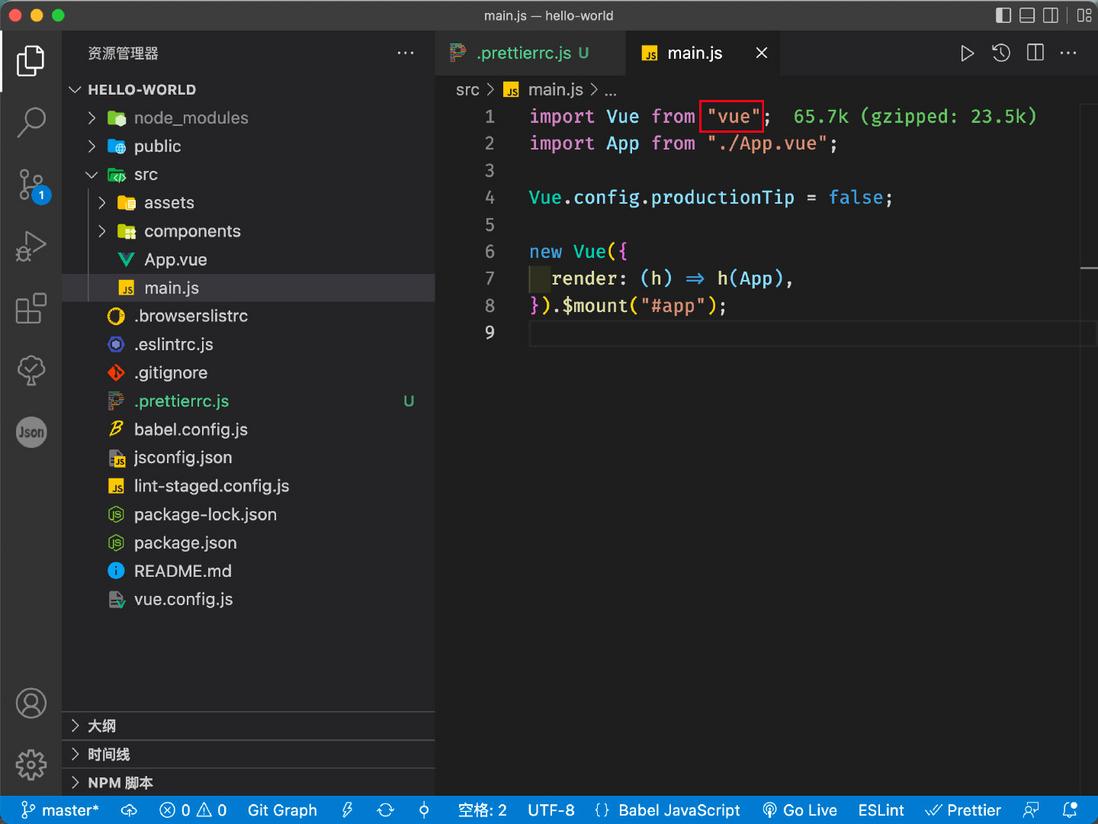
After configuring Prettier, we can use the src/main.js file as an example to test whether the Prettier configuration takes effect.
The picture below is the default state of the file src/main.js . Pay attention to the double quotation marks in the file.
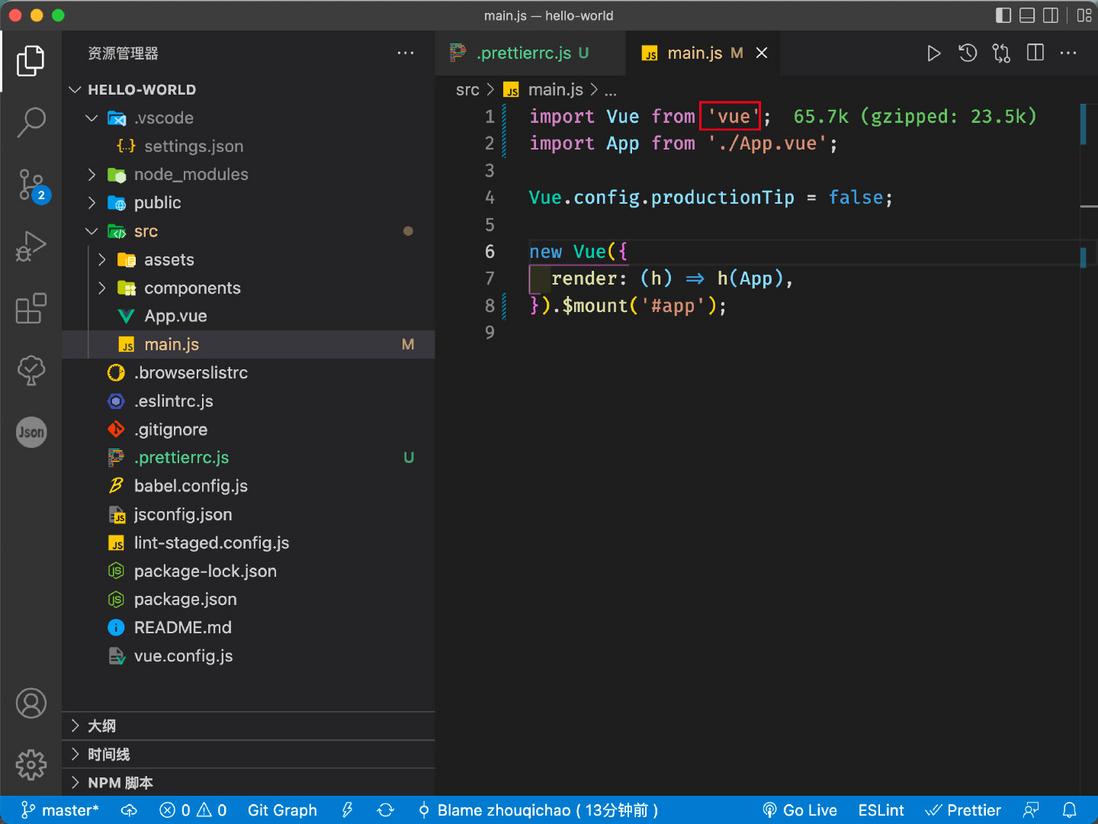
When we use the shortcut key cmd/ctrl+s to save the file, we will find that all double quotes have become single quotes. This is because we configured the single quote rule singleQuote: true in the .prettierrc.js file, which also proves that the Prettier configuration takes effect.
EditorConfig configuration
Because most development tools support EditorConfig, configuration is simple. Generally speaking, you only need to create a .editorconfig file in the root directory of the project, and then add common configuration items. Here I list the configurations I often use, and you can adjust them according to your needs.
 # 顶层配置文件,不会继续向上层搜索配置文件
root = true

# 匹配任意格式文件
[*]

# 字符集
charset = utf-8

# 缩进风格
indent_style = space

# 缩进值
indent_size = 2

# 换行符
end_of_line = lf

# 保存文件后文件末尾是否插入一行
insert_final_newline = true

# 删除行尾空格
trim_trailing_whitespace = true
Add Code Specifications to Existing Projects
Suppose there is a Vue project now, and Eslint, Prettier and EditorConfig are not configured, how do we implement code specification?
Install and configure Eslint
First, we can install the Eslint plugin using the vue add command as recommended by the official Vue CLI documentation :
Here we are using the vue add command instead of the npm install command. This is because the vue add command will automatically install and configure related and dependent plugins for us. And npm install only installed the specified plug-in, and we need to manually implement the installation and configuration of the dependent plug-in.
After the installation is complete, the command line will prompt us which Eslint configuration to choose:
Here we select Prettier and select both automatic lint rules, so that Vue CLI will automatically install and configure the Prettier plugin for us.
Configure Prettier and EditorConfig
The configuration of Prettier and EditorConfig in the existing project is the same as the previous configuration in the new project, and will not be repeated here.
Vue projects created with tools like Webpack
Suppose we now have a Vue project created with Webpack or other tools, then we can't enjoy the convenience that Vue CLI brings us. However, the idea of implementation is the same, and the implementation is very simple. The following takes the Webpack tool as an example.
Configure Eslint
Referring to the official documentation of Vue Eslint , first we need to install the Eslint plugin
After installation, create a new file .eslintrc.js and add common configuration items
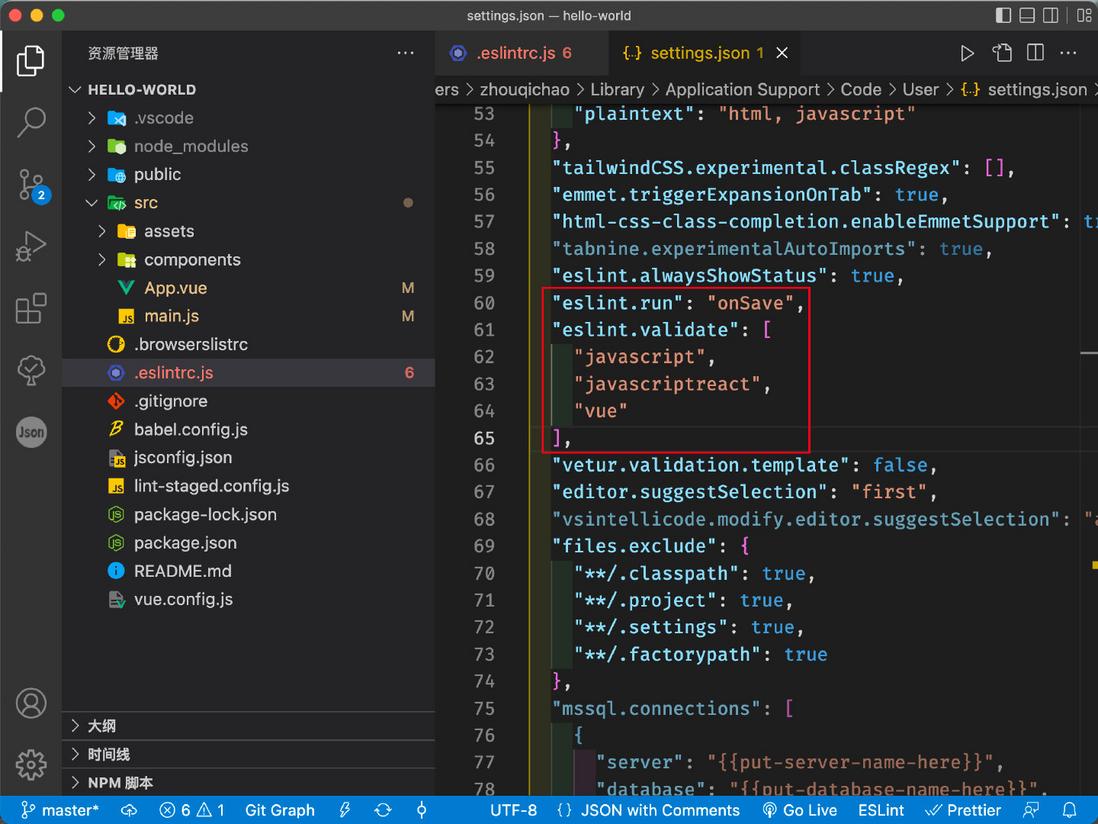
Then make sure Eslint in the dev tools is configured correctly:
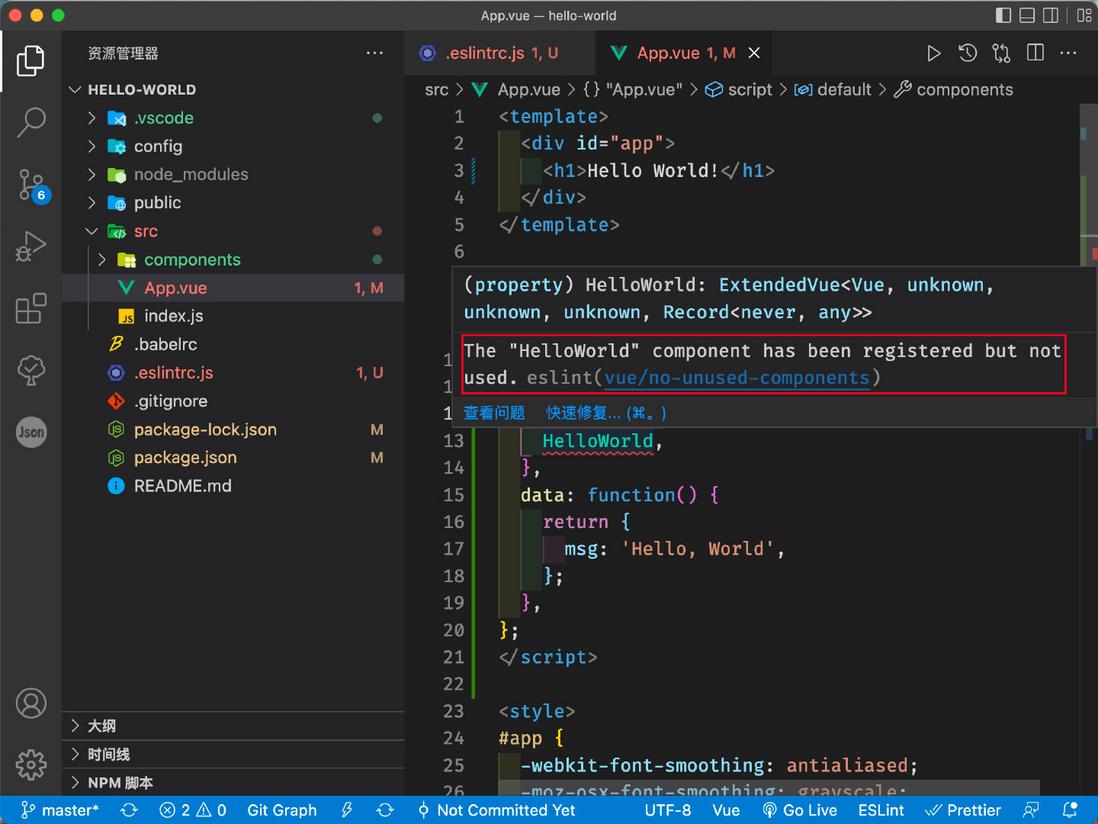
Finally, we can check whether the following configuration takes effect:
Configure Prettier
Eslint and Prettier will conflict in some rules. According to the official Prettier documentation , we can solve it by installing the eslint-config-prettier plugin.
After installation, you also need to modify the Eslint configuration.
Then create a new Prettier configuration file .prettierrc.js and configure it, and finally set Prettier as the default formatting tool (refer to the previous article, which will not be repeated here).
Configure Webpack
According to the official Webpack documentation , if we want Webpack to integrate Eslint, we need to install the eslint-webpack-plugin plugin.
After the installation is complete, you also need to configure Webpack.
 // webpack.config.dev.js
const ESLintPlugin = require('eslint-webpack-plugin');

module.exports = {
  // ...
  plugins: [
    new ESLintPlugin({
      extensions: ['js', 'vue'],
      exclude: 'node_modules',
    }),
  ],
  // ...
};
Finally restart the project. If there is a problem with the code, the command line will display the specific Eslint error message.
Configure EditorConfig
The EditorConfig configuration is the same step as the previous configuration in the new project, and will not be repeated here.
Summarize
This article mainly introduces how to implement code specifications in Vue projects, mainly using tools such as
Eslint + Prettier + EditorConfig. The implementation can also be referenced in non-Vue projects, which are essentially the same.In fact, code standardization is not only helpful for team collaborative development, but also has many benefits for individual development. The most intuitive is that it can motivate us to develop good coding habits, rather than "free coding". This good habit helps us go better and further.















**粗体** _斜体_ [链接](http://example.com) `代码` - 列表 > 引用。你还可以使用@来通知其他用户。