0. Basic environment
Category: Notebook Model: Great Wall of China NF14C
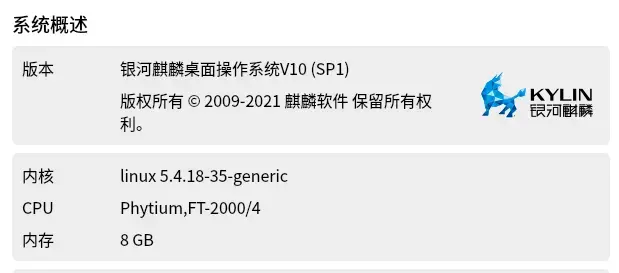
Hardware platform: Feiteng processor (ArmV8 instruction set)
System: Galaxy Kirin OS V10 SP1 (2203)
Key words:
Xinchuang, Kylin system, linux, PKS, Galaxy Kirin, Feiteng, arm, NAS, NFS, Synology
1. Requirement Background
The clients currently provided by Synology are all Linux x86 series, windows, android/ios. There is no client for the arm series. Under normal circumstances, the management background is accessed through the web. This article attempts to mount it under the system through NFS, which is convenient to use. Other types of NAS can refer to the settings.
2. Synology settings
2.1 NFS settings
Open the Synology web management page
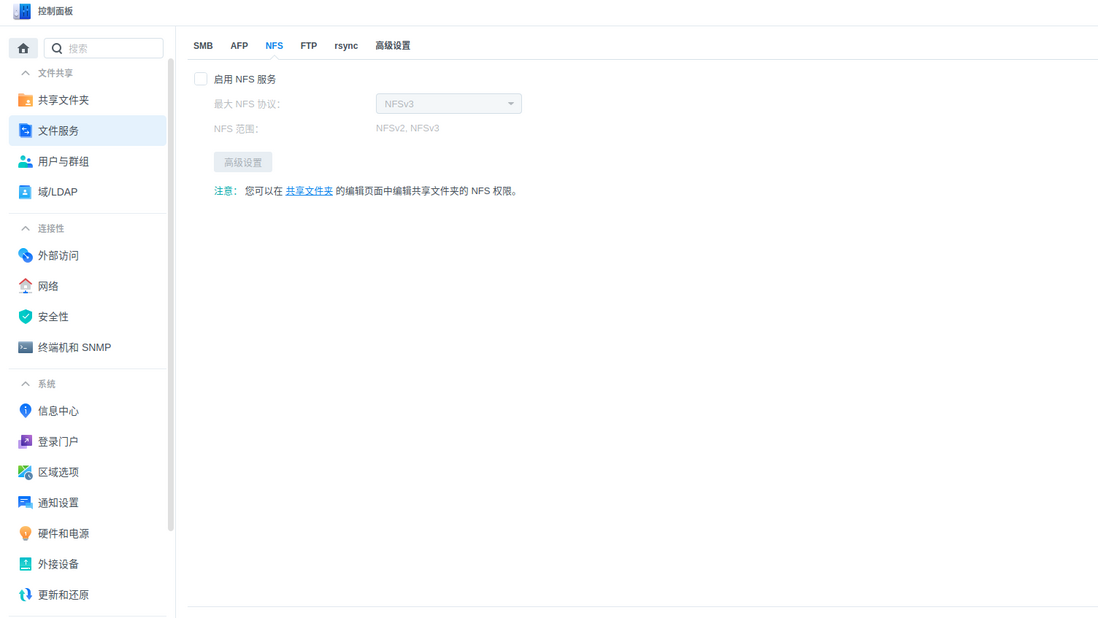
Open Control Panel and find File Services
Find the nfs service menu item
Open nfs service, select v4 protocol and apply
The NFS protocol is set up
2.2 Shared folder settings
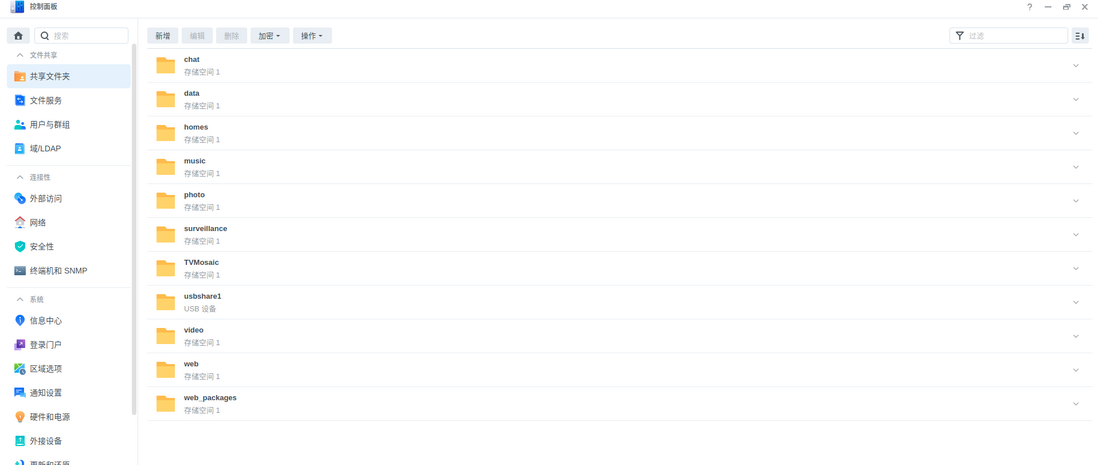
Open Control Panel and find Shared Folder Services
Enter the shared folder list
After selecting the folder to be shared, click the [Edit] button in the action bar
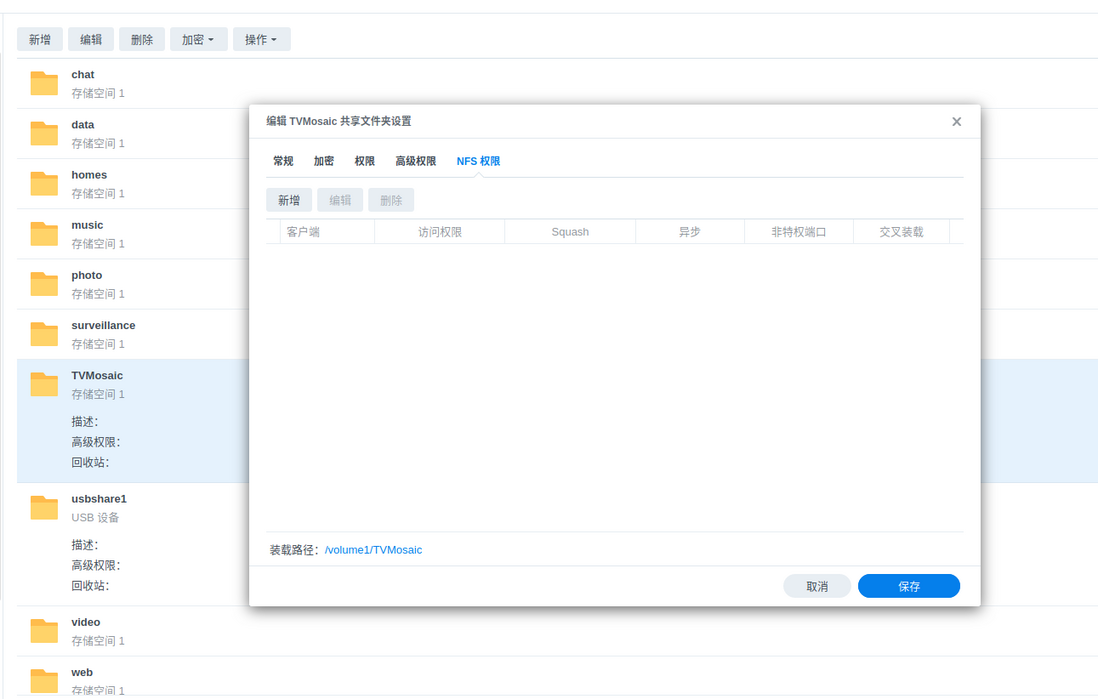
Click to add
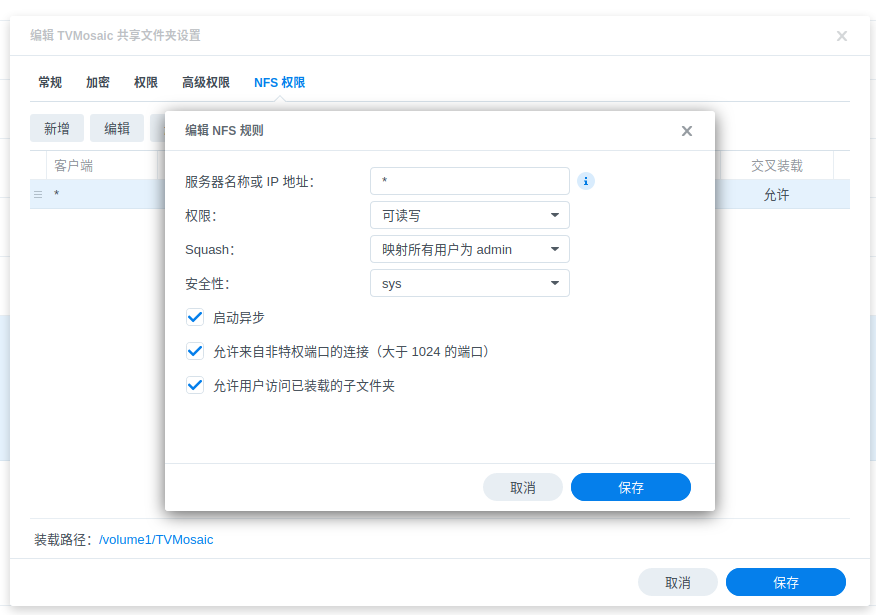
Set relevant information according to the actual situation, and the requirements are roughly as follows:
IP Settings: Enter the IP address of the NFS client that will access the shared folder. You can complete this field in three ways:
 单一主机:完全限定域名 (FQDN) 或 IP 地址。
通配符:,.synology.com
IP 网络:203.74.205.32/255.255.252.0, /24
Permissions: Select read and write permissions for NFS clients.
Security: Specify the type of security to implement.
AUTH_SYS: Use the NFS client's UID (User Identifier) and GID (Group Identifier) to check access rights.
Kerberos authentication:
 当 NFS 客户端连接到共享文件夹时执行 Kerberos 验证。客户端必须通过 Kerberos 验证才能访问共享文件夹。
Kerberos 完整性:传输数据时执行 Kerberos 验证并确保数据包的完整性。
Kerberos 隐私性:传输数据时执行 Kerberos 验证并对 NFS 数据包进行加密,从而防止他人恶意干扰 NFS 通信。
Squash: This field allows you to control access rights for NFS client users. Please choose one of the following actions:
 无映射:允许 NFS 客户端的所有用户(包括 root 用户)保有原始访问权限。
映射 root 为 admin:将访问权限分配给 NFS 客户端的 root 用户,相当于您系统中的 admin 用户访问权限。
映射 root 为 guest:将访问权限分配给 NFS 客户端的 root 用户,相当于您系统中的 guest 用户访问权限。
映射所有用户为 admin:将访问权限分配给 NFS 客户端的所有用户,相当于您系统中的 admin 用户访问权限。
Asynchronous: Tick this option to allow your Synology NAS to reply to requests from NFS clients before completing changes to files for better performance.
Allow Unprivileged Ports: Check this option to allow NFS clients to connect to Synology NAS using unprivileged ports (ie ports greater than 1024).
The settings in Squash are very important, otherwise the mapping cannot be accessed without permission.
Finally, click OK to complete the settings for the shared folder.
3. Kylin system settings
3.1 Install basic services
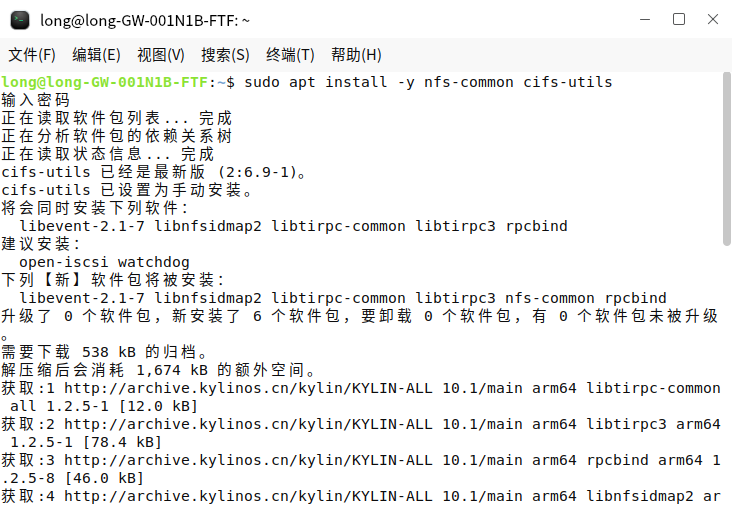
Open the command line terminal and install the nfs service
sudo apt install -y nfs-common cifs-utils3.2 Create a mapping folder and mount it
Create directly in the file manager
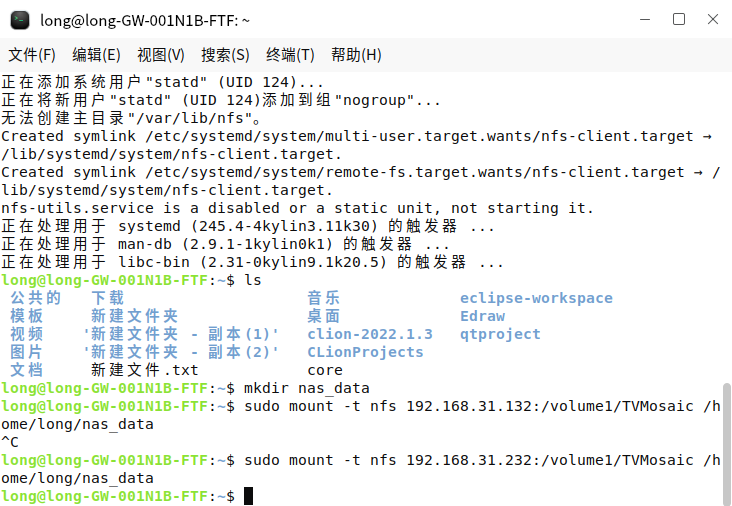
Can also be created with mkdir 路径/文件夹名称
execute the mount command
mount -t nfs NASIP address: shared folder mount path local mount address
sudo mount -t nfs 192.168.31.232:/volume1/TVMosaic /home/long/nas_data #ip的访问限定在内网会安全不小,如果是公网可以考虑使用nps+vps的穿透功能等更高阶的操作
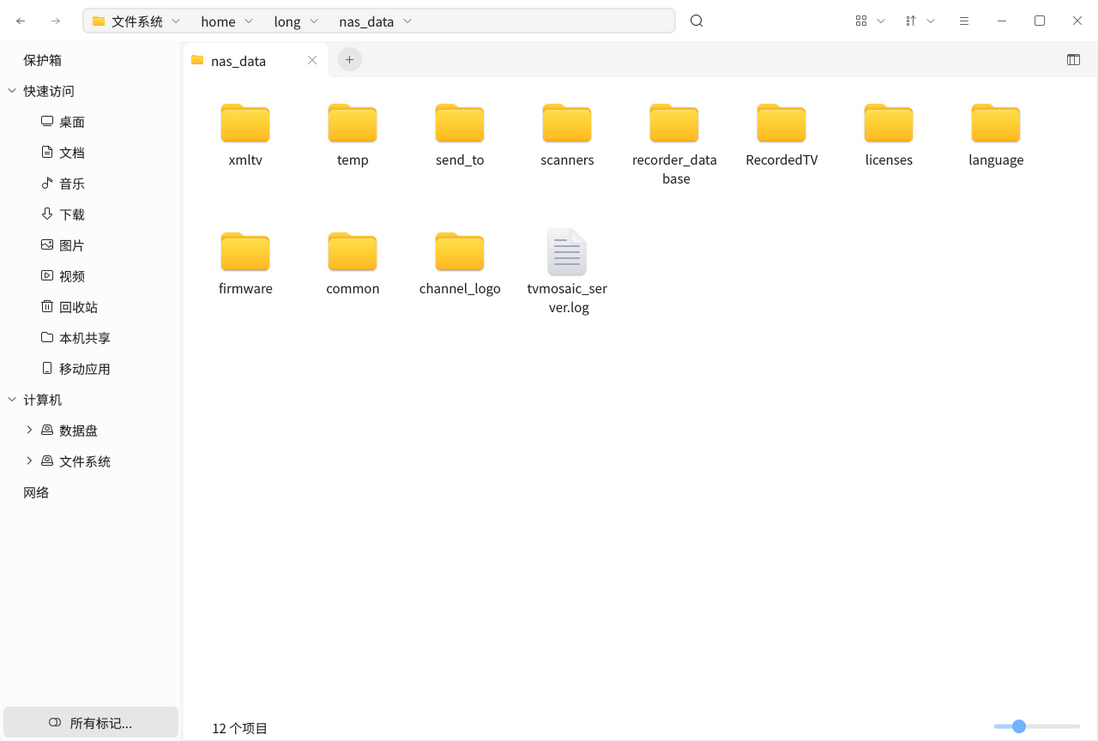
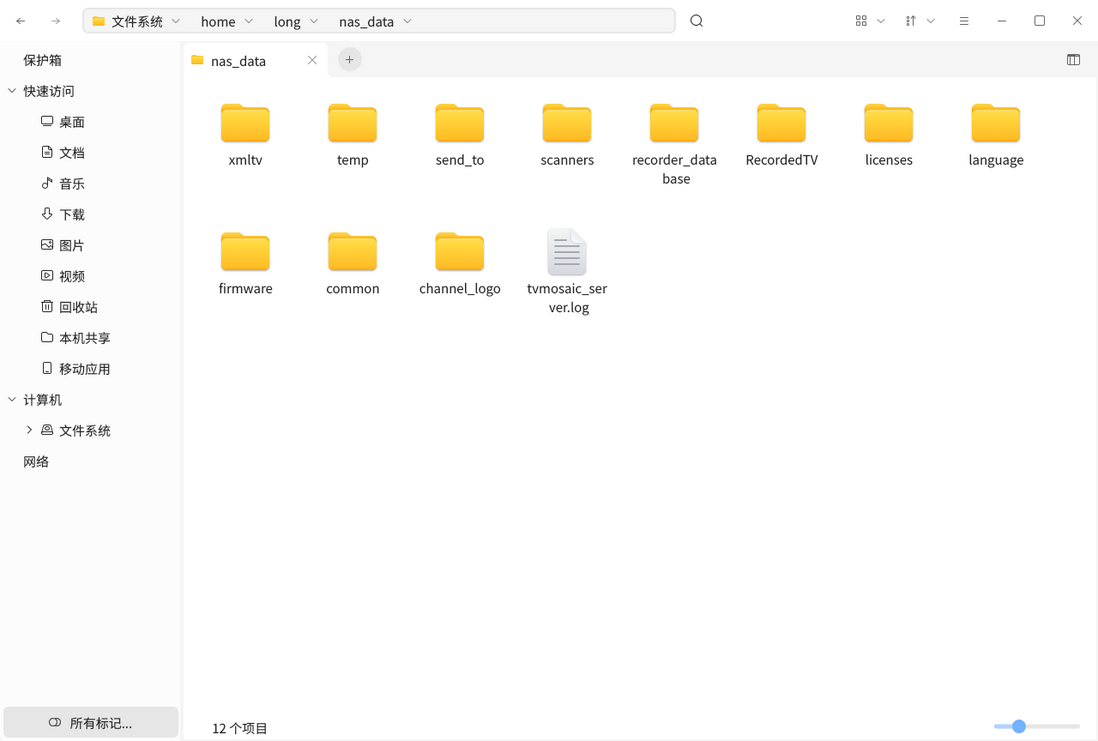
Mapping effect
4. View the mount result and cancel the mount
df
unmount
sudo umount /home/long/nas_dataSetting the mapping mount to take effect when the system starts up
5. Mount with the system boot
Edit /etc/fstab
 sudo gedit /etc/fstab #需要先安装sudo apt-get install gedit -y
#或使用vim
sudo gedit /etc/fstab
Add the following:
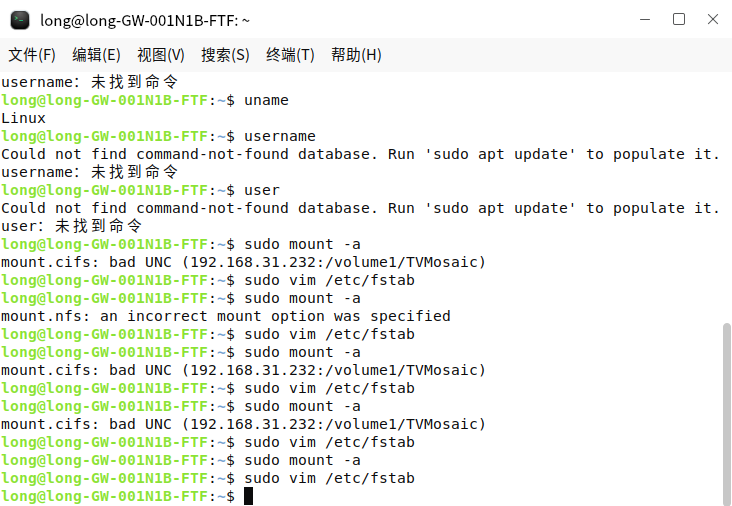
192.168.31.232:/volume1/TVMosaic /home/long/nas_data nfs defaults 0 0After editing and saving, execute
sudo mount -a If there is no error and prompt information, it is successfully mounted~
Kylin system column:
https://segmentfault.com/blog/kylinos
Article published in SegmentFault
Contact email: 1179611323@qq.com
Group: 662512340
Release log:
20220703 first release









**粗体** _斜体_ [链接](http://example.com) `代码` - 列表 > 引用。你还可以使用@来通知其他用户。