foreword
There are many different ways to use docker in Synology. Today I will talk about how to deploy the halo CMS blog system in Synology
Install and download the halo image
1. First, you need to download the halo image, open the registry in the docker suite, search for halo, select the first double-click, select the latest version by default, and start the download
2. After downloading, you can see it in the image, double-click to start the configuration
configure halo
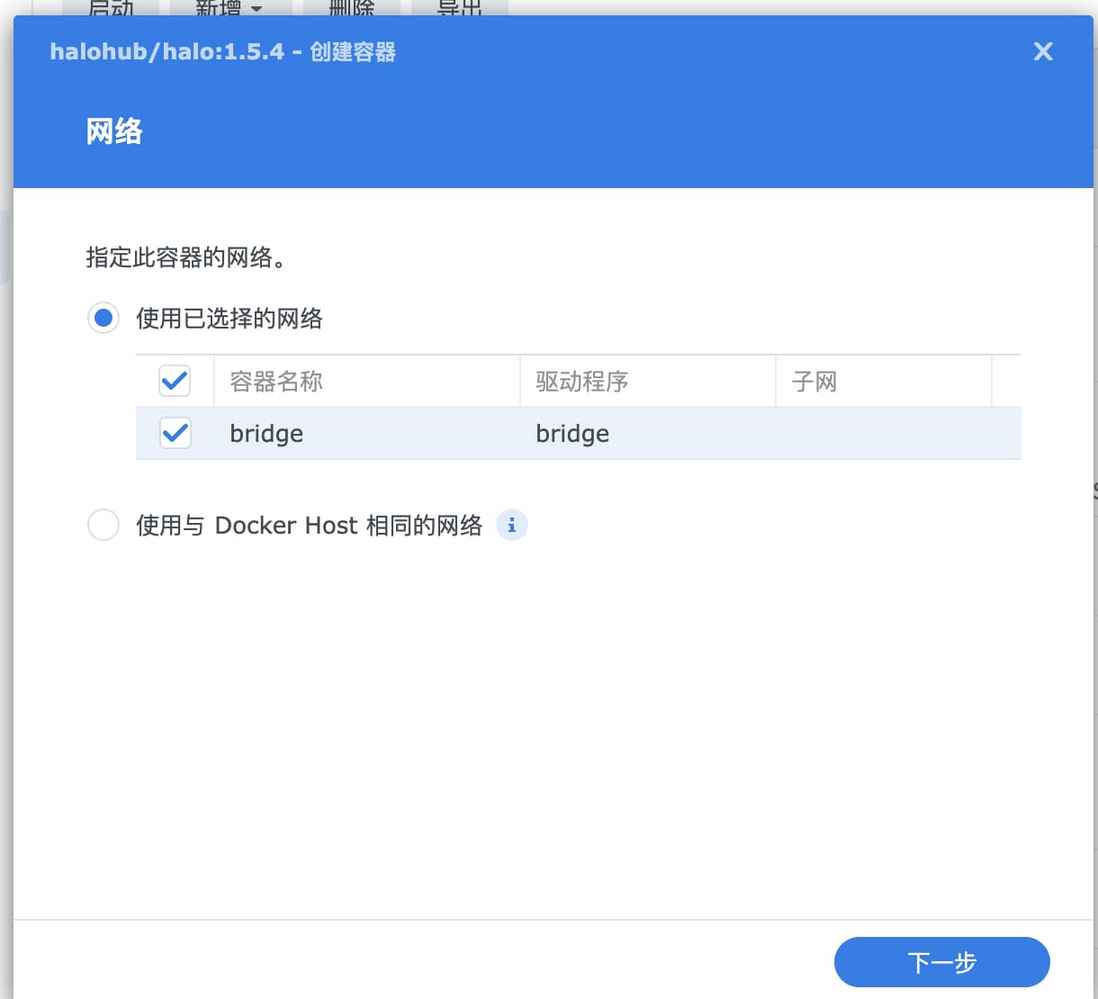
1. Network configuration, set the default, click Next
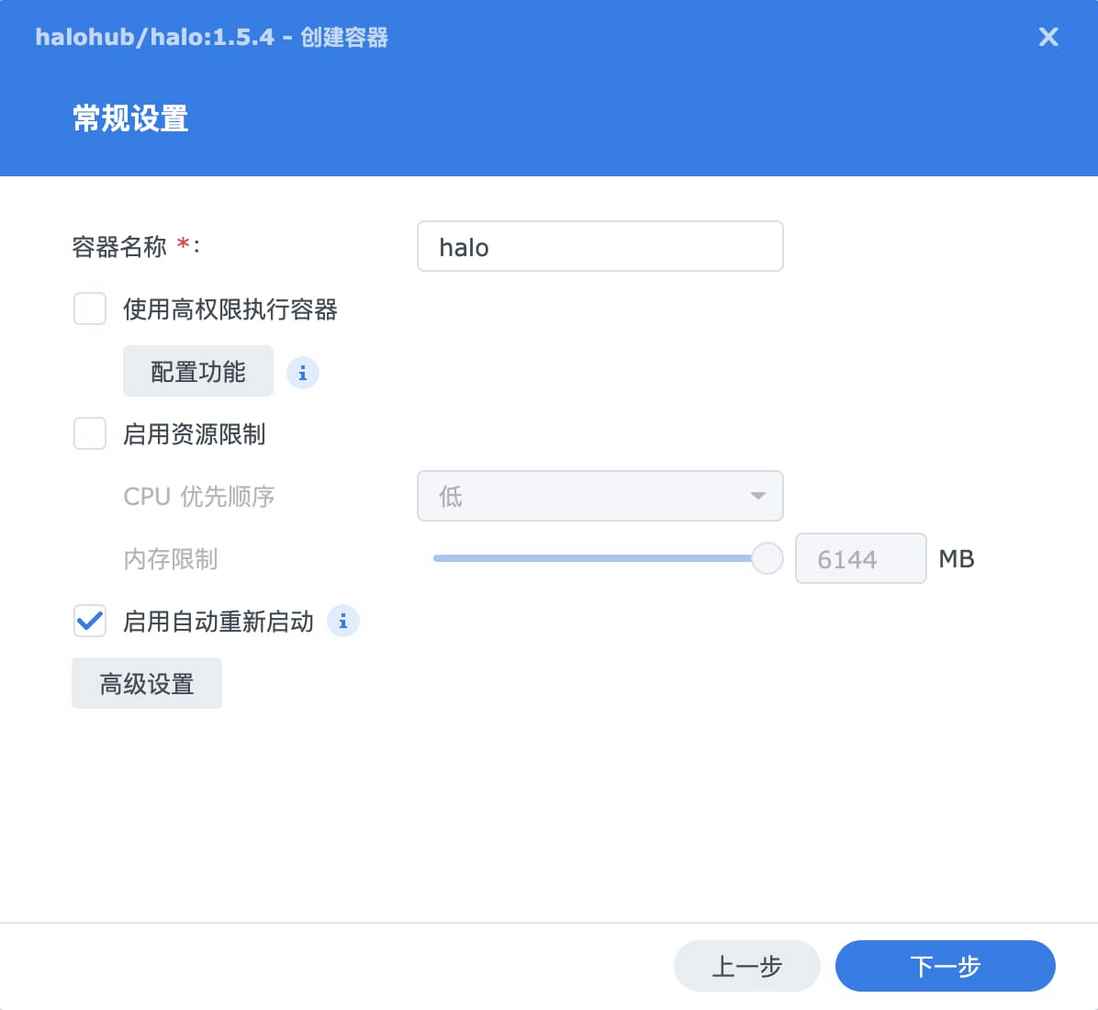
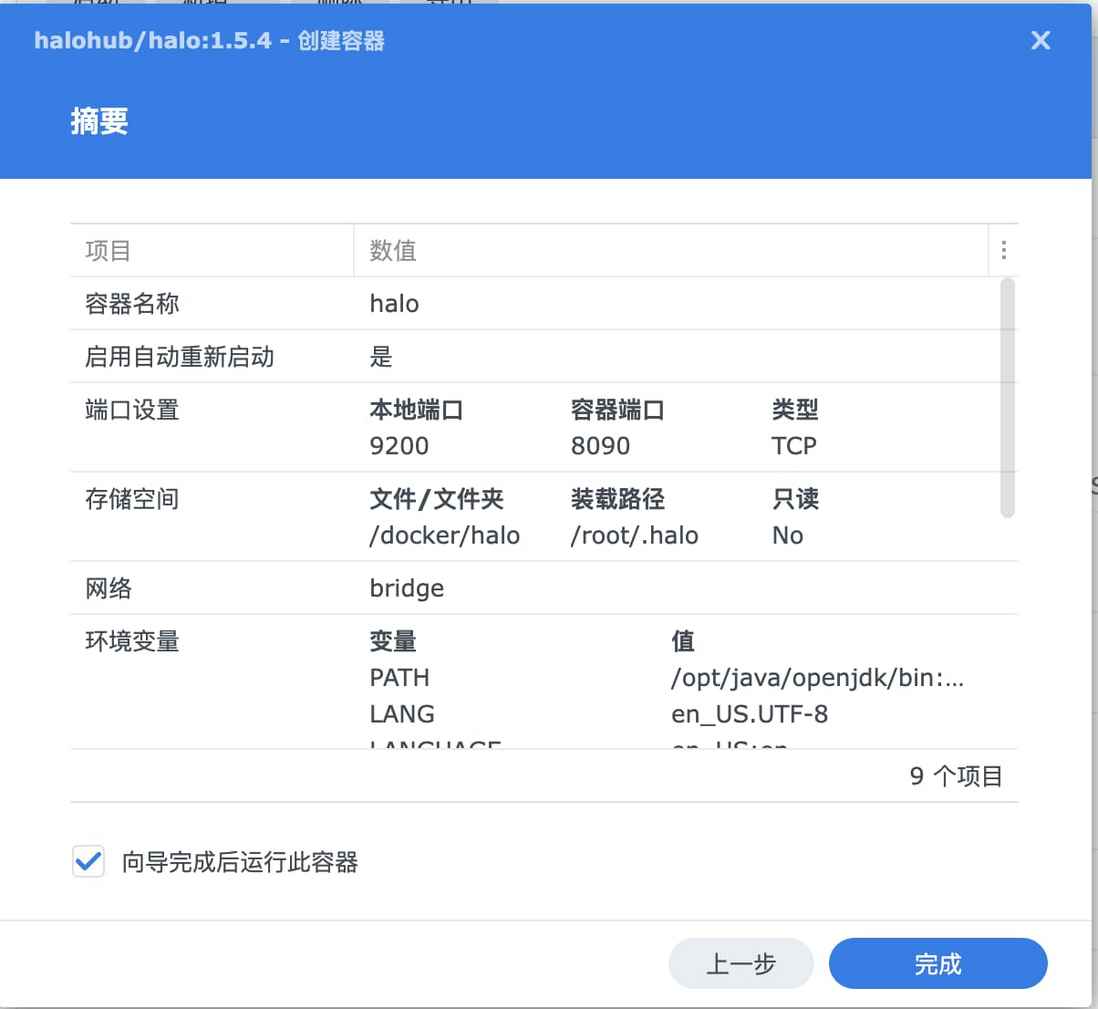
2. The container name is optional, check automatic restart, the others can be left as default, and click Next
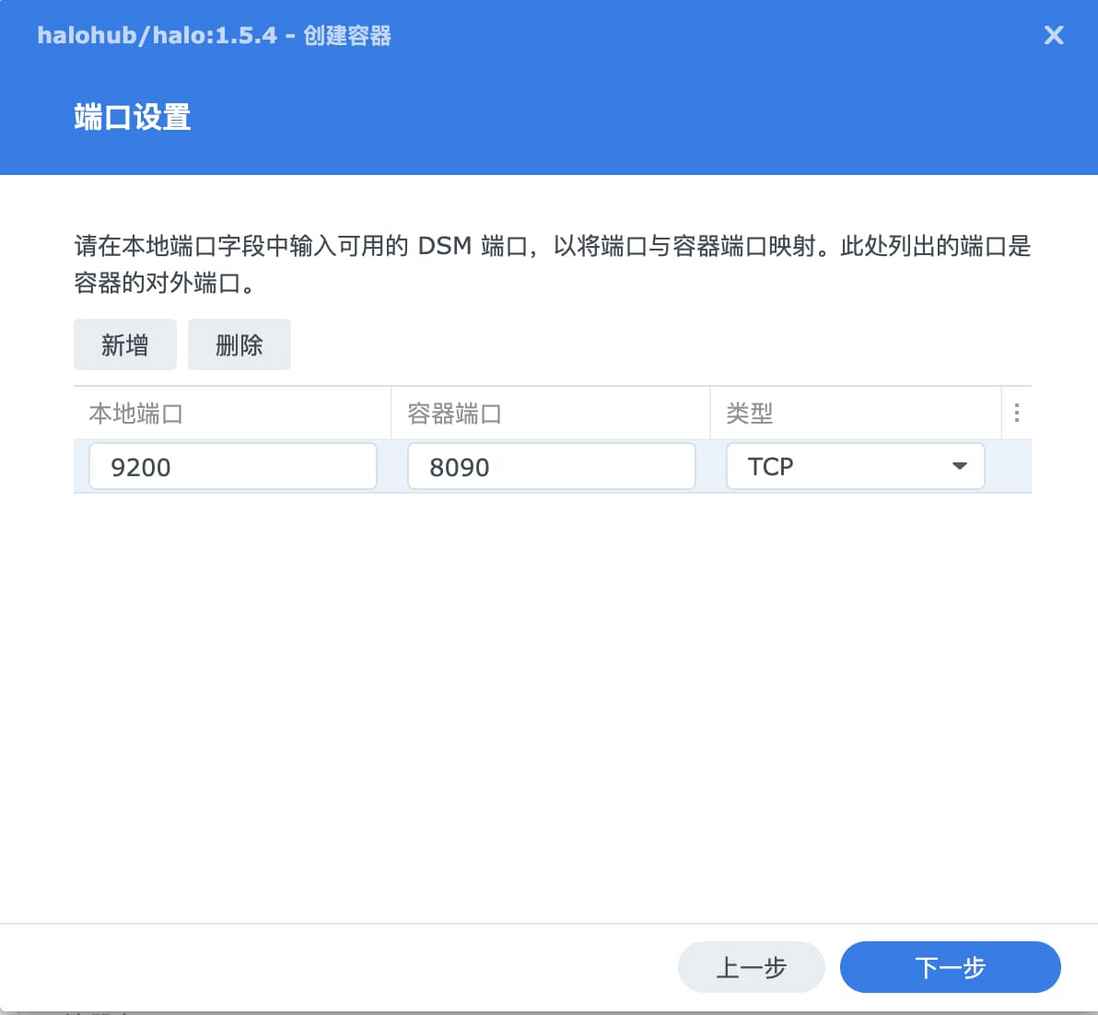
3. Port settings, the local port is optional, as long as it is not occupied, the container port must be 8090, the type remains the default, here my local port is set to 9200, click Next
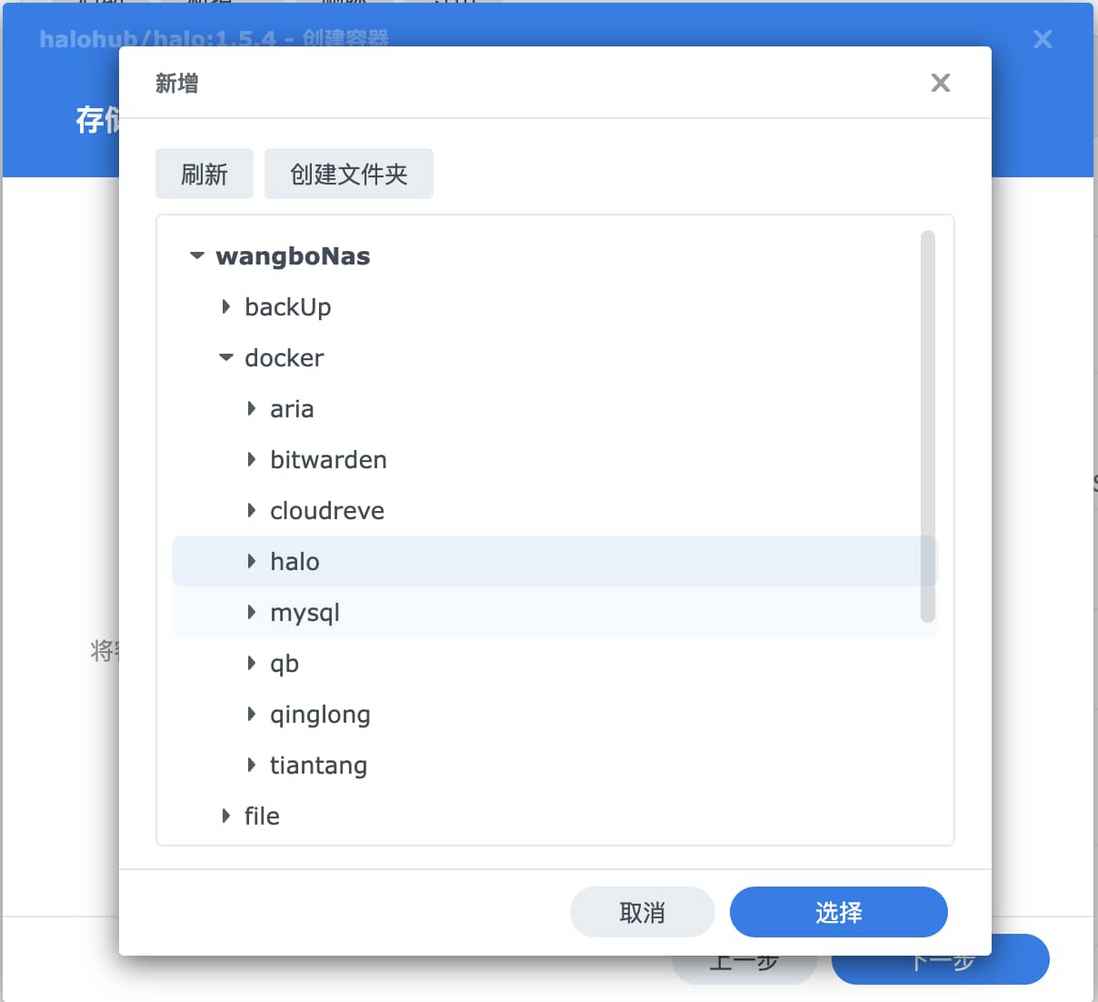
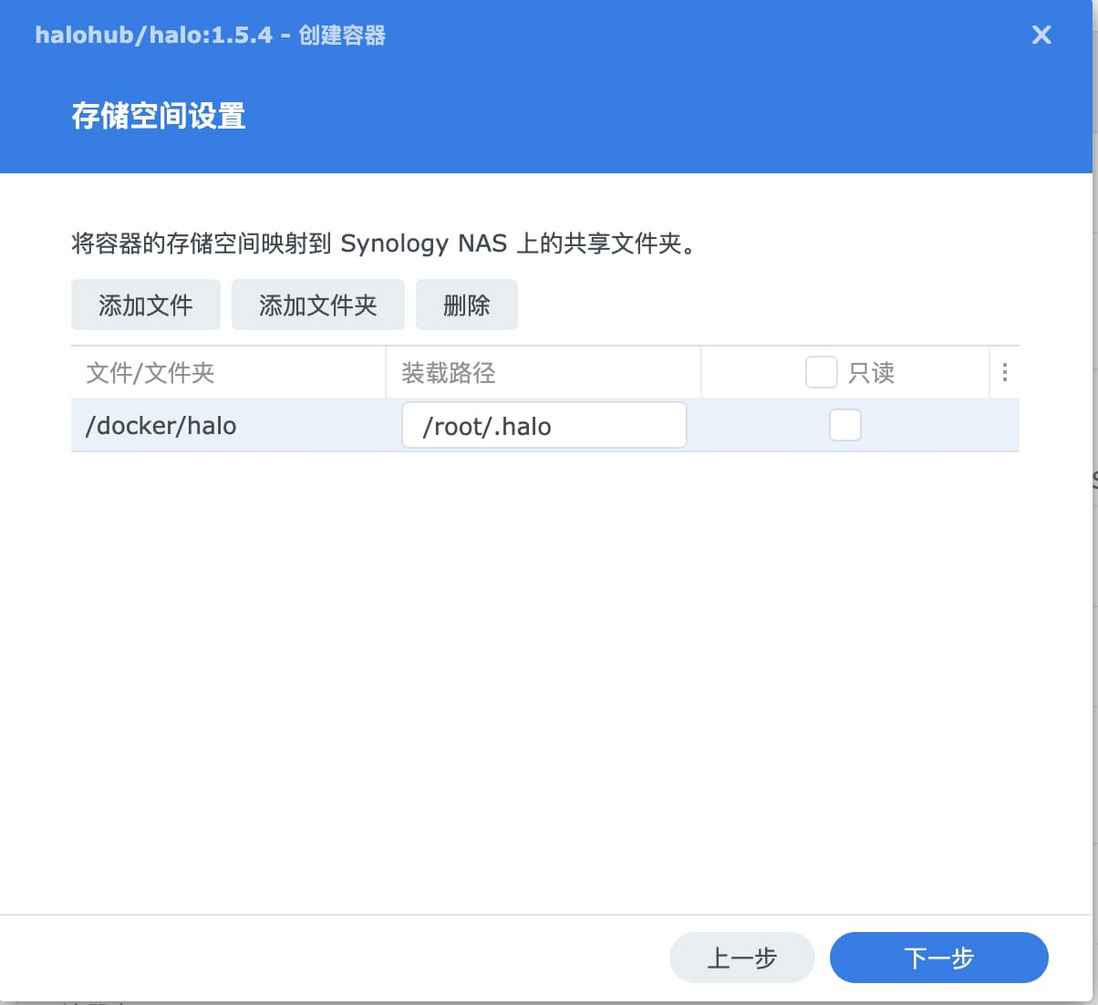
4. Storage space settings, click Add Folder, select an empty folder created in fileStation, here I created the halo folder under docker
The loading path must be /root/.halo , which corresponds to the path in the halo system, so it must be this, click Next
5. At this point, the relevant configuration is ok, click Finish, the container will be automatically started, and you can access it after waiting for the container to start.
6. You can see the halo image that has been started in the container. If your Synology access address is, for example, http://192.168.2.11 , then the access path of the halo blog is http://192.168.2.11:9200 , now you can Start doing other blog configurations.
access
The front-end access path of the halo blog system is directly opened as above
http://192.168.2.11:9200, and the background access path ishttp://192.168.2.11:9200/admin. For the first access, you need to configure the relevant account and password, and you can configure it according to your needs.For example, the access path of my blog is https://nas.wangboweb.site:9200 . The domain name is used here because the broadband at home has a public IP, which can be set through Alibaba Cloud Dynamic DNS, and then through the port of the router. It can be achieved by forwarding, and I will write about how to set it up later.
other
How to upgrade an image
Find the container you created in dokcer suite-container, stop and delete it directly, delete the corresponding image at the same time, search for halo in the registry, and download the configuration again, because we have already configured the relevant configuration in the fourth step above It has been mapped to the local, so as long as you do not delete the local folder and configure it next time, the previous data will be retained;
This article is published by mdnice Multiplatform




**粗体** _斜体_ [链接](http://example.com) `代码` - 列表 > 引用。你还可以使用@来通知其他用户。