This article is the eighth in a series of articles explaining the source code of ahoos in simple language, which has been organized into document- address . I think it's not bad, give a star to support it, thanks.
This article is an Easter egg article in this series. It records the process of submitting PR to an open source project for the first time (it seems to have happened before, but that is a very small change), hoping to help more people participate in open source projects. Come.
cause
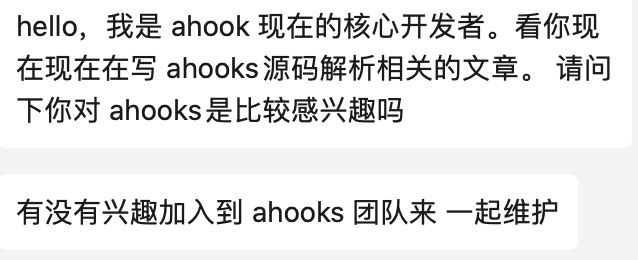
After writing a few articles about ahooks, I received a private letter from an official classmate.
This made me flattered and a little excited and apprehensive at the same time.
The excitement is that getting involved in open source felt out of reach before, and now it seems like I can do it too. Of course, there is also selfishness. If I have the experience of contributing to open source projects on my resume, wouldn’t that be a good plus?
The scary thing is that I haven't been involved in open source projects before, and I'm worried that I can't do it well.
According to the boss's suggestion, I decided to start with some issues, that is, to help solve the issue.
Clarify the problem or the need
So I took a look at the official issue and saw this one with the attitude of giving it a try. issue details .
It just so happened that I did some analysis of the useRequest source code before - how to use the plug-in mechanism to elegantly encapsulate your request . So I decided to fix this issue.
The requirement of this issue is very simple, that is, after the polling fails, it can support the maximum number of polling times. If the number of failures is greater than this value, the polling will be stopped.
Preparation before coding
First, follow a copy from the official ahooks GitHub. I have done this operation before.
The second step is to switch a feature branch based on master. as follows:
git checkout -b fix/pollingSupportRetryCountFinally, there are some initialization operations of the environment. Different warehouses are different. The ahooks are as follows:
 yarn run init
yarn start
Function realization
Let's first look at the implementation of the current useRequest polling. The principle is mainly to re-request through setTimeout at the end of a request (regardless of success or failure) to achieve the effect of polling.
 onFinally: () => {
  // 省略部分代码...
  // 通过 setTimeout 进行轮询
  timerRef.current = setTimeout(() => {
    fetchInstance.refresh();
  }, pollingInterval);
},
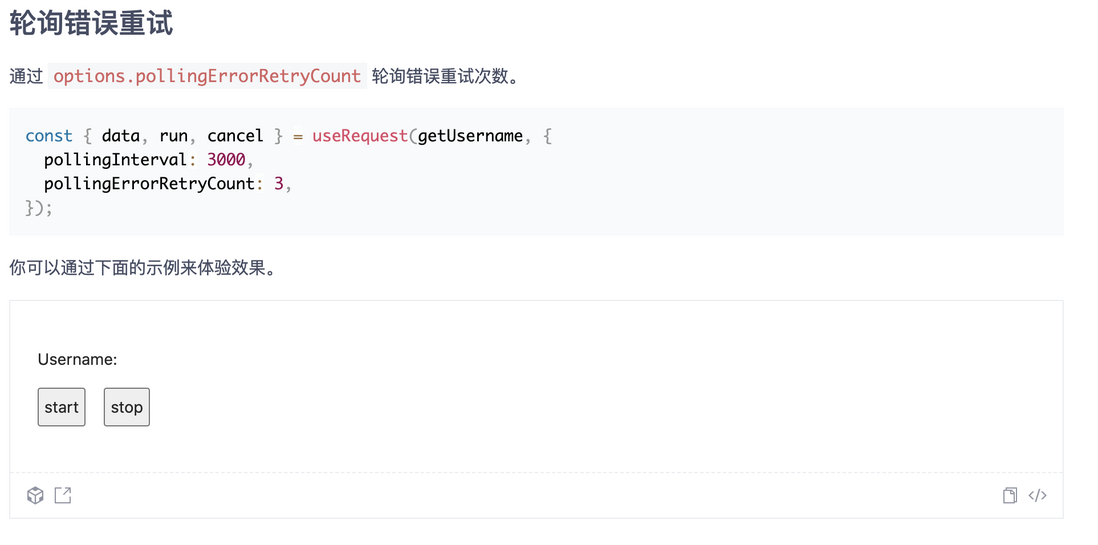
My idea is to define an options parameter, pollingErrorRetryCount , the default is -1, which means no limit.
Also define a variable to record the current number of retries:
const countRef = useRef<number>(0);When the developer sets pollingErrorRetryCount, and the number of retries is greater than this value, we return directly without executing the polling logic.
On success or failure, update the current number of retries:
 onError: () => {
  countRef.current += 1;
},
onSuccess: () => {
  countRef.current = 0;
},
Then when the request ends, it is determined whether the number of retries has reached the number of times set by the development, and if not, the retry operation is performed. If so, reset the number of retries and stop polling.
 onFinally: () => {
  if (
    pollingErrorRetryCount === -1 ||
    // When an error occurs, the request is not repeated after pollingErrorRetryCount retries
    (pollingErrorRetryCount !== -1 && countRef.current <= pollingErrorRetryCount)
  ) {
    // 忽略部分代码
    timerRef.current = setTimeout(() => {
      fetchInstance.refresh();
    }, pollingInterval);
  } else {
    countRef.current = 0;
  }
},
test case
The above overall transformation is not difficult, but when I write test cases, I start to step on the pit, because I rarely write front-end test cases, or test cases for hooks. This is where I spend the most time.
The final use case is as follows:
 // 省略部分代码...
// if request error and set pollingErrorRetryCount
// and the number of consecutive failures exceeds pollingErrorRetryCount, polling stops
let hook2;
let errorCallback;
act(() => {
  errorCallback = jest.fn();
  hook2 = setUp(() => request(0), {
    pollingErrorRetryCount: 3,
    pollingInterval: 100,
    pollingWhenHidden: true,
    onError: errorCallback,
  });
});

expect(hook2.result.current.loading).toEqual(true);
expect(errorCallback).toHaveBeenCalledTimes(0);

act(() => {
  jest.runAllTimers();
});
await hook2.waitForNextUpdate();
expect(hook2.result.current.loading).toEqual(false);
expect(errorCallback).toHaveBeenCalledTimes(1);

act(() => {
  jest.runAllTimers();
});
await hook2.waitForNextUpdate();
expect(errorCallback).toHaveBeenCalledTimes(2);

act(() => {
  jest.runAllTimers();
});
await hook2.waitForNextUpdate();
expect(errorCallback).toHaveBeenCalledTimes(3);

act(() => {
  jest.runAllTimers();
});
await hook2.waitForNextUpdate();
expect(errorCallback).toHaveBeenCalledTimes(4);

act(() => {
  jest.runAllTimers();
});
expect(errorCallback).toHaveBeenCalledTimes(4);

act(() => {
  hook2.result.current.run();
});
act(() => {
  jest.runAllTimers();
});
await hook2.waitForNextUpdate();
expect(errorCallback).toHaveBeenCalledTimes(5);

hook2.unmount();
// 省略部分代码...
To roughly explain the logic of this test case, I set up to retry three times, after the error, after running it three times, errorCallback will be called 4 times (including the error one). In the fifth execution, it will not execute errorCallback , which is still 4 times. Then we manually run a request, expecting errorCallback should be executed 5 times.
I stepped on a pit here, that is, when the fifth request was made, I would have written an operation waiting for the timer to be executed, but in fact, it will not execute the timer here, resulting in an error report, which has been tossing here for a long time. Later, the following code was deleted to execute successfully.
 act(() => {
  jest.runAllTimers();
});
- await hook2.waitForNextUpdate();
expect(errorCallback).toHaveBeenCalledTimes(4);
Documentation and Demo Supplements
After all, a new API parameter has been added, which needs to be noted in the document, and both Chinese and English documents need to be supplemented, and a Demo example is also added.
mention PR
After the above is completed, you can submit your code. After submitting, go to the project you followed and you can see this.
We need to click on the "Compare & pull request" framed in the picture, and the following picture will appear.
By default, the branch will be selected for us. We only need to improve the information in it, and the message we submitted before can also be modified. It is best to explain the content of this submission in English.
Just click submit.
There is also an entry for submitting PR, as follows:
Finally, just wait for the official CR (in fact, part of the above implementation was changed after CR). The PR has now been merged into master.
Summary thinking
The PR operation process for open source projects is not a very complicated thing, and the focus is on the modification of requirements. It is often necessary to consider multiple boundary scenarios. At this time, we need front-end unit tests to help us cover comprehensive scenarios.
In addition, for some students who have no experience in participating in open source projects, I think a tool library like ahoos is a good choice:
- Its module division is clearer. If you change the function of a module, the impact can be better estimated. Friendly to newcomers.
- The logic is relatively simple. In fact, you will find a lot of code in the utils/hooks folder of your business project.
- The community is more active, and maintainers can respond faster.
I hope to be helpful.


**粗体** _斜体_ [链接](http://example.com) `代码` - 列表 > 引用。你还可以使用@来通知其他用户。