完成应用测试
我们已经完成了我们想要创建的博客引擎。不过这个项目尚未完全结束。为了保证代码的质量,我们需要添加更多的测试。
当然我们已经完成了测试所有模型层的功能。所以博客引擎的核心功能已经被测试过了。但是一个Web应用并不只有模型层。我们需要确保Web交互界面是否完好。这需要测试引擎的控制层。但是我们甚至需要测试UI界面,比如我们的Javascript代码。
测试控制层
通过JUnit,你可以直接测试应用的控制层。我们将这些测试称之为功能测试。因为我们会测试应用完整的功能。
一个功能测试会调用Play的ActionInvoker,模拟一个HTTP请求。我们需要提供HTTP方法,一个URI和HTTP参数。Play会根据这个请求,找到路由,接着调用对应的action,最后返回一个响应。你可以分析它,看看响应是否在意料之中。
先写第一个功能测试。打开yabe/test/ApplicationTest.java:
import org.junit.*;
import play.test.*;
import play.mvc.*;
import play.mvc.Http.*;
import models.*;

public class ApplicationTest extends FunctionalTest {

    @Test
    public void testThatIndexPageWorks() {
        Response response = GET("/");
        assertIsOk(response);
        assertContentType("text/html", response);
        assertCharset("utf-8", response);
    }

}
看上去像是一般的JUnit测试。注意我们使用Play的Functionaltest父类来获取辅助函数。这个测试仅仅是用于检测主页是否正常(一般/URL会渲染一个HTML文件,并返回‘200 OK’状态码)。
现在我们将检测管理面板的安全是否禁得住考验。给ApplicationTest.java添加新的测试:
…
@Test
public void testAdminSecurity() {
    Response response = GET("/admin");
    assertStatus(302, response);
    assertHeaderEquals("Location", "/login", response);
}
…
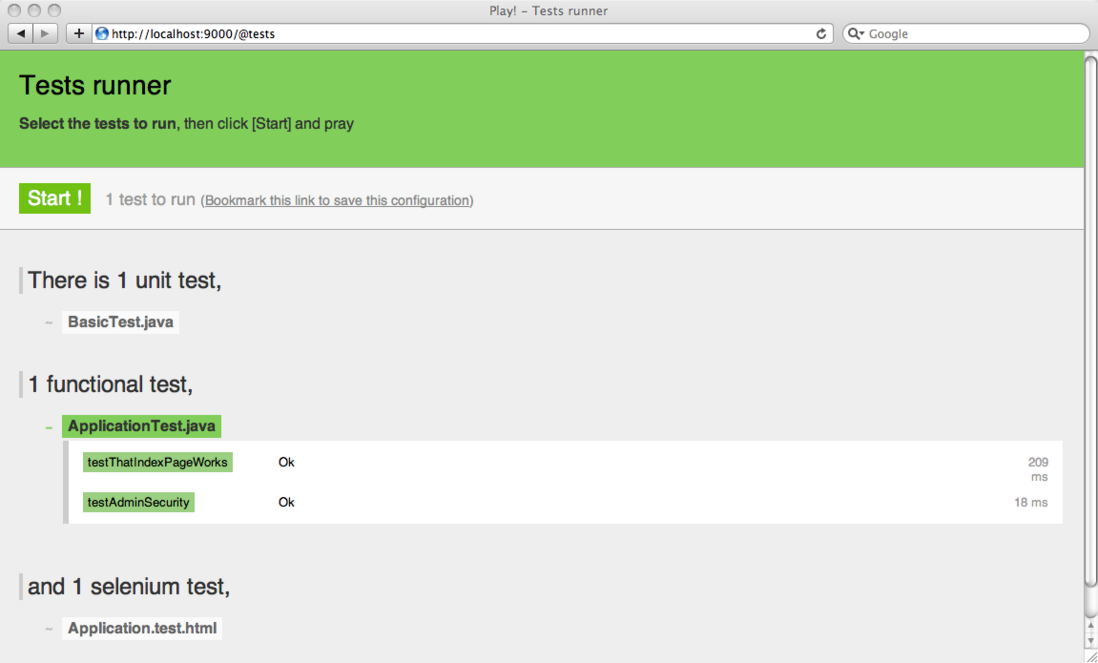
使用play test命令运行你的yabe应用,打开http://localhost:9000/@tests,选择ApplicationTest.java用例,然后运行它。
变绿了吗?
现在,我们可以对应用的全部功能进行同样的测试,但这并不是测试一个基于HTML的Web应用的最佳方式,我们的博客引擎需要在Web浏览器中执行,如果能够在真实的浏览器中进行测试,这就是Play的Selenium测试所做的事情。
一个Selenium测试套件一般是个HTML文件。Selenium所使用的HTML语法有点令人乏味(就像是一个HTML表格元素一样)。好消息是,Play可以让你使用模板引擎以及一些支持简化的Selenium语法的标签来生成它。这也意味着,你可以利用Play模板的表达能力(条件语句,循环语句等等)来生成许多复杂的测试。
当然,如果需要的话,你也可以不用模板的生成功能,直接撰写Selenium页面。其实,使用Selenium专用工具,比如Selenium IDE,来生成Selenium测试页面也是不错的选择。
一个刚创建的Play应用已经自带了一个Selenium测试。打开yabe/test/Application.test.html:
*{ You can use plain Selenium commands using the selenium tag }*

#{selenium}
    // Open the home page, and check that no error occurred
    open('/')
    waitForPageToLoad(1000)
    assertNotTitle('Application error')
#{/selenium}
在yabe上运行这个测试应该不会出现任何问题。它只是打开主页,然后检测页面中是否包括"Application error"文本。
不过,一如任何复杂的测试,在浏览应用并进行测试之前,你都需要设置一些初始数据。我们将重用之前用过的Fixture和yabe/test/data,yml。要在测试开始之前引入数据,仅需使用#{fixture /}标签:
#{fixture delete:'all', load:'data.yml' /}

#{selenium}
    // Open the home page, and check that no error occurred
    open('/')
    waitForPageToLoad(1000)
    assertNotTitle('Application error')
#{/selenium}
还需要检查另一个重要的事情,就是在每个测试开始之前要有一个新的用户会话。这个会话将保持在浏览器的持久cookie中,如果不做清理,它会在两个连续的测试之间保持。
所以我们的测试之前,先添加一个特殊的命令:
#{fixture delete:'all', load:'data.yml' /}

#{selenium}
    clearSession()

    // Open the home page, and check that no error occurred
    open('/')
    waitForPageToLoad(1000)
    assertNotTitle('Application error')
#{/selenium}
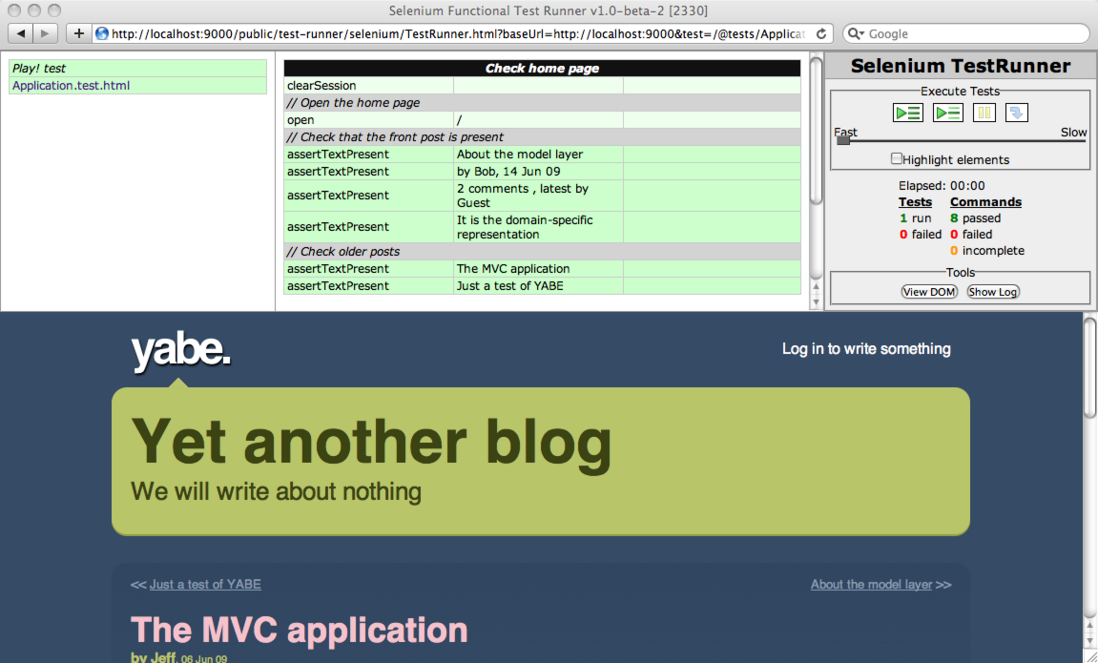
运行这个测试,确保一切安好。应该会是全绿的结果。
所以我们可以开始写更复杂的测试了。打开主页面,检查是否展示了默认的文章。
#{fixture delete:'all', load:'data.yml' /}

#{selenium 'Check home page'}
    clearSession()

    // Open the home page
    open('/')

    // Check that the front post is present
    assertTextPresent('About the model layer')
    assertTextPresent('by Bob, 14 Jun 09')
    assertTextPresent('2 comments , latest by Guest')
    assertTextPresent('It is the domain-specific representation')

    // Check older posts
    assertTextPresent('The MVC application')
    assertTextPresent('Just a test of YABE')
#{/selenium}
我们使用的是标准的Selenium语法,叫做Selenese。
运行它。(通过在新的标签页打开链接,你可以在一个不同的窗口中运行)。
现在我们开始测试评论框。添加一个新的#{selenium /}标签到模板中:
#{selenium 'Test comments'}

    // Click on 'The MVC application post'
    clickAndWait('link=The MVC application')
    assertTextPresent('The MVC application')
    assertTextPresent('no comments')

    // Post a new comment
    type('content', 'Hello')
    clickAndWait('css=input[type=submit]')

    // Should get an error
    assertTextPresent('no comments')
    assertTextPresent('Author is required')
    type('author', 'Me')
    clickAndWait('css=input[type=submit]')

    // Check
    assertTextPresent('Thanks for posting Me')
    assertTextPresent('1 comment')
    assertTextPresent('Hello')
#{/selenium}
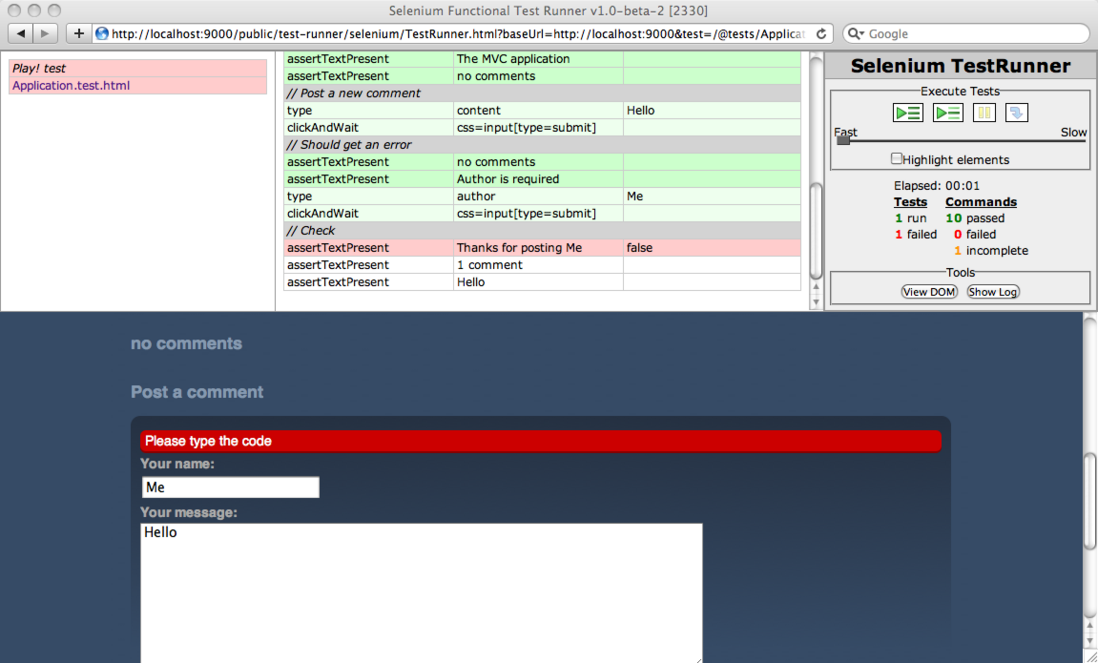
然后运行它。啊,出错了;看来这里有点问题。
原来是验证码的问题。这个可模拟不了……只好作弊了嘿嘿。在测试模式中,我们可需要把任何针对验证码的输入都当做正确的。而在测试模式下,框架的id是test。所以修改掉yabe/app/controllers/Application.java的postComment action来跳过测试模式下的验证:
…
if(!Play.id.equals("test")) {
    validation.equals(code, Cache.get(randomID)).message("Invalid code. Please type it again");
}
…
现在修改下测试用例。验证码那一栏就随便乱写好了:
…
type('author', 'Me')
type('code', 'XXXXX')
clickAndWait('css=input[type=submit]')
…
然后重新运行测试,这下应该通过了。
评估代码覆盖率
当然我们还没有完成应用所需的所有测试用例。但是对于我们的教程来说已经足够了。在现实的应用中,我们怎么知道是否已经写了足够的测试用例?我们需要一个代码覆盖率的概念。
Cobertura 模块使用Cobertura工具生成代码覆盖率报告。使用install命令安装这个模块:
play install cobertura-{version}
我们仅需在测试模式下启动这个模块。所以在application.conf文件下添加这一行:
# Import the cobertura module in test mode
%test.module.cobertura=${play.path}/modules/cobertura
现在在测试模式下重新启动应用,打开http://localhost:9000/@tests,选中所有测试并运行。应该是绿光满面的节奏。
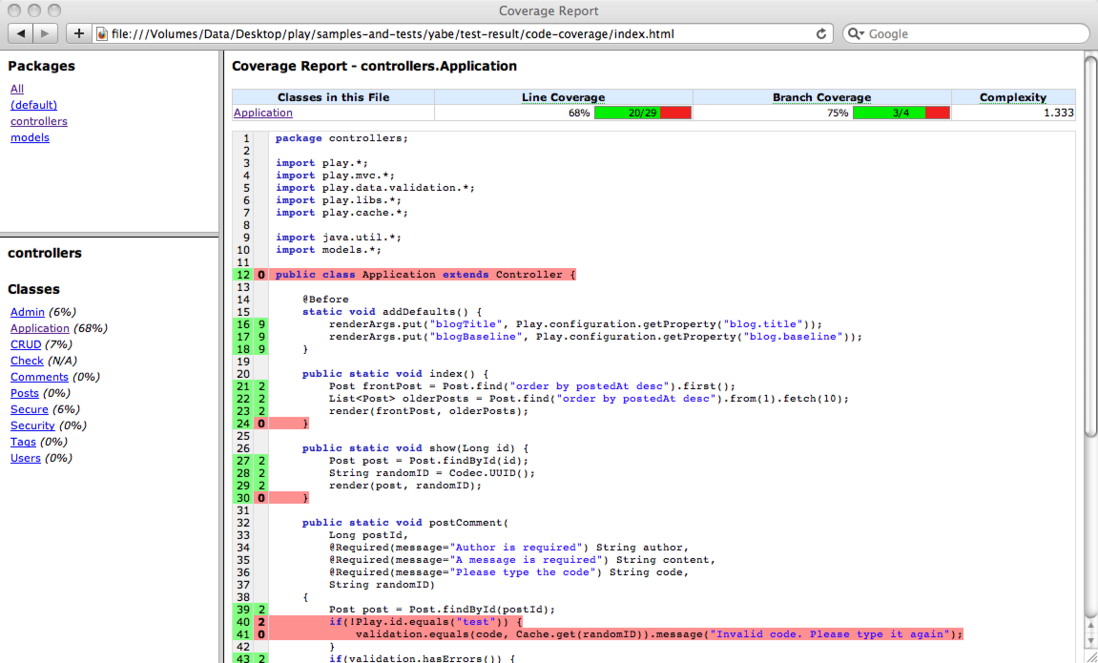
在所有的测试结束后,停止应用,cobertura将生成代码覆盖率报告。接着你可以在浏览器打开yabe/test-result/code-coverage/index.html,看一下那份报告。
如果重新启动应用,你也可以在http://localhost:9000/@cobertura看到它。
如你所见,我们远远没有完成对应用的全面测试。一个好的测试覆盖率应该尽量达到100%,即使检查所有的代码是几乎不可能的。毕竟我们有时候不得不在测试模式下做一些变通,正如我们曾对验证码做过的一样。


**粗体** _斜体_ [链接](http://example.com) `代码` - 列表 > 引用。你还可以使用@来通知其他用户。