复制代码
/*
Android开发之初识camera图像采集
北京Android俱乐部群:167839253
Created on: 2011-8-24
Author: blueeagle
Email: liujiaxiang@gmail.com
*/
下面记录一个简单的相机的制作方法。
制作相机,首先需要添加照相的权限。添加方法是在AndroidManifest.xml文件中添加
其次:修改布局文件:如下代码所示。
<textarea readonly name="code" class="html">
<LinearLayout xmlns:android="http://schemas.android.com/apk/res/android"
android:orientation="vertical"
android:layout_width="fill_parent"
android:layout_height="fill_parent"
<LinearLayout xmlns:android="http://schemas.android.com/apk/res/android"
android:layout_width="fill_parent"
android:layout_height="wrap_content"<Button android:id="@+id/myButton" android:layout_width="wrap_content" android:layout_height="wrap_content" android:text="打开"/>
<Button android:id="@+id/myButton2" android:layout_width="wrap_content" android:layout_height="wrap_content" android:text="关闭"/>
</textarea>再次,编辑代码,如下所示:
<textarea readonly name="code" class="java">/*
* Android开发之camera图像采集
* MyTestCamera.java
* Created on: 2011-8-24
* Author: blueeagle
* Email: liujiaxiang@gmail.com
*/
package com.blueeagle;
import java.io.IOException;
import android.app.Activity;
import android.hardware.Camera;
import android.os.Bundle;
import android.view.SurfaceHolder;
import android.view.SurfaceView;
import android.view.View;
import android.widget.Button;
public class MyTestCamera extends Activity implements SurfaceHolder.Callback{
Camera myCamera;
SurfaceView mySurfaceView;
SurfaceHolder mySurfaceHolder;
Button myButton1;
Button myButton2;
boolean isPreview = false;
@Override
public void onCreate(Bundle savedInstanceState) {
    super.onCreate(savedInstanceState);
    setContentView(R.layout.main);

    mySurfaceView = (SurfaceView)findViewById(R.id.mySurfaceView);
    myButton1 = (Button)findViewById(R.id.myButton);
    myButton2 = (Button)findViewById(R.id.myButton2);

    mySurfaceHolder = mySurfaceView.getHolder();
    mySurfaceHolder.addCallback(this);
    mySurfaceHolder.setType(SurfaceHolder.SURFACE_TYPE_PUSH_BUFFERS);
    myButton1.setOnClickListener(new Button.OnClickListener(){
@Override
public void onClick(View v) {
initCamera();
}
});
myButton2.setOnClickListener(new Button.OnClickListener(){
@Override
public void onClick(View v) {
if(myCamera!=null&&isPreview){
myCamera.stopPreview();
myCamera.release();
myCamera = null;
isPreview = false;
}
}
    });
}
public void initCamera() {
// TODO Auto-generated method stub
if(!isPreview){
myCamera = Camera.open();
}
if(myCamera !=null && !isPreview){
try{
myCamera.setPreviewDisplay(mySurfaceHolder);
myCamera.startPreview();
}
catch(IOException e){
e.printStackTrace();
}
isPreview = true;
}
}
@Override
public void surfaceChanged(SurfaceHolder holder, int format, int width,
int height) {
// TODO Auto-generated method stub
}
@Override
public void surfaceCreated(SurfaceHolder holder) {
// TODO Auto-generated method stub
}
@Override
public void surfaceDestroyed(SurfaceHolder holder) {
// TODO Auto-generated method stub
}
}
</textarea>
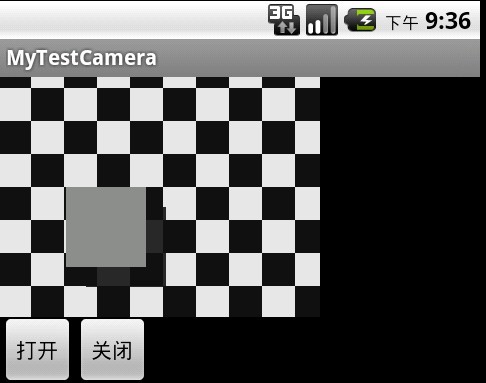
如果在模拟器中运行,可以得到如图所示的情形。如果在真机上运行,则会打开摄像头,将实际的影响显现出来。关闭时,则定在关闭时的画面。这样基本可以完成了图像的采集。如果程序中对相机有要求的话,可以采用这种方式进行。

这个例子只是一个小demo。供深入学习参考用。
**粗体** _斜体_ [链接](http://example.com) `代码` - 列表 > 引用。你还可以使用@来通知其他用户。