本章节,我们做分页组件,这是一个非常常用的组件。grid, listview都离不开它。因此其各种形态也有。
本章节教授的是一个比较纯正的形态,bootstrap风格的那种分页栏。
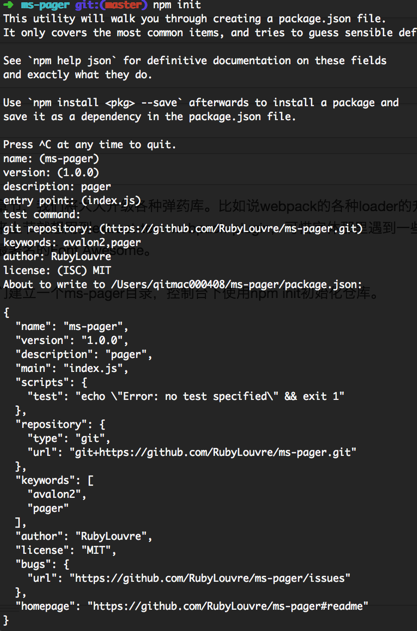
我们建立一个ms-pager目录,控制台下使用npm init初始化仓库。
然后我们添加dependencies配置项,尝试使用一些更强大的loader!
  "dependencies": {
    "file-loader":"~0.9.0",
    "url-loader": "0.5.7",
    "node-sass": "^3.8.0",
    "sass-loader": "^3.2.2",
    "style-loader": "~0.13.1",
    "css-loader": "~0.8.0",
    "raw-loader":"~0.5.1",
    "html-minify-loader":"~1.1.0",
    "webpack": "^1.13.1"
  },
然后npm install,安装几百个nodejs模块……
编写模板与VM
这次我们打算使用boostrap的样式,因此重心就只有这两部分。
<ul class="pagination">
    <li class="first"
        ms-class='{disabled: @currentPage === 1}'>
        <a ms-attr='{href:@getHref("first"),title:@getTitle("first")}'
           ms-click='cbProxy($event, "first")'
           >
            {{@firstText}}
        </a>
    </li>
    <li class="prev"
        ms-class='{disabled: @currentPage === 1}'>
        <a ms-attr='{href:@getHref("prev"),title:@getTitle("prev")}'
           ms-click='cbProxy($event, "prev")'
           >
            {{@prevText}}
        </a>
    </li>
    <li ms-for='page in @pages'
        ms-class='{active: page === @currentPage}' >
        <a ms-attr='{href:@getHref(page),title:@getTitle(page)}'
           ms-click='cbProxy($event, page)'
           >
            {{page}}
        </a>
    </li>
    <li class="next"
        ms-class='{disabled: @currentPage === @totalPages}'>
        <a ms-attr='{href:@getHref("next"),title: @getTitle("next")}'
           ms-click='cbProxy($event, "next")'
           >
            {{@nextText}}
        </a>
    </li>
    <li class="last"
        ms-class='{disabled: @currentPage === @totalPages}'>
        <a ms-attr='{href:@getHref("last"),title: @getTitle("last")}'
           ms-click='cbProxy($event, "last")'
           >
            {{@lastText}}
        </a>
    </li>
</ul>
一个分页,大概有这么属性:
currentPage: 当前页, 选中它,它应该会高亮,加一个active类名给它。
totalPages: 总页数
showPages: 要显示出来的页数。1万页不可能都全部生成出来。
firstText, lastText, prevText, nextText这些按钮或链接的文本,有的人喜欢文字,有的喜欢图标,要做成可配置。
onPageClick, 事件回调,它应该在该页disabled或active时不能触发事件。但我们需要将它一层。onPageClick是用户的方法,而处理disabled, active则是组件的事。因此我们模仿上一节的弹出层,外包一个cbProxy。
此外是类名,href, title的动态生成。
var avalon = require('avalon2')

avalon.component('ms-pager', {
    template: require('./template.html'),
    defaults: {
        getHref: function (href) {
            return href
        },
        getTitle: function (title) {
            return title
        },
        showPages: 5,
        pages: [],
        totalPages: 15,
        currentPage: 1,
        firstText: 'First',
        prevText: 'Previous',
        nextText: 'Next',
        lastText: 'Last',
        onPageClick: avalon.noop,//让用户重写
        cbProxy: avalon.noop, //待实现
        onInit: function (e) {
            var a = getPages.call(this, this.currentPage)
            this.pages = a.pages
            this.currentPage = a.currentPage
        }
    }
})
function getPages(currentPage) {
    var pages = []
    var s = this.showPages
    var total = this.totalPages
    var half = Math.floor(s / 2)
    var start = currentPage - half + 1 - s % 2
    var end = currentPage + half

    // handle boundary case
    if (start <= 0) {
        start = 1;
        end = s;
    }
    if (end > total) {
        start = total - s + 1
        end = total
    }

    var itPage = start;
    while (itPage <= end) {
        pages.push(itPage)
        itPage++
    }

    return {currentPage: currentPage, pages: pages};
}
这样分页栏的初始形态就出来。最复杂就是中间显示页数的计算。
构建工程
我们立即检验一下我们的分页栏好不好使。建一个main.js作为入口文件
var avalon = require('avalon2')
require('./index')
avalon.define({
    $id: 'test'
})

module.exports = avalon //注意这里必须返回avalon,用于webpack output配置
建立一个page.html,引入bootstrap的样式
<!DOCTYPE html>
<html>
    <head>
        <title>分页栏</title>
        <meta charset="UTF-8">
        <meta name="viewport" content="width=device-width, initial-scale=1.0">
        <link href="http://netdna.bootstrapcdn.com/bootstrap/3.0.3/css/bootstrap.min.css" rel="stylesheet">
        <script src="./dist/index.js"></script>
    </head>
    <body ms-controller="test">
        <wbr ms-widget="{is:'ms-pager'}" />
    </body>
</html>
然后建webpack.config开始构建工程:
var webpack = require('webpack');

var path = require('path');


function heredoc(fn) {
    return fn.toString().replace(/^[^\/]+\/\*!?\s?/, '').
            replace(/\*\/[^\/]+$/, '').trim().replace(/>\s*</g, '><')
}
var api = heredoc(function () {
    /*
     avalon的分页组件

     使用
     兼容IE6-8
     <wbr ms-widget="[{is:'ms-pager'}, @config]"/>
     只支持现代浏览器(IE9+)
     <ms-pager ms-widget="@config">
     </ms-pager>
     */
})

module.exports = {
    entry: {
        index: './main'
    },
    output: {
        path: path.join(__dirname, 'dist'),
        filename: '[name].js',
        libraryTarget: 'umd',
        library: 'avalon'
    }, //页面引用的文件
    plugins: [
        new webpack.BannerPlugin('分页 by 司徒正美\n' + api)
    ],
    module: {
        loaders: [
            //ExtractTextPlugin.extract('style-loader', 'css-loader','sass-loader')
            //http://react-china.org/t/webpack-extracttextplugin-autoprefixer/1922/4
            // https://github.com/b82/webpack-basic-starter/blob/master/webpack.config.js
            {test: /\.html$/, loader: 'raw!html-minify'}
        ]
    },
    'html-minify-loader': {
        empty: true, // KEEP empty attributes
        cdata: true, // KEEP CDATA from scripts
        comments: true, // KEEP comments
        dom: {// options of !(htmlparser2)[https://github.com/fb55/htmlparser2]
            lowerCaseAttributeNames: false, // do not call .toLowerCase for each attribute name (Angular2 use camelCase attributes)
        }
    },
    resolve: {
        extensions: ['.js', '', '.css']
    }
}
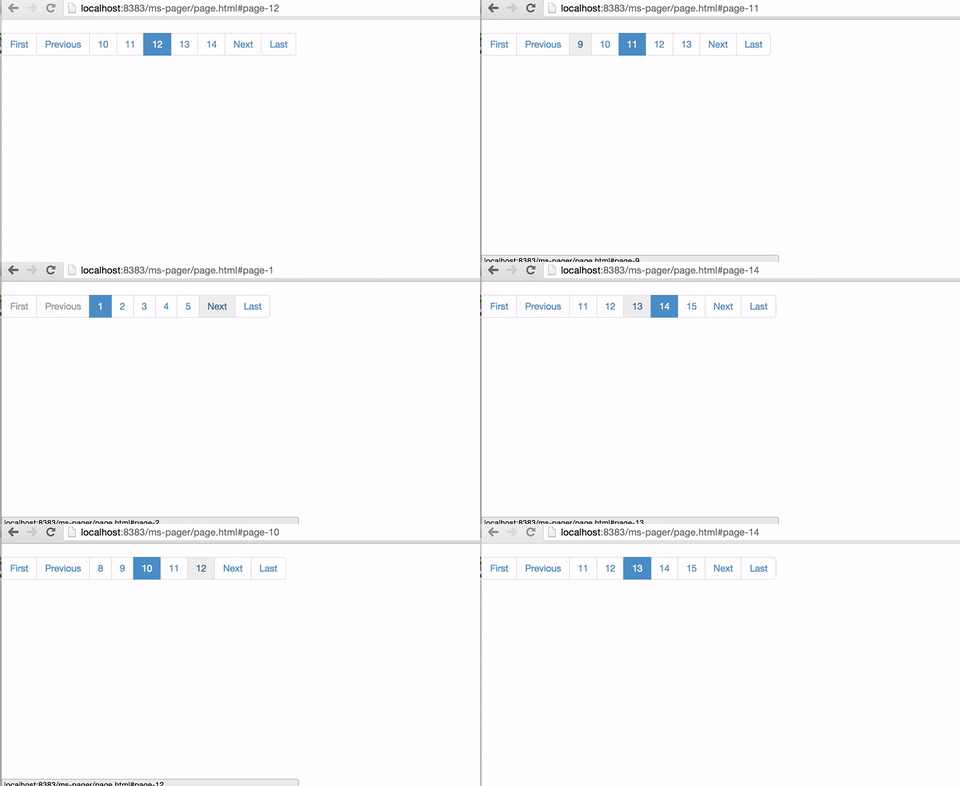
执行webpack --watch,打包后打开页面:
优化与打磨
目前还没有加入事件。但加入事件也是轻而易举的事,但这个事件有点特别,它分别要作用第一页,最后一页,前一页,后一页及中间页上。这要传入不同的参数。此外,它还要排除disabled状态与active状态的页码。虽然当我们点击页码时,页码上已经有disabled, active 这样的类名,但这要访问元素节点,这与MVVM的理念不一致。因此我们要另寻他法。此时,我们再看一下我们的模板,发现类名的生成部分太混乱,需要抽象一下。把添加了disabled与active 的页面存放起来,这样以后就不用访问元素节点了。
我们抽象出一个toPage方法,用于将first, last, prev, next转换页码
    toPage: function (p) {
            var cur = this.currentPage
            var max = this.totalPages
            switch (p) {
                case 'first':
                    return 1
                case 'prev':
                    return Math.max(cur - 1, 0)
                case 'next':
                    return Math.min(cur + 1, max)
                case 'last':
                    return max
                default:
                    return p
            }
        },
然后添加一个$buttons对象,这是用于存放first, last, prev, next的disabled状态。之所以用$开头,那是因为这样做就不用转换为子VM,提高性能。
抽象一个isDisabled方法
 isDisabled: function (name, page) {
    return this.$buttons[name] = (this.currentPage === page)
},那么页面的对应位置就可以改成disabled: @isDisabled('first', 1)
然后优化getHref方法,内部调用toPage方法,这样就能看到地址栏的hash变化。
getHref: function(){
   return '#page-' + this.toPage(a)
}
实现cbProxy。大家看到我命名的方式是不是很怪,什么XXXProxy, isXXX。那是从java的设计模式过来的。
cbProxy: function (e, p) {
    if (this.$buttons[p] || p === this.currentPage) {
        e.preventDefault()
        return //disabled, active不会触发
    }
    var cur = this.toPage(p)
    var obj = getPages.call(this, cur)
    this.pages = obj.pages
    this.currentPage = obj.currentPage
    return this.onPageClick(e, p)
},
重写onInit,方便它直接从地址栏得到当前参数。
  onInit: function () {
        var cur = this.currentPage
        var match = /(?:#|\?)page\-(\d+)/.exec(location.href)

        if (match && match[1]) {
            var cur = ~~match[1]
            if (cur < 0 || cur > this.totalPages) {
                cur = 1
            }
        }
        var obj = getPages.call(this, cur)
        this.pages = obj.pages
        this.currentPage = obj.currentPage
    }
当然,有的用户会重写getHref方法,地址栏的参数也一样。因此最好这个正则也做成可配置。
rpage : /(?:#|\?)page\-(\d+)/注意,avalon2.1.1有一个BUG,会将VM中的正则转换一个子VM,因此需要大家打开源码,修改其isSkip方法
var rskip = /function|window|date|regexp|element/i

function isSkip(key, value, skipArray) {
    // 判定此属性能否转换访问器
    return key.charAt(0) === '$' ||
            skipArray[key] ||
            (rskip.test(avalon.type(value))) ||
            (value && value.nodeName && value.nodeType > 0)
}
然后我们再打包一下:
接着是样式问题。我最开始说过,我们是用bootstrap样式,但我并不需要整个库,那么在这里将pagination的相关部分扒下来就是。
建立一个style.scss文件
//
// Pagination (multiple pages)
// --------------------------------------------------
$gray-base:              #000 !default;
$gray-light:             lighten($gray-base, 46.7%) !default; // #777
$gray-lighter:           lighten($gray-base, 93.5%) !default; // #eee
$brand-primary:         darken(#428bca, 6.5%) !default; // #337ab7
//** Global textual link color.
$link-color:            $brand-primary !default;
//** Link hover color set via `darken()` function.
$link-hover-color:      darken($link-color, 15%) !default;
$border-radius-base:        4px !default;

$line-height-large:         1.3333333 !default; // extra decimals for Win 8.1 Chrome
$border-radius-large:       6px !default;


$padding-base-vertical:     6px !default;
$padding-base-horizontal:   12px !default;


$font-size-base:          14px !default;

//** Unit-less `line-height` for use in components like buttons.
$line-height-base:        1.428571429 !default; // 20/14
//** Computed "line-height" (`font-size` * `line-height`) for use with `margin`, `padding`, etc.
$line-height-computed:    floor(($font-size-base * $line-height-base)) !default; // ~20px


$cursor-disabled:                not-allowed !default;

$pagination-color:                     $link-color !default;
$pagination-bg:                        #fff !default;
$pagination-border:                    #ddd !default;

$pagination-hover-color:               $link-hover-color !default;
$pagination-hover-bg:                  $gray-lighter !default;
$pagination-hover-border:              #ddd !default;

$pagination-active-color:              #fff !default;
$pagination-active-bg:                 $brand-primary !default;
$pagination-active-border:             $brand-primary !default;

$pagination-disabled-color:            $gray-light !default;
$pagination-disabled-bg:               #fff !default;
$pagination-disabled-border:           #ddd !default;


// Single side border-radius

@mixin border-right-radius($radius) {
  border-bottom-right-radius: $radius;
     border-top-right-radius: $radius;
}
@mixin border-left-radius($radius) {
  border-bottom-left-radius: $radius;
     border-top-left-radius: $radius;
}

.pagination {
  display: inline-block;
  padding-left: 0;
  margin: $line-height-computed 0;
  border-radius: $border-radius-base;

  > li {
    display: inline; // Remove list-style and block-level defaults
    > a,
    > span {
      position: relative;
      float: left; // Collapse white-space
      padding: $padding-base-vertical $padding-base-horizontal;
      line-height: $line-height-base;
      text-decoration: none;
      color: $pagination-color;
      background-color: $pagination-bg;
      border: 1px solid $pagination-border;
      margin-left: -1px;
    }
    &:first-child {
      > a,
      > span {
        margin-left: 0;
        @include border-left-radius($border-radius-base);
      }
    }
    &:last-child {
      > a,
      > span {
        @include border-right-radius($border-radius-base);
      }
    }
  }

  > li > a,
  > li > span {
    &:hover,
    &:focus {
      z-index: 2;
      color: $pagination-hover-color;
      background-color: $pagination-hover-bg;
      border-color: $pagination-hover-border;
    }
  }

  > .active > a,
  > .active > span {
    &,
    &:hover,
    &:focus {
      z-index: 3;
      color: $pagination-active-color;
      background-color: $pagination-active-bg;
      border-color: $pagination-active-border;
      cursor: default;
    }
  }

  > .disabled {
    > span,
    > span:hover,
    > span:focus,
    > a,
    > a:hover,
    > a:focus {
      color: $pagination-disabled-color;
      background-color: $pagination-disabled-bg;
      border-color: $pagination-disabled-border;
      cursor: $cursor-disabled;
    }
  }
}
然后在index.js加上
require('./style.scss')然后在webpack.config.js加上
{test: /\.scss$/, loader: "style!css!sass"}我们再尝试将样式独立成一个请求,有效利用页面缓存。
npm install extract-text-webpack-plugin --save-dev修改构建工具:
var webpack = require('webpack');

var path = require('path');

function heredoc(fn) {
    return fn.toString().replace(/^[^\/]+\/\*!?\s?/, '').
            replace(/\*\/[^\/]+$/, '').trim().replace(/>\s*</g, '><')
}
var api = heredoc(function () {
    /*
     avalon的分页组件
    getHref: 生成页面的href
    getTitle: 生成页面的title
    showPages: 5 显示页码的个数
    totalPages: 15, 总数量
    currentPage: 1, 当前面
    firstText: 'First',
    prevText: 'Previous',
    nextText: 'Next',
    lastText: 'Last',
    onPageClick: 点击页码的回调

     使用
     兼容IE6-8
     <wbr ms-widget="[{is:'ms-pager'}, @config]"/>
     只支持现代浏览器(IE9+)
     <ms-pager ms-widget="@config">
     </ms-pager>
     */
})
var ExtractTextPlugin = require('extract-text-webpack-plugin');
var cssExtractor = new ExtractTextPlugin('/[name].css');

module.exports = {
    entry: {
        index: './main'
    },
    output: {
        path: path.join(__dirname, 'dist'),
        filename: '[name].js',
        libraryTarget: 'umd',
        library: 'avalon'
    }, //页面引用的文件
    plugins: [
        new webpack.BannerPlugin('分页 by 司徒正美\n' + api)
    ],
    module: {
        loaders: [
            //http://react-china.org/t/webpack-extracttextplugin-autoprefixer/1922/4
            // https://github.com/b82/webpack-basic-starter/blob/master/webpack.config.js
            {test: /\.html$/, loader: 'raw!html-minify'},
            {test: /\.scss$/, loader: cssExtractor.extract( 'css!sass')}

        ]
    },
    'html-minify-loader': {
        empty: true, // KEEP empty attributes
        cdata: true, // KEEP CDATA from scripts
        comments: true, // KEEP comments
        dom: {// options of !(htmlparser2)[https://github.com/fb55/htmlparser2]
            lowerCaseAttributeNames: false, // do not call .toLowerCase for each attribute name (Angular2 use camelCase attributes)
        }
    },
    plugins: [
        cssExtractor
    ],
    resolve: {
        extensions: ['.js', '', '.css']
    }
}
修改页面的link为
<link href="./dist/index.css" rel="stylesheet"/>但这时我们的CSS与JS还没有压缩,这个很简单,
webpack -p于是dist目录下的js, css全部压成一行了!
最后大家可以在这里下到这个工程
最近又重构了一下,用上web font字体。
相关链接


**粗体** _斜体_ [链接](http://example.com) `代码` - 列表 > 引用。你还可以使用@来通知其他用户。