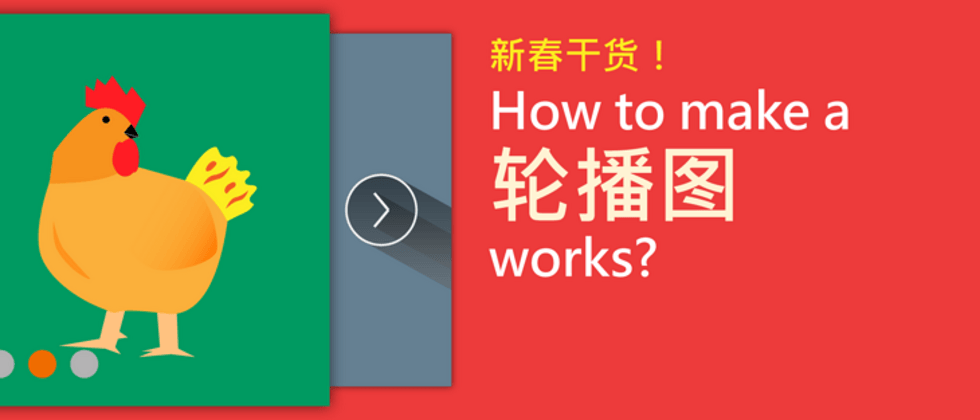
轮播图千种万种,怎样才能做出符合要求的轮播图?原理上天入地,如何优化才能达到极限丝滑?本文作者将解答这一切,通过现场制作一个轮播图,带你详细了解、理解,制作 All kinds of 高性能轮播图 !
仿自 Google Play
不过,在事实上,轮播图的点击率通常都很低,很少能引起用户的注意,而却往往占用了页面某个极重要的位置。你的网站真的需要一个轮播图吗?轻轻问自己三声,谷歌一下对轮播图效果的相关调查和建议,再决定是否要着手制作你的轮播图。
2017.8.20 更新——————————
1. 代码简洁化 & 语言精简
2. 删去不被推荐的有限部分
3. API 重写
! ES6 API 重写
ES6 啊,,牛逼啊!我TM要火啊!!
然而并没有。
开始
1. 结构
div.father包裹图片。div.viewport为视口部分。
<div class="viewport" id="example">
  <div class="father">
    <div>A</div><!-- 1 -->
    <div>B</div>
    <div>C</div><!-- 3 -->
    <div>D</div>
    <div>E</div><!-- 5 -->
  </div>
  <div class="mother">左</div>
  <div class="mother">右</div>
</div>
.viewport {
width: 900px;
height: 300px;
overflow: hidden;
position: relative;
}
.father {
height: inherit;
width: 3000%; /* 子元素 float 无法撑开 */
transform: translate3d(0, 0, 0);
transition: transform 0.3s ease-in-out;
}
.father > div {
width: 550px;
height: inherit;
float: left;
}
.mother {
width: 30px;
height: inherit;
line-height: 300px;
text-align: center;
cursor: pointer;
user-select:none;
background: rgba(0,0,0,0.15);
position: absolute;top: 0;
} .mother.left { left: 0 } .mother.right { right: 0 }transform: translate3d()使用 GPU 加速。
2. 代码实现
class Lunbo {
  constructor(element) {
    this.viewport = element;
    this.father = element.children[0];
    this.photos = this.father.children;
    // 自设的图片宽, 包括 margin
    this.photoWidth = this.photos[0].offsetWidth + parseInt(getComputedStyle(this.photos[0]).marginLeft) + parseInt(getComputedStyle(this.photos[0]).marginRight);

    // 注册移动事件
    element.children[1].addEventListener('click', this.left.bind(this));
    element.children[2].addEventListener('click', this.right.bind(this));
  }

  load() {

  }

  left() {
    this.load(this.showingId - 1);
  }

  right() {
    this.load(this.showingId + 1);
  }
}- 页面加载时:选取一张作为焦点
切换时:fatherGo(to)负责跳转到指定的焦点图; - 高效 & 无限轮播
(此处以下所有代码仅显示添加 / 修改部分)
思路也是难点。一题,这样解决:
class Lunbo {
  constructor(element) {
    // (可视宽 -焦点图片宽) / 2,焦点图到视口左或右的距离
    this.partnerWidth = (this.viewport.clientWidth - this.photoWidth) / 2;
  }

  // 计算移动距离
  countX(id) {
    return -id * this.photoWidth + this.partnerWidth;
  }

  // 切换 / 载入 / 移动图片。无参数则除法求整,仅用来切换到一个瞎选的初始焦点
  load(newId = parseInt(this.photos.length / 2) - 1) {
    this.father.style.transform = `translate3d(${this.countX(newId)}px, 0, 0)`;
    this.showingId = newId;
  }
}
// 切换至初始焦点
const Example = new Lunbo(document.getElementById("example"));
Example.load();
countX(id) 解释:
若将 Id = 2 对应图片(第 3 张)作焦点,向左挪过去两张(此时该图靠最左),后加回partnerWidth
二题:
<div class="father" id="father">
  <div>A</div><div>B</div><div>C</div><div>D</div><div>E</div>

  <div>A</div>
  <div>B</div>
  <div>C</div>
  <div>D</div>
  <div>E</div>

  <div>A</div><div>B</div><div>C</div><div>D</div><div>E</div>
</div>
三倍于展示图,JS 动态生成亦可。称之三个块。
.moving { transition: none }在接近块间距时关闭动画移至另一块相应位置。
class Lunbo {
  constructor(element) {
    // 表示接近边缘的图片 Id。接近左边缘的即第2 张图,右边缘的则为倒数第二张
    this.closeLeftId = 1;
    this.closeRightId = this.photos.length - 2;

    this.photosQuantity = this.photos.length / 3;

    // 当运动到上面两个 Id 时默默移动到的对应 Id
    // 接近左边时跳转到右边块的第二张
    // 接近右边则跳转到左边块的倒数第二张
    this.backLeftId = this.photosQuantity - 2;
    this.backRightId = this.photosQuantity * 2 + 1;
  }

  load(newId = parseInt(this.photos.length / 2) - 1) {
    this.father.style.transform = `translate3d(${this.countX(newId)}px, 0, 0)`;

    if (newId === this.closeLeftId){
      newId = this.backRightId;
    } else if (newId === this.closeRightId){
      newId = this.backLeftId;
    } else {
      this.showingId = newId;
      return;
    }
    this.father.addEventListener('transitionend', this.backMove.bind(this, newId), {once: true});
  }

  backMove(newId) {
    this.father.classList.add("moving");
    this.father.clientWidth();
    this.father.style.transform = `translate3d(${this.countX(newId)}px, 0, 0)`;
    this.father.clientWidth();
    this.father.classList.remove("moving");
    this.showingId = newId;
  }
}
4. 整理代码
<!DOCTYPE html><html><head>
<title>17.8.20</title>
<style>
html,body { height: 100% }
.viewport {
  width: 900px;height: 300px;
  overflow: hidden;
  position: relative;
}
.father {
  height: inherit;
  width: 3000%;
  transform: translate3d(0, 0, 0);
  transition: transform 0.3s ease-in-out;
} .father.moving { transition: none }
.father > div {
  width: 550px;height: inherit;background: #aaa;
  float: left;
}
.mother {
  width: 30px;
  height: inherit;
  line-height: 300px;
  text-align: center;
  cursor: pointer;
  user-select:none;
  background: rgba(0,0,0,0.15);
  position: absolute;top: 0;
} .mother.left { left: 0 } .mother.right { right: 0 }
</style></head><body>
<div class="viewport" id="example">
  <div class="father">
    <div>A</div><div>B</div><div>C</div><div>D</div><div>E</div>

    <div>A</div>
    <div>B</div>
    <div>C</div>
    <div>D</div>
    <div>E</div>

    <div>A</div><div>B</div><div>C</div><div>D</div><div>E</div>
  </div>
  <div class="mother left">左</div>
  <div class="mother right">右</div>
</div>
<script>
class Lunbo {
  constructor(element) {
    this.viewport = element;
    this.father = element.children[0];
    this.photos = this.father.children;
    // 自设的图片宽, 包括 margin
    this.photoWidth = this.photos[0].offsetWidth + parseInt(getComputedStyle(this.photos[0]).marginLeft) + parseInt(getComputedStyle(this.photos[0]).marginRight);

    // (可视宽 -焦点图片宽) / 2,焦点图到视口左或右的距离
    this.partnerWidth = (this.viewport.clientWidth - this.photoWidth) / 2;

    // 表示接近边缘的图片 Id。接近左边缘的即第2 张图,右边缘的则为倒数第二张
    this.closeLeftId = 1;
    this.closeRightId = this.photos.length - 2;

    this.photosQuantity = this.photos.length / 3;

    // 当运动到上面两个 Id 时默默移动到的对应 Id
    // 接近左边时跳转到右边块的第二张
    // 接近右边则跳转到左边块的倒数第二张
    this.backLeftId = this.photosQuantity - 2;
    this.backRightId = this.photosQuantity * 2 + 1;

    // 注册移动事件
    element.children[1].addEventListener('click', this.left.bind(this));
    element.children[2].addEventListener('click', this.right.bind(this));
  }

  // 计算移动距离
  countX(id) {
    return -id * this.photoWidth + this.partnerWidth;
  }

  // 切换 / 载入 / 移动图片。无参数则除法求整,仅用来切换到一个瞎选的初始焦点
  load(newId = parseInt(this.photos.length / 2) - 1) {
    this.father.style.transform = `translate3d(${this.countX(newId)}px, 0, 0)`;

    if (newId === this.closeLeftId){
      newId = this.backRightId;
    } else if (newId === this.closeRightId){
      newId = this.backLeftId;
    } else {
      this.showingId = newId;
      return;
    }
    this.father.addEventListener('transitionend', this.backMove.bind(this, newId), {once: true});
  }

  backMove(newId) {
    this.father.classList.add("moving");
    this.father.style.transform = `translate3d(${this.countX(newId)}px, 0, 0)`;

    this.father.clientWidth;

    this.father.classList.remove("moving");
    this.showingId = newId;
  }

  left() {
    this.load(this.showingId - 1);
  }

  right() {
    this.load(this.showingId + 1);
  }
}

// 切换至初始焦点
const Example = new Lunbo(document.getElementById("example"));
Example.load();
</script></body></html>
代码已通过测试。你需要码更多的代码,兼容各个浏览器,以及让它可以被更好地维护,然后做得更好(装)看(B)一些。
高级选项
一味把<script>放到</body>前只会适得其反——你需要 “加载优化” ;焦点图没有特别样式不够突出——你在想 “突出焦点” ;需要给予用户更多自主选择——去看看 “位置指示”
加载优化(重要)
我们会在页面载入后看到轮播图从第一张转到焦点 —— 非常有损体验。可把一部分<script>放到<head>里或轮播图前,阻塞渲染。最好是提前计算 translateX 。
<div class="father" id="father" style="transform: translate3d(-3125px, 0px, 0px)">
</div>
然后删去多余初始移动代码。
突出焦点
焦点 { 放大到110% }
其他 { 半透明;正常大小 }
.focusing { opacity: 1;transform: scale3d(1.1, 1.1, 1) }
.father > div { opacity: 0.4;background: #bbb;transition: inherit; }为Lunbo.load(newId)及backMove(newId)添加‘焦点样式更改’行
class Lunbo {
  ...(前后文省略)
  load(newId) {
    ...
    this.photos[showingId].classList.remove("focusing");
    this.photos[newId].classList.add("focusing");
    ...
  }
  ...
  backMove(newId) {
    this.father.classList.add("moving");
    this.photos[newId].classList.add("focusing");
    this.father.style.transform = `translate3d(${this.countX(newId)}px, 0, 0)`;

    this.father.clientWidth;

    this.father.classList.remove("moving");
    this.photos[showingId].classList.remove("focusing");
    this.showingId = newId;
  }
  ...
}
<div class = "father" id="father" style="transform: translate3d(-3125px, 0px, 0px);">
...
<div class="focusing">..</div><!--提前选择焦点 -->
...
</div>位置指示 & 切换
(在更新 ES6 之前,)这里的代码经过了测试。
1. 显示
.seter {
  width: 400px;height: 20px;
  position: absolute;bottom: 0;left: calc(50% - 200px);
  cursor: pointer;
}
.seter > div {
  width: 80px;height: 28px;
  background: orange;
  float: left;
} .seter > .on { margin-top: -8px;transition: margin 0.5s ease-in-out; }
<div class="viewport" id="example">
<div class="father" ...>
...
</div>
<div class="mother" id="left" left>左</div>
<div class="mother" id="right" right>右</div>
<div class="seter" id="seter">
<div data-seter-id="0"></div>
<div class="on" data-seter-id="1"></div>
<div data-seter-id="2"></div>
<div data-seter-id="3"></div>
<div data-seter-id="4"></div>
</div>
</div>- 函数 toSeterId 通过给予的图片 Id 计算对应的 seterId;
class Lunbo {
  constructor(element) {
    ...
    this.seters = element.children[3].children;
    ...

    // 注册移动事件
    ...
    element.children[3].addEventListener('click', function (event) {
      if (!event.target.hasAttribute('data-seter-id')) return;
      this.load(Number(event.target.getAttribute('data-seter-id')));
    }.bind(this))
  }
  ...
  load(newId) {
    ...
    this.seters[this.toSeterId(showingId)].className = '';
    this.seters[this.toSeterId(newId)].className = 'on';
    ...
  }
  ...
  toSeterId(id) {
    let seterId;
    if(id >= this.photosQuantity * 2) {
      seterId = id - 2 * this.photosQuantity;
    } else if(id >= this.photosQuantity) {
      seterId = id - this.photosQuantity;
    }
    return seterId;
  }
}
2. 可切换
- 每次通过指示切换时先
backMove至中间块,后再进行移动; - 避免从第一张晃过中间数张至最后一张(最短路径)。
// 继上文 “显示” 进一步更改
class Lunbo {
  constructor(element) {
    ...
    this.magicNumber = parseInt(this.photosQuantity / 2);
    ...
    // 注册移动事件
    ...
    element.children[3].addEventListener('click', function (event) {
      if (!event.target.hasAttribute('data-seter-id')) return;

      const newId = Number(event.target.getAttribute('data-seter-id')) + this.photosQuantity;

      // 切换至中间块
      this.backMove(toSeterId(showingId) + this.photosQuantity);

      // 最短路径选择
      if (newId > this.showingId + this.magicNumber) {
        // XXXX则移至左块
        this.load(newId - this.photosQuantity);
      } else if (newId < this.showingId - this.magicNumber) {
        // XXXX则移至右块
        this.load(newId + this.photosQuantity);
      } else {
        // 中间块不变
        this.load(newId);
      }
    }.bind(this))
  }
  ...
}
(°\_°ノ)
我突然知道为什么越牛的大牛会越越来越牛了 !!!∑(゚Д゚ノ)ノ
其实他们本来是想写一个文档来说明,写一个动态图演示给新手的!('▽'〃)
但是……
做完后他们一定会腰酸背痛……(;`O´)o
// 本文不再更新,除非作者开心

**粗体** _斜体_ [链接](http://example.com) `代码` - 列表 > 引用。你还可以使用@来通知其他用户。