1.环境信息
nginx-1.11.10
redis-latest包(redis windows版本)
springboot1.5.1.RELEASE
2.新建一个SpringBoot项目,参考如下链接:https://segmentfault.com/a/11...
3.nginx和redis解压缩即可,并正常启动
4.springboot集成Redis以及springboot,需要在POM文件中增加依赖
    <?xml version="1.0" encoding="UTF-8"?>
    <project xmlns="http://maven.apache.org/POM/4.0.0" xmlns:xsi="http://www.w3.org/2001/XMLSchema-instance"
    xsi:schemaLocation="http://maven.apache.org/POM/4.0.0 http://maven.apache.org/xsd/maven-4.0.0.xsd">
    <modelVersion>4.0.0</modelVersion>

    <groupId>com.example</groupId>
    <artifactId>demo3</artifactId>
    <version>0.0.1-SNAPSHOT</version>
    <packaging>jar</packaging>

    <name>demo</name>
    <description>Demo project for Spring Boot</description>

    <parent>
        <groupId>org.springframework.boot</groupId>
        <artifactId>spring-boot-starter-parent</artifactId>
        <version>1.5.1.RELEASE</version>
        <relativePath/> <!-- lookup parent from repository -->
    </parent>

    <properties>
        <project.build.sourceEncoding>UTF-8</project.build.sourceEncoding>
        <project.reporting.outputEncoding>UTF-8</project.reporting.outputEncoding>
        <java.version>1.8</java.version>
    </properties>

    <dependencies>
        <dependency>
            <groupId>org.springframework.boot</groupId>
            <artifactId>spring-boot-starter</artifactId>
        </dependency>
        <dependency>
             <groupId>org.springframework</groupId>
             <artifactId>spring-context-support</artifactId>
             <version>4.3.5.RELEASE</version>
        </dependency>
        <dependency>
            <groupId>org.springframework.boot</groupId>
            <artifactId>spring-boot-starter-web</artifactId>
        </dependency>
        <dependency>
            <groupId>org.springframework.session</groupId>
            <artifactId>spring-session-data-redis</artifactId>
        </dependency>
        <dependency>
          <groupId>org.springframework.boot</groupId>
          <artifactId>spring-boot-starter-redis</artifactId>
          <version>1.3.8.RELEASE</version>
          </dependency>
        <dependency>
            <groupId>org.springframework.boot</groupId>
            <artifactId>spring-boot-starter-test</artifactId>
            <scope>test</scope>
        </dependency>
      <dependency>
        <groupId>org.springframework.data</groupId>
        <artifactId>spring-data-redis</artifactId>
     </dependency>
    </dependencies>

    <build>
        <plugins>
            <plugin>
                <groupId>org.springframework.boot</groupId>
                <artifactId>spring-boot-maven-plugin</artifactId>
            </plugin>
        </plugins>
    </build>
</project>
5.新建Controller类DemoController.java
@Controller
public class DemoController {
    @Autowired
    DemoService demoService;

    @RequestMapping("testcache")
    @ResponseBody
    public String testCache(@RequestParam String key){
        String s = demoService.testCache(key);
        return s;
    }

    @RequestMapping("/getseansession")
    @ResponseBody
    public Map<String,String> getSession(HttpServletRequest request){
        Map<String,String> attributeMap = new HashMap<String, String>();
        request.getSession().setAttribute("message", request.getRequestURI());
        attributeMap.put("message", request.getRequestURI());
        System.out.println("sessionID:" + request.getSession().getId());
        return attributeMap;
    }
}
6.新建Service类DemoService.java
@Service
public class DemoService {
    @Cacheable(value = "keycache")
    public String testCache(String key){
        System.out.println("testCache:" + key);
        return key;
    }
}
7.新建RedisConfig类增加@EnableRedisHttpSession注解
@Configuration
@EnableCaching
@EnableRedisHttpSession
public class RedisConfig{
}
8.application.properties文件配置,其中为了测试ngnix负载均衡功能,本工程配置为8080端口,另一个springboot工程可以配置为别的端口,比如8088,以便启动两个Server
#redis spring.redis.password=xxx
#spring.redis.database= # database name
spring.redis.hostname=127.0.0.1 # server host
spring.redis.port=6379
spring.redis.pool.maxActive=8
spring.redis.pool.maxWait=-1
spring.redis.pool.maxIdle=8
spring.redis.pool.minIdle=0
spring.redis.timeout=0

#tomcat port configuration
server.port=8080
可以看到启动了两个Server,DemoApplication和DemoApplication(1)
9.ngnix.conf配置文件中配置负载均衡策略
upstream test {
        server localhost:8080;
        server localhost:8088;
    }

    server {
        listen       80;
        server_name  localhost;
        client_max_body_size 1024M;

        #charset koi8-r;

        #access_log  logs/host.access.log  main;

        #location / {
        #    root   html;
        #    index  index.html index.htm;
        #}

        location / {
            proxy_pass http://test/getseansession;
            proxy_set_header Host $host:$server_port;
        }
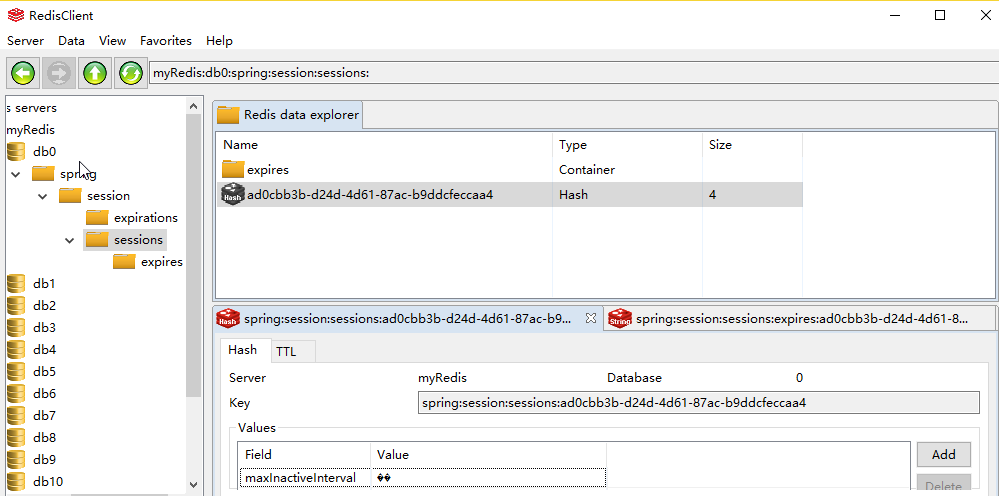
10.访问http://localhost,会发现http请求交替访问后端两个server。且sessionID是一样的“sessionID:ad0cbb3b-d24d-4d61-87ac-b9ddcfeccaa4”。并没有因为server不一致而sessionID不同
使用RedisClient连接Redis Server,确实存储了一个sessionID,如下:
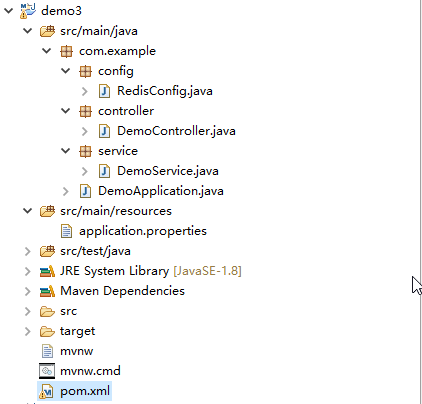
11.maven工程目录
12.实际操纵过程中遇到一个问题:启动springboot工程的时候报错“java.lang.IllegalStateException: Cannot load configuration class: org.springframework.boot.autoconfigure.cache.RedisCacheConfiguration”
解决方法:对于spring-context-support依赖,增加了一个version,且版本为4.3.5.RELEASE。启动,未报错,问题解决。没配version的时候,默认是4.3.6.RELEASE,奇怪。后续有时间再研究。
        <dependency>
             <groupId>org.springframework</groupId>
             <artifactId>spring-context-support</artifactId>
             <version>4.3.5.RELEASE</version>
        </dependency>


**粗体** _斜体_ [链接](http://example.com) `代码` - 列表 > 引用。你还可以使用@来通知其他用户。