准备工作
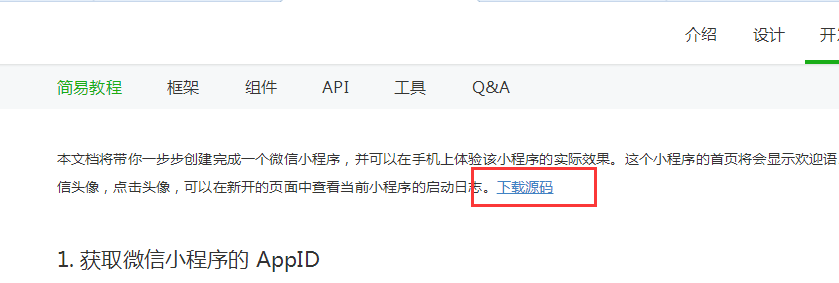
要开发微信小程序之前,需要做一些准备工作,首先进入https://mp.weixin.qq.com/debu...
然后再进入https://mp.weixin.qq.com/debu...,接下来就解压源码包和安装微信开发工具,安装好开发软件之后,在桌面可以看到
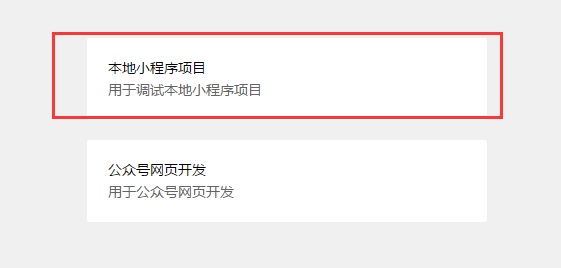
然后点击进入需要手机微信扫码确认登录,扫码完之后选择本地小程序项目
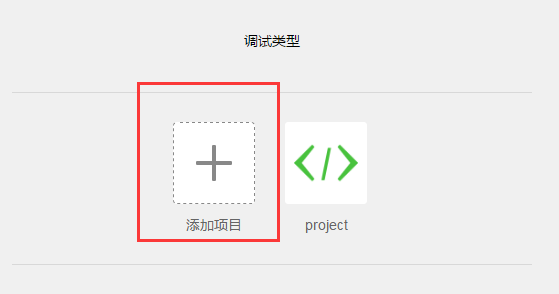
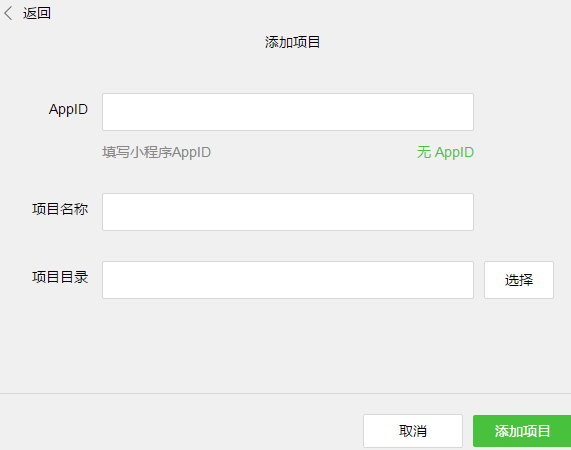
选择添加项目之后
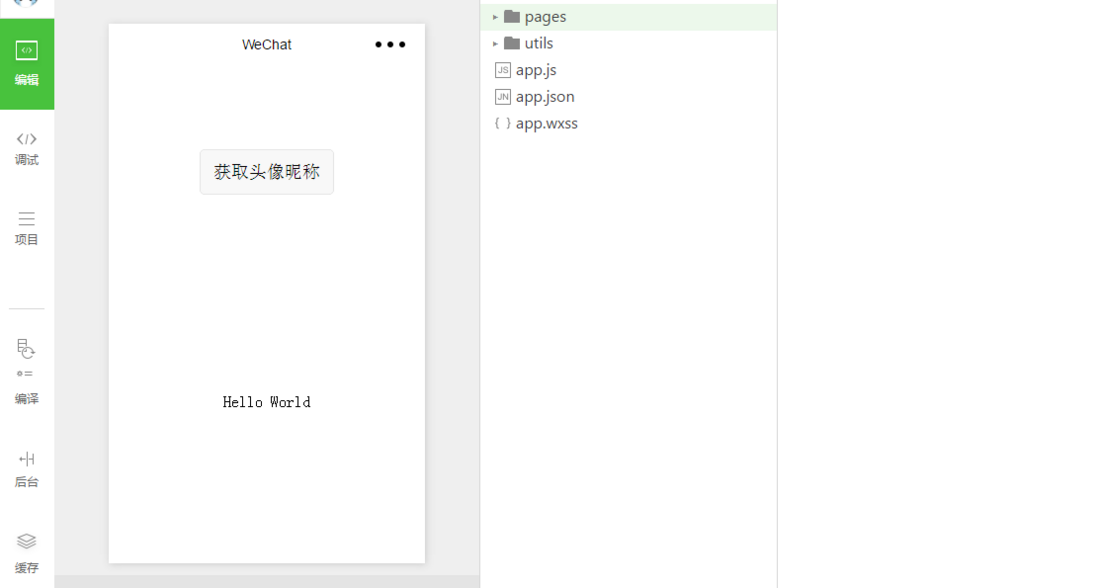
如果想要学习一下微信小程序,暂时不发布的,就可以点击无AppID,如果后期要发布就去官网申请小程序帐号,会给你发一个AppID,项目名称你就随意取一个,项目目录就进入刚刚我们下载解压后的源码包,然后就会进入微信开发的界面了
了解完这个开发界面之后,我们就可以进行简单的微信小程序开发了
小程序配置文件
首先来说下小程序的三个全局文件:
app.js:小程序脚本,声明全局变量和监听处理小程序的生命周期函数
app.json:全局配置文件,如小程序有多少个页面,窗口标题颜色内容,导航条配置,窗口颜色等等,注意:此页不可添加任何注释
app.wxss:存放公共样式
另外还有两个文件,一个是utils这个文件里面主要是放一些通用工具类,重点是pages这个文件,他是存放所有页面的文件夹,小程序页面主要是由三个文件构成,wxml,wxss,js,json,
pages里面的文件你是可以删除,然后建立属于自己的文件名称,目前pages中默认两个文件index和logs你可以删除,但是如果你新建立你的新页面文件,得在app.json中声明,这里要注意一下,在app.json中的pages数组中,第一个声明的页面就是微信小程序会进入的首页
进入开发阶段
1. 改变顶部导航样式
如果要改变某页面顶部导航样式,要在当前页面的json文件中修改,例如,要修改index页面的顶部导航,则在index.json中设置
{
  "navigationBarTitleText": "首页",
  "navigationBarBackgroundColor": "black",
  "navigationBarTextStyle": "#fff"
}
如果要修改全部页面的顶部导航,则要在app.json中修改
  "window": {
    "backgroundTextStyle": "light",
    "navigationBarBackgroundColor": "#fff",
    "navigationBarTitleText": "WeChat",
    "navigationBarTextStyle": "black"
  }
}
如果在index.json中也设置了顶部导航,则优先级别是index.json,app.json里面设置顶部导航是默认样式
index页面设置顶部导航,结果如下:
2.页面跳转问题
首先微信小程序中有个navigator标签,你可以把他理解成web中的a标签
在wxml文件中:
   <!-- 跳转到新页面 -->
    <navigator url="../test/test">navigator跳转</navigator>
   <!-- 跳转到当前页面 -->
    <navigator url="../test/test"  open-type="redirect">redirect跳转</navigator>
当然除了可以在wxml中直接写跳转,也可以用另外一种方法写跳转
在wxml中:
   <text bindtap="navigatorFunc">navigator跳转</text>
   <text bindtap="enterTest">redirect跳转</text>
在js文件中:
 enterTest:function(){
    wx.redirectTo({
      url: '../test/test',
    })
  },

  navigatorFunc:function(){
     wx.navigateTo({
       url: '../test/test',
     })
  },
3.创建轮播图
在wxml中:
<swiper indicator-dots="{{indicatorDots}}"
        autoplay="{{autoplay}}" interval="{{interval}}" duration="{{duration}}">
      <block wx:for="{{imgUrls}}">
        <swiper-item>
           <navigator url="{{item.link}}" hover-class="navigator-hover">
            <image src="{{item.url}}" class="slide-image"/>
           </navigator>
        </swiper-item>
      </block>
</swiper>
swiper不能放在任何元素内部,否则轮播会出错
在wxss中:
.slide-image{
  width: 100%;
}
设置图片宽度铺满整个屏幕
在js中:
 data: {
      imgUrls: [
        {
          link: '/pages/index/index',
          url: 'http://www.wallcoo.com/holiday/2015%20New%20Year%2001/images/2015_celebrating_wallpaper_164701524.jpg'
        }, {
          link: '/pages/logs/logs',
          url: 'http://www.wallcoo.com/holiday/2015%20New%20Year%2001/images/2015_celebrating_wallpaper_164701516.jpg'
        }, {
          link: '/pages/test/test',
          url: 'http://www.wallcoo.com/holiday/2015%20New%20Year%2001/images/2015_celebrating_wallpaper_164701517.jpg'
        }
      ],
      // 是否需要底部轮播小点
      indicatorDots: true,
      // 是否自动播放
      autoplay: true,
      // 自动播放时间间隔
      interval: 5000,
      // 滑动动画时间
      duration: 1000,

  },
其中link为跳转的链接,URL为图片的地址,但是这个图片地址不能是本地地址,必须是线上图片地址或者base64为图片
运行效果如下:
4.底部导航栏切换
在app.json中添加:
"tabBar": {
    "color": "#000",
    "selectedColor": "#1296db",
    "borderStyle": "white",
    "list": [
      {
        "selectedIconPath": "images/1-1.png",
        "iconPath": "images/1.png",
        "pagePath": "pages/index/index",
        "text": "首页"
      },
      {
          "selectedIconPath": "images/1-1.png",
          "iconPath": "images/1.png",
        "pagePath": "pages/logs/logs",
        "text": "日志"
      },
      {
          "selectedIconPath": "images/1-1.png",
          "iconPath": "images/1.png",
        "pagePath": "pages/test/test",
        "text": "测试"
      }
    ]
  }
selectedIconPath为选中时底下图标,iconPath为未选中底下图标,pagePath为点击时切换页面路径,text为顶部文字内容,color为底部文字颜色,selectedColor文字选中颜色,注意:底部导航切换按钮不能超过五个
运行截图:
这里要注意一点,当你的页面路径已经弄成底部导航切换时,其他页面要进入此页面路径切换代码就不能用普通的切换了,正确代码如下:
在js中:
  wx.switchTab({
    url: 'pages/test/test',
  })
或者在wxml中:
<navigator url="/pages/index/index" open-type="switchTab">跳转按钮</navigator>以上两个是等价的
5.表单提交和清空
在wxml中:
<!-- 表单 -->
   <form bindsubmit="formSubmit" bindreset="formReset">
       <view class="group">
          <view class="title">用户名:</view>
          <view class="cont">
             <input type="text" name="username" placeholder="请输入用户名"/>
          </view>
          <view class="clear"></view>
       </view>

        <view class="group">
          <view class="title">性别:</view>
          <view class="cont">
               <radio-group name="gender">
                  <label><radio value="1"/>男</label>
                  <label><radio value="0"/>女</label>
                </radio-group>
          </view>
          <view class="clear"></view>
       </view>

       <view class="group">
          <view class="title">food:</view>
          <view class="cont">
              <checkbox-group name="hobby">
                 <label><checkbox value="0"/>蛋糕</label>
                 <label><checkbox value="1"/>牛排</label>
                 <label><checkbox value="1"/>排骨头</label>
              </checkbox-group>
          </view>
          <view class="clear"></view>
       </view>

       <view class="group">
          <view class="title">同意:</view>
          <view class="cont">
             <switch name="isagree"/>
          </view>
          <view class="clear"></view>
       </view>

       <view class="group">
          <button form-type="submit">提交表单</button>
          <button form-type="reset">清空表单</button>
       </view>
    </form>
在wxss中:
.clear{
  clear: both;
}
.title{
  float: left;
  width: 100px;
  text-align: right;
}
.cont{
  float: left;
}
input{
  border:1px solid gainsboro;
}
.group{
  margin-top:20px;
}
在js中:
  // 提交表单函数
  formSubmit:function(e){
      console.log(e);
      console.log("表单已经提交!");
      console.log("用户名:"+e.detail.value.username);
      console.log("性别:" + (e.detail.value.gender==1?"男":"女"));
  },

  // 清空表单函数
  formReset:function(e){
    console.log("表单已经清空!");
  },
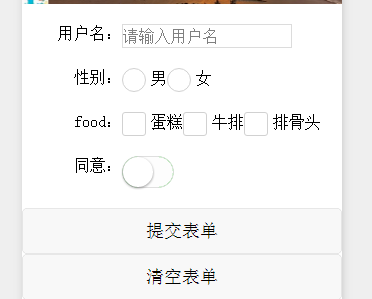
效果如下:
注意:formSubmit为表单提交后执行的函数,e.detail.value中是表单提交上来的数据,这里要注意,存放数据的标签一定要有name属性值才能获取数据
6.弹窗
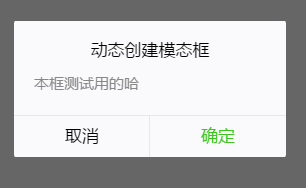
1.模态框
在wxml中:
<view class="modalBox">
  <button bindtap="modalFunc">modal模态框</button>
  <button bindtap="createModal">动态创建模态框</button>
</view>

<!-- 提示框 -->
<modal title="提示" confirm-text="确认" cancel-text="取消" hidden="{{modalHidden}}" mask bindconfirm="confirmFunc" bindcancel="cancelFunc">
  是否确认提交?
</modal>
在js中:
 data: {
    //false显示,true为隐藏
    modalHidden:true
  },

  // 模态框出现
  modalFunc:function(){
    // 显示提示框
    this.setData({
      modalHidden: false
    });
  },

  // 动态创建模态框
  createModal:function(){
    wx.showModal({
      title: '动态创建模态框',
      content: '本框测试用的哈',
      success: function (res) {
        if (res.confirm) {
          console.log('用户点击确定')
        } else if (res.cancel) {
          console.log('用户点击取消')
        }
      }
    })
  },

  // 确认函数
  confirmFunc:function(){
    console.log("点击了确认!");
    // 关闭提示框
    this.setData({
      modalHidden: true
    });
  },

  // 取消函数
  cancelFunc:function(){
    console.log("点击了取消!");
      // 关闭提示框
    this.setData({
      modalHidden: true
    });
  },
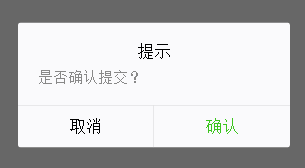
运行结果如下:
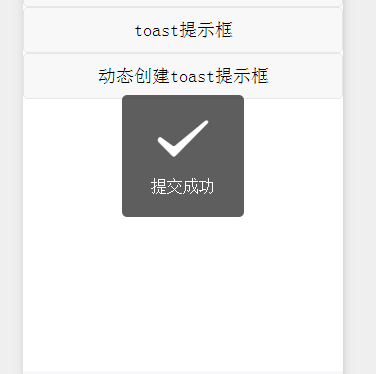
2.提示框
在wxml中:
<view class="modalBox">
  <button bindtap="toastFunc">toast提示框</button>
   <button bindtap="createToast">动态创建toast提示框</button>
</view>


<!-- 提示框 -->
  <toast hidden="{{toastHidden}}">提交成功</toast>
在js中:
  data: {
     //false显示,true为隐藏
    toastHidden:true
  },

  // 提示框出现
  toastFunc:function(){
    // 显示提示框
    this.setData({
      toastHidden: false
    });

    // 两秒后提示框消失
    var that = this;
    setTimeout(function(){
      that.setData({
        toastHidden: true
      });
    },2000);

  },

  // 动态创建提示框
  createToast:function(){
     wx.showToast({
       title: '设置成功',
     })
  },
截图效果如下:
以上这些都是微信小程序里面比较基础的内容,以后如果有新的发现会再次更新本篇文章。





**粗体** _斜体_ [链接](http://example.com) `代码` - 列表 > 引用。你还可以使用@来通知其他用户。