在用Python的urllib和BeautifulSoup写过了很多爬虫之后,本人决定尝试著名的Python爬虫框架——Scrapy.
本次分享将详细讲述如何利用Scrapy来下载豆瓣电影Top250, 主要解决的问题有:
- 如何利用ImagesPipeline来下载图片
- 如何对下载后的图片重命名,这是因为Scrapy默认用Hash值来保存文件,这并不是我们想要的
首先我们要爬取的豆瓣电影Top250网页截图如下:
网页的结构并不复杂,所以,我们决定把所有的250部电影的图片都下载下来。接下来,就开始我们的Scrapy之旅啦~~
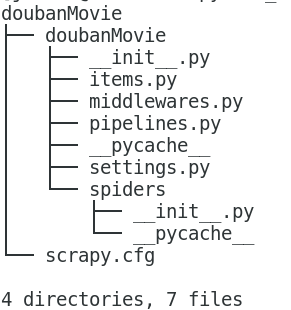
首先我们新建一个Scrapy项目,叫做doubanMovie.
scrapy startproject doubanMovie该项目的文件树形结构如下:
修改items.py如下:
# -*- coding: utf-8 -*-
import scrapy

class DoubanmovieItem(scrapy.Item):
    # two items: url and name of image
    url = scrapy.Field()
    img_name = scrapy.Field()
这是我们用来存放图片的url和name的部分。
接着,在spiders文件夹下,新建爬虫(Spider)文件:doubanMovieSpider.py, 文件代码如下:
import scrapy
from scrapy.spiders import Spider
from scrapy.selector import Selector
from doubanMovie.items import DoubanmovieItem

class movieSpider(Spider):
    # name of Spider
    name = "movie"
    #start urls
    start_urls = ["https://movie.douban.com/top250"]
    for i in range(1,10):
        start_urls.append("https://movie.douban.com/top250?start=%d&filter="%(25*i))

    #parse function
    def parse(self, response):

        item = DoubanmovieItem()
        sel = Selector(response)
        images = sel.xpath('//*[@id="content"]/div/div[1]/ol/li')

        item['url'] = []
        item['img_name'] = []
        # append the url and name of the image in item
        for image in images:
            # extract url and name of the image
            site = image.xpath('div/div[1]/a/img/@src').extract_first()
            img_name = image.xpath('div/div[1]/a/img/@alt').extract_first()

            item['url'].append(site)
            item['img_name'].append(img_name)

        yield item
该部分代码主要利用xpath来提出网页中的电影图片的url和name,并添加到item中。
为了能够对下载后的图片进行重命名,我们需要修改pipeline.py文件,代码如下:
# -*- coding: utf-8 -*-

from scrapy.pipelines.images import ImagesPipeline
from scrapy.http import Request

class DoubanmoviePipeline(object):
    def process_item(self, item, spider):
        return item

class MyImagesPipeline(ImagesPipeline):
    # yield meta for file_path() function
    def get_media_requests(self, item, info):
        for url in item['url']:
            yield Request(url, meta={'item': item, 'index':item['url'].index(url)})

    # rename the image
    def file_path(self, request, response=None, info=None):
        item = request.meta['item']
        index = request.meta['index']

        image_name = item['img_name'][index]
        return 'full/%s.jpg' % (image_name)
在这儿我们添加了MyImagesPipeline类,主要目的是用来对下载后的图片进行重命名。
最后一步,也是关键的一步,就是修改settings.py文件,将其中的ROBOTSTXT_OBEY设置为False, 这是为了防止爬虫被禁,并且添加以下代码:
USER_AGENT = "Mozilla/5.0 (X11; Linux x86_64; rv:10.0) Gecko/20100101 Firefox/10.0"

ITEM_PIPELINES {'doubanMovie.pipelines.DoubanmoviePipeline': 2,
                'doubanMovie.pipelines.MyImagesPipeline':1 }

IMAGES_URLS_FIELD = 'url'
IMAGES_STORE = r'.'
在上面的代码中,我们设置了USER_AGENT, 这是为了在Linux系统中模拟浏览器的设置,读者可以根据自己的系统和浏览器来设置不同的USER_AGENT. 同时, 我们又加了ITEM_PIPELINES管道和图片的保存路径。
一切就绪,我们就可以运行爬虫啦。切换到spiders文件夹下,输入scrapy list可以查看爬虫的名字,输入scrapy crawl movie即可运行爬虫。
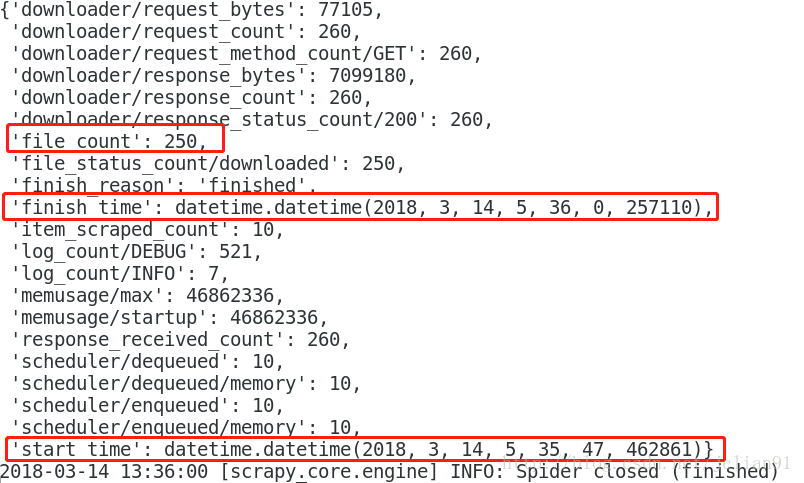
movie爬虫的运行结果如下:
该爬虫下载了250个文件,用时约13秒,效率惊人啊!
下载后的图片保存在当前文件夹(spiders)下的full文件夹下,我们来看一下里面的内容:
Surprise!Wonderful! 里面有没有你喜欢的电影呢?
本项目的Github地址为 https://github.com/percent4/d..., 欢迎大家访问哦~~


**粗体** _斜体_ [链接](http://example.com) `代码` - 列表 > 引用。你还可以使用@来通知其他用户。