Swagger2简介
简单的来说,Swagger2的诞生就是为了解决前后端开发人员进行交流的时候API文档难以维护的痛点,它可以和我们的Java程序完美的结合在一起,并且可以与我们的另一开发利器Spring Boot来配合使用。
开始使用
第一步:导入POM文件
         <dependency>
            <groupId>io.springfox</groupId>
            <artifactId>springfox-swagger2</artifactId>
            <version>2.9.2</version>
        </dependency>

        <!-- 这里使用 swagger-bootstrap-ui 替代了原有丑陋的ui,拯救处女座~ -->
        <dependency>
            <groupId>com.github.xiaoymin</groupId>
            <artifactId>swagger-bootstrap-ui</artifactId>
            <version>1.9.0</version>
        </dependency>
#### 第二步:添加配置类
我们需要新增一个Swagger2Config 的配置类:
/**
 *    Swagger2 配置类
 * @author vi
 * @since 2019/3/6 8:31 PM
 */
@Configuration
public class Swagger2Config {

    @Bean
    public Docket createRestApi() {
        return new Docket(DocumentationType.SWAGGER_2)
                .apiInfo(apiInfo())
                .select()
                .apis(RequestHandlerSelectors.basePackage("indi.viyoung.viboot.*"))
                .paths(PathSelectors.any())
                .build();
    }

    private ApiInfo apiInfo() {
        return new ApiInfoBuilder()
                .title("viboot-swagger2")    //标题
                .description("Restful-API-Doc")    //描述
                .termsOfServiceUrl("https://www.cnblogs.com/viyoung") //这里配置的是服务网站,我写的是我的博客园站点~欢迎关注~
                .contact(new Contact("Vi的技术博客", "https://www.cnblogs.com/viyoung", "18530069930@163.com")) // 三个参数依次是姓名,个人网站,邮箱
                .version("1.0") //版本
                .build();
    }
}
第三步:在启动类中添加配置
注意一定要记得添加@EnableSwagger2注解
/**
 * @author vi
 * @since 2019/3/6 6:35 PM
 */
@SpringBootApplication
@ComponentScan(value = "indi.viyoung.viboot.*")
@MapperScan(value = "indi.viyoung.viboot.swagger2.mapper")
@EnableSwagger2
@EnableSwaggerBootstrapUI
public class ViBootSwaggerApplication {
    public static void main(String[] args) {
        SpringApplication.run(ViBootSwaggerApplication.class, args);
    }
}
第四步:通过注解来完成API文档
1. @Api
| 注解名称 | 注解属性 | 作用域 | 属性作用 |
|---|---|---|---|
@Api |
tags | 类 | 说明该类的作用 |
| value | 类 | 说明该类的作用 |
举个🌰:
@Api(value = "用户类控制器",tags="用户类控制器")
public class UserController {
...
}
2 . @ApiOperation
| 注解名称 | 注解属性 | 作用域 | 属性作用 |
|---|---|---|---|
@ApiOperation() |
value | 方法 | 描述方法作用 |
| notes | 方法 | 提示内容 | |
| tags | 方法 | 分组 |
举个🌰:
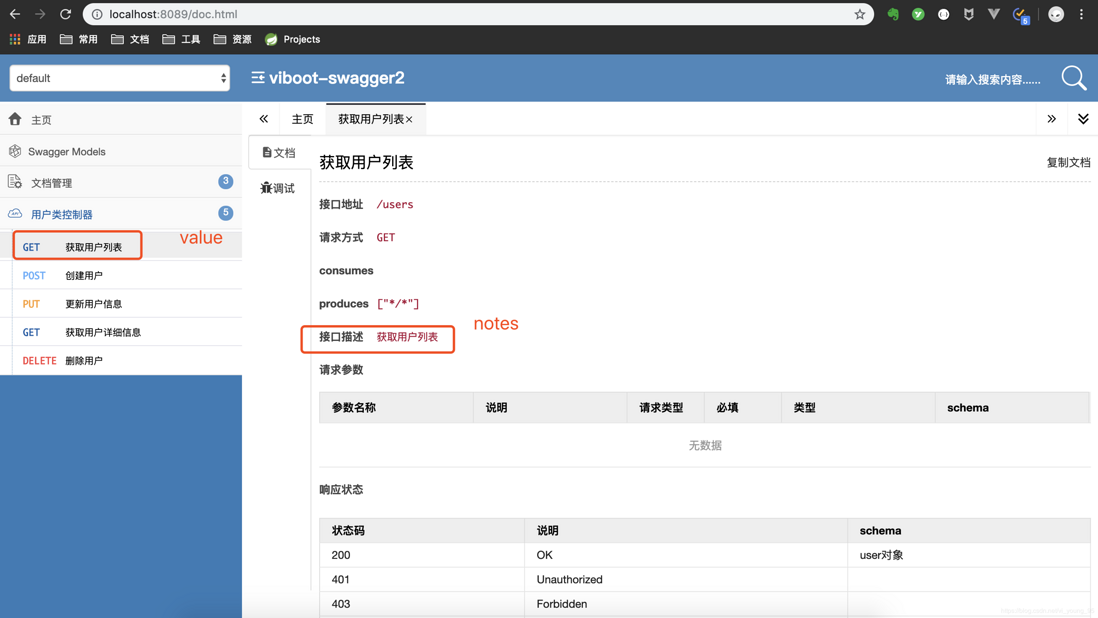
     @ApiOperation(value = "获取用户列表",notes = "获取用户列表")
    public List<User> get() {
         ...
    }
3. @ApiParam
| 注解名称 | 注解属性 | 作用域 | 属性作用 |
|---|---|---|---|
@ApiParam() |
name | 方法参数 | 参数名 |
| value | 方法参数 | 参数说明 | |
| required | 方法参数 | 是否必填 |
举个🌰:
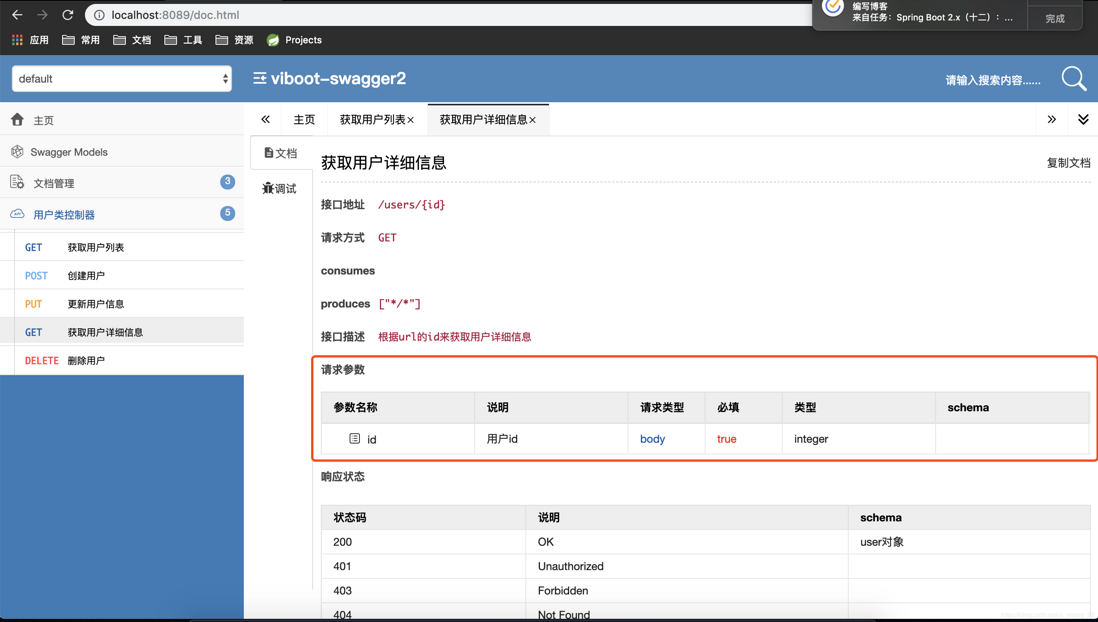
    @ApiOperation(value="获取用户详细信息", notes="根据url的id来获取用户详细信息")
    public User get(@ApiParam(name="id",value="用户id",required=true) Long id) {
        log.info("GET..{}...方法执行。。。",id);
        return userService.getById(id);
    }
4. @ApiModel && @ApiModelProperty
| 注解名称 | 注解属性 | 作用域 | 属性作用 |
|---|---|---|---|
@ApiModel() |
value | 类 | 对象名 |
| description | 类 | 描述 | |
@ApiModelProperty() |
value | 方法 | 字段说明 |
| name | 方法 | 属性名 | |
| dataType | 方法 | 属性类型 | |
| required | 方法 | 是否必填 | |
| example | 方法 | 举例 | |
| hidden | 方法 | 隐藏 |
举个🌰:
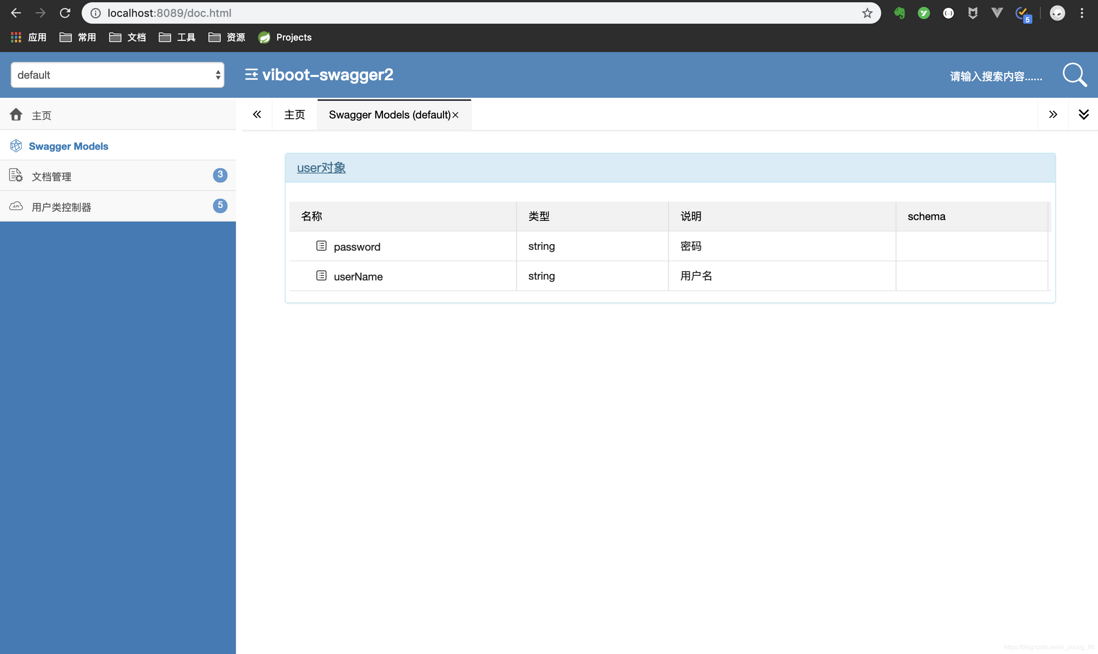
@ApiModel(value="user对象",description="用户对象user")
public class User implements Serializable {

    private static final long serialVersionUID = 1L;

    @TableId(value = "id", type = IdType.AUTO)
    @ApiModelProperty(value = "用户ID",example = "1000001",hidden=true)
    private Long id;

    @ApiModelProperty(value="用户名",required = true,dataType = "String")
    private String userName;

    @ApiModelProperty(value = "密码")
    private String password;
}
5. @ApiImplicitParam && @ApiImplicitParams
`@ApiImplicitParam`可以单个用于方法至上,多个参数的话可以把`@ApiImplicitParam`放到`@ApiImplicitParams`中,这里只罗列`@ApiImplicitParam`的属性:
| 注解名称 | 注解属性 | 作用域 | 属性作用 |
|---|---|---|---|
@ApiImplicitParam() |
value | 方法 | 参数说明 |
| name | 方法 | 参数名 | |
| dataType | 方法 | 数据类型 | |
| paramType | 方法 | 参数类型 | |
| example | 方法 | 举例 |
举个🌰:
    @ApiImplicitParams({
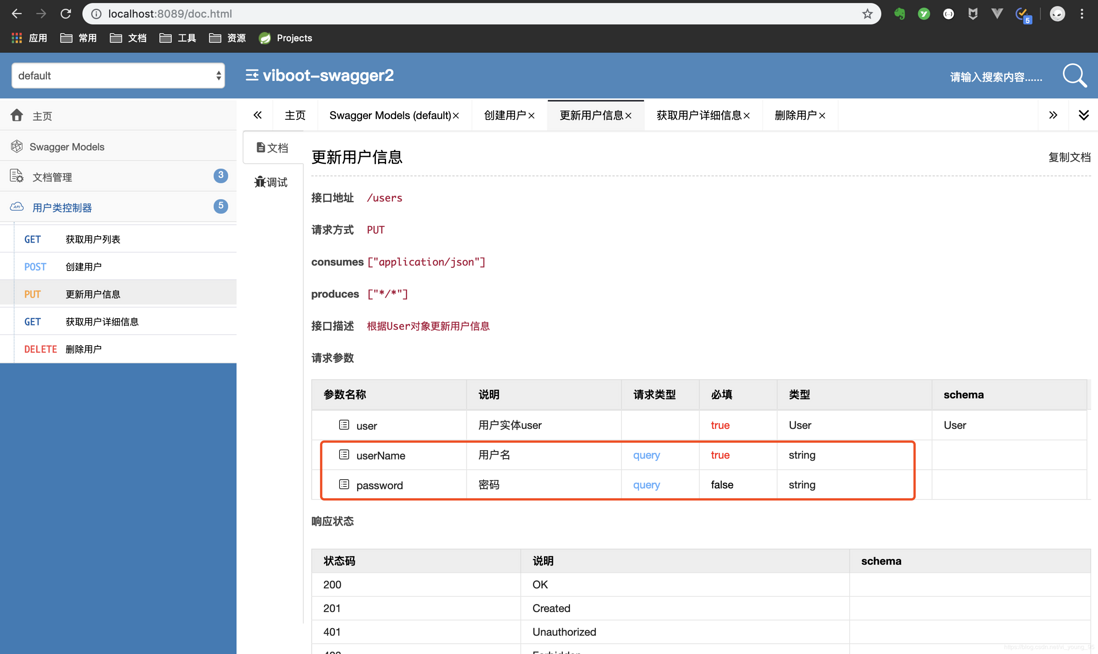
            @ApiImplicitParam(name = "user", value = "用户实体user", required = true, dataType = "User")
    })
    public void put(User user) {
        userService.updateById(user);
        log.info("PUT方法执行。。。");
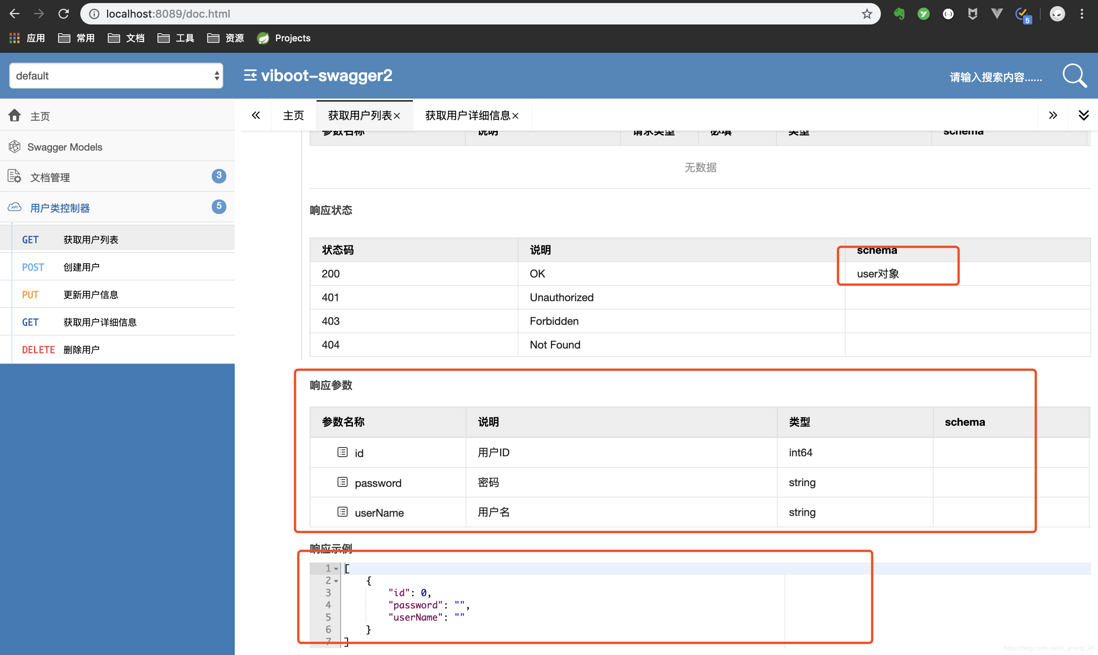
}这里需要注意一点,我们并没有在注解中写图中圈中的两个参数,这个是去读取了我们刚刚为User类的注解,并将用户名设置为必填!
6.@ApiResposne && @ApiResponses
@ApiResponses与@ApiResponse的关系和@ApiImplicitParam && @ApiImplicitParams 的关系和用法都是类似的
| 注解名称 | 注解属性 | 作用域 | 属性作用 |
|---|---|---|---|
@ApiResponse() |
response | 方法 | 返回类 |
| code | 方法 | 返回码 | |
| message | 方法 | 返回信息 | |
| examples | 方法 | 例子 |
最后再聊聊这个UI
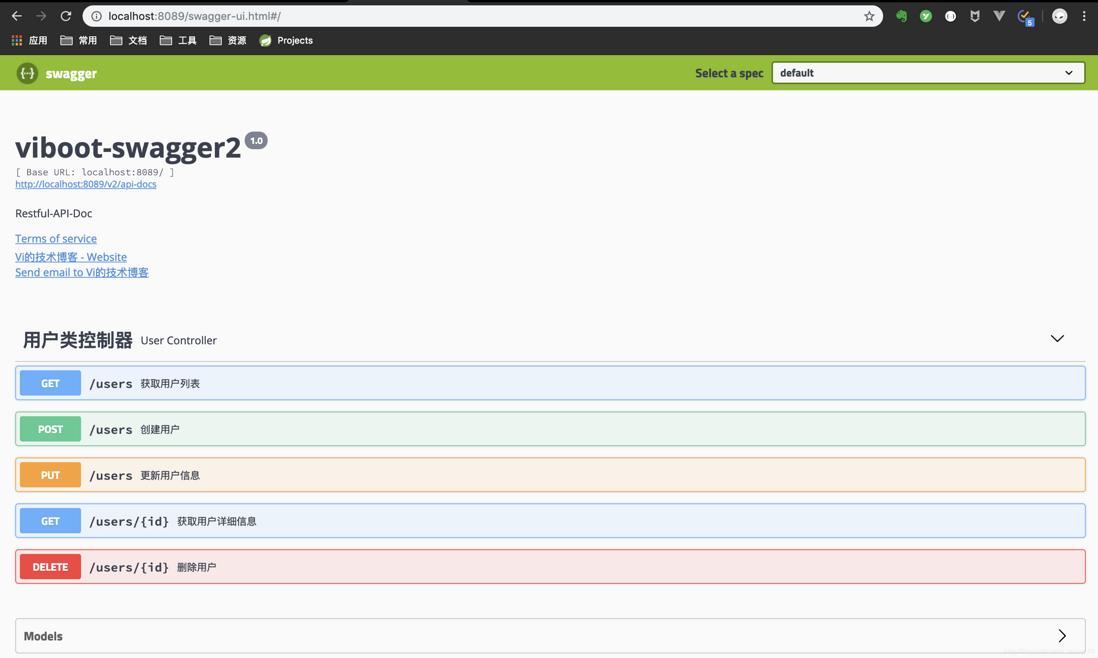
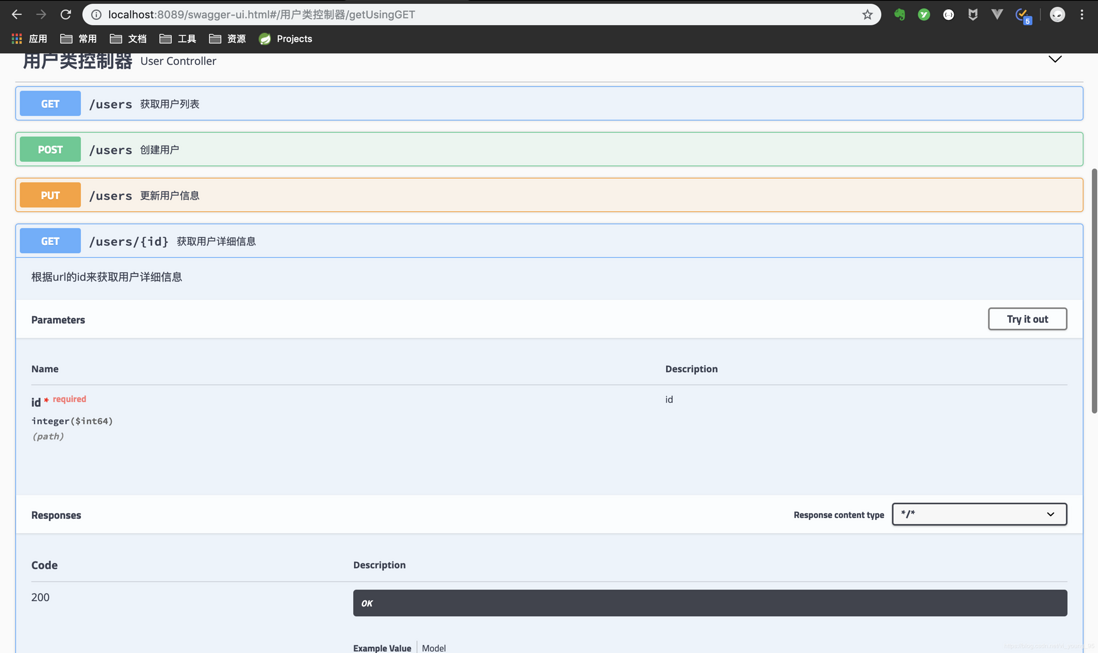
先贴几张spring-fox的ui(正是我们所熟知的那一套)
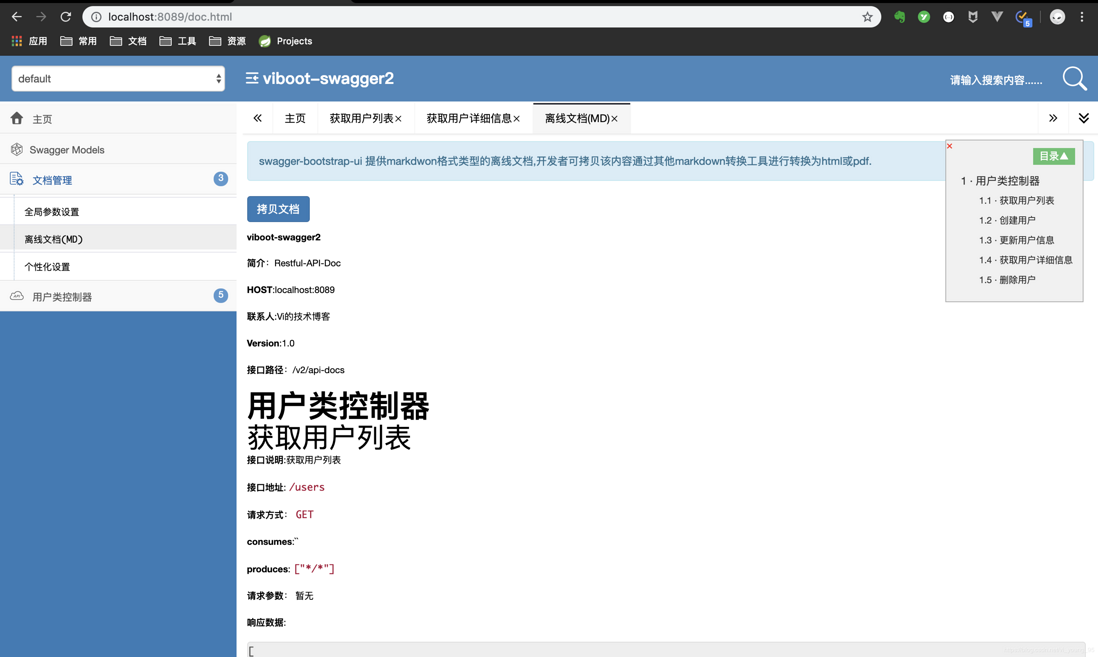
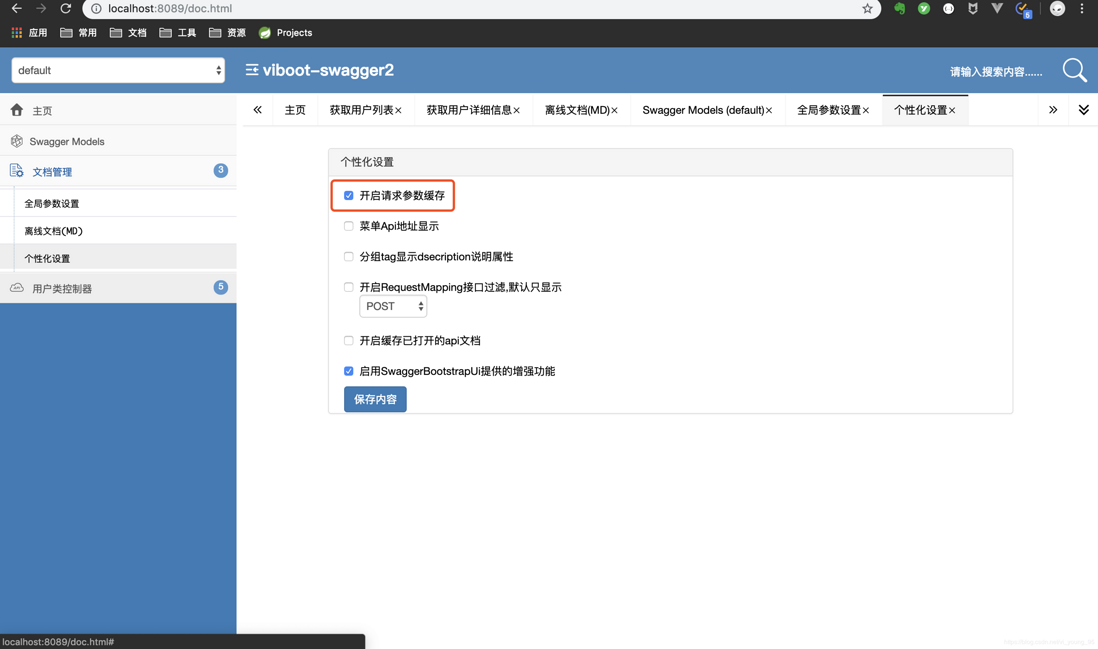
相信看到这里,大家心里对于这两套UI的选择应该都有个答案了,当然bootstrap风格的ui不仅好看,而且有各种强大的功能~
- 导出md文档
- 参数缓存
公众号
原创文章,文笔有限,才疏学浅,文中若有不正之处,万望告知。


**粗体** _斜体_ [链接](http://example.com) `代码` - 列表 > 引用。你还可以使用@来通知其他用户。