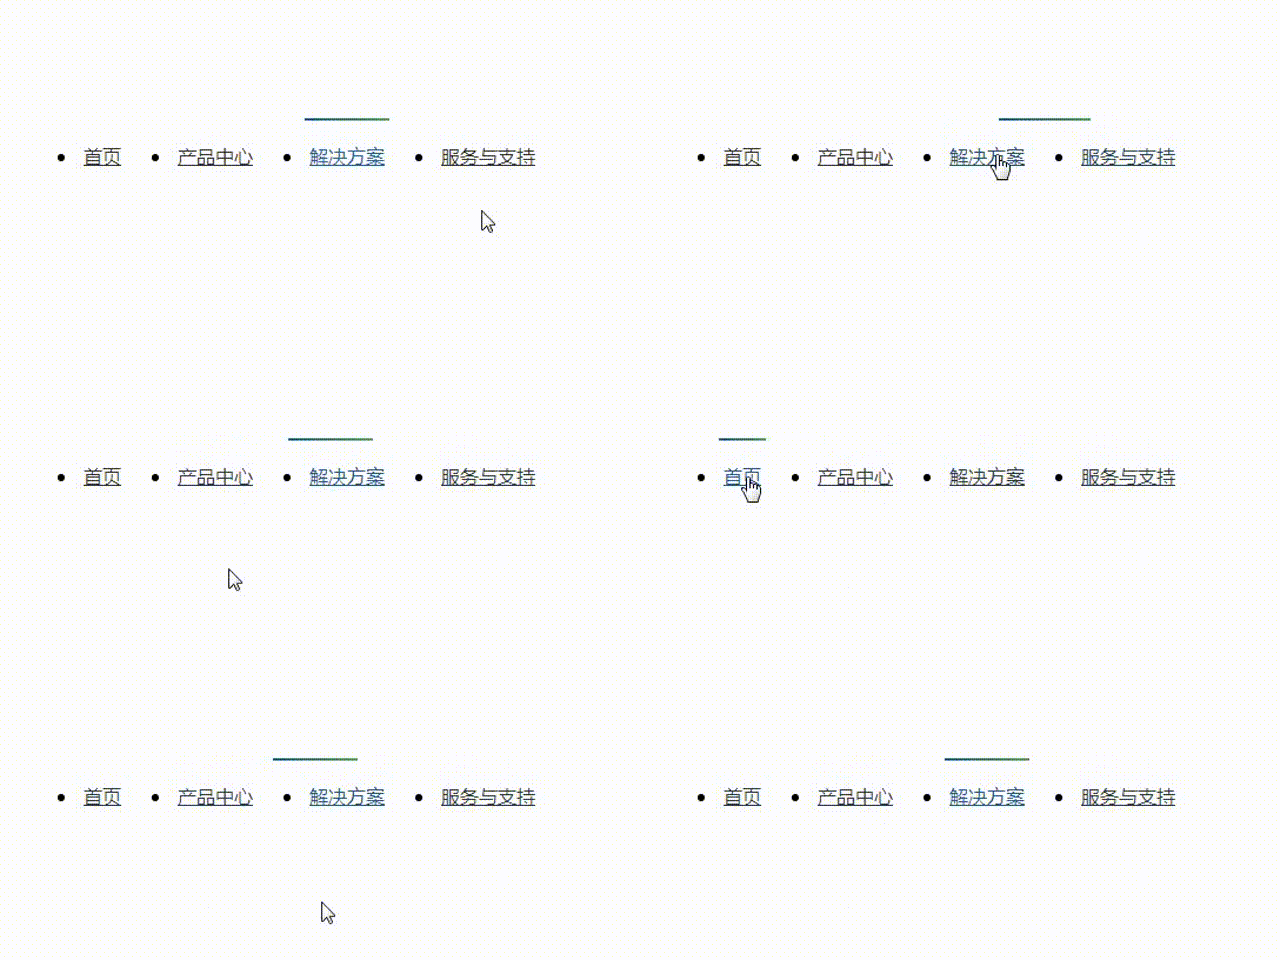
最近有一个高亮的导航上面会有一个动画的悬浮块效果,网上有很多类似的效果,参考了很多,拿过来修修改改,终于实现了我工作中的需求。js部分不是很多:
<html>

<head></head>
<!-- <link rel="stylesheet" href="css/css.css"> -->
<style>
    nav {
        position: relative
    }

    nav #line {
        position: absolute;
        top: 0;
        left: 0;
        width: 40px;
        height: 2px;
        background: -webkit-linear-gradient(315deg, #0c5fa4, #4aa654);
        background: -moz- oldlinear-gradient(315deg, #0c5fa4, #4aa654);
        background: -o-linear-gradient(315deg, #0c5fa4, #4aa654);
        background: linear-gradient(135deg, #0c5fa4, #4aa654);
        -webkit-transition: all 0.4s;
        -o-transition: all 0.4s;
        -moz-transition: all 0.4s;
        transition: all 0.4s
    }
    nav ul {
        text-align: center;
        position: relative;
        z-index: 1
    }
    nav ul li {
        float: left;
        margin-right: 40px;
        position: relative
    }
    nav ul li:hover .stair {
        color: #1e649f
    }
    nav ul li.active .stair {
        color: #1e649f
    }
    nav ul li .stair {
        color: #333;
        font-size: 16px;
        height: 64px;
        line-height: 64px;
        padding: 0 4px;
        display: inline-block;
        -webkit-transition: all 0.3s;
        -o-transition: all 0.3s;
        -moz-transition: all 0.3s;
        transition: all 0.3s;
        position: relative
    }
    nav ul li .stair .new-icon {
        position: absolute;
        width: 22px;
        top: 9px;
        right: -22px
    }

    nav ul li .second {
        padding-top: 25px;
        padding-bottom: 25px;
        position: absolute;
        width: 150px;
        top: 74px;
        left: 50%;
        margin-left: -95px;
        background-color: #fff;
        -webkit-box-sizing: border-box;
        -moz-box-sizing: border-box;
        box-sizing: border-box;
        display: none
    }
    nav ul li .second:before {
        position: absolute;
        content: "";
        width: 100%;
        height: 10px;
        background-color: transparent;
        top: -10px;
        left: 0;
        z-index: 2
    }
    nav ul li .second .item {
        display: block;
        line-height: 40px;
        color: #666;
        font-size: 16px
    }
    nav ul li .second .item:hover {
        color: #1e649f
    }
    nav ul li .second .item.active {
        color: #1e649f
    }
</style>
<script src="jquery.min.js"></script>

<body>
    <nav>
        <span id="line"></span>
        <ul class="clearfix">
            <li class="">
                <a class="stair" href="javascript:;">首页</a>
            </li>
            <li class="">
                <a class="stair" href="javascript:;">产品中心</a>
            </li>
            <li class="active">
                <a class="stair" href="javascript:;">解决方案 </a>
            </li>
            <li class="">
                <a class="stair" href="javascript:;">服务与支持 </a>
            </li>
        </ul>
    </nav>
    <script>
        // 悬浮的高亮导航
        var navActive = $("nav li.active");
        $("#line, .triangle-color").width($("li.active").outerWidth());
        $("#line, .triangle-color").offset({ left: $("li.active").offset().left })
        $("nav li").hover(function () {
            $(this).addClass("active").siblings().removeClass("active");
            $("#line, .triangle-color").width($("li.active").outerWidth());
            $("#line, .triangle-color").offset({ left: $("li.active").offset().left })
        }, function () {
            $("nav li").removeClass("active");
            navActive.addClass("active");
            $("#line, .triangle-color").width(navActive.outerWidth());
            $("#line, .triangle-color").offset({ left: navActive.offset().left })
        });
    </script>
</body>
</html>
上面是完整的代码。
基本原理是鼠标移入获得移入导航的偏移位置
($("li.active").offset().left)
和移入导航的宽度,最终把获得的值赋给悬浮的块。
不过记得要获取初始导航高亮的元素$("nav li.active"),因为在鼠标移出导航后,要把悬浮块的位置重新给初始导航。
上面是我的总结,希望能帮到有需要的人,如果有写的有问题的地方,也欢迎朋友能够指出来。

**粗体** _斜体_ [链接](http://example.com) `代码` - 列表 > 引用。你还可以使用@来通知其他用户。