Preface
Some students may think that setting up a blog is a cumbersome task. You need to purchase a registered domain name and configure a server, and you also need to spend money to maintain them. It doesn't matter, even if you don't have these, you can still build your own blog. You only need to prepare a github account.
The overview of this article is as follows:

Build a blog
Install hexo
npm install -g hexo-cliInitialize the project
Now we have installed hexo. Next, use hexo to initialize the blog project.
// 初始化生成blog项目
hexo init blog
Configure the theme
The default theme of hexo is _landscape, now we configure the theme to keep. _
// 确认目录是否切换到了blog中,如果没有,则将目录切换到blog中
cd blog

// 安装keep主题
npm install hexo-theme-keep

// 修改_config.yml配置文件
theme: keep

// 预览网站
hexo server
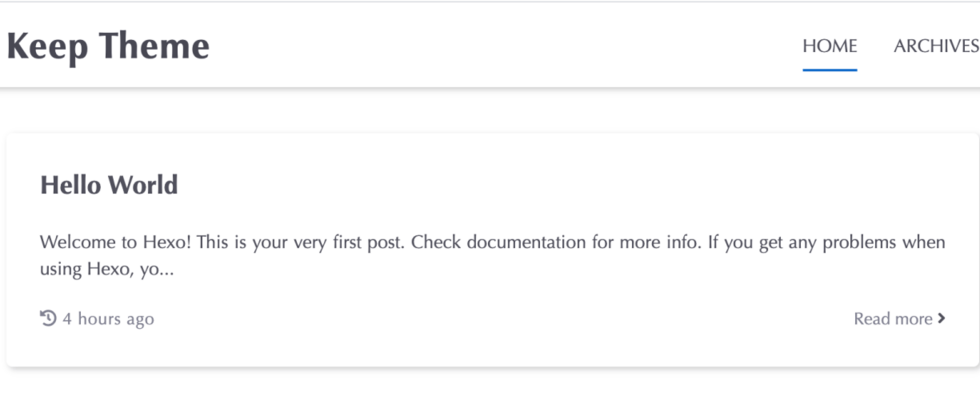
Open http://localhost:4000 , as shown in the figure
Add article
New
Now, let’s create a new blog
// 在blog项目中,执行如下命令:新建文章
hexo new post 今日菜谱
As shown in the figure, the newly created blog is stored in the blog/source/_posts directory in markdown format.
edit
Add text
Now we open [Today's Recipe.md] and write down our today’s recipe.
Then save. Refresh the http://localhost:4000. can see the latest article we just updated. As shown
Add categories and tags
Then we add categories and tags to the article: Open [Today's Recipe.md] and modify it as follows
Then, open the terminal and execute the following commands respectively.
hexo new page categories
hexo new page tags
As shown below, hexo will create a categories and tags folder in the souce directory, which all contain an index.md file.

Now we visit the following addresses in the browser, and then we can see the categories and tags we added. Click the [Food] category and [Cookbook] tab to see the articles belonging to them.
http://localhost:4000/categories/
In order to directly access tags and categories on the homepage, we can modify the node_moduels/hexo-theme-keep/_config.yml configuration file as follows:
Refresh http://localhost:4000 , as shown in the figure
Publish draft
If you don’t want the article to be publicly accessible yet, you can create a draft first. as follows
hexo new draft 今日随想
Refresh http://localhost:4000 temporarily unable to access this newly created article, if we want to access this article, we need to publish the article, execute the following command
// 发布草稿
hexo publish draft 今日随想
Now this post has moved from the _draft directory to the _post directory.
Then, we refresh http://localhost:4000 , you can see this article
Deployment blog
Now we use github page to deploy our blog. First you need to have a github account, if not, you need to register one first.
New warehouse
1. We open github , and then click the New repository button, as shown in the figure
2. Create a username .github.io , where username is your username on GitHub
3. After successfully creating a long warehouse, copy the https address of the warehouse, as shown in the figure
deploy
// 确认目录是否切换到了blog中,如果没有,则将目录切换到blog中
cd blog

// 安装部署插件
npm install hexo-deployer-git --save

// 修改_config.yml配置文件
// 将复制的地址,黏贴到如下repo字段中
deploy:
    type: git
  repo: https://github.com/one-cheese/one-cheese.github.io.git
    branch: master

// 部署网站到创建的仓库
hexo deploy
After the deployment is complete, we refresh the one-cheese.github.io warehouse, and all the static resources in the public generated locally are uploaded to the warehouse, as shown in the figure.
Now, visit the github page address one-cheese.github.io, you can see the successfully deployed blog.


**粗体** _斜体_ [链接](http://example.com) `代码` - 列表 > 引用。你还可以使用@来通知其他用户。