Talk about what Svelte.js technology does and how to achieve it (below)
1. Loop statement
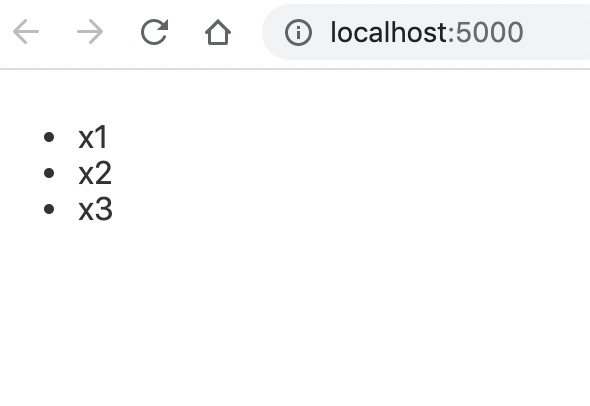
We are definitely inseparable from the loop rendering. Svelte.js provides us with an interesting way of writing.
<script>
  const arr = ['x1', 'x2', 'x3'];
</script>

<ul>
  {#each arr as item}
    <li>{item}</li>
  {/each}
</ul>
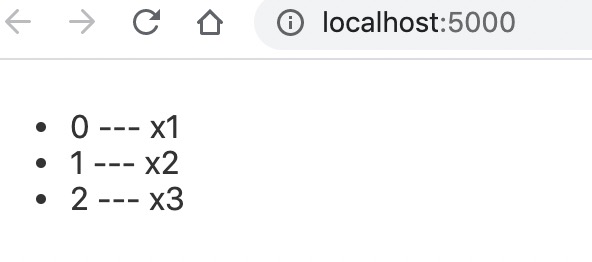
Although Svelte.js does not have a virtual dom, key is also needed when looping. Its writing is a bit special.
<script>
  const arr = ['x1', 'x2', 'x3'];
</script>

<ul>
  {#each arr as item, i (i)}
    <li>{i} --- {item}</li>
  {/each}
</ul>
The above (i) is key value, i is the serial number must be used , the item spaced.
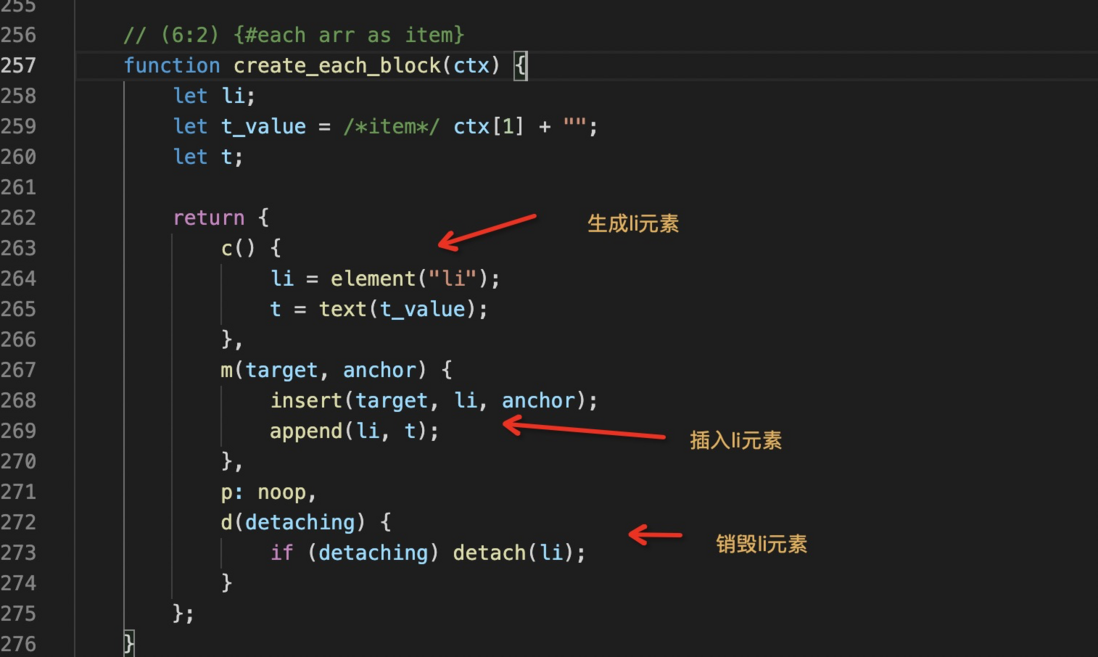
2. What does the loop statement compile into
Initialization is just a variable. This is nothing to say.
ctx in Figure 2 is a prime group, ctx[0] is our defined arr , and ctx[1] is the value corresponding to the current li.
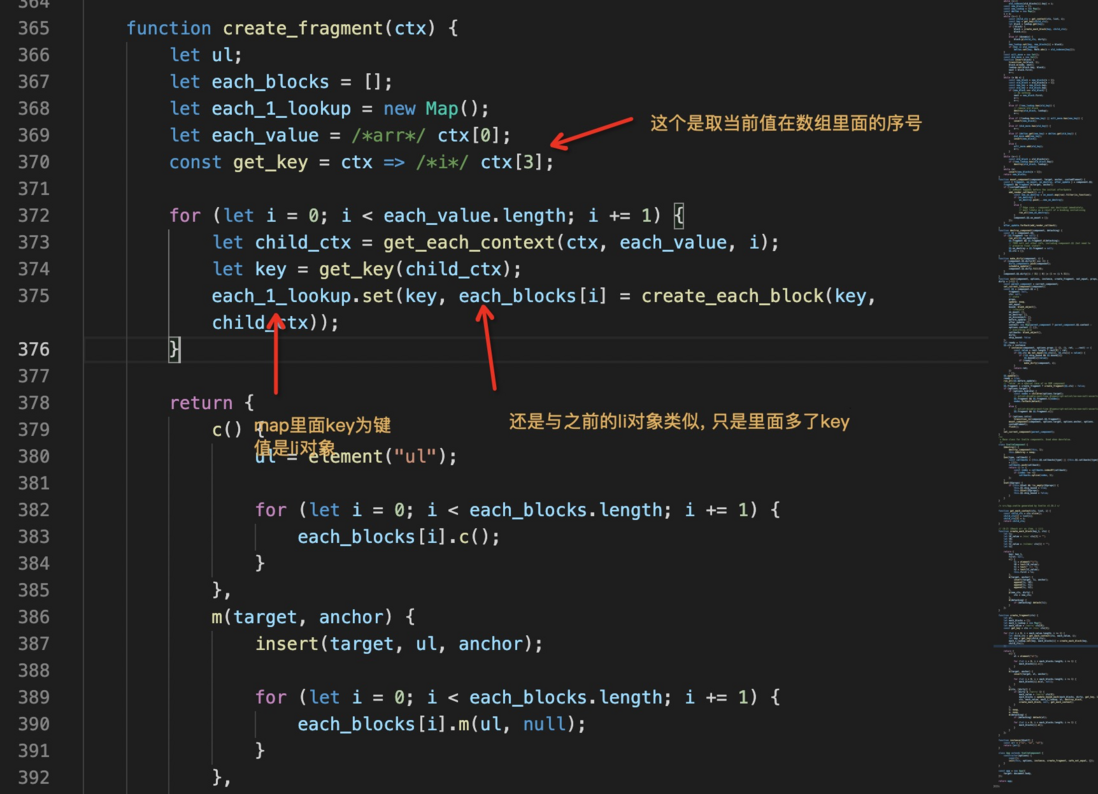
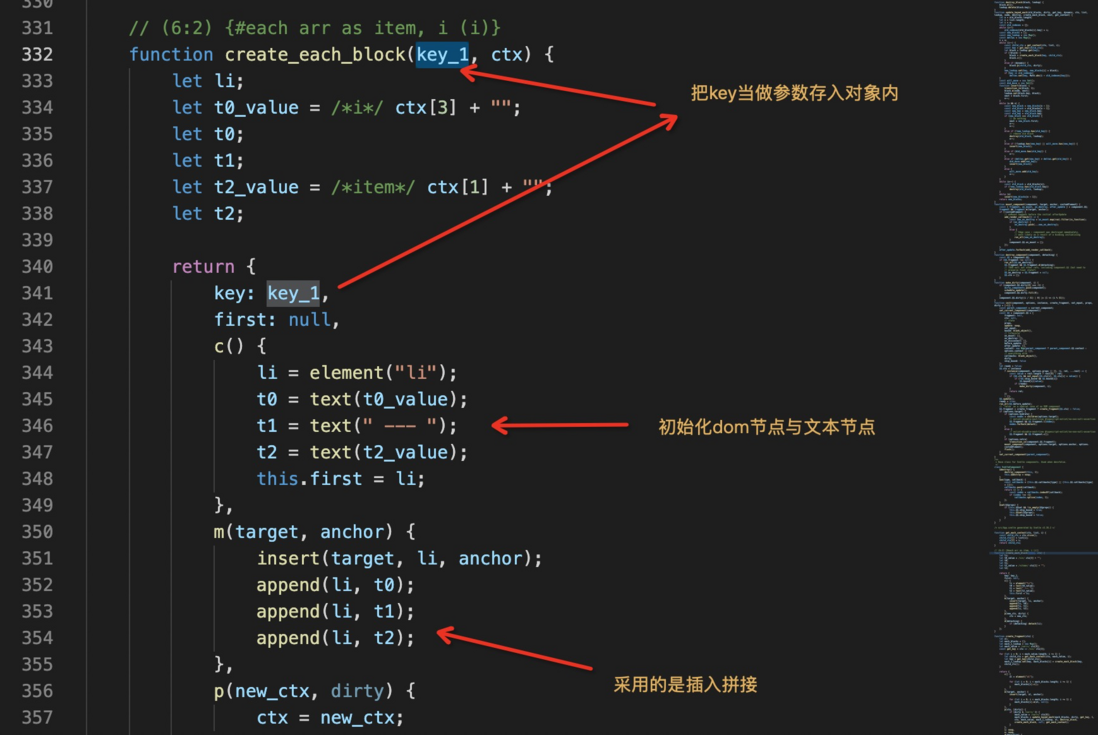
3. How to deal with key in loop statement
The following is the compiled code of the loop body with the key set.
Let's focus on how the key works when updating the dom data.
In fact, the diff algorithm is also needed to update the dom Svelte.js
Four. Parent-child components
Parent component
/src/App.svelte
<script>
  import Son from './子组件.svelte';
  const options = {
    msg: 'xxxxxx',
  };

  // 如此传递属性
  const footer = {
    footer1: 'footer1',
    footer2: 'footer2',
  };

  // 处理订阅事件
  function handleEmit(res) {
    console.log('相应事件1', res);
    console.log('相应事件2', res.detail);
  }
</script>

<div>
  <p>父组件</p>
  <Son {options} {...footer} on:emit={handleEmit} />
</div>
Subassembly
/src/subcomponent.svelte
<script>
  import { createEventDispatcher } from 'svelte';

  export let options;
  export let footer1;
  export let footer2;

  // 触发事件发布
  const dispatch = createEventDispatcher();

  function emit() {
    dispatch('emit', {
      msg: '你好',
    });
  }
</script>

<div>
  <p>子组件: {options.msg}</p>
  <p>footer1: {footer1}</p>
  <p>footer2: {footer2}</p>
  <button on:click={emit}>点击触发事件</button>
</div>
- The sub-component can be used
import - The parent component passes parameters between lines, and the child component
exportreceives it. - The parent component can use the spread operator to pass parameters.
- The parent component
on:emit={handleEmit}listens to events published by the child component. - The sub-component introduces
createEventDispatcherrealize the release of events. - The child component can change the passed value at will, and will not affect the value of the value in the parent component (
focus). - The change of the value passed by the parent component to the child component will re-render the child component.
Five. Parent-child component packaging analysis
Six. Style
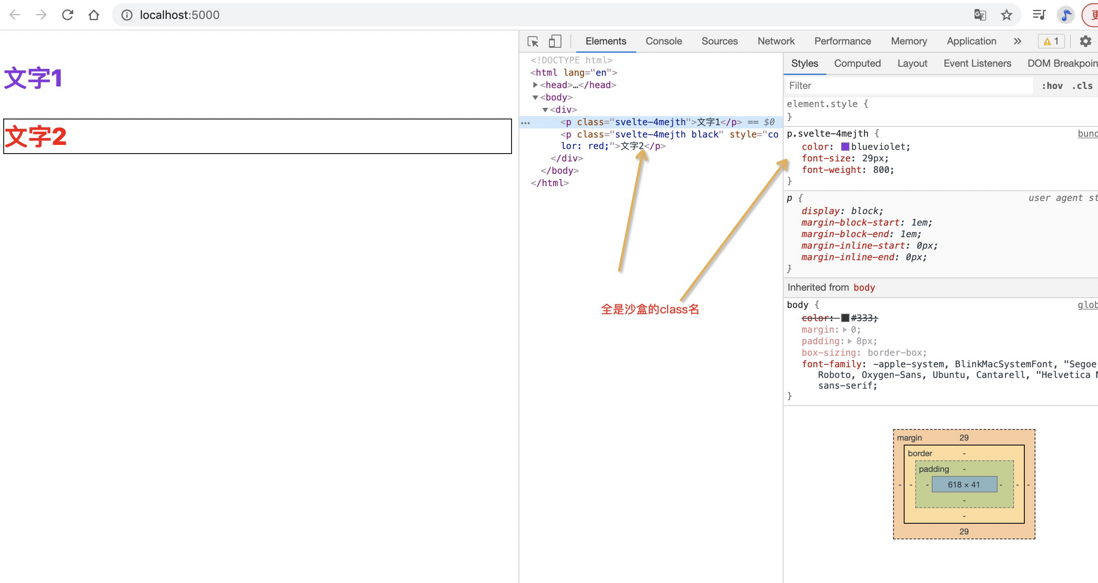
The Svelte.js is sandboxed by default, which means that .svelte file will not penetrate the whole world.
It’s very convenient and cool that we don’t use template strings to splice, so it’s cool to write styles.
<script>
  const color = 'red';
  const isBlack = true;
</script>

<div>
  <p>文字1</p>
  <p style="color:{color}" class:black={isBlack}>文字2</p>
</div>

<style>
  p {
    color: blueviolet;
    font-size: 29px;
    font-weight: 800;
  }
  .black {
    border: 1px solid black;
  }
</style>
class:black={isBlack} means that only isBlack is true will be given the className of black
If you want to set the global style, you can html it in the 060bc8ea26b1a3 or main.js file.
Seven. Life Cycle
The concept of life cycle is now basically available in all libraries, and svelte does a good job at this point.
<script>
  import { onMount, onDestroy, beforeUpdate, afterUpdate } from 'svelte';

  onMount(() => {
    console.log('mounted');
  });

  onDestroy(() => {
    console.log('onDestroy');
  });

  beforeUpdate(() => {
    console.log('beforeUpdate');
  });

  afterUpdate(() => {
    console.log('afterUpdate');
  });
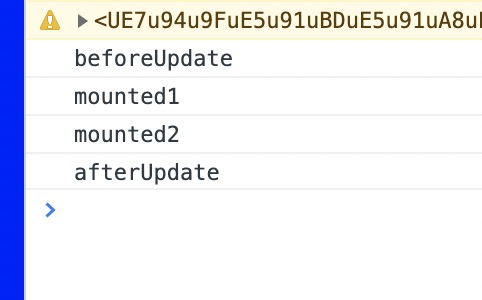
</script>onMountwill run after the component is rendered to the DOM for the first time.onDestroyis called when the component is destroyed.beforeUpdatebefore the DOM update.afterUpdateafter the DOM is updated.
Note that the life cycle can be called multiple times as follows:
  onMount(() => {
    console.log('mounted1');
  });

  onMount(() => {
    console.log('mounted2');
  });
8. Asynchronous request
Asynchronous request and component structure integration settings, for example, we usually write loading effects for different dom blocks in some projects, so there are n loading variables, and the following method will make us less define some variables.
<script>
  function ajax() {
    return new Promise((res) => {
      setTimeout(() => {
        res('请求成功');
      }, 1000);
    });
  }
</script>

<div>
  {#await ajax()}
    <p>...loading</p>
  {:then res}
    <p>
      res: {res}
    </p>
  {/await}
</div>
The effect is that loading is displayed in the request, and the content is displayed after the request, and a {:catch err} tag can be added later, but it is not very good to handle errors here.
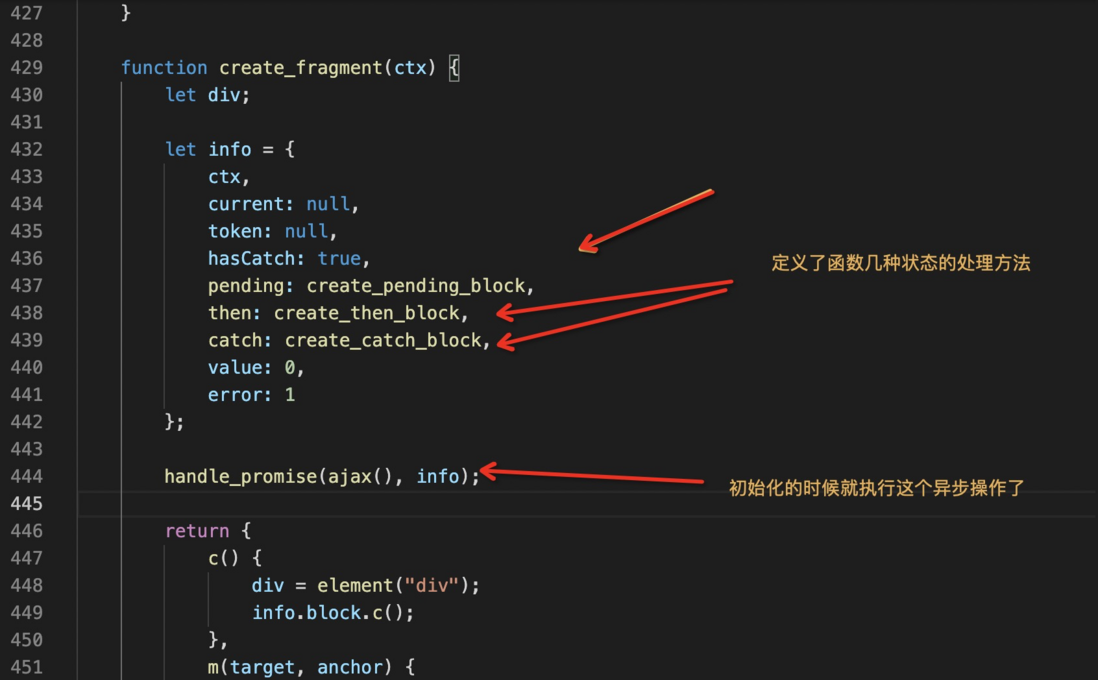
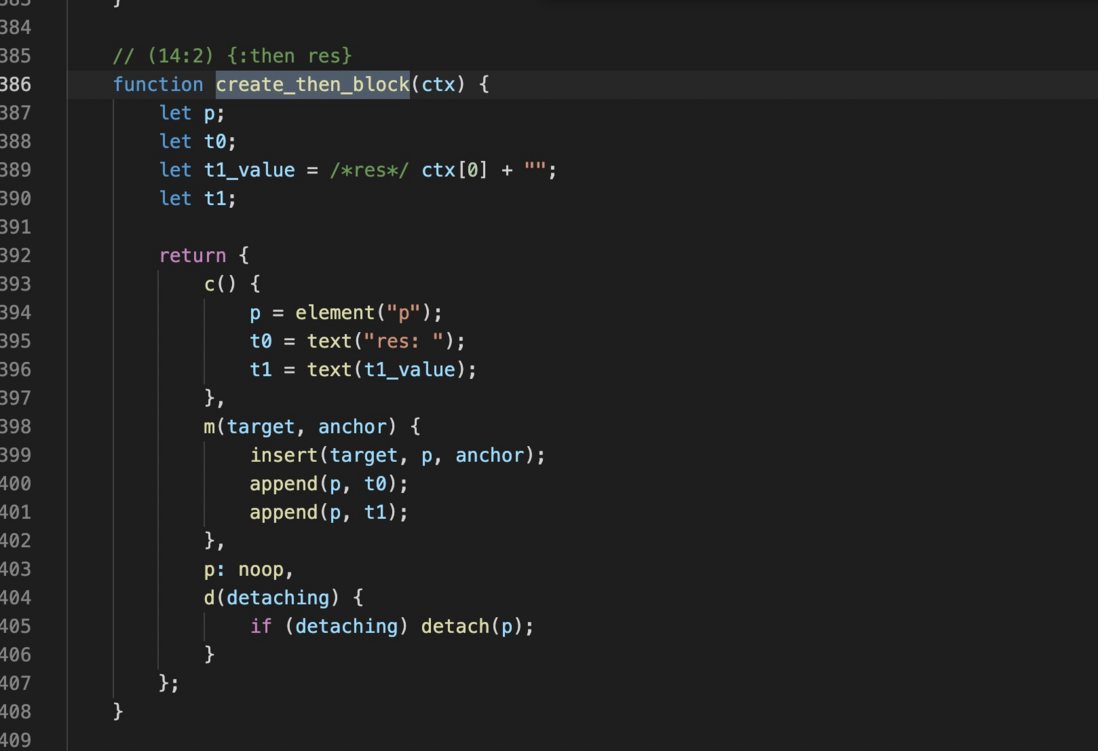
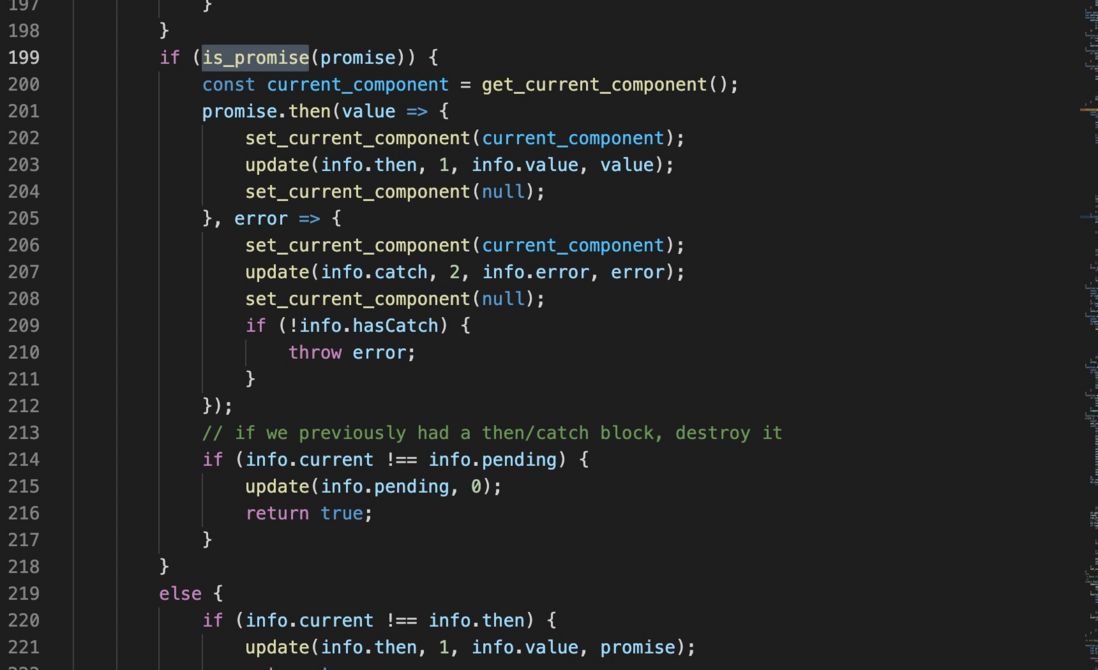
What the packaged code looks like
In the handle_promise method, if it is judged that what we passed in is a promise, it will execute the promise for us and assign the result to it. There are other complicated operations that we don’t need to delve into.
What seems to be a practical way of writing is actually not very practical.
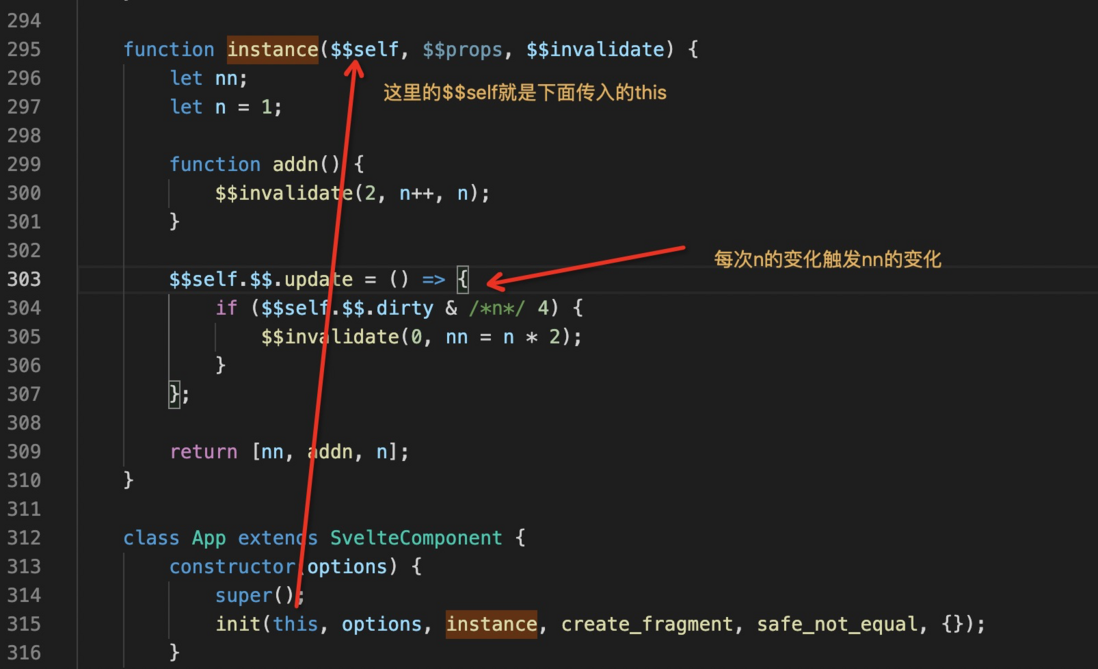
Nine. Calculated properties
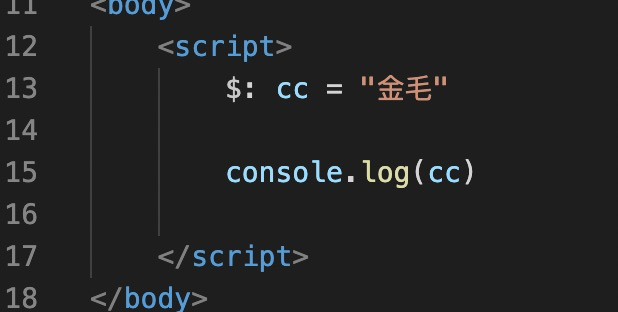
You can mark a statement with an identifier in JavaScript as follows: $: foo = bar. It will add an identifier named $ to the foo = bar statement (if foo is not defined before, an error will occur in strict mode).
So in this case, when Svelte sees any statement with the $: prefix, it knows that the variable on the left needs to get the value from the variable on the right. We now have a way to bind the value of one variable to another variable.
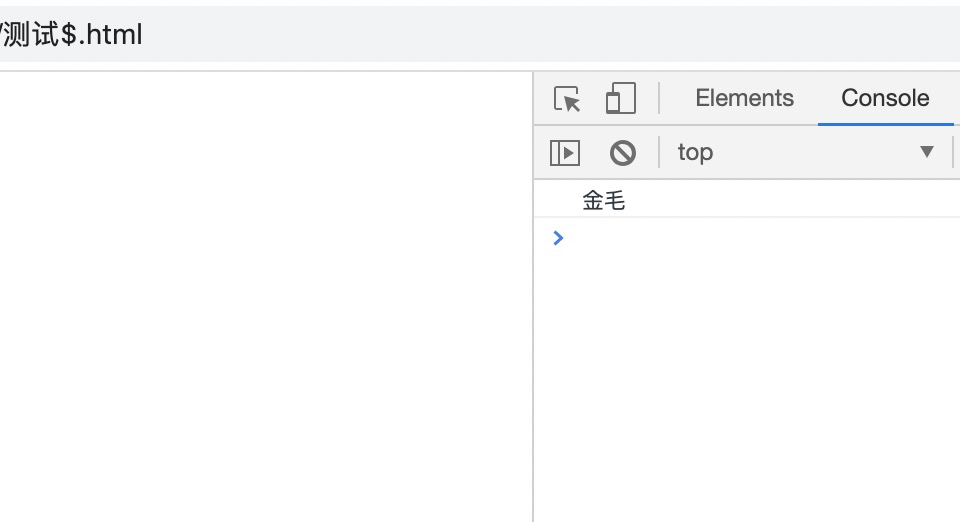
Writing directly in js will not report an error. With long knowledge, we can use this to develop our own compiler to create new grammatical rules:
Usage of calculated attributes:
<script>
  let n = 1;

  $: nn = n * 2;

  function addn() {
    n++;
  }
</script>

<div>
  <button on:click={addn}>点了{nn}次</button>
</div>
The above nn is always equal to n*2 .
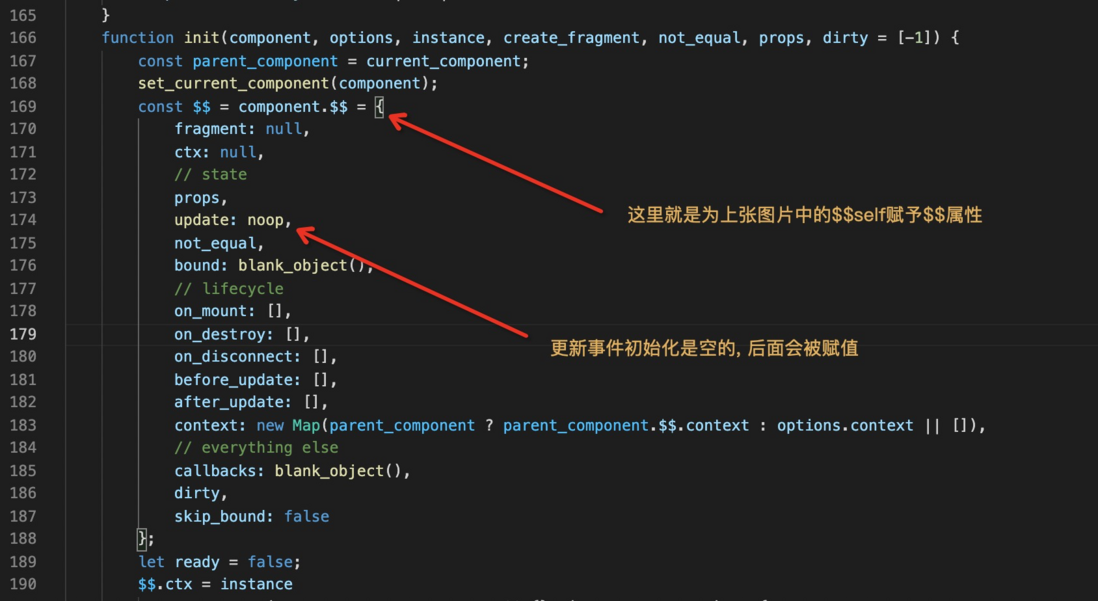
How to achieve it after packaging
X. Observer
<script>
  let n = 0;

  // 1: 大括号内的全部执行
  $: {
    const titel = 'n的值为: ';
    console.log(titel + n);
  }

  // 2: 加判断条件
  $: if (n > 5) {
    alert('n 大于 5');
  }

  function addn() {
    n++;
  }
</script>

<div>
  <button on:click={addn}>点了{n}次</button>
</div>- The content of the initial braces will be executed once by default.
- If the value in the braces changes, the code in the braces will be executed once.
$:can mark conditional statements.
Packaged code
I have to admire that svelte the identifier very well.
11. Animation
The first type: comes with animation (fade in and fade out)
<script>
  import { fade } from 'svelte/transition';
  let visible = true;

  function change() {
    visible = !visible;
  }

</script>

<button on:click={change}>点击动画</button>

{#if visible}
  <div transition:fade>第一种</div>
{/if}
- The first is to introduce the animation
fade. - The label definition
transition:fade.
The second kind of custom animation
<script>
  import { elasticOut } from 'svelte/easing';
  let visible = true;

  function change() {
    visible = !visible;
  }

  // 自定义
  function whoosh(node, params) {
    const existingTransform = getComputedStyle(node).transform.replace(
      'none',
      ''
    );
    return {
      delay: params.delay || 0,
      duration: params.duration || 400,
      easing: params.easing || elasticOut,
      css: (t, u) => `transform: ${existingTransform} scale(${t})`,
    };
  }
</script>

<button on:click={change}>点击动画</button>

{#if visible}
  <div in:whoosh>自定义</div>
{/if}
in:whooshspecifies that the animation uses the whoosh function.whooshreturns the animation delay time, execution time, css effect, etc.
This will not discuss packaging files.
12. Two-way binding of input box
<script>
  let value = '';
</script>

<div>
  <input type="text" bind:value />
  <p>value: {value}</p>
</div>
Package file
The approach is also tougher, that is
Thirteen. vue which use svelte components
svelte is that it is cross-platform, it can be used in any framework, because it is the native js code, let's see how we use it vue
<script>
  let n = 0;

  function addn() {
    n++;
    console.log('触发了:addn');
  }
</script>

<div>
  <button on:click={addn}>点了{n}次</button>
</div>
/src/main.js
import App from './App.svelte';
export default App;
Here is our simple write hits event code package, yarn build after the bundle.js copied to the named xxx file folder index.js file into the target project node_modules , which is to simulate realistic scenarios.
We need to process the index.js
Before modification
After modification
Specific usage
<script>
import xxx from "xxx";

export default {
  name: "App",
  mounted() {
    new xxx({
      target: document.body, // 随便传入你想插入的元素与初始值
    });
  },
};
</script>
14. Technical Selection
How can the two technologies be mixed in normal development? For example, if I use vue develop and have introduced the Vue runtime, there is no need to use this technology, but if you use svelte develop some cross-platform compatible components that are particularly good? You can consider using svelte to do it, so whether it is react or vue , you can easily use your components.
It should be noted that 060bc8ea26b803 does have advantages when the project volume is small svelte use after the logic is complicated. We can see that it will inevitably appear a lot of logic after packaging. Code, so the performance is not necessarily better than the runtime form after the logic is too large to a certain extent.
end.
This is the case this time, I hope to make progress with you.








**粗体** _斜体_ [链接](http://example.com) `代码` - 列表 > 引用。你还可以使用@来通知其他用户。