一、前言
对于java来说,很多工作都被jvm包揽了,比如内存分配和回收、其他系统级别调用。这其实就把操作系统底层的一些东西给屏蔽了,对于javaer来说,方便的同时也带来一些困惑(我还不是一个纯javaer),很多细节性概念始终不是很通透,特别是当涉及底层交互的时候。特别是学NIO那块东西的时候(epoll&poll?、zero-copy?、userbuffer?、kernel buffer?)。
为了解决内心的种种疑惑,还是准备学习jdk的底层源码。首先需要下载jdk源码,并在本地编译,下面开整(还是有很多坑):
二、本地环境
官方支持的构建环境说明:https://wiki.openjdk.org/display/Build/Supported+Build+Platforms
- macOS Monterey 12.0.1;
- intel x86_64
需要安装XCode【下载地址】,本地安装版本13.1;
XCode安装完后使用命令验证安装结果:xcodebuild -version
如果出现如下报错,执行命令:sudo xcode-select --switch /Applications/Xcode.app/Contents/Developer/xcode-select: error: tool ‘xcodebuild’ requires Xcode, but active developer directory ‘/Library/Developer/CommandLineTools’ is a command line tools instance- brew install freetype & brew install ccache
三、JDK9的坑
- 首先下载JDK9源码,下载地址:https://github.com/campolake/openjdk9.git;
在源码根目录执行如下命令(环境检查和配置):
bash ./configure --with-debug-level=slowdebug --with-jvm-variants=server --enable-ccache --with-freetype=/usr/local/Cellar/freetype/2.11.0 --disable-warnings-as-errors
freetype(字体引擎)路径根据本地环境自己更改;ccache缓存编译代码,加速编译,可以不用;disable-warnings-as-errors避免将warning信息当成error;with-debug-level用来设置编译的级别,可选值为release、fastdebug、slowde-bug,越往后进行的优化措施就越少,带的调试信息就越多。
执行完出现如下提示就表示可以下一步了:
 A new configuration has been successfully created in
 /Users/***/CLionProjects/openjdk9/build/macosx-x86_64-normal-server-slowdebug
 using configure arguments '--with-debug-level=slowdebug --with-jvm-variants=server --enable-ccache --with-freetype=/usr/local/Cellar/freetype/2.11.0 --disable-warnings-as-errors'.

 Configuration summary:
 * Debug level:    slowdebug
 * HS debug level: debug
 * JDK variant:    normal
 * JVM variants:   server
 * OpenJDK target: OS: macosx, CPU architecture: x86, address length: 64
 * Version string: 9-internal+0-2021-12-03-105259.***.openjdk9 (9-internal)

 Tools summary:
 * Boot JDK:       java version "1.8.0_281" Java(TM) SE Runtime Environment (build 1.8.0_281-b09) Java HotSpot(TM) 64-Bit Server VM (build 25.281-b09, mixed mode)  (at /Library/Java/JavaVirtualMachines/jdk1.8.0_281.jdk/Contents/Home)
 * Toolchain:      clang (clang/LLVM from Xcode 13.1)
 * C Compiler:     Version 13.0.0 (at /usr/bin/clang)
 * C++ Compiler:   Version 13.0.0 (at /usr/bin/clang++)

 Build performance summary:
 * Cores to use:   16
 * Memory limit:   32768 MB
 * ccache status:  Active (4.5.1)

 The following warnings were produced. Repeated here for convenience:
 WARNING: Ignoring value of CCACHE from the environment. Use command line variables instead.
执行
make images,开始编译;
事情当然没有那么简单,在这一步成功出现了报错,如下:/Users/yulewei/jdk9/hotspot/src/share/vm/memory/virtualspace.cpp:585:14: error: ordered comparison between pointer and zero ('char *' and 'int') if (base() > 0) { ~~~~~~ ^ ~ ... /Users/yulewei/jdk9/hotspot/src/share/vm/opto/lcm.cpp:42:35: error: ordered comparison between pointer and zero ('address' (aka 'unsigned char *') and 'int') if (Universe::narrow_oop_base() > 0) { // Implies UseCompressedOops. ~~~~~~~~~~~~~~~~~~~~~~~~~~~ ^ ~ ... /Users/yulewei/jdk9/hotspot/src/share/vm/opto/loopPredicate.cpp:915:73: error: ordered comparison between pointer and zero ('const TypeInt *' and 'int') assert(rng->Opcode() == Op_LoadRange || _igvn.type(rng)->is_int() >= 0, "must be"); ~~~~~~~~~~~~~~~~~~~~~~~~~ ^ ~这个是JDK9的bug,需要修改源码文件然后重新编译,参考这篇文章解决:https://segmentfault.com/a/1190000016732492
改完源码文件重新编译,出现新的报错:
* For target hotspot_variant-server_libjvm_gtest_objs_gtestMain.o:
clang: warning: include path for libstdc++ headers not found; pass   '-stdlib=libc++' on the command line to use the libc++ standard     library instead [-Wstdlibcxx-not-found]
In file included from      /Users/***/CLionProjects/openjdk9/hotspot/test/native/gtestMain.cpp :33:
In file included from  /Users/***/CLionProjects/openjdk9/hotspot/test/native/unittest.hpp: 29:
/Users/***/CLionProjects/openjdk9/test/fmw/gtest/include/gtest/gtest.h:54:10: fatal error: 'limits' file not found
#include <limits>
      ^~~~~
1 error generated.
* For target hotspot_variant-server_libjvm_gtest_objs_test_os.o:
clang: warning: include path for libstdc++ headers not found; pass '-stdlib=libc++' on the command line to use the libc++ standard library instead [-Wstdlibcxx-not-found]
In file included from /Users/***/CLionProjects/openjdk9/hotspot/test/native/runtime/test_os.cpp:25:
In file included from /Users/***/CLionProjects/openjdk9/hotspot/src/share/vm/runtime/os.hpp:29:
In file included from /Users/***/CLionProjects/openjdk9/hotspot/src/share/vm/runtime/extendedPC.hpp:28:
/Users/***/CLionProjects/openjdk9/hotspot/src/share/vm/memory/allocation.hpp:38:10: fatal error: 'new' file not found
#include <new>
      ^~~~~
这个问题是由于XCode版本比较新导致,找不到C语言相关的头文件。其实XCode中是有的,只是路径和老的不一样了,在
configure命令中添加如下3个参数就行:--with-extra-cflags=-stdlib=libc++ --with-extra-cxxflags=-stdlib=libc++ --with-extra-ldflags=-stdlib=libc++。
configure命令就是这样的了:bash ./configure --with-debug-level=slowdebug --with-jvm-variants=server --enable-ccache --with-freetype=/usr/local/Cellar/freetype/2.11.0 --disable-warnings-as-errors --with-extra-cflags=-stdlib=libc++ --with-extra-cxxflags=-stdlib=libc++ --with-extra-ldflags=-stdlib=libc++再一次执行
make images
出现如下报错:# # A fatal error has been detected by the Java Runtime Environment: # # SIGILL (0x4) at pc=0x0000000106321898, pid=39315, tid=8195 # # JRE version: OpenJDK Runtime Environment (9.0) (slowdebug build 9-internal+0-2021-12-03-133118.chensheng.openjdk9) # Java VM: OpenJDK 64-Bit Server VM (slowdebug 9-internal+0-2021-12-03-133118.chensheng.openjdk9, mixed mode, tiered, compressed oops, serial gc, bsd-amd64) # Problematic frame: # V [libjvm.dylib+0xc1e898] PerfData::~PerfData()+0x8 # # No core dump will be written. Core dumps have been disabled. To enable core dumping, try "ulimit -c unlimited" before starting Java again # # If you would like to submit a bug report, please visit: # http://bugreport.java.com/bugreport/crash.jsp #google了一圈,有的说是硬件问题,最后实在没搞定,就换成JDK11了。
四、编译JDK11
首先需要先在本地安装jdk11(jdk11可以用来编译jdk11,不需要低一个版本的jdk),可以直接下载压缩包然后解压(不需要配置环境变量)
用于编译的jdk版本:
java version "11.0.12" 2021-07-20 LTS
Java(TM) SE Runtime Environment 18.9 (build 11.0.12+8-LTS-237)
Java HotSpot(TM) 64-Bit Server VM 18.9 (build 11.0.12+8-LTS-237, mixed mode)- 下载JDK11源码:https://github.com/openjdk/jdk11u.git
执行
configurebash ./configure --with-debug-level=slowdebug --with-boot-jdk=/Users/***/Applications/jdk11/jdk-11.0.12.jdk/Contents/Home --with-jvm-variants=server --enable-ccache --disable-warnings-as-errors --with-extra-cflags=-stdlib=libc++ --with-extra-cxxflags=-stdlib=libc++ --with-extra-ldflags=-stdlib=libc++--with-boot-jdk参数的值就是我们解压后jdk11的绝对路径执行
make images,一次成功。说明了一个问题,新版本(
os&XCode)和新版本(jdk)才更适配
五、使用clion调试hotspot虚拟机
clion默认是用cmake,但是编译openjdk是用make,如果不想自己写cMakeList且想减少出问题概率,参考这篇文章:https://segmentfault.com/a/1190000040305260。
不出意外,一定可以一步到位。
六、使用vscode调试hotspot虚拟机(2022-6-28更新)
虽然比较习惯了jetbrains的界面和操作习惯,但是强迫症患者对一大坨“报红”真的有点看不下去,试了下vscode进行调试,真的少了很多报红,而且方法追踪也是妥妥的。简单记录下 debug 方式:
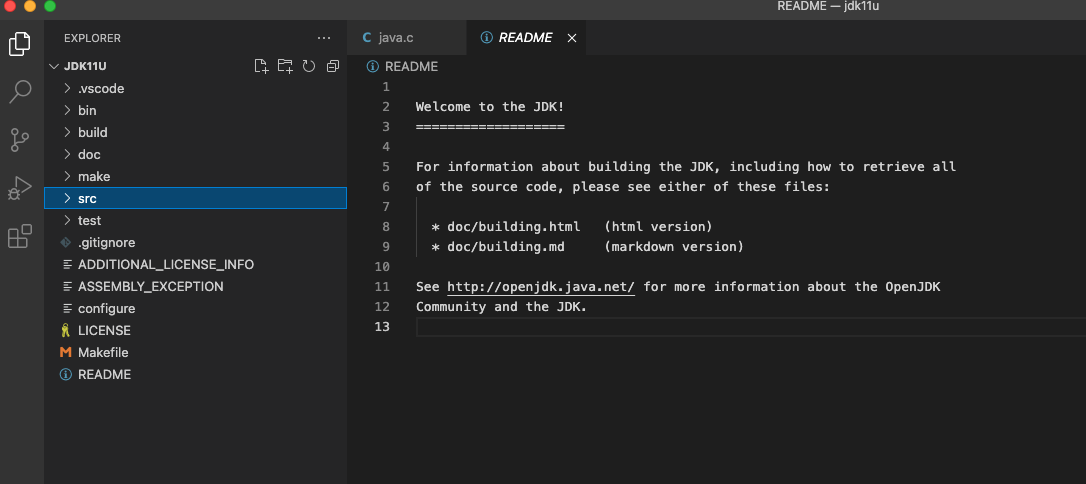
- 直接使用 Open Folder 打开源码目录
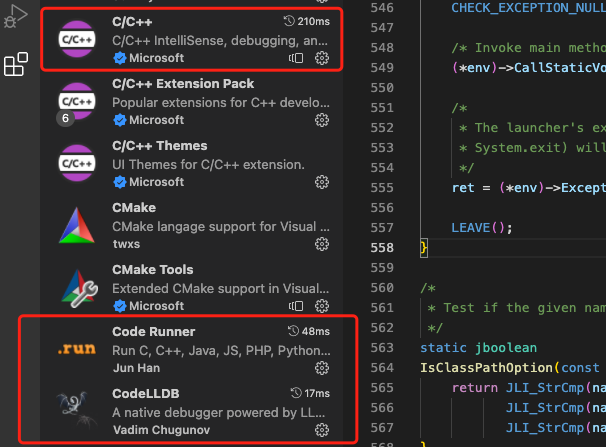
- 安装C/C++调试插件,最核心的是下面3个插件
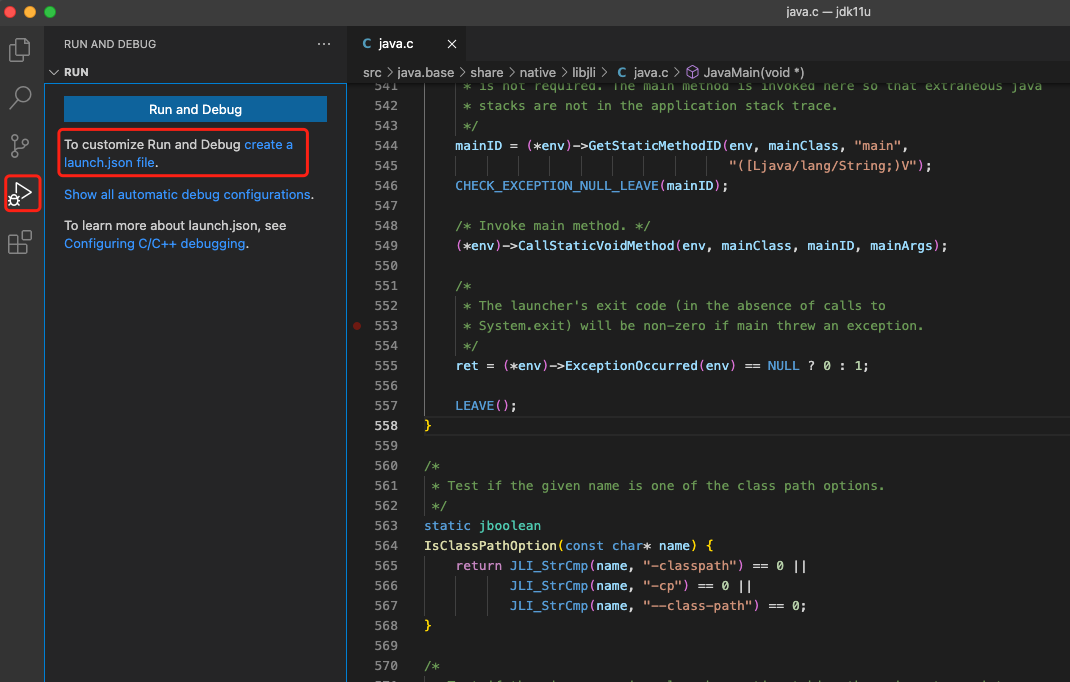
- 创建/定义 启动文件 launch.json
自定义 launch.json
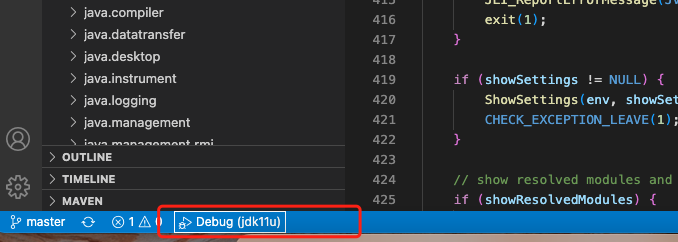
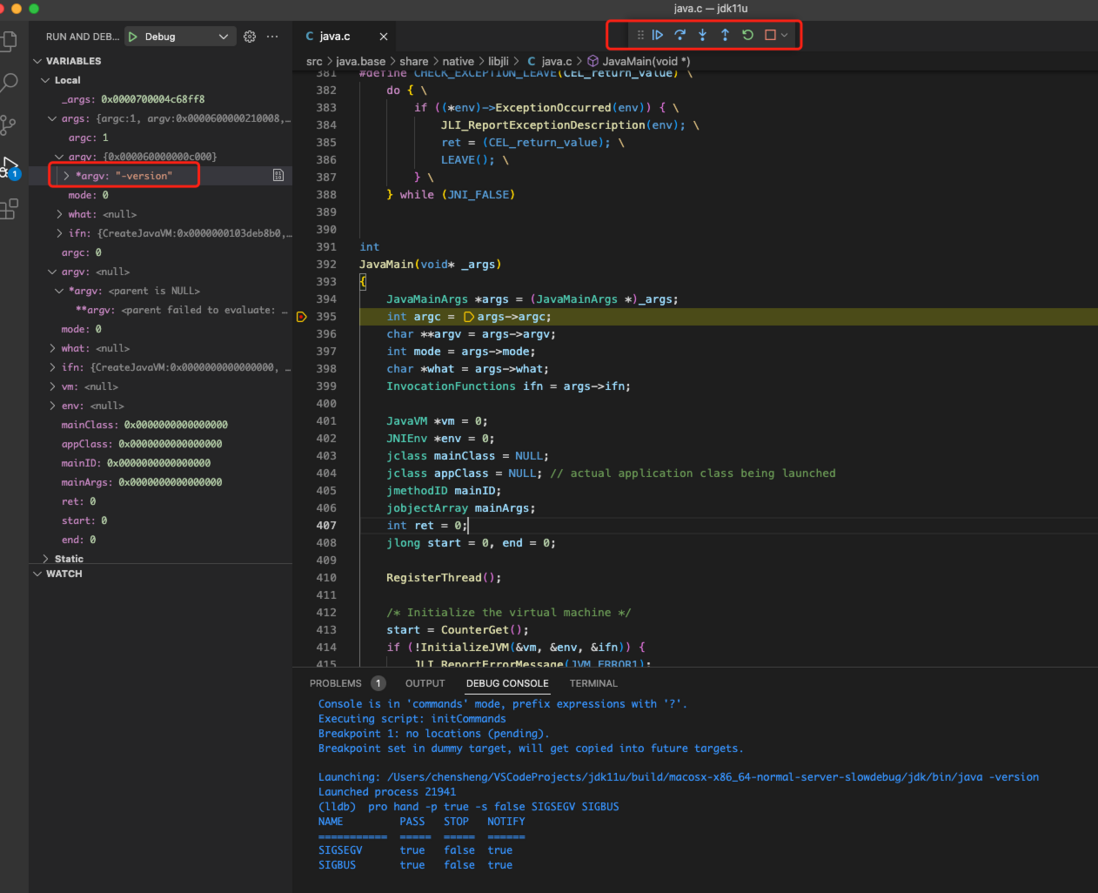
{ // Use IntelliSense to learn about possible attributes. // Hover to view descriptions of existing attributes. // For more information, visit: https://go.microsoft.com/fwlink/?linkid=830387 "version": "0.2.0", "configurations": [ { "type": "lldb", "request": "launch", "name": "Debug", "program": "${workspaceFolder}/build/macosx-x86_64-normal-server-slowdebug/jdk/bin/java", "args": ["-version"], "cwd": "${workspaceFolder}" } ] }- 开始断点调试(点击Debug,然后选择上面新建的启动文件)
进行单步调试
七、macOS M1编译jdk11
最近换电脑了,捣鼓了下ARM架构下编译jdk,遇到了几个问题,最终还是顺利编译成功了。
需要使用arm版本的jdk,最终使用jdk17成功编译jdk18源码
jdk17官方下载地址:https://www.oracle.com/java/technologies/downloads/#java17
问题1 openjdk11 compiler error: Failed to determine Xcode version
bash configure --disable-warnings-as-errors --with-debug-level=slowdebug

checking if Boot JDK is 32 or 64 bits... 64
checking for local Boot JDK Class Data Sharing (CDS)... yes, created
checking for Build JDK... yes, will use output dir
configure: xcodebuild output: objc[97127]: Class AMSupportURLConnectionDelegate is implemented in both /usr/lib/libauthinstall.dylib (0x203c6ab90) and /Library/Apple/System/Library/PrivateFrameworks/MobileDevice.framework/Versions/A/MobileDevice (0x1042e82c8). One of the two will be used. Which one is undefined.
configure: error: Failed to determine Xcode version.
/Users/xxx/Documents/My/Sources/java/opensource/jdk-jdk-11-28/build/.configure-support/generated-configure.sh: line 84: 5: Bad file descriptor
configure exiting with result code 1
修改toolchain.m4文件,将231行脚本改成如下:
XCODE_VERSION_OUTPUT=`"$XCODEBUILD" -version 2>&1 | $TAIL -n 2`问题2 The tested number of bits in the target (32) differs from the number of bits expected to be found in the target
- 编译时指明32位。参数是:--with-target-bits=32
修改配置文件。
打开common/autoconf/generated-configure.sh,搜索这个语句,把判断语句用到的两个变量改为32即可。如:TESTED_TARGET_CPU_BITS=`expr 8 \* $ac_cv_sizeof_int_p` # 加上这一句(视情况而定,我这边改成32位) TESTED_TARGET_CPU_BITS=32 if test "x$TESTED_TARGET_CPU_BITS" != "x$OPENJDK_TARGET_CPU_BITS"; then as_fn_error $? "The tested number of bits in the target ($TESTED_TARGET_CPU_BITS) differs from the number of bits expected to be found in the target ($OPENJDK_TARGET_CPU_BITS)" "$LINENO" 5 fi
最终发现jdk11貌似并不支持M1芯片进行编译,后改为使用jdk17编译jdk18.
最终编译使用命令:bash ./configure --with-debug-level=slowdebug --with-boot-jdk=/Users/***/Applications/jdk17/jdk-17.0.6.jdk/Contents/Home --with-jvm-variants=server --enable-ccache --disable-warnings-as-errors --with-extra-cflags=-stdlib=libc++ --with-extra-cxxflags=-stdlib=libc++ --with-extra-ldflags=-stdlib=libc++
环境终于搞定了,又要开始学C语言了? {{{(>_<)}}}。


**粗体** _斜体_ [链接](http://example.com) `代码` - 列表 > 引用。你还可以使用@来通知其他用户。