Ubuntu 22.04 Release Date
Ubuntu 22.04 Jammy Jellyfish is scheduled for release on April 21, 2022
If you're ready to use Ubuntu 22.04 Jammy Jellyfish, you can either upgrade your current Ubuntu system or download Ubuntu 22.04 and install it from ISO.
Ubuntu22 is still a few months away, and the Python version that comes with it will be 3.10, but I want to use it on Ubuntu20.04 too!
The Python version that comes with Ubuntu20.04 is 3.8. If you want to install python3.9, you can use this command: sudo apt install python3.9The repository of Ubuntu20.04 does not include python3.10, so let's compile and install it from the source code!
Preparations, first install dependencies
 sudo apt update && sudo apt upgrade
sudo apt install git gcc g++ build-essential checkinstall openssl
sudo apt install uuid-dev libreadline-gplv2-dev libncursesw5-dev libssl-dev libsqlite3-dev tk-dev libgdbm-dev libc6-dev libbz2-dev liblzma-dev libssl-dev libgdbm-compat-dev libffi-dev libreadline-dev
There is no libreadline-gplv2-dev under debian
ubuntu22.04 has no libreadline-gplv2-dev:E: Package 'libreadline-gplv2-dev' has no installation candidate
I downloaded the python3.10 source code package to the
~/Downloadsdirectory and installed python3.10 to the~/opt/python/cpythondirectoryRegarding the choice of installation path:
Q: Why put it in the user path instead of the system path? A: Because for me, I just need him to run under the user path, because this is just a development environment.
Q: Why is
cpythonadded to the path? A: Because I not only need to install the cpython interpreter, but sometimes also need to use the pypy interpreter and so on. So the cpython interpreter can be placed in the~/opt/python/cpythondirectory; the pypy interpreter can be placed in the~/opt/python/pypydirectory;
Q: How to manage multiple versions? A: cpython3.10 is like this:~/opt/python/cpython/python3.10;cpython3.9 is like this:~/opt/python/cpython/python3.9;pypy3.9 is like this:~/opt/python/pypy/python3.9
Download Python source code
Go to the ~/opt directory and execute the following command to download the compressed package of the source code
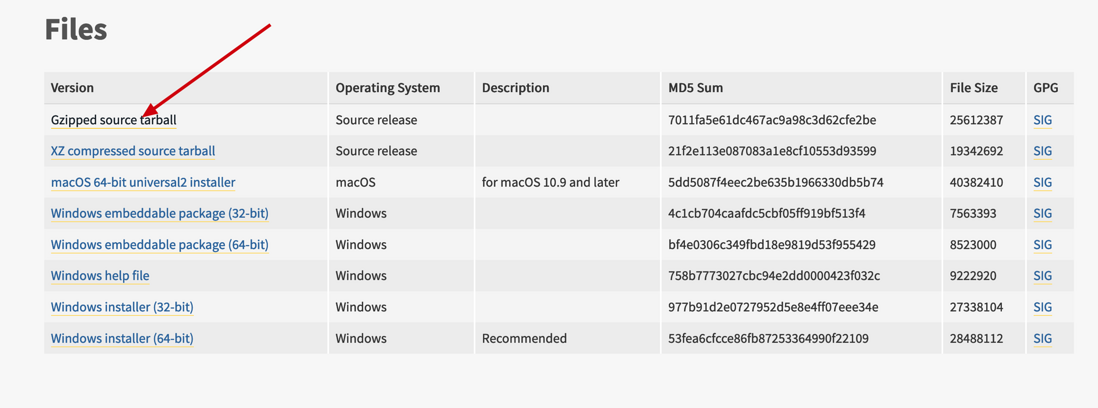
sudo curl -O https://www.python.org/ftp/python/3.10.1/Python-3.10.1.tgz You can also go to the official website to download: https://www.python.org/downloads/release/python-3104/
unzip
tar zxvf ./Python-3.10.1.tgzIf not.tgzsuffix, but.tar.xz, usetar -xvf Python-3.10.2.tar.xzto decompress
Check
 ╭─bot@amd-5700G ~/Downloads
╰─➤  ll | grep Python
 6439688 drwxr-xr-x     16    -        - bot  bot    7 Dec  2021  Python-3.10.1
 6439619 .rw-rw-r--      1  25M    48952 bot  bot    2 Jan 13:58  Python-3.10.1.tgz
Prepare the installation path
mkdir -p ~/opt/python/cpython/python3.10 The mkdir command plus -p parameters can create a multi-level directory at one timeInstall
 cd ~/Downloads/Python-3.10.1
sudo ./configure --enable-optimizations --prefix=/home/vobile/opt/python/cpython/python3.10
sudo make -j8
sudo make install
sudo ./configure --enable-optimizations --prefix=/home/vobile/opt/python/cpython/python3.10is the configuration compilation parameter
sudo make -j8is the compilation.-j8indicates that 8 cores are compiled in parallel to improve the speed (by default, only one processor is used to compile, which is too slow, we multi-process parallel processing: sudo make -j8,-j8 means to use 8 processors , if your processor only has 4, change it to 4)
--prefix=/home/bot/opt/python/cpython/python3.10This must not be less, and do not bring~, but an absolute path.
sudo make installindicates installation, that is, cpoy the compiled result to the directory specified by--prefix
Once installed, it looks like the following
 ╭─bot@amd-5700G ~/opt/python3.10.1
╰─➤  ll
  inode Permissions Links Size Blocks User Group Date Modified Name
6301327 drwxr-xr-x      2    -      - bot  bot    2 Jan 14:25  bin
7873931 drwxr-xr-x      3    -      - root root   2 Jan 14:25  include
6301328 drwxr-xr-x      4    -      - bot  bot    2 Jan 14:25  lib
7998483 drwxr-xr-x      3    -      - root root   2 Jan 14:25  share
╭─bot@amd-5700G ~/opt/python3.10.1
╰─➤  cd bin
╭─bot@amd-5700G ~/opt/python3.10.1/bin
╰─➤  ll
  inode Permissions Links Size Blocks User Group Date Modified Name
6305556 lrwxrwxrwx      1    9      0 root root   2 Jan 14:25  2to3 -> 2to3-3.10
6305551 .rwxr-xr-x      1  118      8 root root   2 Jan 14:25  2to3-3.10
6305554 lrwxrwxrwx      1    8      0 root root   2 Jan 14:25  idle3 -> idle3.10
6305549 .rwxr-xr-x      1  116      8 root root   2 Jan 14:25  idle3.10
6305561 .rwxr-xr-x      1  246      8 root root   2 Jan 14:25  pip3
6305562 .rwxr-xr-x      1  246      8 root root   2 Jan 14:25  pip3.10
6305555 lrwxrwxrwx      1    9      0 root root   2 Jan 14:25  pydoc3 -> pydoc3.10
6305550 .rwxr-xr-x      1  101      8 root root   2 Jan 14:25  pydoc3.10
6305552 lrwxrwxrwx      1   10      0 root root   2 Jan 14:25  python3 -> python3.10
6305553 lrwxrwxrwx      1   17      0 root root   2 Jan 14:25  python3-config -> python3.10-config
6301329 .rwxr-xr-x      1  24M  46296 root root   2 Jan 14:25  python3.10
6305548 .rwxr-xr-x      1 3.1k      8 root root   2 Jan 14:25  python3.10-config
╭─bot@amd-5700G ~/opt/python3.10.1/bin
╰─➤  ./python3.10
Python 3.10.1 (main, Jan  2 2022, 14:23:57) [GCC 9.3.0] on linux
Type "help", "copyright", "credits" or "license" for more information.
>>>
Create environment variables
Add environment variable as below code
export PATH=$PATH:/home/ponponon/opt/python/cpython/python3.10/bin If it's bash, add it to ~/.bashrc
If it is zsh, add it to ~/.zshenv
Don't use it again source for example source ~/.bashrc
refer to:
[Raspberry Pi] Install python3.7 for ubuntu18
zsh configuration files and their load order in macOS
Files
After switching users, the configuration of /etc/profile does not work
Change the software source
Replace with Tsinghuayuan
pip config set global.index-url https://pypi.tuna.tsinghua.edu.cn/simpleCreate soft link
Without going into details:
[Raspberry Pi] Install python3.7 for ubuntu18
After adding the environment variable, enter python3.10 in the terminal to use python3.10 , but the input python may not be python3.10 , you can where pyhon View.
use 3.10
I generally use pipenv to manage packages and virtual environments
pipenv install --python=python3.10 Reference article:
Build Python
[Raspberry Pi] Install python3.7 for ubuntu18


**粗体** _斜体_ [链接](http://example.com) `代码` - 列表 > 引用。你还可以使用@来通知其他用户。