1. Background && Function
- Abnormal monitoring system
- Collection exception
- Collect log information; interface duration information
- prompt warning; send mail
- Display statistics
- The cost of code review is high; sometimes only syntax or code style problems can be found; there is not much time for deep reading of logical business problems
- Compatibility issues are not easy to test. The process is long and the logic is complex and cannot be covered 100%
Inaccurate user feedback; do not understand some technical terms; high communication costs lead to low problem solving efficiency
Second, the server installs Sentry
2.1 Server Environment Requirements
- Docker 19.03.6+
- Compose 1.28.1+
- 4 CPU Cores
- 8 GB RAM
- 20 GB Free Disk Space
- Python 3
docker 安装流程 https://docs.docker.com/engine/install/centos/
Compose 安装流程 https://docs.docker.com/compose/install/ (选择linux环境安装)
1. sudo yum install -y yum-utils
2. sudo yum-config-manager \
    --add-repo \
    https://download.docker.com/linux/centos/docker-ce.repo
3. sudo yum install docker-ce docker-ce-cli containerd.io
4. systemctl enable docker && systemctl start docker (启动docker)
5. sudo curl -L "https://github.com/docker/compose/releases/download/1.29.2/docker-compose-$(uname -s)-$(uname -m)" -o /usr/local/bin/docker-compose
6. sudo chmod +x /usr/local/bin/docker-compose
7. docker info (成功查看信息)
2.2 sentry deployment
Get the latest Sentry code from github
git clone https://github.com/getsentry/onpremise.git 这时候如果遇到超时的情况;可以将包先拉到本地;然后拷到服务器上 scp -r onpremise songxianling@182.92.84.242:/tmp 进到/tmp文件夹下找到拷贝的文件- Go to onpremise and run the install.sh script.
`cd onpremise
./install.sh` Manually run docker-compose up -d to start Sentry.
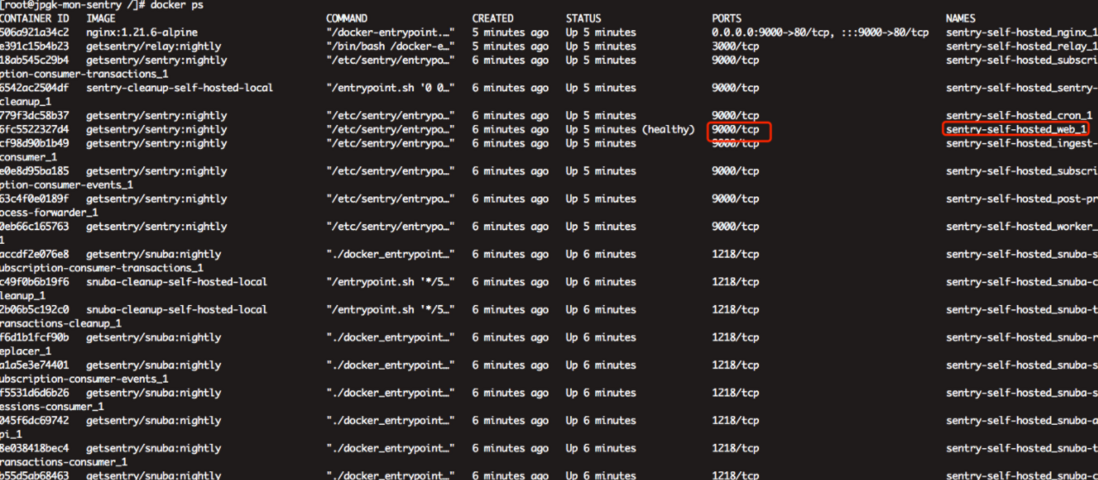
When you see that all services are up; the web is also normal; at this time, you can see the basic page by accessing port 9000 corresponding to the domain name 🎉2.3 Configure Email Sending
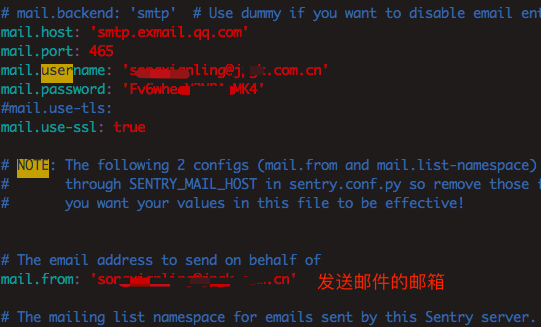
- Modify sentry/config.yml file configuration
3. Start using
3.1 Create a project
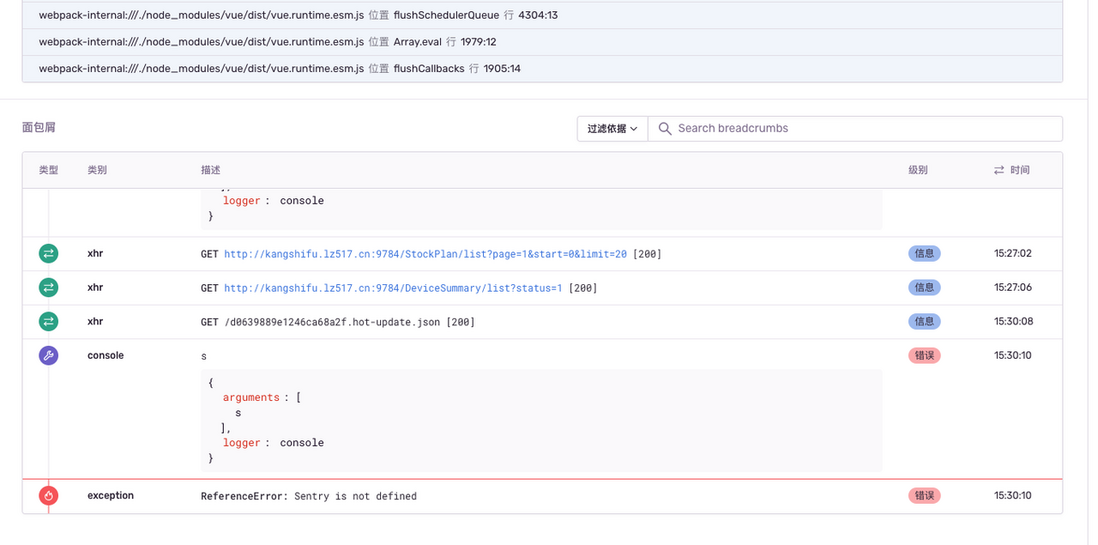
Open the error console; because this took 1h+ time; it has something to do with the version; other people on the Internet have not set this and have not encountered my problem
3.2 Edit configuration file
Create .sentryclirc file in the project root directory
[defaults]
project=mars # 创建的项目名称
org=sentry # 组名称
url=http://sentry.jpgk.com.cn/ # sentry服务url

[auth]
token=8e8eea22357843ac9480a2e3ed373ae01659315567914de4b62442d9041287c7 #手动生成的token;具体下图
3.3 Run and test errors
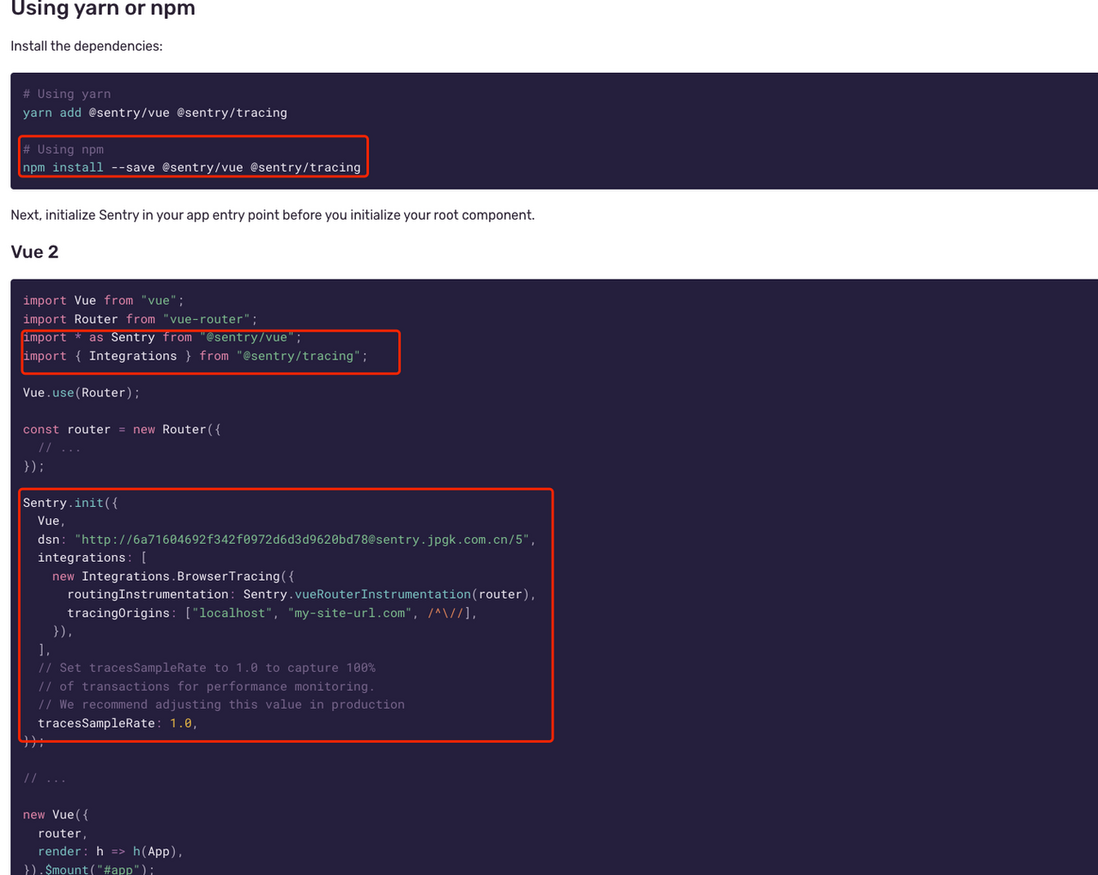
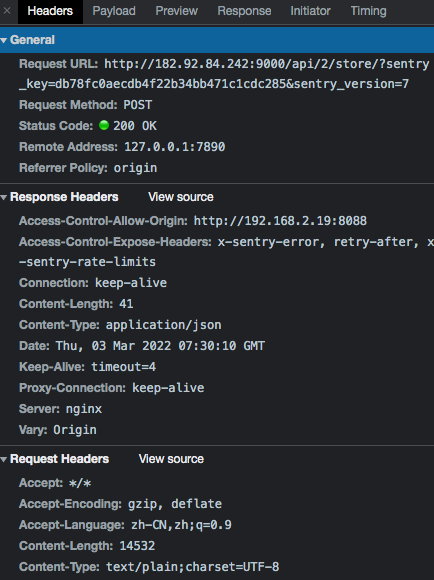
🔨 Randomly create an error message in some code; then you can see; a request is sent to the console's network
🥚In the sentry, you can see the corresponding error collection, breadcrumbs, ajax requests, previous error information, etc.; these information can provide context information for the current error and reproduce the steps of the error; it can also be used for reproduction and debugging bugs with useful information
At the same time, the context information that can be customized includes: user user information, tags event tag information, level event severity error, grouping rules for fingerprint events, extra data additional data.
3.4 Upload source-map
- webpack manually upload sentry/webpack-plugin (webpack plugin)
- sentry-cli server installation
Most of the Internet is the way to upload with the webpack plugin; I will not describe this place.
The server installs sentry-cli or executes the script after installing it with Jenkins (current scheme)
Jenkins configure sentry-cli
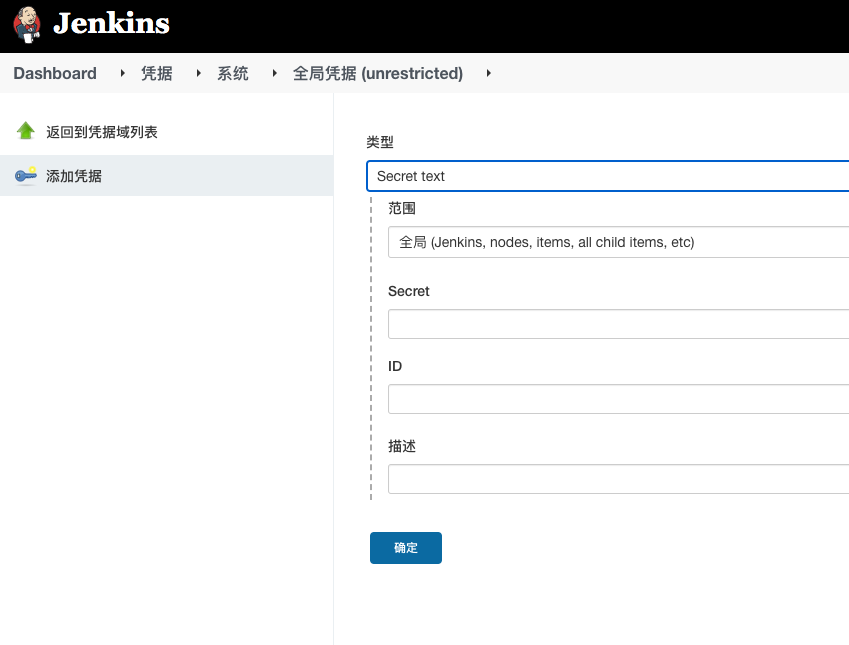
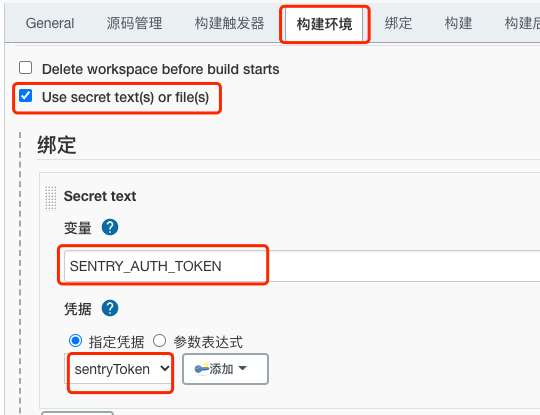
First create a*variable* under Jenkins for the cli to use when executing commands; prevent key token information from being exposed
Increase the execution script after build packaging; upload to the sentry server
# 文档 https://docs.sentry.io/product/cli/releases/

curl -sL http://sentry.jpgk.com.cn/get-cli/ | bash || true

export SENTRY_ORG=sentry
export SENTRY_PROJECT=mars
export SENTRY_ENVIRONMENT=test # env环境变量
export SENTRY_RELEASE=v1.0.3 # 和main.js中init里面的版本号要一致对应
# 更新版本信息
/usr/local/bin/sentry-cli releases new -p $SENTRY_PROJECT $SENTRY_RELEASE
# 设置提交信息
/usr/local/bin/sentry-cli releases set-commits $SENTRY_RELEASE --auto --ignore-empty
# 删除所有已上传的文件
/usr/local/bin/sentry-cli releases files $SENTRY_RELEASE delete --all
# 上传sourceMap和打包后的项目文件
/usr/local/bin/sentry-cli releases files $SENTRY_RELEASE upload-sourcemaps ./dist --ignore ./dist/node_modules ./dist/vue.config.js
# 设置发布
/usr/local/bin/sentry-cli releases finalize $SENTRY_RELEASE
# 设置环境信息
/usr/local/bin/sentry-cli releases deploys $SENTRY_RELEASE new -e $SENTRY_ENVIRONMENT
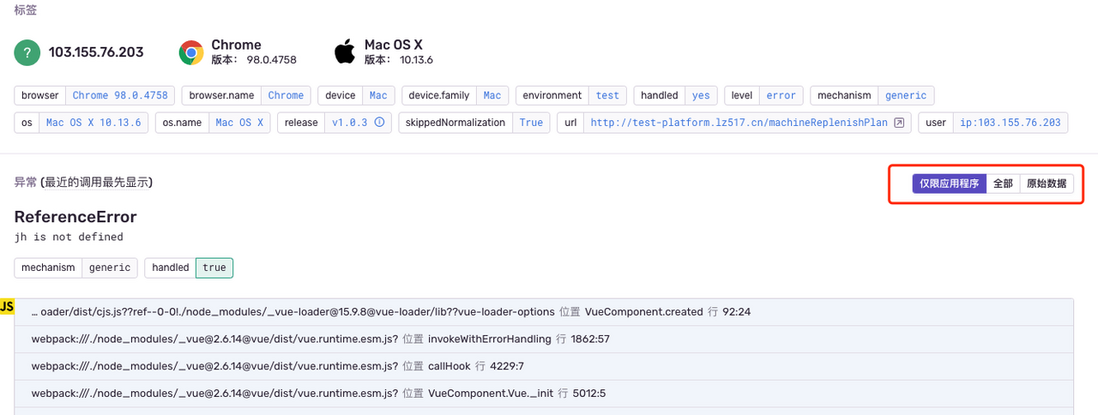
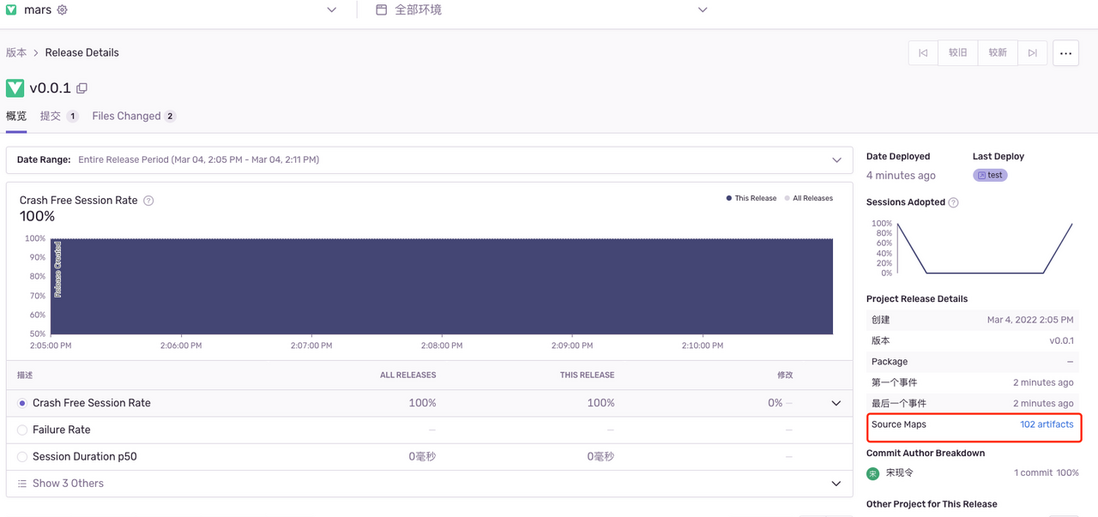
The sourceMap is not uploaded error as below
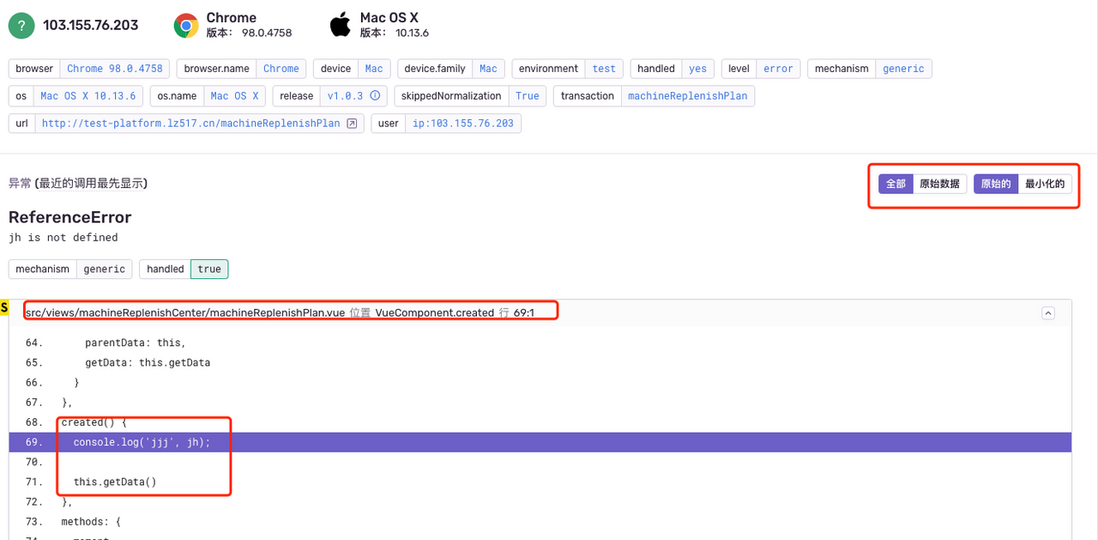
After uploading the sourceMap, you can see two more "original, minimized" tags; at the same time, you can also locate the specific code location
So far; the deployment of sentry is basically completed; sentry is an out-of-the-box monitoring tool with good compatibility, powerful functions, and a very complete ecosystem. you deserve to have! ! 🐂🍺
4. What did you get
Sentry is not a substitute for traditional log and monitoring systems; it focuses more on "application exception information"; thus allowing us to find, locate, and solve problems faster and more conveniently; reduce the impact and provide direction for optimization; the same Issues are merged; rich data reflects the number of impacts; at the same time, the time flow of issues is provided; status follower can be set; performance indicators provide strong data support
- The front-end [before use] runs to the client client; except for resource request exceptions; others cannot be traced; the occurrence cannot be reproduced. The problem can only rely on the repeated feedback of users; the efficiency is low and the reproduction is difficult
- Front-end [after use] Any abnormality on the client side can be reported; at the same time, the influence of the number of people affected can be obtained; some reports can also be actively triggered (such as abandoned functions); there is a context for user operations; there are traceable recurring problems ;Some parts that do not affect the use can also be monitored; the user experience can be optimized
Tips
- When docker-compose fails to start; check whether the version is the latest; sentry requires version 1.28 or above; when I installed the command was 1.29+; but a 1.18+ version was installed
- When it is not possible to execute
./.install.shby yourself; you can ask the operation and maintenance to help execute it; it is because of the environment variable problem; and it cannot be configured temporarily; the whole installation process may take about 20 minutes; wall - Encountered that the sourcemap upload was successful; still can not locate the specific code (warning: could not determine a source map reference (Could not auto-detect referenced sourcemap); you can modify vue's devtool to 'source-map' open; trouble time longest question
- "Test mail" does not appear, you can refer to [Sentry operation and maintenance] Sentry configuration mailbox based on Docker installation_MacwinWin's blog-CSDN blog





**粗体** _斜体_ [链接](http://example.com) `代码` - 列表 > 引用。你还可以使用@来通知其他用户。