This series of articles is the summary and harvest of my learning webpack. I hope some of my learning content can help some friends who are learning webpack. This article is the second in a series of articles, including webpack basic configuration and css related loader
The use of webpack (01 content supplement)
How to install webpack:
 # 全局安装
npm install webpack webpack-cli -g
# 本地项目安装
npm install webpack webpack-cli
If we execute webpack directly on the command line, at this time, it uses the globally installed webpack and webpack-cli by default. If these two things are not installed globally, an error will be reported as follows:
 $ webpack --config wk.config.js
bash: webpack: command not found
If the same dependencies are installed globally, then we can execute this command directly
If you want to use webpack and webpack-cli in the local project, there are two ways:
-
npx webpack --config wk.config.js: This command can directly use the executable file under node_modules/.bin/, using the locally installed dependencies -
npm run build: This command will execute the build command under scripts in the package.json file. In this case, the local dependency will be used first. If the local dependency does not exist, the global dependency will be used.
This also explains a very common interview question: why do you want to run npm run xxx instead of directly running its corresponding command
webpack configuration
webpack configuration file
The default configuration file of webpack is: webpack.config.js, which is placed in the root directory of the project. But in fact, webpack (the version of webpack 5 I use) provides three ways to write default configuration files, all of which are located in the project root directory, with decreasing priorities from top to bottom, as follows:
- webpack.config.js
- .webpack/webpack.config.js
- .webpack/webpackfile.js
If you don't want to use the default configuration file, you can customize the configuration file. In package.json, add --config 自定义配置文件路径
 "scripts": {
    "build": "webpack --config path"
}
The corresponding code can be viewed in webpack-cli/lib/webpack-cli.js:
 if (options.config && options.config.length > 0) {
    // 读取自定义配置文件
    // options.config 中包含自定义配置文件的路径
    const loadedConfigs = await Promise.all(
    options.config.map((configPath) => {
      return loadConfigByPath(path.resolve(configPath), options.argv)
    }
    ),
  );
} else {
    // 默认配置文件路径
    // Order defines the priority, in decreasing order
    const defaultConfigFiles = [
        "webpack.config",
        ".webpack/webpack.config",
        ".webpack/webpackfile"
    ]
}
custom configuration file
webpack basic configuration
This part includes simple configuration of entry, output and module. More complex configurations such as multi-entry, hashname, etc. will be explained step by step in subsequent articles
entry : Indicates the entry of the packaged file, represented by a relative path
 module.exports = {
    // src 下的 index.js 文件为打包的入口文件
    entry: './src/index.js'
}
outptut : Packed file output configuration. The output file path path is an absolute path
 module.exports = {
    output: {
        filename: 'bundle.js',
        path: path.resolve(__dirname, './build')
    }
}
module: is mainly used to configure loader options, and its writing structure is as follows:
 module.exports = {
    module: {
        rules: [

        ]
    }
}
Rules are stored in the Rule object, and the Rule object can be divided into three parts:
- Rule Conditions: Used to match the corresponding file. For example, use test, include, exclude, etc. combined with regular expressions to match css, less, jpg files
- Rule results: The loader used. Commonly used attributes are loader, options, and use. The use attribute corresponds to an array, and the array stores objects one by one. These objects are the specific loaders used. Among them, the loader attribute is a string, and the options attribute is a string or an object, which will be passed into the loader
- Nested rules: Specify nested rules under attribute rules
There are three specific ways of writing:
The first way of writing: the most complete way of writing
 module.exports = {
    module: {
        rules: [
            {
                test: /\.css$/,  // 使用正则表达式进行匹配
                use: [
                    {loader: 'css-loader', options: {}}
                ]
            }
        ]
    }
}
The second writing method: when there is only one loader, this shorthand method can be adopted
 module.exports = {
    module: {
        rules: [
            {
                 test: /\.css$/,  // 使用正则表达式进行匹配
                 loader: 'css-loader'
            }
        ]
    }
}
The third way of writing: omit the loader attribute and write the name of the loader directly. This shorthand can be used without configuring the options attribute.
 module.exports = {
    module: {
        rules: [
            {
                test: /\.css$/,  // 使用正则表达式进行匹配
                use: [
                    'css-loader'
                ]
            }
        ]
    }
}
CSS related loader configuration
css-loader
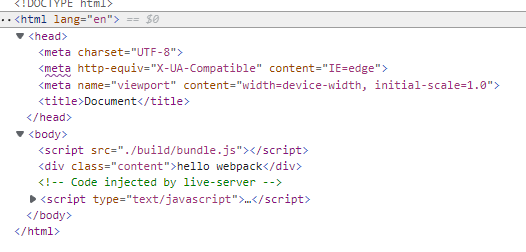
css-loader is only used to load css files, and will not insert the parsed css into the page. Therefore, the styles in the packaged HTML will not change.
At this point, you can see that CSS is not inserted in the form of style tags or inline styles, so CSS will not take effect.
style-loader
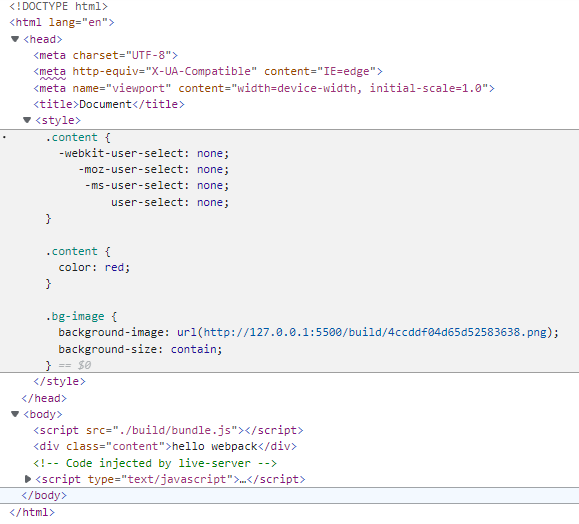
If you want to insert the style processed by css-loader into the page, you need another loader, style-loader. The style-loader is responsible for creating a style tag in the page and inserting the processed style into it, so that we can see the style change on the page.
What needs to be paid attention to is the execution order of the loader. In webpack, when multiple loaders are required, they are executed in bottom-up order
css-loader is used to load css files, style-loader inserts the processed css into the page, therefore, css-loader is executed before style-loader
 module.exports = {
    rules: [
        {
            test: /\.css$/,
            use: [
                'style-loader',
                'css-loader'
            ]
        }
    ]
}
How to deal with css preprocessing files such as less?
In development, less, sass, and stylus preprocessors are often used to write CSS styles, so how to support these preprocessors? Therefore, it is necessary to convert the preprocessor style file into a css file, and then process the css file
less
npm install less less-loader --save-devsass
npm install sass-loader sass webpack --save-devNote that it is the less tool we installed that really converts the less file into a css file. This tool has nothing to do with webpack, and the less-loader will automatically call the less package to process the less file.
Execute npx less ./src/css/component.less > component.css can convert less file to css file
less file processing configuration
 module.exports = {
    rules: [
        {
            test: /\.css$/,
            use: [
                'style-loader',
                'css-loader',
                'less-loader'
            ]
        }
    ]
}


**粗体** _斜体_ [链接](http://example.com) `代码` - 列表 > 引用。你还可以使用@来通知其他用户。