Vivo Internet Front-end Team-Wei Xing
Houdini is called Magic of styling and layout on the web. It looks very mysterious, but in fact, Houdini is not a mysterious organization or magic. It is a general term for a series of browser APIs related to CSS engines.
1. What is Houdini
Before understanding, let's take a look at some of the effects that Houdini can achieve:
Reverse rounded corner effect (Border-radius):
Dynamic spherical background (Backgrond):
Color border (Border):
It's amazing, it's not that easy to achieve these effects with regular CSS, but for CSS Houdini, it's very easy, these effects are just the tip of the iceberg, CSS Houdini can do so much more. (These examples are from Google Chrome Labs, more examples can be viewed through Houdini Samples ).
After reading the effect, let's talk about what Houdini is.
First of all, the most direct purpose of Houdini is to solve the problem of poor browser support for new CSS features and Cross-Browser . We know that there are a lot of new CSS features that are great, but rarely used because they are not widely supported by major browsers.
As the CSS specification is continuously updated and iterated, more and more beneficial features are incorporated, but a new CSS feature needs to wait a long time from being proposed to becoming a stable CSS feature until it is adopted by most browsers. Only when it is supported can it be widely used by developers.
The emergence of Houdini is the insight and solution to this pain point. It opens up a series of CSS engine APIs, allowing developers to create or extend existing CSS features through JavaScript, and even create their own CSS rendering rules for developers. Higher CSS development freedom to achieve more complex effects.
2. JS Polyfill vs Houdini
One might ask, why do we still need Houdini when in fact many new CSS features have alternative JavaScript Polyfills available before they are supported by browsers? Aren't these Polyfills the same solution to our problem?
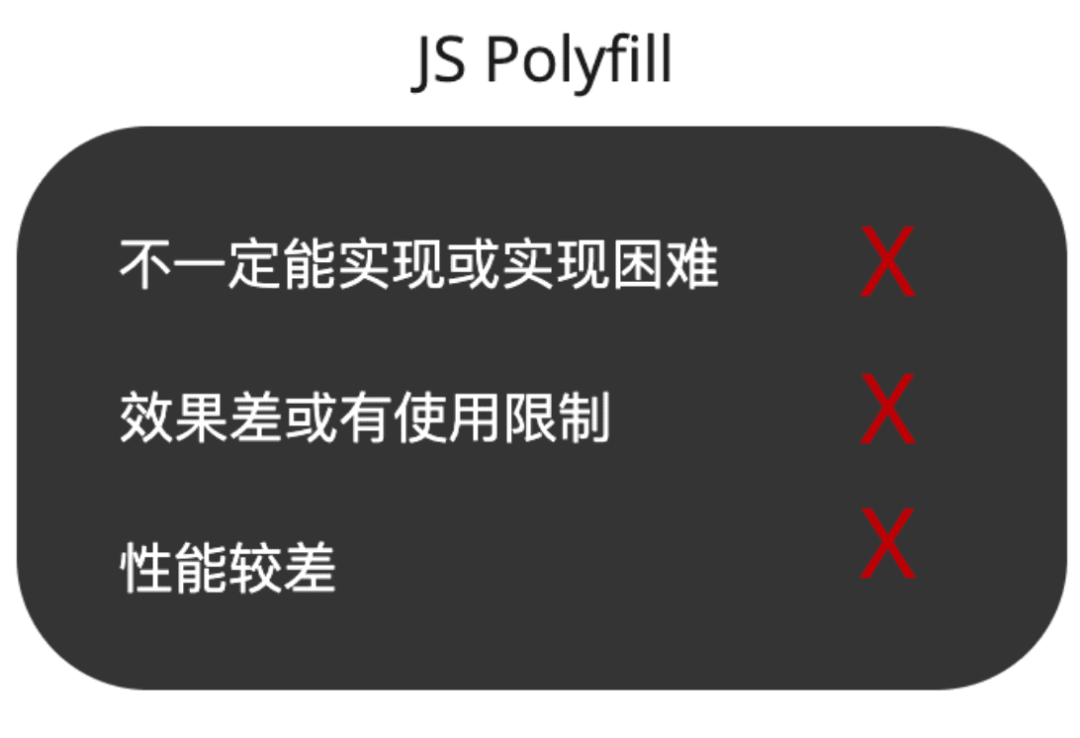
It's also easy to answer this question, the JavaScript Polyfill has three distinct flaws relative to Houdini:
1. Not necessarily attainable or difficult to attain.
CSSOM has very few APIs open to JavaScript, which means that developers can only do very limited things. They can only simply manipulate the DOM and dynamically calculate and adjust styles. Polyfills that implement some complex new CSS features are already very difficult. It is difficult, and it is powerless to render rules such as Layout, Paint, and Composite at a deeper level. So when a new CSS feature is introduced, it may not be fully implemented through JavaScript Polyfill.
2. The effect is poor or there are restrictions on use.
JavaScript Polyfills simulate CSS features through JavaScript, rather than rendering them directly through the CSS engine, and they usually have certain limitations and flaws. For example, the well-known css-scroll-snap-polyfill is a polyfill generated for the new CSS feature Scroll Snap, but it has limitations or inconsistent performance of native CSS when it is used.
3. Poor performance.
JavaScript Polyfills may incur a certain performance penalty. The execution time of JavaScript Polyfill is after the DOM and CSSOM are constructed and rendered. Usually, JavaScript Polyfill simulates CSS features by setting inline styles to DOM elements, which will cause page re-rendering or reflow. Especially when these Polyfills are bound to scroll events, it will cause more obvious performance loss.
The birth of Houdini makes the new features of CSS no longer depend on the browser. By directly operating the CSS engine, developers have a higher degree of freedom and performance advantages, and its browser support is constantly improving, and more and more APIs are used. Support, Houdini will inevitably accelerate into the world of web developers in the future, so it is necessary to do some understanding of it now.
In this article, we will introduce Houdini's APIs and how to use them, look at the current support of these APIs, and give some suggestions for using them in a production environment.
The name of Houdini is the same as the name of a famous American escape magician, Harry Houdini. Perhaps it is the meaning of escape, allowing new CSS features to escape the control of the browser.
3. Houdini APIs
As mentioned above, CSS Houdini provides many APIs related to CSS engines. According to the specification document provided by Houdini, APIs are divided into two types: high-level APIs and low-level APIs .
high-level APIs: As the name suggests, they are high-level APIs that are related to the rendering process of the browser.
- Paint API
Provides a set of APIs related to the painting process, through which we can customize rendering rules, such as adjusting color, border, background, shape and other drawing rules.
- Animation API
Provides a set of APIs related to composite rendering, through which we can adjust drawing levels and customize animations.
- Layout API
Provides a set of APIs related to the layout process, through which we can customize layout rules, similar to implementing layouts such as flex, grid, etc., and customize the alignment and position of elements or sub-elements and other layout rules.
low-level APIs: Low-level APIs that are the basis for the implementation of high-level APIs.
- Typed Object Model API
- CSS Properties & Values API
- Worklets
- Font Metrics API
- CSS Parser API
The support of these APIs is constantly being updated. You can see that the latest update is in May 2021, which is still relatively active. (Note: The picture comes from Is Houdini ready yet? )
Compared with the situation at the end of 2018 in the picture below, Houdini is currently receiving wider support, and we also expect more green plates in the picture to be gradually lit up.
You can visit Is Houdini ready yet? to see the latest support from Houdini.
In the following, we will focus on Typed Object Model API, CSS Properties & Values API, Worklets and Paint API, Animation API, because they currently have better support than other APIs, and their features have stabilized, and in the future There won't be any major changes, and you can use them directly in your projects after learning about them.
4. Typed Object Model API
Before Houdini appeared, the way we manipulated CSS Style through JavaScript was very simple, let's take a look at a piece of code that everyone is familiar with.
 // Before Houdini

const size = 30
target.style.fontSize = size + 'px' // "20px"

const imgUrl = 'https://www.exampe.com/sample.png'
target.style.background = 'url(' + imgUrl + ')' // "url(https://www.exampe.com/sample.png)"

target.style.cssText = 'font-size:' + size + 'px; background: url('+ imgUrl +')'
// "font-size:30px; background: url(https://www.exampe.com/sample.png)"
We can see that CSS styles are parsed as strings when accessed, and must also be passed in as strings when setting CSS styles. Developers need to manually concatenate values, units, formats and other information. This method is very primitive and backward. In order to save performance loss, many developers choose to pass a long string of CSS Style strings into cssText, which is poorly readable. And it's easy to make hidden syntax errors.
Typed Object Model is similar in naming to TypeScript , and both add the prefix Type . If you have used TypeScript, you will know that TypeScript enhances type checking, making the code more stable and easier to maintain, and the same is true for Typed Object Model .
Compared with the obscure traditional method above, Typed Object Model wraps CSS property values as Typed JavaScript Objects , so that each property value has its own type, which simplifies the manipulation of CSS properties and brings performance improvements. Describing CSS values via JavaScript objects is more readable and maintainable than strings, and is generally faster because the value can be manipulated directly and then cheaply converted back to the underlying value without building and parsing CSS characters string.
In Typed Object Model CSSStyleValue is the base class for all CSS property values, and subclasses under it are used to describe various CSS property values, for example:
- CSSUnitValue
- CSSImageValue
- CSSKeywordValue
- CSSMathValue
- CSSNumericValue
- CSSPositionValue
- CSSTransformValue
- CSSUnparsedValue
- other
Through their names, you can see which type of CSS property value these different subclasses are used to represent. Taking CSSUnitValue as an example, it can be used to represent CSS property values with units, such as font-size, width, height, its structure is very simple, consisting of value and unit.
 {
  value: 30,
  unit: "px"
}
As you can see, describing CSS property values through objects is indeed more readable than traditional strings.
To access and operate CSSStyleValue, you need to use two tools, attributeStyleMap and computedStyleMap(), the former is used to process inline styles and can be read and written, while the latter is used to process non-inline styles (stylesheet), only read operations .
 // 获取stylesheet样式
target.computedStyleMap().get("font-size"); // { value: 30, unit: "px"}

// 设置内联样式
target.attributeStyleMap.set("font-size", CSS.em(5));

// stylesheet样式仍然返回20px
target.computedStyleMap().get("font-size"); // { value: 30, unit: "px"}

// 内联样式已经被改变
target.attributeStyleMap.get("font-size"); // { value: 5, unit: "em"}
Of course, attributeStyleMap and computedStyleMap() have more available methods, such as clear, has, delete, append, etc. These methods provide developers with more convenient and clear CSS operation methods.
5. CSS Properties & Values API
According to the definition of MDN, the CSS Properties & Values API is also a part of Houdini's open API. Its function is to allow developers to explicitly declare custom properties (css custom properties), and to define the type, default value, initial value and Inherit method.
 --my-color: red;
--my-margin-left: 100px;
--my-box-shadow: 3px 6px rgb(20, 32, 54);
After being declared, these custom properties can be referenced via var(), for example:
 // 在:root下可声明全局自定义属性
:root {
  --my-color: red;
}

#container {
  background-color: var(--my-color)
}
After understanding the basic concepts and usage of custom properties, let's consider a question, can we use custom properties to help us complete some transition effects?
For example, we want to set the transition animation of the background color for a div container. We know that CSS cannot directly animate the transition transition to the background-color, then we consider setting the transition on our custom attribute --my-color, Is it possible to indirectly complete the gradient effect of the background through the gradient of the custom attribute? Based on the introduction to custom properties just now, maybe you will try this:
 // DOM
<div id="container">container</div>

// Style
:root {
  --my-color: red;
}

#container {
  transition: --my-color 1s;
  background-color: var(--my-color)
}

#container:hover {
  --my-color: blue;
}
This seems like a logical way to write it, but in fact, since the browser doesn't know how to parse the --my-color variable (because it doesn't have a clear type, it's just treated as a string), it can't The effect of transition is used, so we can't get a gradient background animation.
However, you can do it via the CSS.registerProperty() method provided by the CSS Properties & Values API, like this:
 // DOM
<div id="container">container</div>

// JavaScript
CSS.registerProperty({
  name: '--my-color',
  syntax: '<color>',
  inherits: false,
  initialValue: '#c0ffee',
});

// Style
#container {
  transition: --my-color 1s;
  background-color: var(--my-color)
}

#container:hover {
  --my-color: blue;
}
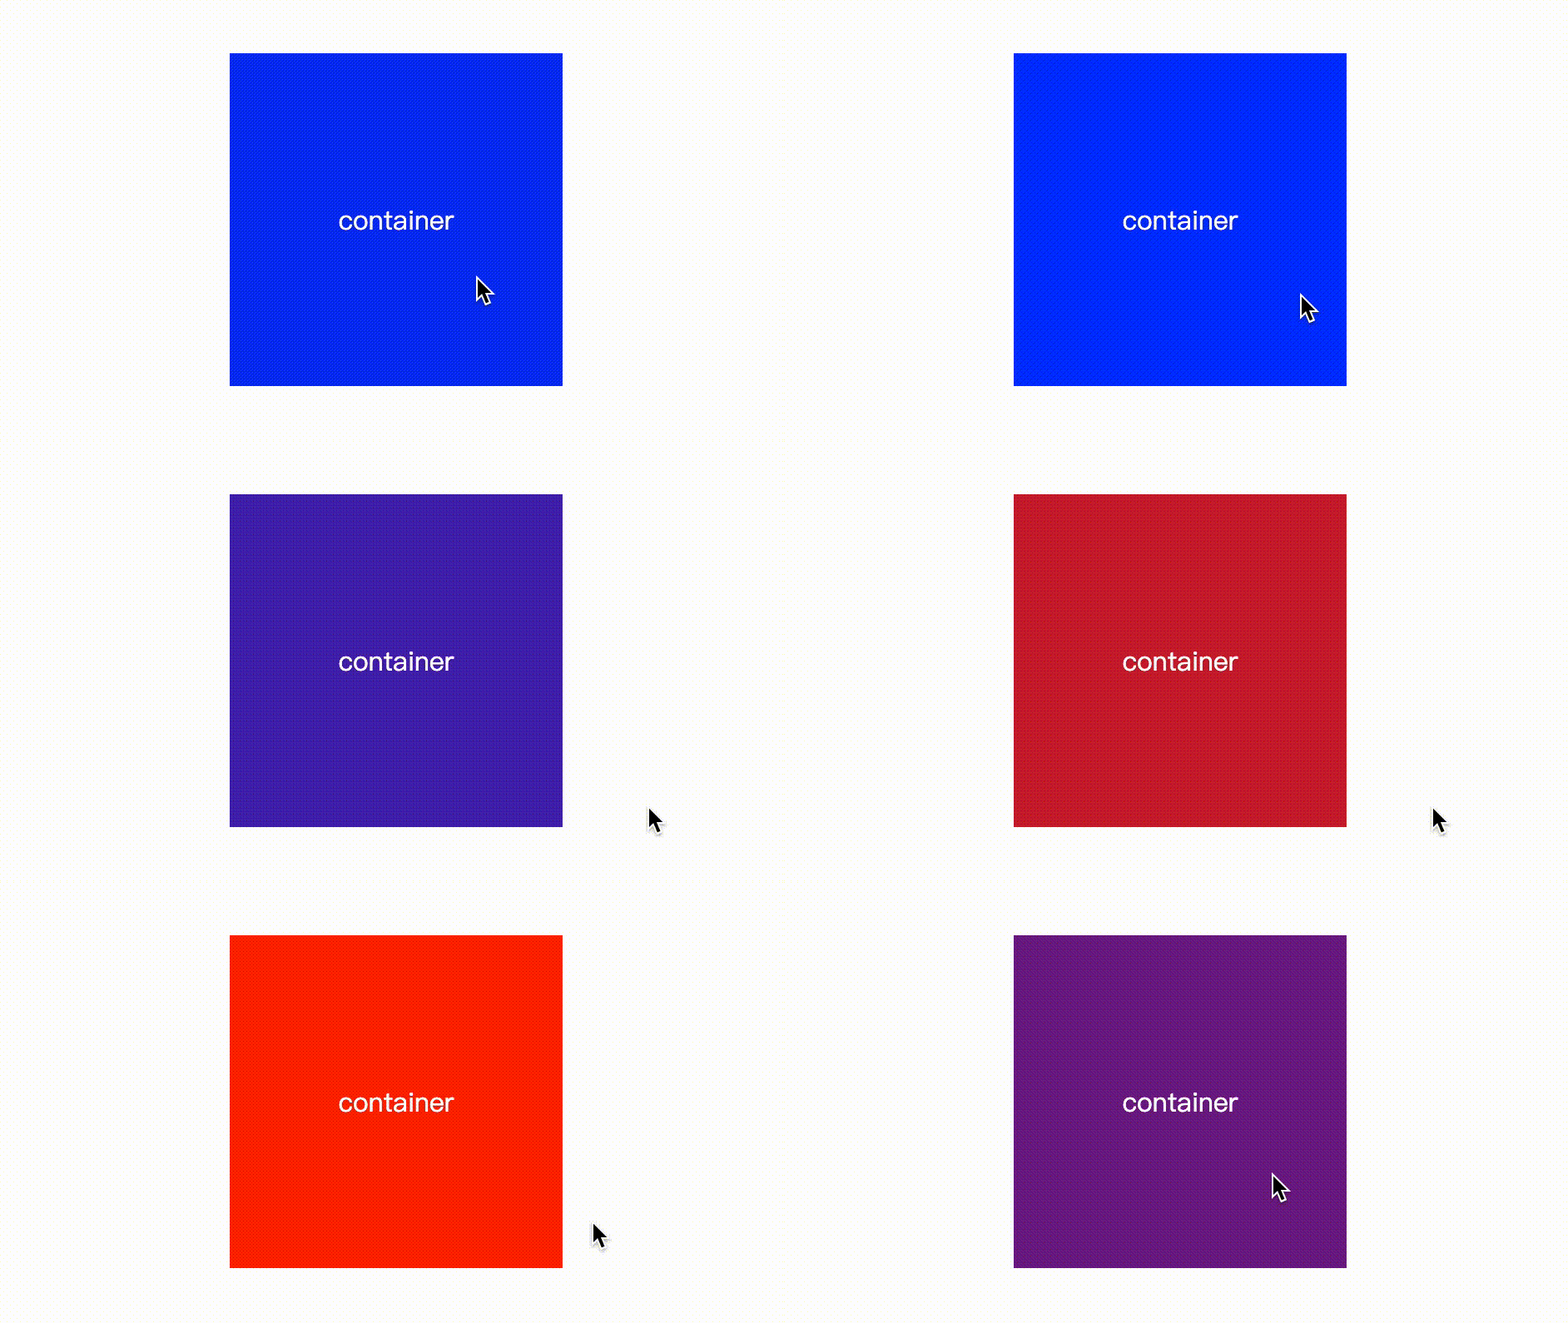
The difference from the above is that CSS.registerProperty() explicitly defines the type syntax of --my-color, which tells the browser to parse --my-color as color, so when we set transition: -- When my-color is 1s, the browser is informed of the type and parsing method of this attribute in advance, so it can correctly add a transition effect to it, and the obtained effect is shown in the following figure.
CSS.registerProperty() accepts a parameter object that contains the following options:
- name: The name of the variable. Repeated declarations or overwriting of variables with the same name are not allowed, otherwise the browser will give a corresponding error.
- syntax: tells the browser how to parse this variable. Its options contain some predefined values, etc.
- inherits: Tells the browser whether this variable inherits from its parent element.
- initialValue: Set the initial value of the variable and use the initial value as fallback.
In the future, developers can not only declare CSS variables explicitly in JavaScript, but also directly in CSS:
 @property --my-color{
  syntax: '<color>',
  inherits: false,
  initialValue: '#c0ffee',
}
6. Font Metrics API
Currently, the Font Metrics API is still in the early draft stage, and its specification may undergo major changes in the future. In the current specification file, it is explained that the Font Metrics API will provide a series of APIs, allowing developers to intervene in the rendering process of text, create text or dynamically modify the rendering effect of text, etc. Expect it to be adopted and supported in the future, providing more possibilities for developers.
7. CSS Parser API
The Font Metrics API is also in an early draft stage, and the current specification document states that it will provide more CSS parser-related APIs for parsing any form of CSS description.
8. Worklets
Worklets are lightweight Web Workers that provide an API for developers to access the underlying rendering mechanism. The worker threads of Worklets are independent of the main thread and are suitable for doing some high-performance graphics rendering work. And it can only be used in the HTTPS protocol (production environment) or enabled via localhost (development debugging).
Unlike Web Workers, we cannot perform any computing operations in Worklets. Worklets expose specific properties and methods that allow us to handle graphics rendering-related operations. The types of Worklet we can use are temporarily as follows:
- PaintWorklet - Paint API
- LayoutWorklet - Animation API
- AnimationWorklet - Layout API
- AudioWorklet - Audio API (in draft stage, not introduced yet)
Worklets provides the only method Worklet.addModule(), which is used to add execution modules to Worklets. The specific usage will be introduced in the subsequent Paint API, Layout API, and Animation API.
9. Paint API
The Paint API allows developers to draw the background, border, content and other graphics of elements through Canvas 2d methods, which cannot be done in the original CSS rules.
The Paint API needs to be used in conjunction with the PaintWorklet mentioned above. In short, the developer builds a PaintWorklet, and then passes it into the Paint API to draw the corresponding Canvas graphics. If you are familiar with Canvas, then the Paint API will not be unfamiliar to you.
The process of using the Paint API is briefly described as follows:
- Create a PaintWorklet using the registerPaint() method.
- Add it to the Worklet module, CSS.paintWorklet.addModule().
- It is used in CSS via the paint() method.
The registerPaint() method is used to create a PaintWorklet, in which developers can draw custom graphics using Canvas 2d.
You can visually see its specific usage through a paint API case checkboardWorklet given by Google Chrome Labs. In the case, the Paint API is used to draw a colored grid background for the textarea. Its code composition is very simple:
 /* checkboardWorklet.js */

class CheckerboardPainter {
  paint(ctx, geom, properties) {
    const colors = ['red', 'green', 'blue'];
    const size = 32;
    for(let y = 0; y < geom.height/size; y++) {
      for(let x = 0; x < geom.width/size; x++) {
        const color = colors[(x + y) % colors.length];
        ctx.beginPath();
        ctx.fillStyle = color;
        ctx.rect(x * size, y * size, size, size);
        ctx.fill();
      }
    }
  }
}

// 注册checkerboard
registerPaint('checkerboard', CheckerboardPainter);
/* index.html */
<script>
    CSS.paintWorklet.addModule('path/to/checkboardWorklet.js')  // 添加checkboardWorklet到paintWorklet
</script>
/* index.html */
<!doctype html>
<textarea></textarea>
<style>
  textarea {
    background-image: paint(checkerboard);  // 使用paint()方法调用checkboard绘制背景
  }
</style>
Through the above three steps, the final generated textarea background effect is shown in the figure:
Interested students can visit houdini-samples to view more official samples.
10. Animation API
In the past, when we wanted to animate DOM elements, there were usually only two options: CSS Transitions and CSS Animations. Although these two are simple to use and can meet most animation needs, they have two common shortcomings :
- Time-driven animations: Animations are only time-driven.
- Stateless: The developer cannot intervene in the execution process of the animation, and cannot obtain the intermediate state of the animation execution.
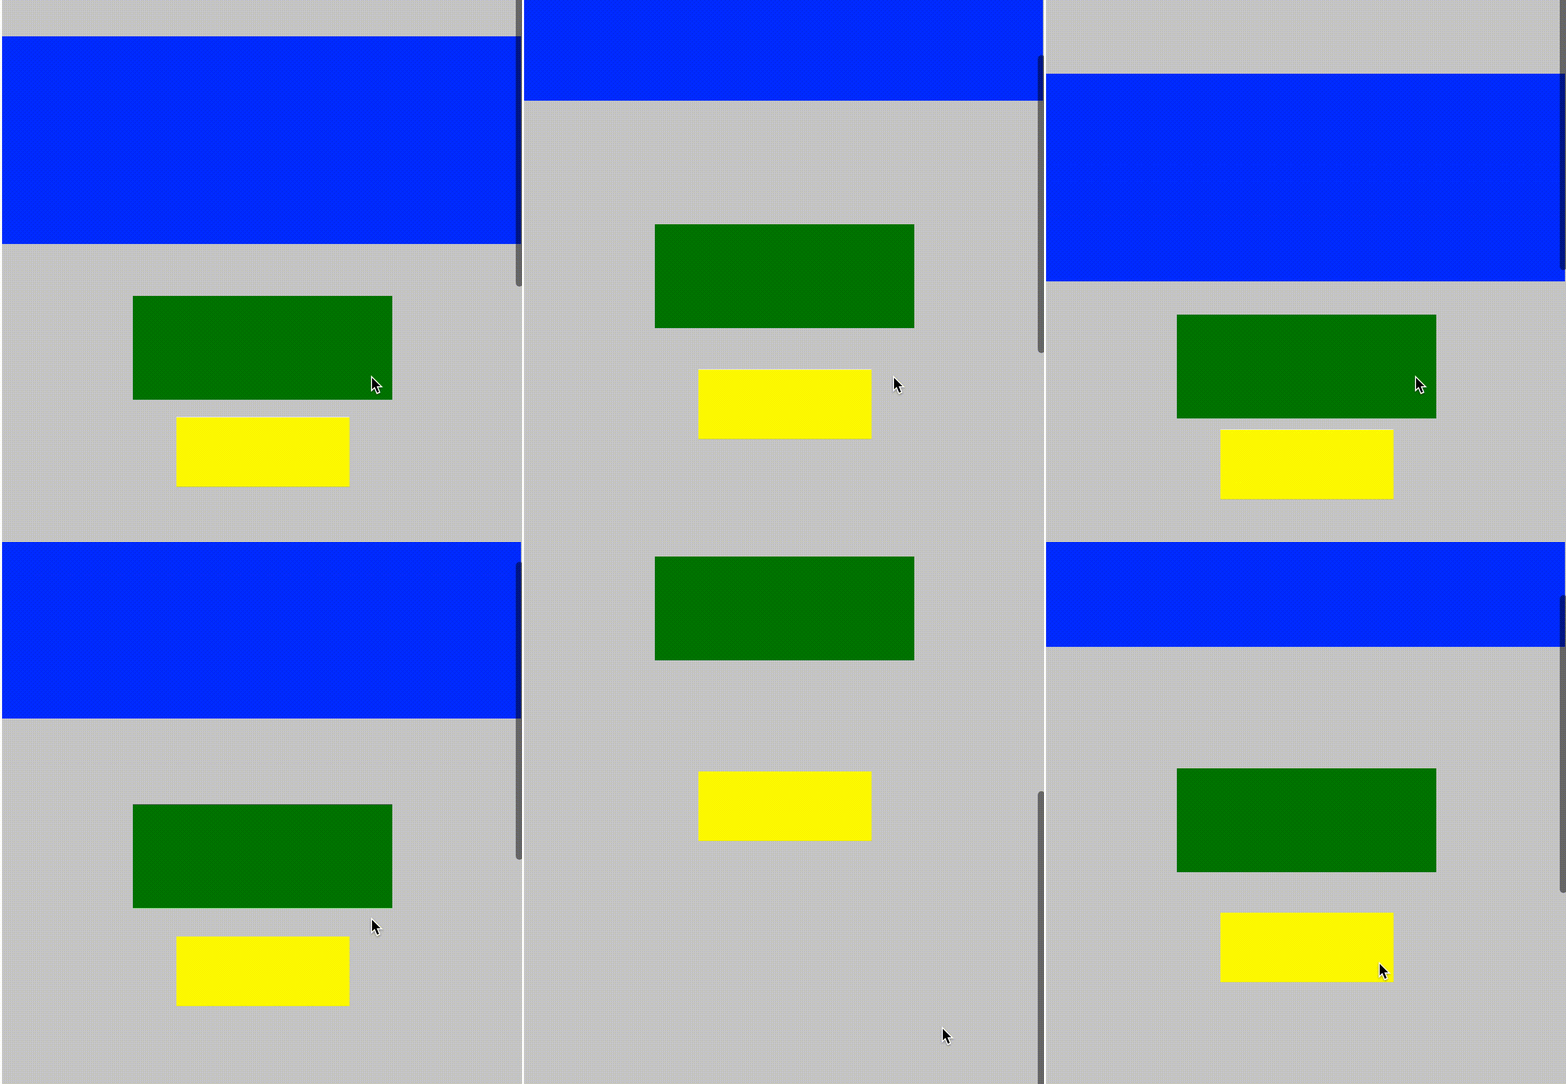
However, in some scenarios, it is difficult to develop a non-time-driven animation or to control the execution state of the animation. For example, parallax scrolling (Parallax Scrolling) , it performs animation according to the scrolling situation, and each element makes an inconsistent animation effect according to the scrolling situation. The following is a simple example of parallax scrolling effect. In general, more complex Parallax scrolling effects (such as those on beckett pages) are more difficult.
The Animation API can help us do that easily.
In terms of functions , it is an extension of CSS Transitions and CSS Animations, which allows users to intervene in the process of animation execution, such as combining the user's scroll, hover, and click events to control animation execution, such as adding a progress bar to the animation, through the progress bar Control the animation process to achieve some more complex animation scenes.
In terms of performance , it relies on AnimationWorklet and runs in a separate Worklet thread, so it has a higher animation frame rate and smoothness, which is especially noticeable in low-end models (of course, usually the browser kernel in low-end models This feature is not yet supported, this is just to illustrate that the Animation API is very friendly to the optimization of the visual experience of animation).
The use of Animation API is the same as that of Paint API, and it also follows the creation and use process of Worklet, which is divided into three steps, which are briefly described as follows:
- Create an AnimationWorklet using the registerAnimator() method.
- Add it to the Worklet module, CSS.animationWorklet.addModule().
- Use new WorkletAnimation(name, KeyframeEffect) to create and perform animations.
 /* myAnimationWorklet.js */
registerAnimator("myAnimationWorklet", class {
  constructor(options) {
    /* 构造函数,动画示例被创建时调用,可用于做一些初始化 */
  }

  //
  animate(currentTime, effect) {
    /* 干预动画的执行 */
  }
});
/* index.html */
await CSS.animationWorklet.addModule("path/to/myAnimationWorklet.js");;
/* index.html */

/* 传入myAnimationWorklet,创建WorkletAnimation */
new WorkletAnimation(
  'myAnimationWorklet', // 动画名称
  new KeyframeEffect(   // 动画timeline(对应于步骤一中animate(currentTime, effect)中的effect参数)
    document.querySelector('#target'),
    [
      {
        transform: 'translateX(0)'
      },
      {
        transform: 'translateX(200px)'
      }
    ],
    {
      duration: 2000, // 动画执行时长
      iterations: Number.POSITIVE_INFINITY  // 动画执行次数
    }
  ),
  document.timeline // 控制动画执行进程的数值(对应于步骤一中animate(currentTime, effect)中的currentTime参数)
).play();
You can see that the animate(currentTime, effect) method in step 1 has two parameters, that is, they allow developers to intervene in the animation execution process.
- currentTime:
The value used to control the animation execution corresponds to the document.timeline parameter passed in in the example of step 3. Usually, another parameter effect is dynamically modified according to its value, thereby affecting the animation execution. For example, we can pass in document.timeline or element.scrollTop as this dynamic value. Passing in the former indicates that we just want to use time changes to control the execution of the animation, and passing in the latter indicates that we want to control the animation execution by scrolling distance.
document.timeline is the time value that increases from 0 after each page is opened. It can be simply understood as the duration of the page being opened. Initially, document.timeline === 0, and it continues to increase with time.
- effect:
Corresponds to the new KeyframeEffect() passed in in step 3, which can be modified to affect the animation execution. A very common practice is to control the execution of animation by modifying effect.localTime. The effect of effect.localTime is equivalent to controlling the progress bar of animation playback, and modifying its value is equivalent to dragging the progress of animation playback.
If you do not modify effect.localTime or set effect.localTime = currentTime, the animation will be executed at a constant speed along with document.timeline, and the animation will be linear. But if effect.localTime is set to a fixed value, such as effect.localTime = 1000ms, then the animation will freeze the corresponding frame at 1000ms and will not continue.
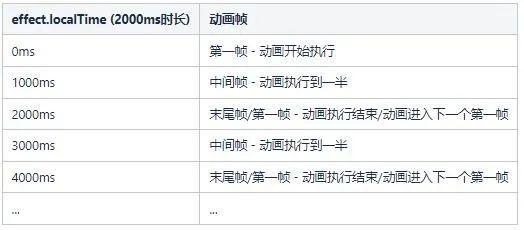
To better understand effect.localTime, let's take a look at the relationship between effect.localTime and animation execution. Suppose we create an animation with a duration of 2000ms, and the animation does not set a delay time.
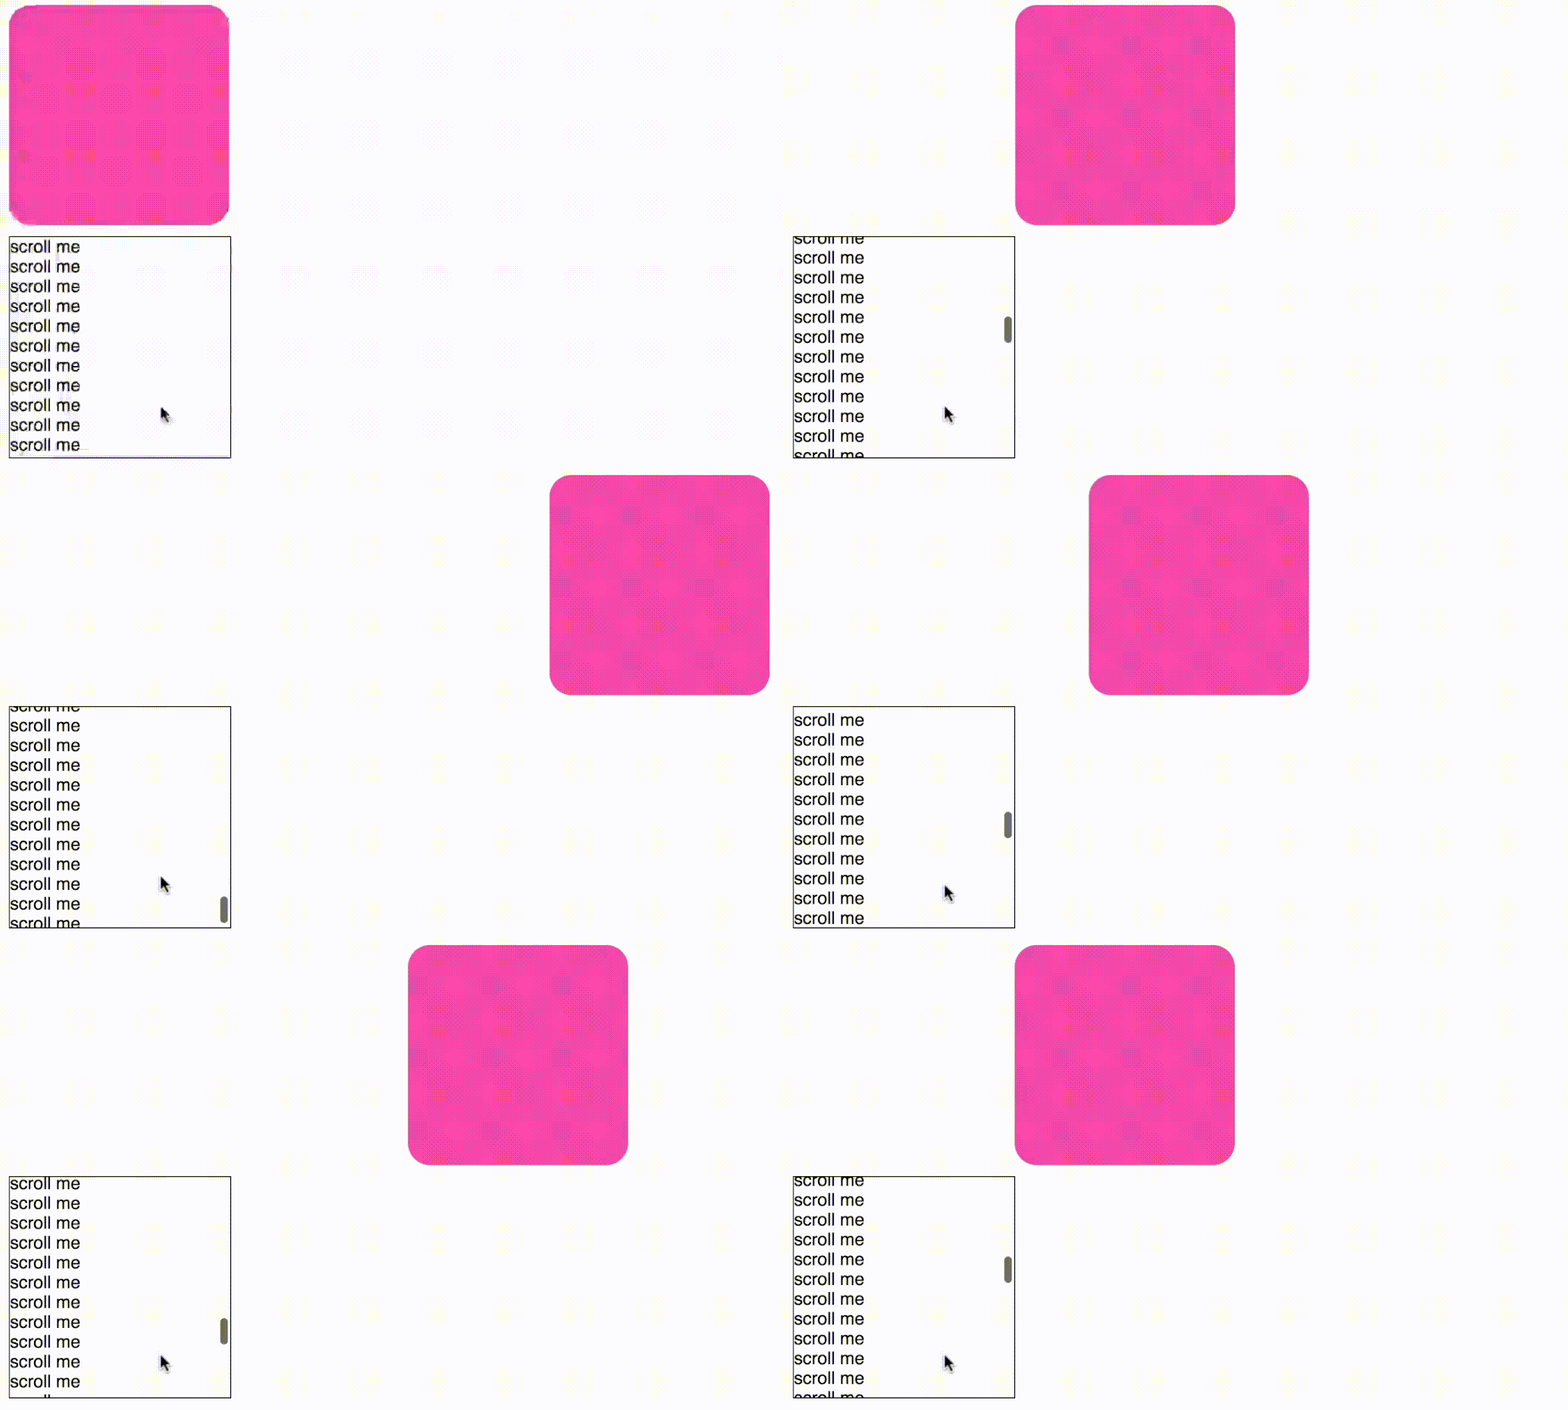
Through the above description, you should get to know how to do a simple scroll-driven animation. In fact, there is a special class for generating scrolling animation: ScrollTimeline Its usage is also very simple:
 /* myWorkletAnimation.js */

new WorkletAnimation(
  'myWorkletAnimation',
  new KeyframeEffect(
    document.querySelector('#target'),
    [
      {
        transform: 'translateX(0)'
      },
      {
        transform: 'translateX(500px)'
      }
    ],
    {
      duration: 2000,
      fill: 'both'
    }
  ),
  new ScrollTimeline({
    scrollSource: document.querySelector('.scroll-area'), // 监听的滚动元素
    orientation: "vertical", // 监听的滚动方向"horizontal"或"vertical"
    timeRange: 2000 // 根据scroll的高度,传入0 - timeRage之间的数值,当滚动到顶端时,传入0,当滚动到底端时,传入2000
  })
).play();
This way, with just a few lines of code, a simple scroll-driven animation is ready, smoother than any CSS Animations or CSS Transitions.
Let's take a look at the last API with the same potential: **Layout API**.
Eleven, Layout API
The Layout API allows users to customize new layout rules and create layouts other than flex and grid.
However, it is not simple to create a complete layout rule. The official flex and grid layouts fully consider various boundary conditions to ensure that there will be no mistakes in use. At the same time, the Layout API is more complicated to use than other APIs. Due to space limitations, this article only briefly shows the related APIs and usage methods. For details, please refer to the official description.
The Layout API is similar to the other two APIs, and the usage steps are also divided into three steps, which are briefly described as follows:
- Create a LayoutWorklet via registerLayout().
- Add it to the Worklet module, CSS.layoutWorklet.addModule().
- Use it with display: layout(exampleLayout).
The Google Chrome Labs example is shown below, which implements a waterfall layout through the Layout API.
Although it is difficult to customize the layout through the Layout API, we can still introduce excellent open source Worklets from others to help ourselves achieve complex layouts.
12. New feature detection
Given that the current browser support of Houdini APIs is still not perfect, you need to do feature detection when using these APIs before considering using them.
 /* 特性检测 */

if (CSS.paintWorklet) {
  /* ... */
}

if (CSS.animationWorklet) {
  /* ... */
}

if (CSS.layoutWorklet) {
  /* ... */
}
To debug in chrome, enter chrome://flags/#enable-experimental-web-platform-features in the address bar and check Enable Experimental Web Platform features.
13. Summary
Houdini APIs provide developers with access to the CSS rendering engine to achieve higher performance and more complex CSS rendering effects through various APIs. Although it is not fully ready, many APIs are even in draft stage, but it brings us more possibilities, and new features such as paint API, Typed OM, Properties & Values API are widely supported, Can be directly used to enhance our page effect. In the future, Houdini APIs will surely enter the world of developers slowly, and everyone can look forward to it and prepare for it.
references:









**粗体** _斜体_ [链接](http://example.com) `代码` - 列表 > 引用。你还可以使用@来通知其他用户。