How to create a front-end WebGPU project?
1. Beggar version of HelloWebGPU
The simplest WebGPU program should look like this:
 <script>
const init = () => {
  if ('gpu' in navigator) {
    console.log(navigator.gpu)
  } else {
    console.log('浏览器不支持 WebGPU;浏览器未开启 WebGPU 功能。')
  }
}
init()
</script>
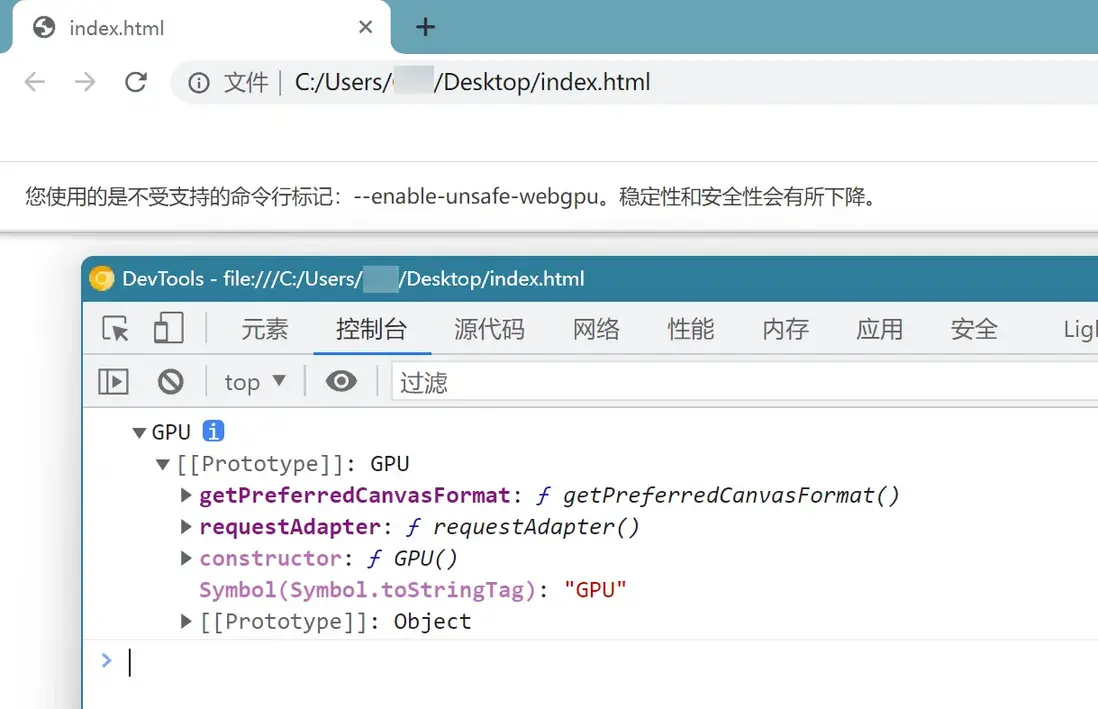
Save the above code as index.html , double-click to open and you can see the output object in the console:
If you are a novice who knows nothing, then I will only say these next few questions once. Of course, veterans can choose to skip.
① Why is index.html
不为什么,你喜欢home.html , main.html ,但是文件的后缀名得是html ,用index.html是习惯。
② Why is your code not displaying anything in the browser?
If you haven't read my previous article, and haven't read it carefully, you don't know why.
WebGPU Unlike WebGL , it breaks the strong association with the DOM - HTMLCanvasElement . It's simple:
WebGPU focus on GPU . Rendering is part of GPU's features, not all.
It means that rendering graphics is only a part of the function of the GPU, and WebGPU is closer to the functional positioning of modern GPUs.
Therefore, as an API built into the browser, you only need JavaScript to get this newly designed API, which is mounted on navigator .
③ Why don't you open index.html with HTTP protocol
Don't worry, use it later.
Double-click the "index.html" file, the browser will open this page, and you can see the complete file resource path in the browser address bar:
file:///C:/Users/<YourUserName>/Desktop/index.html The first letter is file:/// , followed by a local disk path, this method is called using the file protocol to access (open) the page , but we often use http (or https, for simplicity, the following All open with http) protocol, even locally:
http://localhost:8080/index.htmlThe specific reasons will not be repeated. There are many differences between the two protocols in Web development.
And start an HTTP server software locally to serve the resources in a certain disk. When I was a student, the data was not too much, not too little. You can use Apache-HTTPD, you can also use Tomcat, even for a small index.html There are a lot of people downloading a XAMPP.
Now, you can take advantage of:
- LiveServer plugin for VSCode
- More configurable nginx/openresty
- Python's http.server module
- NodeJS global http plugin / NodeJS write a simple HTTP server
- With various front-end engineering tools, use devServer
To serve this index.html, I will choose the last one later as an auxiliary tool during development.
2. I need type hints
In 2202, if anyone still suggests that novices use Notepad to write code, it is recommended to take a sip of Ganges water. Since software development, countless technologies and thresholds have been accumulated, so don't stack them anymore.
I chose VSCode as the JavaScript code editor, but you can choose anything else.
When writing a dynamically typed language like JavaScript, when calling a function, moving the mouse pointer to a variable, and no intellisense on the function, pure guessing and backrest are quite impatient.
We can do type hinting with the help of TypeScript's type declaration .
It is a pity that at the time of writing this article, the major browsers in the official channel have not officially exposed the WebGPU JavaScript API.
2.1. Getting type hints with VSCode's jsconfig
VSCode is written in TypeScript and naturally supports type declaration files ( *.d.ts ). In an ordinary JavaScript project, to get type hints like TypeScript, just add a jsconfig.json file in the project root directory, which has a compilerOptions.typeRoots configuration item, telling VSCode to Just go where to read the type declaration file.
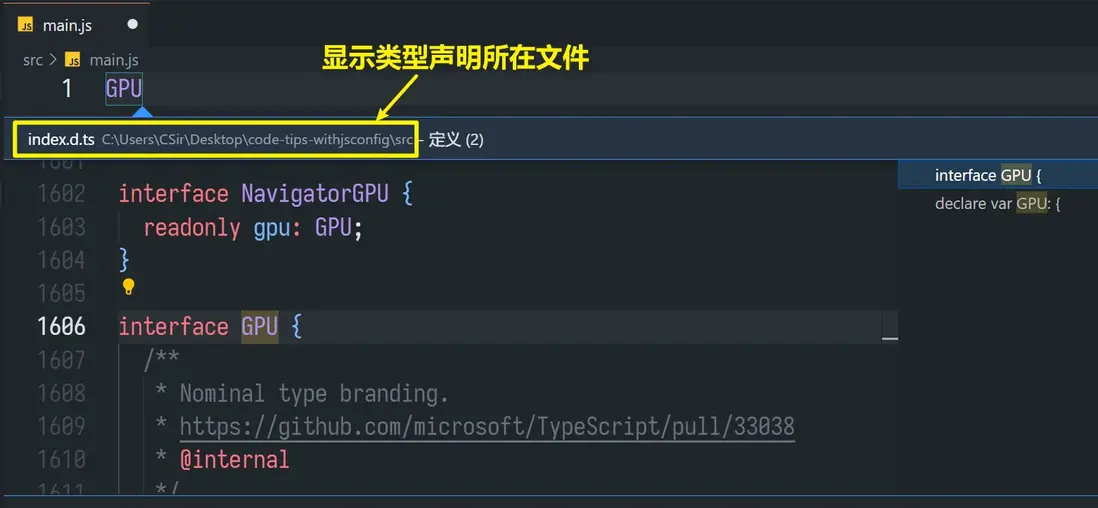
As shown above, jsconfig.json tells VSCode that the type declaration file is found in the ./src folder. In that index.d.ts file, you can write the type declaration yourself; I just got lazy and copied a WebGPU type declaration file from the official repository and pasted it here.
So, you can use WebGPU type hints in the main.js file!
This is just a transitional method, and the next step will show the use of WebGPU's official type hinting library in a Vite + TypeScript project.
2.2. Using type hints in front-end engineering projects
My choice is Vite + TypeScript, and the reason for choosing Vite is simple:
- The development server is fast enough with esbuild
- Plugins are booming, and out-of-the-box supports many features that Webpack requires loader to implement
- Rich documentation
- Less built-in dependencies
On top of that, I'm rather tired of the polyfilling process. after all,
Do browsers that can run WebGPU still need to consider backward compatibility?
I will not repeat how to use the Vite scaffolding tool to open various template projects. I used the Vanilla + TS template to create a project "gpuweb-prj":
Then, install the project dependencies:
pnpm install && pnpm add @webgpu/types -D Then, add the path of the type hint library in the tsconfig.json of compilerOptions.typeRoots in the project root directory:
 {
  "compilerOptions": {
    "typeRoots": [ "./node_modules/@webgpu/types", "./node_modules/@types"]
  }
}
"./node_modules/@types" is the default path for a type hinting library repository located on GitHub - DefinitelyTyped/DefinitelyTyped: The repository for high quality TypeScript type definitions. , but WebGPU is not committed to this repository, so a new path needs to be added, It is the same as adding your own path in Section 2.1, except that the TypeScript project is used here, so it is the tsconfig.json file.
Then, you can happily use the WebGPU type in your ts code.
When WebGPU is officially launched in major browsers, there should be no need to do so much trouble. At that time, like WebGL, types will be integrated into TypeScript's built-in type declarations:
:) It should be coming soon, I hope the official pigeons will not be too long.
2.3. In projects such as Vue/React
Similarly, you can configure the path of the type declaration file in the jsconfig.json / tsconfig.json file.
3. Example of drawing a triangle
Based on the above project created with Vite, modify main.ts as follows:
 import { wgslShader } from './shader'
import './style.css'

const init = async () => {
  if (!('gpu' in navigator)) {
    return
  }
  const canvas = document.getElementById('canvas') as HTMLCanvasElement

  //#region 适配高 DPR 屏幕的 canvas
  const dpr = window.devicePixelRatio
  canvas.style.height = `${canvas.height / dpr}px`
  canvas.style.width = `${canvas.width / dpr}px`
  //#endregion

  const adapter = await navigator.gpu.requestAdapter()
  if (!adapter) {
    return
  }
  const device = await adapter.requestDevice()
  const ctx = (canvas as HTMLCanvasElement).getContext('webgpu')
  if (!ctx) {
    return
  }
  const preferFormat = navigator.gpu.getPreferredCanvasFormat()
  ctx.configure({
    device: device,
    format: preferFormat,
    alphaMode: 'opaque',
  })

  const triangleShader = device.createShaderModule({
    code: wgslShader
  })
  const pipeline = device.createRenderPipeline({
    layout: "auto",
    vertex: {
      module: triangleShader,
      entryPoint: 'vertex_main'
    },
    fragment: {
      module: triangleShader,
      entryPoint: 'frag_main',
      targets: [{
        format: preferFormat
      }]
    },
    primitive: {
      topology: 'triangle-list'
    }
  })

  const renderPassDescriptor = {
    colorAttachments: [{
      view: undefined,
      clearValue: [0, 0, 0, 1],
      loadOp: 'clear',
      storeOp: 'store',
    }],
  } as GPURenderPassDescriptor

  const frame = () => {
    if (!canvas) {
      return
    }

    const commandEncoder = device.createCommandEncoder();
    (renderPassDescriptor.colorAttachments as GPURenderPassColorAttachment[])[0].view = ctx.getCurrentTexture().createView()
    const renderPassEncoder = commandEncoder.beginRenderPass(renderPassDescriptor)
    renderPassEncoder.setPipeline(pipeline)
    renderPassEncoder.draw(3)
    renderPassEncoder.end()

    device.queue.submit([
      commandEncoder.finish()
    ])

    requestAnimationFrame(frame)
  }
  requestAnimationFrame(frame)
}

window.addEventListener('DOMContentLoaded', () => {
  init()
})
Create the shader file shader.ts as follows:
 export const wgslShader = /* wgsl */`
@vertex
fn vertex_main(
  @builtin(vertex_index) vertex_index: u32
) -> @builtin(position) vec4<f32> {
  var pos = array<vec2<f32>, 3>(
    vec2<f32>(0.0, 0.5),
    vec2<f32>(-0.5, -0.5),
    vec2<f32>(0.5, -0.5)
  );

  return vec4<f32>(pos[vertex_index], 0.0, 1.0);
}

@fragment
fn frag_main() -> @location(0) vec4<f32> {
  return vec4<f32>(1.0, 0.0, 0.0, 1.0);
}
`
The styles and HTML are as follows:
 <div id="app">
  <canvas id="canvas" height="800" width="1800"></canvas>
</div>


<style>
html, body {
  margin: 0;
  padding: 0;
}

#app {
  height: 100vh;
  width: 100vw;
  display: flex;
  justify-content: center;
  align-items: center;
}
</style>
The rest of the changes are not big.
4. The author's words
The vigorous development of front-end engineering is inseparable from NodeJS, although this thing is not intended to be front-end, but it provides a good soil for a series of front-end construction and development tools.
Front-end systemization is inseparable from TypeScript, which should be considered at the right time.
The front-end is moving towards a variety of rich applications, ng, react, and vue can be described as a strong stroke, but the web graphics developers who call the GPU need to know more clearly: are you manipulating various DOMs or worrying about graphics APIs?


**粗体** _斜体_ [链接](http://example.com) `代码` - 列表 > 引用。你还可以使用@来通知其他用户。