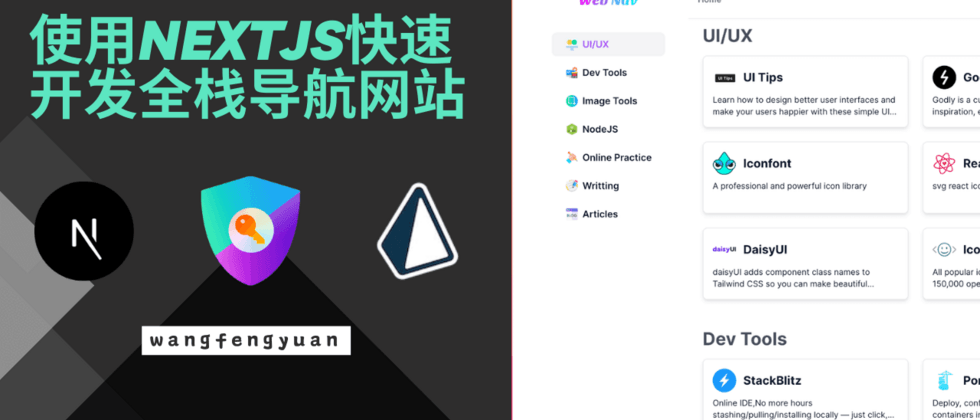
背景
随着ChatGPT的火热,国外很多开发者快速响应,应用于不同场景的AI应用井喷式的爆发,并且基本集中在web领域应用,而在快速开发的背后,我们可以看到,开发者大多选择Next.js或者Nuxt.js全栈框架来开发,以快速验证自己的产品。这种选型的背后,我觉得主要原因有:
SEO的重要性国外更加注重SEO的重要性,国内搜索引擎大多是靠花钱买搜索流量,包括小程序、App这类对SEO的需求并不大
Edge Function的兴起Serverless使得前端开发能快速开发全栈应用,方便的托管自己后端服务,而不用过多关注部署,然而他的缺点是,多数Serverless都是采用容器化的方案,因此冷启动时间长,如果在自己的云函数转发请求OpenAI接口,可能会发生请求时间很长的情况。如今, Vercel、CloudFlare、Supabase等厂商都有了Edge Function的能力,使得函数可以在一些距离用户更近的边缘节点运行,为了更快的冷启动时间来快速响应用户,这种方案一般也加了部分限制,但是依旧得到很多开发者的青睐
云服务厂商的多样性
云服务厂商提供了很多基础服务,当把项目托管给Vercel等服务时,可以与Github集成进行持续部署,同时还会分配一个域名。很多其他厂商也提供了很多的免费后端存储服务,例如:
- Upsatsh提供的Redis
- Supabase提供的PostgreSQL
- PlantScale提供的MySQL
- Clerk提供的用户认证和用户管理
以上这些厂商的免费计划对于个人开发完全够用,当然也可以根据产品规模使用付费计划
而本文旨在尝试开发一个简单的导航页面,满足自己的收集癖好,用于解放自己的收藏夹,来学习Next.js开发,体验Next.js带来的开发全栈应用的便捷性。
初始化项目
随着以tailwindcss、unocss这种原子化CSS方案的出现,基于此衍生出来的UI组件库也很多,比如Radix、daisyUI、flowbite, 其中的RadixUI组件库相当注重网页的可访问性,组件都遵循WAI-ARIA标准,这使得开发者构建可访问的UI界面变得更加容易,而因为他专注于可访问性、属于Headless UI也就是无具体样式类名代码,因此shadcn作者开发了shadcn/ui组件库,在此RadixUI组件库基础上赋予了简洁美观的样式,得到了很多开发者的青睐, 也非常推荐大家体验下。
这里直接选择克隆该作者的Nextjs模版初始化项目
git clone https://github.com/shadcn/next-template该项目使用了Next.js最新的app router版本,并且已经集成了tailwindcss和shadcn/ui组件库。这里选择做导航网站也是因为它足够简单,关键样式是针对侧边栏,因为tailwindcss是移动端优先,所以这里设置默认隐藏,当屏幕宽度大于sm时展示。
<div className="fixed z-20 hidden min-h-screen sm:block">
    ...
</div>而对于列表区域,采用grid布局,默认移动端优先一列,根据屏幕大小展示2列或者3列
<div className="grid grid-cols-1 gap-3 md:grid-cols-2 md:gap-6 lg:grid-cols-3">
   ...
</div>其他的样式可以借鉴一下别人的网站设计简单美化下,对于不太熟悉css并且缺乏审美的我花了不少的时间在调整,总觉得网站不够美观,但是又不知道该如何美化。
数据库集成
定义模型
数据库集成这里我选择了Prisma,类似的比较热门的还有Drizzle,针对Prisma的具体概念、使用和它的优点,可以参考我整理记录的笔记。执行
npx prisma init会创建prisma/schema.prisma文件,创建模型如下
generator client {
  provider = "prisma-client-js"
}

datasource db {
  provider = "mysql"
  url      = env("DATABASE_URL")
}

model Category {
  id          String   @id @default(cuid())
  icon        String
  title       String
  description String
  rank        Int?
  createdAt   DateTime @default(now()) @map(name: "created_at")
  updatedAt   DateTime @default(now()) @map(name: "updated_at")
  links       Link[]

  @@map(name: "category")
}

model Link {
  id          String   @id @default(cuid())
  icon        String
  url         String
  title       String
  description String
  rank        Int?
  public      Boolean  @default(true)
  status      Int      @default(1) @db.TinyInt
  createdAt   DateTime @default(now()) @map(name: "created_at")
  updatedAt   DateTime @default(now()) @map(name: "updated_at")
  cid         String
  catagory    Category @relation(fields: [cid], references: [id])

  @@map(name: "link")
}其中DATABASE_URL为远程数据库地址,这里我使用的是PlantScale的MySQL。当然你也可以使用Supabase的PostgreSQL或者其他数据库,创建.env文件,填入服务地址
DATABASE_URL='mysql://user:password@aws.connect.psdb.cloud/dev?sslaccept=strict'可以在这个可视化Prisma模型网站看到关系图如下, 分别表示类别实例和网站链接实例
表同步
然后执行命令将本地模型同步到数据库表
npx prisma db push然后可能会遇到下面报错
查阅后发现官网在文档中有说明,PlanetScale的MySQL数据库不支持外键,需要特殊的指定relationMode
datasource db {
  provider     = "mysql"
  url          = env("DATABASE_URL")
  relationMode = "prisma"
}relationMode默认值是foreignKeys,当使用PlanetScale数据库的MySQL连接器时,应启用此选项, 在Prisma Client中模拟关系。再次执行db push指令,将模型同步到数据库
插入和查询数据
然后执行
npx prisma studio打开表编辑器添加自己的数据
执行命令生成PrismaClient实例
pnpm install @prisma/client
npx prisma generate
然后就可以通过关联关系一次性查询出数据
import prisma from '@/lib/db';
import type { Prisma } from '@prisma/client';

export default async function getNavLinks() {
  const res = await prisma.category.findMany({
    orderBy: [
      {
        rank: 'asc',
      }
    ],
    include: {
      links: {
        orderBy: {
          rank: 'asc',
        },
        where: {
          public: true,
          status: 1,
        },
      },
    },
  });
  return res;
}

export type CategoryWithLinks = Prisma.PromiseReturnType<typeof getNavLinks>
用户认证
在Next.js中集成用户认证非常简单,可以直接使用NextAuth
NextAuth
NextAuth是一个为Next.js应用程序提供的开源身份验证解决方案。默认情况下,NextAuth使用JSON Web Tokens(JWT)保存用户会话。NextAuth支持流行的登录服务,如Google、Facebook、 Auth0 、Apple、电子邮件以及OAuth 1.0和2.0服务等等,是一种灵活可配置的身份验证解决方案。
首先安装所需依赖
pnpm install next-auth @next-auth/prisma-adapter按照官方文档指引添加用户相关模型
model Account {
  id                 String  @id @default(cuid())
  userId             String
  type               String
  provider           String
  providerAccountId  String
  refresh_token      String?  @db.Text
  access_token       String?  @db.Text
  expires_at         Int?
  token_type         String?
  scope              String?
  id_token           String?  @db.Text
  session_state      String?

  user User @relation(fields: [userId], references: [id], onDelete: Cascade)

  @@unique([provider, providerAccountId])
}

model Session {
  id           String   @id @default(cuid())
  sessionToken String   @unique
  userId       String
  expires      DateTime
  user         User     @relation(fields: [userId], references: [id], onDelete: Cascade)
}

model User {
  id            String    @id @default(cuid())
  name          String?
  email         String?   @unique
  emailVerified DateTime?
  image         String?
  accounts      Account[]
  sessions      Session[]
}

model VerificationToken {
  identifier String
  token      String   @unique
  expires    DateTime

  @@unique([identifier, token])
}
GitHub
获取Github客户端ID,参考文档,包含以下步骤:
打开
GitHub应用程序页面,点击创建Github应用。输入名称、主页、以及授权后的回调地址,这里开发环境时填
localhost:3000,上线时切换成自己的线上域名即可。点击”生成”并保存
Client ID和Client Secret
Google
参考NextAuth文档指引,在Google开发者网站注册应用并选择api服务
应用类型选择Web应用,类似Github填上可信任的域名和回调地址确认
创建 API 路由
首先在.env文件中添加上面保存的认证相关密钥,其中NEXTAUTH_SECRET是用户生成JWT的密钥
# google登录
GOOGLE_CLIENT_ID="GOOGLE_CLIENT_ID"
GOOGLE_CLIENT_SECRET="GOOGLE_CLIENT_SECRET"

# github登录
GITHUB_CLIENT_ID="GITHUB_CLIENT_ID"
GITHUB_CLIENT_SECRET="GITHUB_CLIENT_SECRET"

NEXTAUTH_URL="http://localhost:3000"
NEXTAUTH_SECRET="webnav"可以看到上面的API回调地址分别是/api/auth/github 和 /api/auth/google, 创建app/api/auth/[…nextauth]/route.ts 文件,并添加以下代码片段:
import NextAuth, { type NextAuthOptions } from "next-auth";
import GoogleProvider from "next-auth/providers/google";
import GitHubProvider from "next-auth/providers/github";
import CredentialsProvider from "next-auth/providers/credentials";
import { PrismaAdapter } from "@next-auth/prisma-adapter";
import { PrismaClient } from "@prisma/client";
import { compare } from "bcrypt";

const prisma = new PrismaClient();

export const authOptions: NextAuthOptions = {
  adapter: PrismaAdapter(prisma),
  providers: [
    GitHubProvider({
      clientId: process.env.GITHUB_CLIENT_ID!,
      clientSecret: process.env.GITHUB_CLIENT_SECRET!,
    }),
    GoogleProvider({
      clientId: process.env.GOOGLE_CLIENT_ID!,
      clientSecret: process.env.GOOGLE_CLIENT_SECRET!,
    }),
    CredentialsProvider({
      name: "Credentials",
      credentials: {
        email: { label: "Email", type: "email" },
        password: { label: "Password", type: "password" },
      },
      async authorize(credentials) {
        const { email, password } = credentials ?? {}
        if (!email || !password) {
          throw new Error("Missing username or password");
        }
        const user = await prisma.user.findUnique({
          where: {
            email: credentials?.email,
          },
        });
        // if user doesn't exist or password doesn't match
        if (!user || !(await compare(password, user.password!))) {
          throw new Error("Invalid username or password");
        }
        return user;
      },
    })
  ],
  session: {
    strategy: "jwt",
  },
  debug: process.env.NODE_ENV !== "production",
};

const handler = NextAuth(authOptions);

export { handler as GET, handler as POST };其中,GitHubProvider用户Github登录,GoogleProvider用于Google登录,CredentialsProvider用于自定义登录,这里会检查邮箱密码, 匹配上了就返回用户信息。
同时还需要创建注册登录页面,创建app/login/page.tsx文件和app/register/page.tsx 文件,页面直接复制的taxonomy 页面样式,自己加上google登录按钮,效果如图
页面上通过
import { signIn, signOut } from "next-auth/react"signIn方法允许使用Google或GitHub帐户进行登录。 signOut允许注销用户会话, 具体使用可以参考官方文档这部分
部署
在[Vercel](https://vercel.com/)中直接导入项目,修改构建命令为
npx prisma generate && next build在build之前先生成PrismaClient类型,不然编译时会因为类型报错而失败,同时添加.env中所需要的环境变量
同时因为我们的数据源在数据库,而Nextjs默认是构建时生成页面的也就是SSG模式,在数据库有数据更新时我们需要更新页面内容,因此我们需要使用它的增量静态生成ISR(Incremental Static Regeneration)模式,参考官方文档,在page.tsx中添加导出,这里对更新时效性要求不高所以设置为1天
export const revalidate = 24 * 60 * 60;从构建日志中可以看到已经生效了
部署成功后绑定自定义域名就完结撒花了。
总结
本文以简单的导航网站举例,结合Next.js、Prisma、NextAuth、shadcn/ui 来学习如何构建全栈应用,你可以打开页面体验,也可以在本项目开源地址查看完整代码,最后码字不易,如果你都看到这了,欢迎star一波,感谢。


**粗体** _斜体_ [链接](http://example.com) `代码` - 列表 > 引用。你还可以使用@来通知其他用户。