前言
这里的指令指的是为 Angular 应用程序模板中的标签添加额外行为的类。
Angular中指令分为属性型指令以及结构型指令,其中属性型指令主要用于操作元素的属性和样式,而结构型指令主要用于改变DOM的结构和布局。
下面对@Directive(options)的参数属性说明。
选择器(selector)
指令的选择器可以使用属性,css,元素名,id等来进行选择DOM元素,下面对这几种方式举几个例子。
属性名([attribute])选取
一般在angular中使用使用属性名选取是最常用的方法,只需要将该指令的selector加到dom元素上即可。
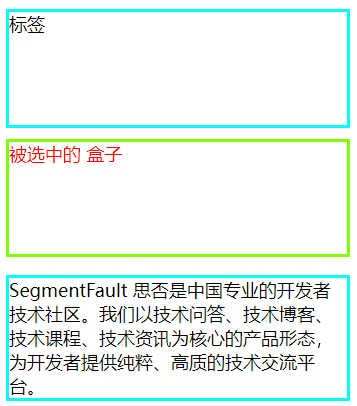
先大概了解一下演示用的指令的作用以及DOM结构( app-index 含有 p 元素)
import {Directive, ElementRef, Renderer2} from '@angular/core';

@Directive({
  selector: '[appSelect]'
})
export class SelectDirective {
  constructor(private elementRef: ElementRef,
              private renderer: Renderer2) {
    this.renderer.setStyle(elementRef.nativeElement, 'color', 'red');
    this.renderer.setProperty(elementRef.nativeElement, 'innerText', '被选中的');
  }
}
<label appSelect class="label-style" id="label-id" for="div-id">
  标签
</label>
<div class="div-style" id="div-id">
  盒子
</div>
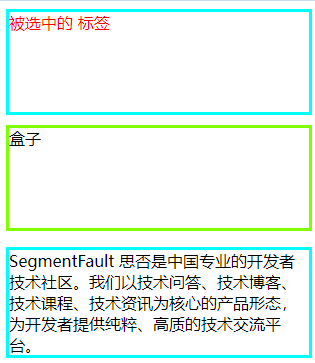
<app-index id="app-index-id"></app-index>选中前后:
这里因为是在构造函数中执行的样式修改,所以修改完innerText之后"标签"二字仍会在浏览器渲染时添加。
类名(.class)选取
div 对应DOM的 class 为 div-style 所以被自动选择。
@Directive({
  selector: '.div-style'
})元素名(element-name)选取
@Directive({
  selector: 'app-index'
})属性名和属性值([attribute=value])选取
@Directive({
  selector: '[for=div-id]'
})元素名、属性名和属性值(elementName[attribute=value])选取
@Directive({
  selector: 'label[id=label-id2]',
})
<label class="label-style" id="label-id1" for="div-id">
标签
</label>
<label class="label-style" id="label-id2" for="div-id">
标签
</label>取非选取(:not(sub_selector))
不符合sub_selector的内容会被选取
@Directive({
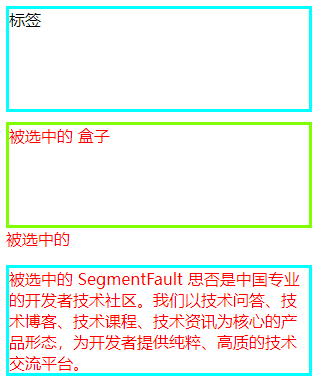
  selector: ':not([for=div-id])'
})或选取(selector1, selector2, ...)
通过 "," 分割每个选择器
@Directive({
  selector: '#label-id, div, .p-style'
})定义输入(inputs)
指令获取到宿主元素时的输入
inputs: string[]可以添加在元数据中,每个字符串可以是name 或者 name:alias, 如果alias别名存在,那么在模板绑定时需要用alias所对应内容来绑定。
同时也需要在类中定义name所对应变量。
使用:
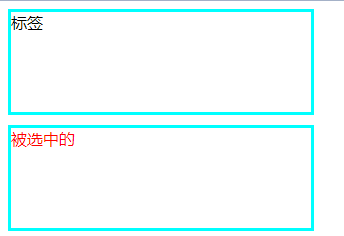
效果:
指令内容:
@Directive({
  selector: '[appSelect]',
  inputs: [
    'color',
    'innerText: content'
  ]
})
export class SelectDirective implements OnInit {
  color = 'red';
  innerText = '被选中的';

  constructor(private elementRef: ElementRef,
              private renderer: Renderer2) {
  }

  ngOnInit(): void {
    this.renderer.setStyle(this.elementRef.nativeElement, 'color', this.color);
    this.renderer.setProperty(this.elementRef.nativeElement, 'innerText', this.innerText);
  }
}定义输出(outputs)
指令:
@Directive({
  selector: '[appSelect]',
  ...
  outputs: [
    'complete: isComplete' // 命名规则同inputs
  ]
})
export class SelectDirective implements OnInit {
  ...
  complete = new EventEmitter<boolean>(); // 定义所需变量
  ngOnInit(): void {
    ...
    this.complete.emit(true);
  }
}
界面:
<label class="label-style" id="label-id" for="div-id" (isComplete)="onComplete($event)" appSelect>
  标签
</label>
组件方法:
onComplete(result: boolean) {
  if (result) {
    console.log('修改完成');
  }
}
exportAs
在模板中把该指令赋值给一个变量,首先在元数据中定义,然后在DOM元素赋给模版变量。
目前还没有找到具体的使用场景。
使用方法:
指令中定义导出名
@Directive({
  selector: '[appSelect]',
  ...
  exportAs: 'exported'
})
视图文件内赋值给模板变量
<label #exported="exported" class="label-style" id="label-id" for="div-id" appSelect>
  标签
</label>
组件中获取到引用
@ViewChild('exported')
exported: ElementRef | undefined;
queries
应该添加到元数据对象后通过ContentChildren和ViewChildren两个装饰器类来进行dom元素的查询。
host
使用host来把类的属性映射到宿主元素的绑定
效果:
import {Directive, ElementRef} from "@angular/core";

@Directive({
  selector: '[hostDirective]',
  host: {
    '(mouseenter)': 'onMouseEnter()',
    '(mouseleave)': 'onMouseLeave()',
    '(click)': 'onClick()',
    'style': 'width: 150px'
  }
})
export class HostDirective {
  constructor(private el: ElementRef) {}

  onMouseEnter() {
    this.highlight('yellow');
  }

  onMouseLeave() {
    this.highlight(null);
  }

  onClick() {
    alert('Directive Clicked!');
  }

  private highlight(color: string | null) {
    this.el.nativeElement.style.backgroundColor = color;
  }
}
补充
关于 @Directive 注解中的元数据的 inputs 和 outputs 可以在类中使用 @Input 和 @Output 注解来替换,可以达到相同的效果,另外 host 中对事件的绑定也可以使用 @HostListener 来替换。
参考:
https://blog.csdn.net/guizi0809/article/details/119971421
自定义结构型指令


**粗体** _斜体_ [链接](http://example.com) `代码` - 列表 > 引用。你还可以使用@来通知其他用户。