今天发现了一个神器——json-server!在他的帮助下可以在很短的时间内搭建一个Rest API, 然后就可以让前端在不依赖后端的情况下进行开发啦!
关于什么是RESTful API:
《RESTful API 设计指南》—— 阮一峰
http://www.ruanyifeng.com/blo...
JSON-Server
简单来说,JSON-Server是一个Node模块,运行Express服务器,你可以指定一个json文件作为api的数据源。
举个例子:
我们现在想做一个app,用来管理客户信息,实现简单的CRUD功能(create/retrieve/update/delete),比如:
获取客户信息
增加一个客户
删除一个客户
更新客户信息
好啦,接下来我们就使用json-server完成这一系列动作吧!
安装JSON-Server
npm install -g json-server //osx系统加'sudo'新建一个文件夹同时cd它:
mkdir customer-manager && cd customer-manager新建一个json文件,然后存放一点数据进去:
touch customers.json{
"customers": [
{ "id": 1, "first_name": "John", "last_name": "Smith", "phone": "219-839-2819" }
]
}开启json-server功能
所有你要做的事情只是让json-server指向这个customers.json就ok啦!
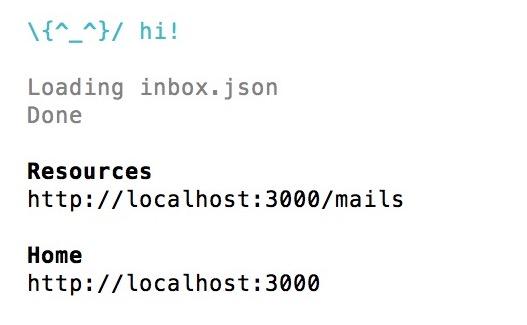
json-server customers.js然后出现这个提示就ok啦!
另外,JSON-Server很酷的一点就是支持各种GET/POST/PUT/DELETE的请求。
看几个例子:
//GET
fetch('http://localhost:3000/tasks/')
  .then(function(response) {
    return response.json()
  }).then(function(json) {
    console.log('parsed json: ', json)
  }).catch(function(ex) {
    console.log('parsing failed: ', ex)
  });


//POST
fetch('http://localhost:3000/tasks/', {
  method: 'post',
  headers: {
    'Accept': 'application/json',
    'Content-Type': 'application/json'
  },
  body: JSON.stringify({
       "title":   "Add a blogpost about Angular2",
       "dueDate": "2015-05-23T18:25:43.511Z",
       "done": false
   })
}).then(function(response) {
      return response.json()
    }).then(function(json) {
      console.log('parsed json: ', json)
    }).catch(function(ex) {
      console.log('parsing failed: ', ex)
    });


//PUT
fetch('http://localhost:3000/tasks/1', { //在url后面指定下id就好
  method: 'put',
  headers: {
    'Accept': 'application/json',
    'Content-Type': 'application/json'
  },
  body: JSON.stringify({
       "done": true
   })
}).then(function(response) {
      return response.json()
    }).then(function(json) {
      console.log('parsed json: ', json)
    }).catch(function(ex) {
      console.log('parsing failed: ', ex)
    });


//DELETE
fetch('http://localhost:3000/tasks/1', {
method: 'delete'
}).then(function(response) {
   return response.json()
 }).then(function(json) {
   console.log('parsed json: ', json)
 }).catch(function(ex) {
   console.log('parsing failed: ', ex)
 });
JSON-Server基本就是这样啦!接下来介绍另一个神器~
Faker.js
如果要自己瞎编API数据的话也是比较烦恼,用faker.js就可以轻松解决这个问题啦!他可以帮助你自动生成大量fake的json数据,作为后端数据~
安装faker.js
还是使用npm来安装faker.js:
npm install faker现在我们用javascript生成一个包含50个客户数据的json文件:
//customers.js
var faker = require('faker')

function generateCustomers () {
  var customers = []

  for (var id = 0; id < 50; id++) {
    var firstName = faker.name.firstName()
    var lastName = faker.name.firstName()
    var phoneNumber = faker.phone.phoneNumberFormat()

    customers.push({
      "id": id,
      "first_name": firstName,
      "last_name": lastName,
      "phone": phoneNumber
    })
  }

  return { "customers": customers }
}

// 如果你要用json-server的话,就需要export这个生成fake data的function
module.exports = generateCustomers
然后让json-server指向这个js文件:
json-server customers.js这样你就可以在http://localhost:3000/customers里看到50个客户数据了。
更多faker.js属性可以查看这里:
https://github.com/marak/Fake...
好啦,基本就是这样啦,happy coding!

**粗体** _斜体_ [链接](http://example.com) `代码` - 列表 > 引用。你还可以使用@来通知其他用户。