个人博客:凌霄的博客
打开seo
在
主题配置文件中找到:
seo: false将其设置为true
百度链接提交
-
自动提交:
打开主题配置文件,找到
baidu_push,将其设置为true
baidu_push: truesitemap
首先安装两个插件:
npm install hexo-generator-sitemap --save
npm install hexo-generator-baidu-sitemap --save
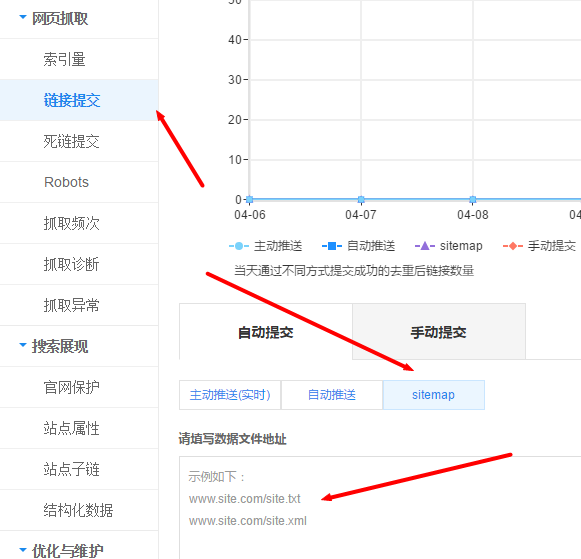
然后打开百度站长平台
添加
http://lx.nextdev.top/baidusitemap.xml
http://lx.nextdev.top/sitemap.xml
添加
robots.txt
# hexo robots.txt
User-agent: * Allow: /
Allow: /archives/
Disallow: /vendors/
Disallow: /js/
Disallow: /css/
Disallow: /fonts/
Disallow: /vendors/
Disallow: /fancybox/
Sitemap: 你的域名/sitemap.xml
Sitemap: 你的域名/baidusitemap.xml
放在
博客/source/目录下
给出站链接加上no follow属性:
打开博客\themes\next\layout\_partials\footer.swig 文件
给下列链接加上no follow属性:
{{ __('footer.powered', '<a class="theme-link" href="http://hexo.io">Hexo</a>') }}<a class="theme-link" href="https://github.com/iissnan/hexo-theme-next">打开博客\themes\next\layout_macro,将下面代码中的a标签加no follow属性:
<a href="{{ link }}" target="_blank">{{ name }}</a><a href="http://creativecommons.org/licenses/{{ theme.creative_commons }}/4.0" class="cc-opacity" target="_blank">title的优化
打开 your-hexo-site\themes\next\layout\index.swig,将下面代码:
{% block title %} {{ config.title }} {% endblock %}改为
{% block title %} {{ config.title }} - {{ theme.description }} {% endblock %}完成!
欢迎评论


**粗体** _斜体_ [链接](http://example.com) `代码` - 列表 > 引用。你还可以使用@来通知其他用户。