容易混淆概念解析
读这篇文章理清下面概念 webpack 中那些最易混淆的 5 个知识点
1.module,chunk 和 bundle 的区别是什么?
2.filename 和 chunkFilename 的区别
版本区别
webpack 2x
- entry
- output
-
loaders
- file-loader:把文件输出到一个文件夹中,在代码中通过相对 URL 去引用输出的文件
- url-loader:和 file-loader 类似,但是能在文件很小的情况下以 base64 的方式把文件内容注入到代码中去
- source-map-loader:加载额外的 Source Map 文件,以方便断点调试
- image-loader:加载并且压缩图片文件
- babel-loader:把 ES6 转换成 ES5
- css-loader:加载 CSS,支持模块化、压缩、文件导入等特性
- style-loader:把 CSS 代码注入到 JavaScript 中,通过 DOM 操作去加载 CSS。
- eslint-loader:通过 ESLint 检查 JavaScript 代码
-
plugins
- CommonsChunkPlugin:CommonsChunkPlugin主要是用来提取第三方库和公共模块,避免首屏加载的bundle文件或者按需加载的bundle文件体积过大,从而导致加载时间过长,着实是优化的一把利器。
- define-plugin:定义环境变量
- HtmlWebpackPlugin: 加入 hash 生成html 文件
- uglifyjs-webpack-plugin:通过UglifyES压缩ES6代码
-
webpack-parallel-uglify-plugin: 删掉webpack提供的UglifyJS插件 以
webpack-parallel-uglify-plugin来替换 优化打包速度 -
HotModuleReplacementPlugin: 热更新, 配合dev-serve中的
webpack-dev-middlerware和webpack-hot-middleware插件使用 - NoEmitOnErrorsPlugin: 在编译出现错误时,使用 NoEmitOnErrorsPlugin 来跳过输出阶段。这样可以确保输出资源不会包含错误。对于所有资源,统计资料(stat)的 emitted 标识都是 false。
- ExtractTextPlugin:该插件的主要是为了抽离css样式,防止将样式打包在js中引起页面样式加载错乱的现象。
- imagemin-webpack-plugin: This is a simple plugin that uses Imagemin to compress all images in your project.
webpack 4x
自动生成html文件
 let HtmlWebpackPlugin = require('html-webpack-plugin');
 new HtmlWebpackPlugin({
    template: './src/index.html',    // 模板文件,不局限html后缀
    filename: 'index.html',  // 生成的html命名
    hash: true, //  会在打包好的bundle.js后加hash串
    chunks: [name]   // 指定输出页面需要引入的chunks
    // removeComments 移除HTML中的注释
    // collapseWhitespace 删除空白符与换行符,整个文件会压成一行
    // inlineSource 插入到html的css,js文件都要内联,既不是以link,script引入
    // inject 是否能注入内容到输入的页面去
  })
应用场景分类:
- 库 : 如: https://github.com/video-dev/...
-
vue web :
- vuecli2 :
iview: https://github.com/iview/ivie...
elementui: https://github.com/ElemeFE/el... - vuecli3 :
- vuecli2 :
新手指南
从零开始
npm init
npm install webpack --save-dev //webpack@4.16.1
npm install webpack-dev-server --save-dev //webpack-dev-server@3.1.4
创建webpack.config.js
var config = {

}

module.exports = config注:这里的module.exports = config相当于export default config ,由于目前还没有安装支持ES6的编译插件,因此不能直接使用ES6的语法 否则会报错
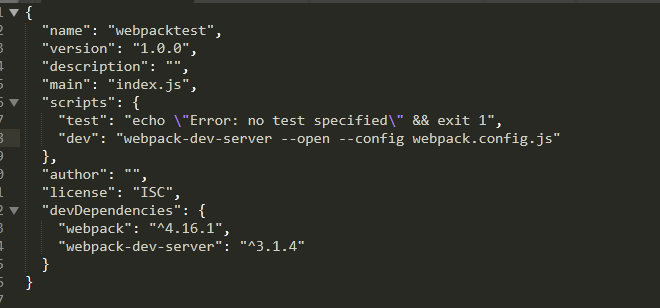
package.json的scripts里添加一个快速启动webpack-dev-server服务脚本:
npm run dev 后默认打开的地址是: 127.0.0.1:8080
可以自己配置:
"dev": "webpack-dev-server --host 197.163.1.2 --port 8888 --open --config webpack.config.js" // webpack.config.js
var path = require('path')
module.exports = {
entry: { //告诉webpack从哪里找依赖并编译
main: './main'
},
output: { // 配置编译的文件储存位置和文件名
path: path.join(__dirname, './dist'),
publicPath: '/dist/',
filename: 'main.js'
}
};// index.html
<!DOCTYPE html>
<html>
<head>
<title>webpack test</title>
</head>
<body>
<div id="app">您好, 镜心的小树屋欢迎您</div>
<script type="text/javascript" src="/dist/main.js"></script>
</body>
</html>npm run dev 启动
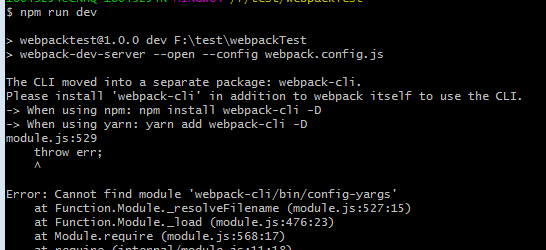
如果报错:
 npm install webpack-cli -D  // "webpack-cli": "^3.0.8",
 npm run dev
main.js
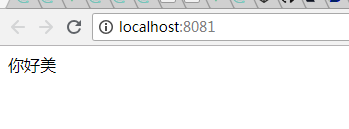
document.getElementById('app').innerHTML = "你好美"进行打包
webpack --progress -- hide-modules// 会生成一个/dist/main.js 完善配置文件
https://github.com/icarusion/...
// css加载器
npm install css-loader --save-dev // style-loader@0.21.0

npm install style-loader --save-dev // css-loader@1.0.0
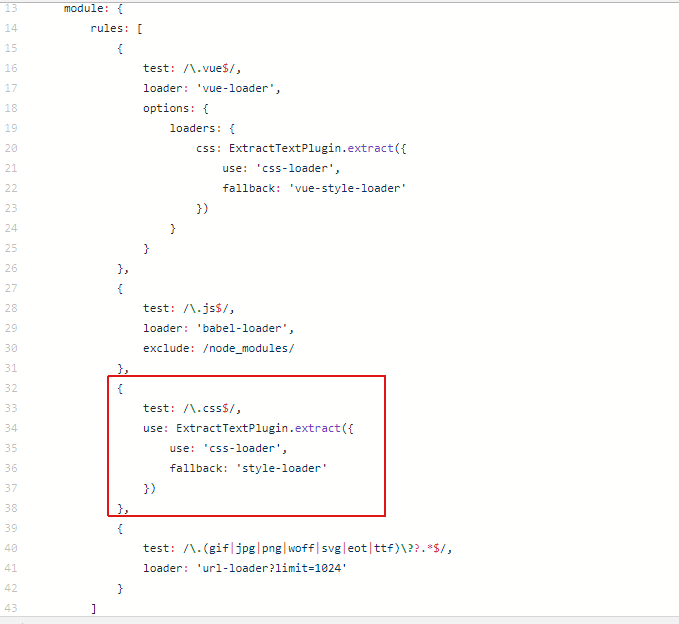
安装后,在webpack.config.js文件配置Loader,添加.css文件处理
module对象rules属性中可以指定一系列loaders。
use选型的值可以是数组或字符串,如果是数组,它的编译顺序就是从后往前。extract-text-webpack-plugin插件是用来把散落在各地的css提取出来,并生成一个main.css文件,最终在index.html通过<link>加载
npm install extract-text-webpack-plugin --save-devvar path = require('path');
var ExtractTextPlugin = require('extract-text-webpack-plugin');
var config = {
entry: {
main: './main'
},
output: {
path: path.join(__dirname, './dist'),
publicPath: '/dist/',
filename: 'main.js'
},
module: {
rules: [
{
test: /\.vue$/,
loader: 'vue-loader',
options: {
loaders: {
css: ExtractTextPlugin.extract({
use: 'css-loader',
fallback: 'vue-style-loader'
})
}
}
},
{
test: /\.js$/,
loader: 'babel-loader',
exclude: /node_modules/
},
{
test: /\.css$/,
use: ExtractTextPlugin.extract({
use: 'css-loader',
fallback: 'style-loader'
})
},
{
test: /\.(gif|jpg|png|woff|svg|eot|ttf)\??.*$/,
loader: 'url-loader?limit=1024'
}
]
},
plugins: [
// 重命名提取后的css文件
new ExtractTextPlugin({
filename: '[name].css',
allChunks: true
})
]
};
module.exports = config;快速构建
快速构建最好的自然是使用脚手架, 你可以选择:
Webpack boilerplate CLI: https://www.npmjs.com/package...
easywebpack-cli: https://yuque.com/hubcarl/ves...
vue-cli: https://github.com/vuejs/vue-cli
脚手架中的 webpack 配置
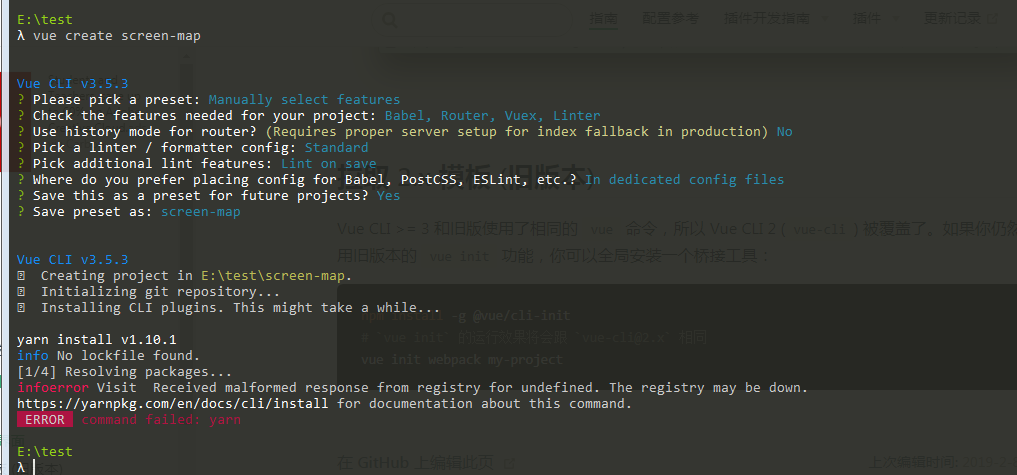
我们这里将以vue-cli3为例构建一个vue项目,(vue-cli3提供了极其完整的配置来帮助开发者快捷开始一个项目)
同时尝试修改这些配置以满足特殊的需求。
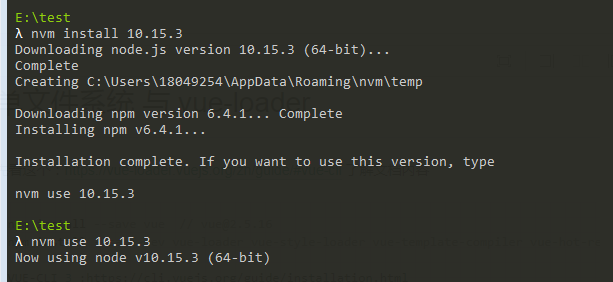
升级nodejs
重新安装
9.0.0 也不能用,换成最新版
单文件系统 与 vue-loader
先看这个:https://vue-loader.vuejs.org/... 了解文档内容
npm install --save vue  // vue@2.5.16
npm install --save-dev vue-loader vue-style-loader vue-template-compiler vue-hot-reload-api babel babel-loader babel-core babel-plugin-transform-runtime babel-preset-es2015 babel-runtime

VUE-CLI 3 :https://cli.vuejs.org/guide/installation.html
修改webpack.config.js 支持.vue和 es6
var path = require('path')
var ExtractTextPlugin = require('extract-text-webpack-plugin')
module.exports = {
    entry: { //告诉webpack从哪里找依赖并编译
        main: './main'
    },
    output: { // 配置编译的文件储存位置和文件名
        path: path.join(__dirname, './dist'),//  打包后的输出目录
        publicPath: '/dist/',// 指定资源文件引用目录(如果资源在cdn上 可以是cdn网址)
        filename: 'main.js'//
    },
    module: {
        rules: [
          {
            test: /\.vue$/,
            loader: 'vue-loader',
            options: {
                loaders: {
                    css: ExtractTextPlugin.extract({
                        use: 'css-loader',
                        fallback: 'vue-style-loader'
                    })
                }
            }
          },
          {
            test: /\.js$/,
            loader: 'babel-loader',
            exclude: /node_modules/
          },
          {
            test: /\.css$/,
            use: ExtractTextPlugin.extract({
                use: 'css-loader',
                fallback: 'vue-style-loader'
            })
          }

        ]
    },
    plugins: [
      new ExtractTextPlugin("main.css")
    ]
};根目录新建.babelrc
{
    "presets": ["es2015"],
    "plugin": ["transform-runtime"],
    "comments": false
}
注意: 此种设置需要把webpack降级到2x:
webpack: 2.3.2
webpack-dev-server: 2.4.2
我们看看实际项目中依赖(webpack2的)
{
  "name": "test",
  "version": "1.0.0",
  "description": "A Vue.js project",
  "author": "AlexZ33",
  "private": true,
  "scripts": {
    "dev": "node build/dev-server.js",
    "build": "node build/build.js",
    "lint": "eslint --ext .js,.vue src",
    "test": "mocha test/*.js"
  },
  "dependencies": {
    "axios": "^0.16.1",
    "d3": "^4.8.0",
    "d3-cloud": "^1.2.4",
    "echarts": "^3.5.2",
    "echarts-wordcloud": "^1.1.0",
    "iview": "^2.5.1",
    "jquery": "^3.3.1",
    "jsonp": "^0.2.1",
    "lodash.merge": "^4.6.1",
    "promise-polyfill": "^6.0.2",
    "shave": "^2.1.3",
    "url-search-params": "^0.9.0",
    "vue": "^2.3.4",
    "vue-router": "^2.2.0",
    "vue-select": "^2.4.0",
    "vuex": "^2.4.0",
    "wordcloud": "^1.0.6"
  },
  "devDependencies": {
    "autoprefixer": "^6.7.2",
    "babel-core": "^6.22.1",
    "babel-eslint": "^7.1.1",
    "babel-loader": "^6.2.10",
    "babel-plugin-transform-runtime": "^6.22.0",
    "babel-preset-env": "^1.2.1",
    "babel-preset-stage-2": "^6.22.0",
    "babel-register": "^6.22.0",
    "chai": "^4.0.2",
    "chalk": "^1.1.3",
    "connect-history-api-fallback": "^1.3.0",
    "copy-webpack-plugin": "^4.0.1",
    "css-loader": "^0.26.1",
    "eslint": "^3.14.1",
    "eslint-config-standard": "^6.2.1",
    "eslint-friendly-formatter": "^2.0.7",
    "eslint-loader": "^1.6.1",
    "eslint-plugin-html": "^2.0.0",
    "eslint-plugin-promise": "^3.4.0",
    "eslint-plugin-standard": "^2.0.1",
    "eventsource-polyfill": "^0.9.6",
    "express": "^4.14.1",
    "extract-text-webpack-plugin": "^2.0.0",
    "file-loader": "^0.10.0",
    "friendly-errors-webpack-plugin": "^1.1.3",
    "fullpage.js": "^2.9.4",
    "function-bind": "^1.1.0",
    "html-webpack-plugin": "^2.28.0",
    "http-proxy-middleware": "^0.17.3",
    "less": "^2.7.2",
    "less-loader": "^4.0.3",
    "mocha": "^3.4.2",
    "node-sass": "^4.9.0",
    "opn": "^4.0.2",
    "optimize-css-assets-webpack-plugin": "^1.3.0",
    "ora": "^1.1.0",
    "rimraf": "^2.6.0",
    "sass-loader": "^6.0.3",
    "semver": "^5.3.0",
    "shelljs": "^0.7.7",
    "url-loader": "^0.5.7",
    "vue-loader": "^12.2.1",
    "vue-style-loader": "^2.0.0",
    "vue-template-compiler": "^2.3.4",
    "webpack": "^2.2.1",
    "webpack-bundle-analyzer": "^2.2.1",
    "webpack-dev-middleware": "^1.10.0",
    "webpack-hot-middleware": "^2.16.1",
    "webpack-merge": "^2.6.1"
  },
  "engines": {
    "node": ">= 4.0.0",
    "npm": ">= 3.0.0"
  },
  "browserslist": [
    "> 1%",
    "last 2 versions",
    "not ie <= 8"
  ]
}
webpack+vue-cil 中proxyTable配置接口地址代理
在项目开发的时候,接口联调的时候一般都是同域名下,且不存在跨域的情况下进行接口联调,但是当我们现在使用vue-cli进行项目打包的时候,我们在本地启动服务器后,比如本地开发服务下是 http://localhost:8080 这样的访问页面,但是我们的接口地址是 http://xxxx.com/save/index 这样的接口地址,我们这样直接使用会存在跨域的请求,导致接口请求不成功,因此我们需要在打包的时候配置一下,我们进入 config/index.js 代码下如下配置即可:
dev: {

    // 静态资源文件夹
    assetsSubDirectory: 'static',

    // 发布路径
    assetsPublicPath: '/',

    // 代理配置表,在这里可以配置特定的请求代理到对应的API接口
    // 例如将'localhost:8080/api/xxx'代理到'www.example.com/api/xxx'
    // 使用方法:https://vuejs-templates.github.io/webpack/proxy.html
    proxyTable: {
      '/api': {
        target: 'http://xxxxxx.com', // 接口的域名
        // secure: false,  // 如果是https接口,需要配置这个参数
        changeOrigin: true, // 如果接口跨域,需要进行这个参数配置
        pathRewrite: {
          '^/api': ''
        }
      }
    },

    // 本地访问 http://localhost:8080
    host: 'localhost', // can be overwritten by process.env.HOST
接口地址原本是 /save/index,但是为了匹配代理地址,在前面加一个 /api, 因此接口地址需要写成这样的即可生效 /api/save/index。
注意: '/api' 为匹配项,target 为被请求的地址,因为在 ajax 的 url 中加了前缀 '/api',而原本的接口是没有这个前缀的,所以需要通过 pathRewrite 来重写地址,将前缀 '/api' 转为 '/'。如果本身的接口地址就有 '/api' 这种通用前缀,就可以把 pathRewrite 删掉。
常见示例如在 :https://github.com/bailicangd... 这里加
proxyTable: {
      // '/pre-web': 'http://118.24.153.55/' // 线上
      '/pre-web': 'http://118.24.153.56' // 测试
      // 'pre-web': 'http://118.24.153.57' // 本地服务器
    },
单页面的多页面切换
按需加载
常见配置
- source map : 详解Webpack中的sourcemap
常用插件
DefinePlugin
-> 用法戳 文档
热更新插件
使用
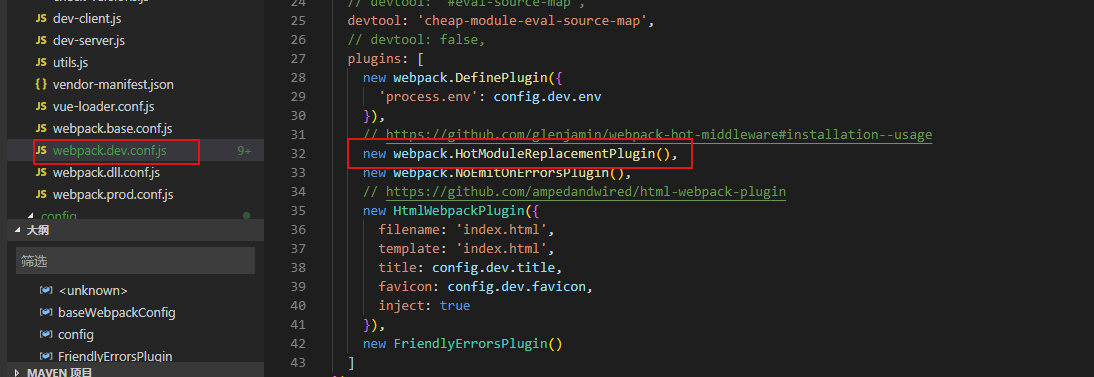
- Webpack 配置添加
HotModuleReplacementPlugin插件
- Node Server 引入
webpack-dev-middlerware和webpack-hot-middleware插件
require('./check-versions')()

var config = require('../config')
if (!process.env.NODE_ENV) {
  process.env.NODE_ENV = JSON.parse(config.dev.env.NODE_ENV)
}

var opn = require('opn')
var path = require('path')
var express = require('express')
var webpack = require('webpack')
var proxyMiddleware = require('http-proxy-middleware')
var webpackConfig = require('./webpack.dev.conf')

// 端口配置
var port = process.env.PORT || config.dev.port
// 打开浏览器
var autoOpenBrowser = !!config.dev.autoOpenBrowser
// 代理配置
var proxyTable = config.dev.proxyTable

var app = express()
var compiler = webpack(webpackConfig)
// 本地服务配置
var devMiddleware = require('webpack-dev-middleware')(compiler, {
  publicPath: webpackConfig.output.publicPath,
  quiet: true
})
//载入热加载配置
var hotMiddleware = require('webpack-hot-middleware')(compiler, {
  log: () => {}
})
// 配置view层代码启用热载
compiler.plugin('compilation', function (compilation) {
  compilation.plugin('html-webpack-plugin-after-emit', function (data, cb) {
    hotMiddleware.publish({ action: 'reload' })
    cb()
  })
})

// 载入代理配置
Object.keys(proxyTable).forEach(function (context) {
  var options = proxyTable[context]
  if (typeof options === 'string') {
    options = { target: options }
  }
  app.use(proxyMiddleware(options.filter || context, options))
})

// 回退配置
app.use(require('connect-history-api-fallback')())

// 载入开发服务配置
app.use(devMiddleware)

// 载入热加载配置
app.use(hotMiddleware)

// 挂载静态资源
var staticPath = path.posix.join(config.dev.assetsPublicPath, config.dev.assetsSubDirectory)
app.use(staticPath, express.static('./static'))

var uri = 'http://localhost:' + port

var _resolve
var readyPromise = new Promise(resolve => {
  _resolve = resolve
})

console.log('> 启动本地开发服务...')
devMiddleware.waitUntilValid(() => {
  console.log('> 服务地址 ' + uri + '\n')
  _resolve()
})

// 开启 express 服务
var server = app.listen(port)

module.exports = {
  ready: readyPromise,
  close: () => {
    server.close()
  }
}
- 如果是
koa引入对应的koa-webpack-dev-middlerware和koa-webpack-hot-middleware
const devMiddleware = require('koa-webpack-dev-middleware')(compiler, {
  publicPath,
   stats: {
    colors: true,
    children: true,
    modules: false,
    chunks: false,
    chunkModules: false,
  },
  watchOptions: {
    ignored: /node_modules/,
  }
});

app.use(devMiddleware);
const hotMiddleware = require('koa-webpack-hot-middleware')(compiler, {
   log: false,
   reload: true
});
app.use(hotMiddleware);-
entry注入热更新代码
webpack-hot-middleware/client?path=http://127.0.0.1:9000/__webpack_hmr&noInfo=false&reload=true&quiet=false这里注入热更新代码是关键,保证服务端和客户端能够通信。
热更新原理
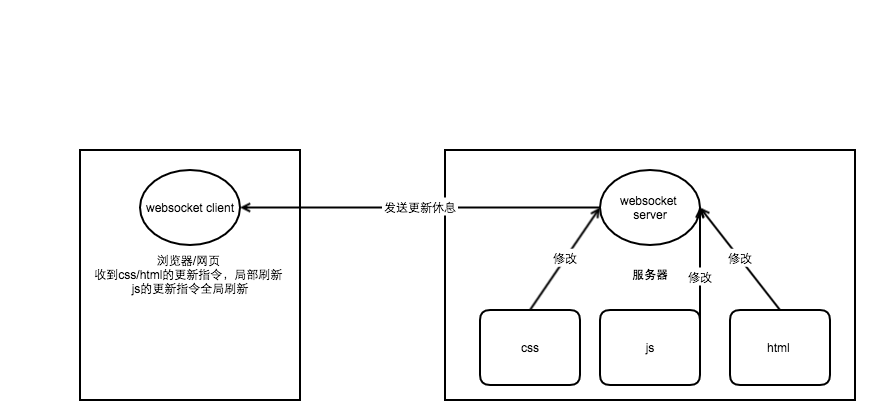
浏览器的网页通过websocket协议与服务器建立起一个长连接,当服务器的css/js/html进行了修改的时候,服务器会向前端发送一个更新的消息,如果是css或者html发生了改变,网页执行js直接操作dom,局部刷新,如果是js发生了改变,只好刷新整个页面
- js发生改变的时候,不太可能判断出对dom的局部影响,只能全局刷新
-
为何没有提到图片的更新?如果是在html或者css里修改了图片路径,那么更新html和css,只要图片路径没有错,那么就已经达到了更新图片的路径。如果是相同路径的图片进行了替换,这往往需要重启下服务
在简单的网页应用中,这一个过程可能仅仅是节省了手动刷新浏览器的繁琐,但是在负责的应用中,如果你在调试的部分需要从页面入口操作好几步才到达,例如:登录->列表->详情->弹出窗口,那么局部刷新将大大提高调试效率
常见面试问题
- gulp/grunt 与 webpack的区别是什么?
- webpack plugin loader区别
- webpack是解决什么问题而生的?
- 如何配置多入口文件?
- 你是如何提高webpack构件速度的?
- 利用webpack如何优化前端性能?
迁移
关于vue-cli2项目
'Real' Static Assets
static/目录下的文件并不会被webpack处理,它们会被复制到最终目录(默认是dist/static下),必须使用绝对路径引用这些文件,这是通过在config.js文件中的build.assetsPublicPath和build.assetsSubDirectory连接来确定的
任何放在 static/中文件需要以绝对路径的形式引用 /static/[filename].
如果更assetSubDirectory的值为assets,那么路径需改为/assets/[filename]
src/assets里面的会被webpack打包进你的代码里,而static里面的,就直接引用了,
一般static里面放一些类库的文件,在assets里面放属于该项目的资源文件。
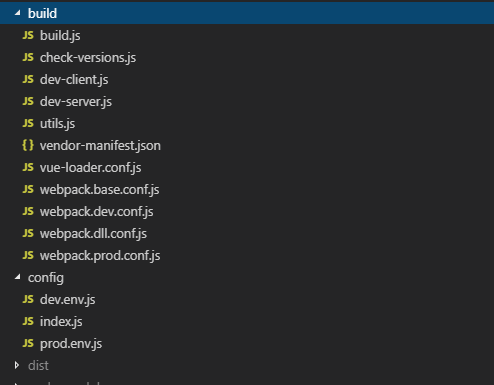
build/
在vue-cli2构建的项目中,build和config是项目的构建和配内容
webpack.base.conf.js
var path = require('path')
var utils = require('./utils')
var config = require('../config')
var vueLoaderConfig = require('./vue-loader.conf')
var webpack = require("webpack")

// webpack 基础文件配置
function resolve (dir) {
  return path.join(__dirname, '..', dir)
}
module.exports = {
  entry: {
    app: './src/main.js'
  },
  plugins: [
    new webpack.ProvidePlugin({
      jQuery: "jquery",
      $: "jquery"
    })
  ],
  output: {
    path: config.build.assetsRoot,
    filename: '[name].js',
    publicPath: process.env.NODE_ENV === 'production'
      ? config.build.assetsPublicPath
      : config.dev.assetsPublicPath
  },
  resolve: {
    extensions: ['.js', '.vue', '.json'],
    modules: [
      resolve('src'),
      resolve('node_modules'),
      resolve('static')
    ],
    alias: {
      'vue$': 'vue/dist/vue.min.js',
      '@': resolve('src'),
      'echart': 'echart/dist/echarts.common.min.js'
    }
  },
  module: {
    rules: [
      {
        test: /\.(js|vue)$/,
        loader: 'eslint-loader',
        enforce: 'pre',
        include: [resolve('src'), resolve('test')],
        options: {
          formatter: require('eslint-friendly-formatter')
        }
      },
      {
        test: /\.vue$/,
        loader: 'vue-loader',
        options: vueLoaderConfig,
        exclude: /node_modules/
      },

      {
        test: /\.js$/,
        loader: 'babel-loader',
        // 把对.js 的文件处理交给id为happyBabel 的HappyPack 的实例执行
        // loader: 'happypack/loader?id=happyBabel',
        include: [resolve('src'), resolve('test'), resolve('static')],
        exclude: /node_modules/
      },
      {
        test: /\.(png|jpe?g|gif|svg)(\?.*)?$/,
        loader: 'url-loader',
        options: {
          limit: 10000,
          name: utils.assetsPath('img/[name].[hash:7].[ext]')
        }
      },
      {
        test: /\.(woff2?|eot|ttf|otf)(\?.*)?$/,
        loader: 'url-loader',
        options: {
          limit: 10000,
          name: utils.assetsPath('fonts/[name].[hash:7].[ext]')
        }
      }
    ]
  }
}
webpack.dev.conf.js
var utils = require('./utils')
var webpack = require('webpack')
var config = require('../config')
var merge = require('webpack-merge')
var baseWebpackConfig = require('./webpack.base.conf')
var HtmlWebpackPlugin = require('html-webpack-plugin')
var FriendlyErrorsPlugin = require('friendly-errors-webpack-plugin')

// 配置 需热载文件
Object.keys(baseWebpackConfig.entry).forEach(function (name) {
  baseWebpackConfig.entry[name] = ['./build/dev-client'].concat(baseWebpackConfig.entry[name])
})

module.exports = merge(baseWebpackConfig, {
  module: {
    rules: utils.styleLoaders({ sourceMap: config.dev.cssSourceMap })
  },
  resolve: {
    alias: {
      'vue$': 'vue/dist/vue.js',
    }
  },
  // devtool: '#source-map',
  // devtool: '#eval-source-map',
  devtool: 'cheap-module-eval-source-map',
  // devtool: false,
  plugins: [
    new webpack.DefinePlugin({
      'process.env': config.dev.env
    }),
    // https://github.com/glenjamin/webpack-hot-middleware#installation--usage
    new webpack.HotModuleReplacementPlugin(),
    new webpack.NoEmitOnErrorsPlugin(),
    // https://github.com/ampedandwired/html-webpack-plugin
    new HtmlWebpackPlugin({
      filename: 'index.html',
      template: 'index.html',
      title: config.dev.title,
      favicon: config.dev.favicon,
      inject: true
    }),
    new FriendlyErrorsPlugin()
  ]
})
webpack.prod.conf.js
var path = require('path')
var utils = require('./utils')
var webpack = require('webpack')
var config = require('../config')
var merge = require('webpack-merge')
var baseWebpackConfig = require('./webpack.base.conf')
var CopyWebpackPlugin = require('copy-webpack-plugin')
var HtmlWebpackPlugin = require('html-webpack-plugin')
var ExtractTextPlugin = require('extract-text-webpack-plugin')
var OptimizeCSSPlugin = require('optimize-css-assets-webpack-plugin')
var ParallelUglifyPlugin = require('webpack-parallel-uglify-plugin')

var env = config.build.env

var webpackConfig = merge(baseWebpackConfig, {
  module: {
    rules: utils.styleLoaders({
      sourceMap: config.build.productionSourceMap,
      extract: true
    })
  },
  devtool: config.build.productionSourceMap ? '#source-map' : false,
  output: {
    path: config.build.assetsRoot,
    filename: utils.assetsPath('js/[name].[chunkhash].js'),
    chunkFilename: utils.assetsPath('js/[id].[chunkhash].js')
  },
  resolve: {
    alias: {
      'vue$': 'vue/dist/vue.min.js'
    }
  },
  plugins: [
    // http://vuejs.github.io/vue-loader/en/workflow/production.html
    //去除重复引用
    new webpack.DefinePlugin({
      'process.env': env
    }),
    // 删掉webpack提供的UglifyJS插件 以webpack-parallel-uglify-plugin来替换 优化打包速度
    // new webpack.optimize.UglifyJsPlugin({
    //   compress: {
    //     warnings: false
    //   },
    //   sourceMap: true
    // }),
    // 增加 webpack-parallel-uglify-plugin
    new ParallelUglifyPlugin({
      cacheDir: '.cache/',
      uglifyJs: {
        output: {
          comments: false
        },
        compress: {
          warnings: false
        }
      }
    }),
    // 添加DllReferencePlugin插件
    new webpack.DllReferencePlugin({
      context: path.resolve(__dirname, '..'),
      manifest: require('./vendor-manifest.json')
    }),
    // 生产单个样式文件
    new ExtractTextPlugin({
      filename: utils.assetsPath('css/[name].[contenthash].css')
    }),

    new OptimizeCSSPlugin({
      cssProcessorOptions: {
        safe: true
      }
    }),
    // 加入 hash 生成html 文件
    new HtmlWebpackPlugin({
      filename: config.build.index,
      template: 'index.html',
      inject: true,
      title: config.build.title,
      favicon: config.build.favicon,
      minify: {
        // 删除注释
        removeComments: true,
        // 合并空白
        collapseWhitespace: true,
        // 删除属性的引号
        removeAttributeQuotes: true
        // https://github.com/kangax/html-minifier#options-quick-reference
      },
      // 允许控制块在添加到页面之前的排序方式
      // dependency 按照依赖关系添加
      chunksSortMode: 'dependency'
    }),
    // new HtmlWebpackPlugin({
    //   filename: 'update-browser.html',
    //   template: 'update-browser.html'
    // }),
    // 分离类库文件
    new webpack.optimize.CommonsChunkPlugin({
      name: 'vendor',
      minChunks: function (module, count) {
        return (
          module.resource &&
          /\.js$/.test(module.resource) &&
          module.resource.indexOf(
            path.join(__dirname, '../node_modules')
          ) === 0
        )
      }
    }),
    // 分离 webpack run time 文件
    new webpack.optimize.CommonsChunkPlugin({
      name: 'manifest',
      chunks: ['vendor']
    }),
    // copy自定义文件
    new CopyWebpackPlugin([
      {
        from: path.resolve(__dirname, '../static'),
        to: config.build.assetsSubDirectory,
        ignore: ['.*']
      }
    ])
  ]
})

if (config.build.productionGzip) {
  var CompressionWebpackPlugin = require('compression-webpack-plugin')

  webpackConfig.plugins.push(
    new CompressionWebpackPlugin({
      asset: '[path].gz[query]',
      algorithm: 'gzip',
      test: new RegExp(
        '\\.(' +
        config.build.productionGzipExtensions.join('|') +
        ')$'
      ),
      threshold: 10240,
      minRatio: 0.8
    })
  )
}

if (config.build.bundleAnalyzerReport) {
  var BundleAnalyzerPlugin = require('webpack-bundle-analyzer').BundleAnalyzerPlugin
  webpackConfig.plugins.push(new BundleAnalyzerPlugin())
}

module.exports = webpackConfig
webpack.dll.conf.js
预编译,优化打包速度的
//DllPlugin 插件:作用是预先编译一些模块。
//DllReferencePlugin 插件:它的所用则是把这些预先编译好的模块引用起来。
var path = require('path')
var webpack = require('webpack')

module.exports = {
  entry: {
    vendor: [
      'vue/dist/vue.common.js',
      'vue-router',
      'vuex',//提前打包一些基本不怎么修改的文件
  ]
  },
  output: {
    path: path.join(__dirname, '../static/js'),//放在项目的static/js目录下面
    filename: '[name].dll.js', // 打包文件的名字
    library: '[name]_library' // 可选 暴露出的全局变量名
    // vendor.dll.js中暴露出的全局变量名。
    // 主要是给DllPlugin中的name使用,
    // 故这里需要和webpack.DllPlugin中的`name: '[name]_library',`保持一致。
  },
  plugins: [
    // 注意:DllPlugin 必须要在 DllReferencePlugin 执行前先执行一次,dll 这个概念应该也是借鉴了 windows 程序开发中的 dll 文件的设计理念。
    new webpack.DllPlugin({
      path: path.join(__dirname, '.', '[name]-manifest.json'),//生成上文说到清单文件,放在当前build文件下面
      name: '[name]_library'
    }),
    //压缩 只是为了包更小一点
    new webpack.optimize.UglifyJsPlugin({
      compress: {
        warnings: false,
        drop_console: true,
        drop_debugger: true
      },
      output: {
        // 去掉注释
        comments: false
      },
      sourceMap: true
    })
  ]
}
dev-server.js
require('./check-versions')()

var config = require('../config')
if (!process.env.NODE_ENV) {
  process.env.NODE_ENV = JSON.parse(config.dev.env.NODE_ENV)
}

var opn = require('opn')
var path = require('path')
var express = require('express')
var webpack = require('webpack')
var proxyMiddleware = require('http-proxy-middleware')
var webpackConfig = require('./webpack.dev.conf')

// 端口配置
var port = process.env.PORT || config.dev.port
// 打开浏览器
var autoOpenBrowser = !!config.dev.autoOpenBrowser
// 代理配置
var proxyTable = config.dev.proxyTable

var app = express()
var compiler = webpack(webpackConfig)
// 本地服务配置
var devMiddleware = require('webpack-dev-middleware')(compiler, {
  publicPath: webpackConfig.output.publicPath,
  quiet: true
})
//载入热加载配置
var hotMiddleware = require('webpack-hot-middleware')(compiler, {
  log: () => {}
})
// 配置view层代码启用热载
compiler.plugin('compilation', function (compilation) {
  compilation.plugin('html-webpack-plugin-after-emit', function (data, cb) {
    hotMiddleware.publish({ action: 'reload' })
    cb()
  })
})

// 载入代理配置
Object.keys(proxyTable).forEach(function (context) {
  var options = proxyTable[context]
  if (typeof options === 'string') {
    options = { target: options }
  }
  app.use(proxyMiddleware(options.filter || context, options))
})

// 回退配置
// https://blog.csdn.net/astonishqft/article/details/82762354
app.use(require('connect-history-api-fallback')())

// 载入开发服务配置
app.use(devMiddleware)

// 载入热加载配置
app.use(hotMiddleware)

// 挂载静态资源
var staticPath = path.posix.join(config.dev.assetsPublicPath, config.dev.assetsSubDirectory)
app.use(staticPath, express.static('./static'))

var uri = 'http://localhost:' + port

var _resolve
var readyPromise = new Promise(resolve => {
  _resolve = resolve
})

console.log('> 启动本地开发服务...')
devMiddleware.waitUntilValid(() => {
  console.log('> 服务地址 ' + uri + '\n')
  _resolve()
})

// 开启 express 服务
var server = app.listen(port)

module.exports = {
  ready: readyPromise,
  close: () => {
    server.close()
  }
}
vue项目 migrate to webpack v4 from v2
- webpack 升级 (npm i webpack@4 -D)
- webpack-cli
- webpack-dev-server@3
- html-webpack-plugin (npm i html-webpack-plugin@3.2.0 -D)
- babel-loader(npm i babel-loader@7 -D)
- vue-loader(npm i vue-loader@15 -D)
- style-loader 最新
- css-loader 最新
-
vue-style-loader 最新
- (如果有sass-loaderless-loader,也更新最新)
- url-loader@1
- file-loader@1
- ts-loader 更新最新
- extract-text-webpack-plugin的beta包 (npm i extract-text-webpack-plugin@next -D) 或者 mini-css-extract-plugin
- mini-css-extract-plugin
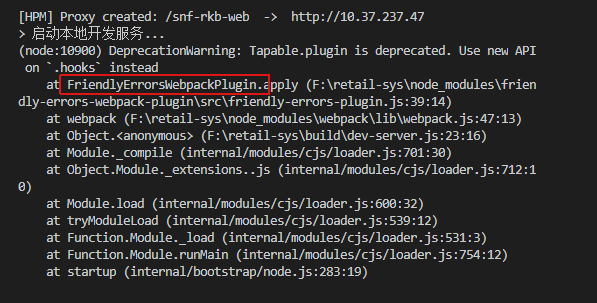
遇到的问题
在
文件下添加了process.traceDeprecation = true
运行 npm run dev,按照webpack.dev.conf.js配置跑下dev-server,发现
升级下
再跑,发现
更新
npm install webpack-dev-middleware@3 -DjavaScript File Code Spliting 代码分离
Webpack打包是把所有js代码打成一个js文件,我们可以通过 CommonsChunkPlugin 分离出公共组件,但这远远不够。 实际业务开发时,一些主要页面内容往往比较多, 而且会引入第三方组件。其中有些内容的展示不再首屏或者监控脚本等对用户不是那么重要的脚本我们可以通过 require.ensure 代码分离延迟加载。在 Webpack在构建时,解析到require.ensure 时,会单独针对引入的js资源单独构建出chunk文件,这样就能从主js文件里面分离出来。 然后页面加载完后, 通过script标签的方式动态插入到文档中。
require.ensure 使用方式, 第三个参数是指定生产的chunk文件名,不设置时是用数字编号代理。相同require.ensure只会生产一个chunk文件。
require.ensure(['swiper'], ()=> {
  const Swiper = require('swiper');
  ......
 }, 'swiper');
Vue Component Code Spliting 代码分离
- 我们在用 Vue 开发业务时,往往是把某个功能封装成 Vue 组件,Vue 动态组件加载 相比 纯js 加载更有实际意义。
- 异步加载 Vue 组件(.vue) 已在 Vue 2.5+ 版本支持,包括路由异步加载和非路由异步加载。在具体实现时,我们可以通过 import(filepath) 加载组件。
- Webpack 已经支持了该特性。import() 返回的 Promise,通过注释 webpackChunkName 指定生成的 chunk 名称。 Webpack 构建时会独立的 chunkjs 文件,然后在客户端动态插入组件,chunk 机制与 require.ensure 一样。有了动态加载的方案,可以减少服务端渲染 jsbundle 文件的大小,页面 Vue 组件模块也可以按需加载。
Vue.component('async-swiper', (resolve) => {
  // 通过注释webpackChunkName 指定生成的chunk名称
  import(/* webpackChunkName: "asyncSwiper" */ './AsyncSwiper.vue')
});

<div id="app">
<p>Vue dynamic component load</p><async-swiper></async-swiper>
</div>
其实这里说的就是 vue-router里的 路由懒加载
实际spa项目中:
基于webpack4 构建多页(mpa)应用
https://juejin.im/post/5d7cc2...
参考
《vue实战》
vue-loader: https://vue-loader.vuejs.org/...
https://www.jianshu.com/p/f05...
https://www.cnblogs.com/tugen...
http://vuejs-templates.github...
性能优化篇---Webpack构建代码质量压缩
Webpack 4 和单页应用入门
Webpack 热更新实现原理分析
前端开发热更新原理解读
实现个简单webpack
详解CommonsChunkPlugin的配置和用法
connect-history-api-fallback库的理解
To v4 from v3 文档












**粗体** _斜体_ [链接](http://example.com) `代码` - 列表 > 引用。你还可以使用@来通知其他用户。