CSS(高级)
CSS 动画
Transform(变换)
2D 转换
CSS3 2D转换,我们可以斜拉(skew),缩放(scale),旋转(rotate)以及位移(translate)元素。
注意: Internet Explorer 10, Firefox, 和 Opera支持transform 属性。Chrome 和 Safari 要求前缀 -webkit- 版本。 Internet Explorer 9 要求前缀 -ms- 版本.
常用 2D 变换方法:
- translate()
- rotate()
- scale()
- skew()
- matrix()
translate()
translate()方法,根据左(X轴)和顶部(Y轴)位置给定的参数,从当前元素位置移动
.translate {
    transform: translate(50px, 100px);
    -ms-transform: translate(50px, 100px); /* IE 9 */
    -webkit-transform: translate(50px, 100px); /* Safari and Chrome */
}
rotate()
rotate()方法,在一个给定度数沿着元素中心顺时针旋转的元素。负值是允许的,这样是元素逆时针旋转。
.rotate
{
    transform:rotate(30deg);
    -ms-transform:rotate(30deg); /* IE 9 */
    -webkit-transform:rotate(30deg); /* Safari and Chrome */
}
scale()
scale()方法,该元素增加或减少的大小,取决于宽度(X轴)和高度(Y轴)的参数:
.scale
{
    transform: scale(2,4);
    -ms-transform: scale(2,4); /* IE 9 */
    -webkit-transform: scale(2,4); /* Safari and Chrome */
}
skew()
skew()方法,该元素会根据横向(X轴)和垂直(Y轴)线参数给定角度:
.skew
{
    transform:skew(30deg,20deg);
    -ms-transform:skew(30deg,20deg); /* IE 9 */
    -webkit-transform:skew(30deg,20deg); /* Safari and Chrome */
}
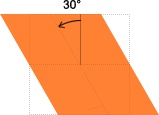
以上几种方法都有其各自的利弊,在实际应用中建议使用第一种和第四种,因为这两种方法是在项目制作中是常用的方法,对于他们的具体区别skewX(30deg) 如下图:
skewY(10deg) 如下图: #
#
skew(30deg, 10deg) 如下图:
matrix()
matrix()方法和2D变换方法合并成一个。
matrix 方法有六个参数,包含旋转,缩放,移动(平移)和倾斜功能。
.matrix
{
    transform:matrix(0.866,0.5,-0.5,0.866,0,0);
    -ms-transform:matrix(0.866,0.5,-0.5,0.866,0,0); /* IE 9 */
    -webkit-transform:matrix(0.866,0.5,-0.5,0.866,0,0); /* Safari and Chrome */
}
源码
https://gitee.com/turingitclub/css-learning/blob/dev/base/2d_transform.html
3D 转换
CSS3 3D Transform,用于 3 维动画或旋转。
CSS3 3D 转换是一个属性,用于改变元素的实际形式。这个特性可以改变元素的形状、大小和位置。
主要有下列方法:
- rotateX()
- rotateY()
- rotateZ()
注意:Internet Explorer 10 和 Firefox 支持 3D 转换; Chrome 和 Safari 必须添加前缀 -webkit-; Opera 还不支持 3D 转换(支持 2D 转换 ) otateX()
rotateX()方法,围绕其在一个给定度数X轴旋转的元素。
.rotate-x {
    transform: rotateX(60deg);
    -webkit-transform: rotateX(120deg); /* Safari and Chrome */
}
rotateY()
rotateY()方法,围绕其在一个给定度数Y轴旋转的元素。
.rotate-y {
    transform: rotateY(60deg);
    -webkit-transform: rotateY(120deg); /* Safari and Chrome */
}
rotateZ()
rotateZ()方法,围绕其在一个给定度数Z轴旋转的元素。
.rotate-z {
    transform: rotateZ(60deg);
    -webkit-transform: rotateY(120deg); /* Safari and Chrome */
}
rotate3d()
otate3d(x,y,z,a)中取值说明:
- x:是一个0到1之间的数值,主要用来描述元素围绕X轴旋转的矢量值;
- y:是一个0到1之间的数值,主要用来描述元素围绕Y轴旋转的矢量值;
- z:是一个0到1之间的数值,主要用来描述元素围绕Z轴旋转的矢量值;
- a:是一个角度值,主要用来指定元素在3D空间旋转的角度,如果其值为正值,元素顺时针旋转,反之元素逆时针旋转。 面介绍的三个旋转函数功能等同:
- rotateX(a)函数功能等同于rotate3d(1,0,0,a)
- rotateY(a)函数功能等同于rotate3d(0,1,0,a)
- rotateZ(a)函数功能等同于rotate3d(0,0,1,a)
例子
.rotate-3d {
    transform: rotate3d(0,0.6,0.2,60deg);
    -webkit-transform: rotate3d(0.6,0.6,0.2,60deg); /* Safari and Chrome */
}
转换方法
| 函数 | 描述 |
|---|---|
| matrix3d(_n_,_n_,_n_,_n_,_n_,_n_, _n_,_n_,_n_,_n_,_n_,_n_,_n_,_n_,_n_,_n_) |
定义 3D 转换,使用 16 个值的 4x4 矩阵。 |
| translate3d(_x_,_y_,_z_) | 定义 3D 转化。 |
| translateX(_x_) | 定义 3D 转化,仅使用用于 X 轴的值。 |
| translateY(_y_) | 定义 3D 转化,仅使用用于 Y 轴的值。 |
| translateZ(_z_) | 定义 3D 转化,仅使用用于 Z 轴的值。 |
| scale3d(_x_,_y_,_z_) | 定义 3D 缩放转换。 |
| scaleX(_x_) | 定义 3D 缩放转换,通过给定一个 X 轴的值。 |
| scaleY(_y_) | 定义 3D 缩放转换,通过给定一个 Y 轴的值。 |
| scaleZ(_z_) | 定义 3D 缩放转换,通过给定一个 Z 轴的值。 |
| rotate3d(_x_,_y_,_z_,_angle_) | 定义 3D 旋转。 |
| rotateX(_angle_) | 定义沿 X 轴的 3D 旋转。 |
| rotateY(_angle_) | 定义沿 Y 轴的 3D 旋转。 |
| rotateZ(_angle_) | 定义沿 Z 轴的 3D 旋转。 |
| perspective(_n_) | 定义 3D 转换元素的透视视图。 |
源码
https://gitee.com/turingitclub/css-learning/blob/dev/base/3d_transform.html
[Transition(过渡)]()
CSS3 过渡是元素从一种样式逐渐改变为另一种的效果。

https://codepen.io/AlexZ33/pen/KKwXLea
尽管 CSS3 过渡效果是足够的过渡的一个元素,但是 text-transform 属性可以提高 CSS3 过渡效果的风格。
主要有四个属性的CSS3转换效果,已被描述如下:
注意:Internet Explorer 10, Firefox, Opera, Chrome, 和Opera 支持transition 属性。Safari 需要前缀 -webkit-。Internet Explorer 9 以及更早的版本,不支持 transition 属性。Chrome 25 以及更早的版本,需要前缀 -webkit-
transition-property
规定应用过渡的 CSS 属性的名称。
transition-property: all;
transition-property: none;
transition-property: background-color;
transition-property: background-color, height, width;
transition-duration
定义过渡效果花费的时间。默认是 0。 时间单位可以是秒/毫秒。
transition-duration: 2s;
transition-duration: 1000ms;
transition-duration: 1000ms, 2000ms;
transition-timing-function
规定过渡效果的时间曲线。默认是 "ease"。
transition-timing-function: ease;
transition-timing-function: ease-in;
transition-timing-function: ease-in-out;
transition-timing-function: ease, linear;
transition-timing-function: cubic-bezier(1.000, 0.835, 0.000, 0.945);
其中:
- linear:线性过渡。等同于贝塞尔曲线(0.0, 0.0, 1.0, 1.0)
- ease:平滑过渡。等同于贝塞尔曲线(0.25, 0.1, 0.25, 1.0)
- ease-in:由慢到快。等同于贝塞尔曲线(0.42, 0, 1.0, 1.0)
- ease-out:由快到慢。等同于贝塞尔曲线(0, 0, 0.58, 1.0)
- ease-in-out:由慢到快再到慢。等同于贝塞尔曲线(0.42, 0, 0.58, 1.0)
- step-start:等同于 steps(1, start)
- step-end:等同于 steps(1, end)
- steps(
<integer>[, [ start | end ] ]?):接受两个参数的步进函数。第一个参数必须为正整数,指定函数的步数。第二个参数取值可以是start或end,指定每一步的值发生变化的时间点。第二个参数是可选的,默认值为end。 - cubic-bezier(
<number>, <number>, <number>, <number>):特定的贝塞尔曲线类型,4个数值需在[0, 1]区间内
https://codepen.io/AlexZ33/pen/KKwvWjg
注意,emmet语法。 我要生成下面的html结构,用的 div#wrapper>(p+div.progress-bar#bar$)*9 再按Tab键
transition-delay
规定过渡效果何时开始。默认是 0。
transition-delay: 2s;
transition-delay: 1000ms, 2000ms;
transition-delay: -2s;
https://codepen.io/AlexZ33/pen/eYmBYmW
<!DOCTYPE html>
<html>
<head>
    <meta charset="utf-8">
    <title>过渡效果 | AlexZ33</title>
    <meta name="description" content="过渡效果">
    <meta name="author" content="AlexZ33"/>
    <meta name="viewport" content="width=device-width">
    <link rel="shortcut icon" href="/favicon.ico">

    <style>
        .example {
            width: 100px;
            height: 100px;
            background: red;
            transition-property: width;
            transition-duration: 1s;
            transition-timing-function: linear;
            transition-delay: 2s;
            /* Safari */
            -webkit-transition-property: width;
            -webkit-transition-duration: 1s;
            -webkit-transition-timing-function: linear;
            -webkit-transition-delay: 2s;
        }
        .example:hover {
            width: 200px;
        }
        #example {
            position: relative;
            width: 530px;
            height: 530px;
            margin: 0 auto 10px;
            padding: 10px;
        }
        .childbox {
            font-size: 12px;
            position: relative;
            width: 60px;
            height: 60px;
            margin-bottom: 10px;
            background-color: #ccc;
        }
        .childbox p {
            text-align: center;
            padding-top: 10px;
        }
        #ease.childbox {
            -webkit-transition: all 4s ease;
            -moz-transition: all 4s ease;
            -o-transition: all 4s ease;
            transition: all 4s ease;
            border: 1px solid #ff0000;
        }
        #ease_in.childbox {
            -webkit-transition: all 4s ease-in;
            -moz-transition: all 4s ease-in;
            -o-transition: all 4s ease-in;
            transition: all 4s ease-in;
            border: 1px solid #00ffff;
        }
        #ease_out.childbox {
            -webkit-transition: all 4s ease-out;
            -moz-transition: all 4s ease-out;
            -o-transition: all 4s ease-out;
            transition: all 4s ease-out;
            border: 1px solid #f5f5f5;
        }
        #ease_in_out.childbox {
            -webkit-transition: all 4s ease-in-out;
            -moz-transition: all 4s ease-in-out;
            -o-transition: all 4s ease-in-out;
            transition: all 4s ease-in-out;
            border: 1px solid #f209f3;
        }
        #linear.childbox {
            -webkit-transition: all 4s linear;
            -moz-transition: all 4s linear;
            -o-transition: all 4s linear;
            transition: all 4s linear;
            border: 1px solid #ddddff;
        }
        #custom.childbox {
            -webkit-transition: all 4s cubic-bezier(1.000, 0.835, 0.000, 0.945);
            -moz-transition: all 4s cubic-bezier(1.000, 0.835, 0.000, 0.945);
            -o-transition: all 4s cubic-bezier(1.000, 0.835, 0.000, 0.945);
            transition: all 4s cubic-bezier(1.000, 0.835, 0.000, 0.945);
            border: 1px solid #cfdf44;
        }
        #negative.childbox {
            -webkit-transition: all 4s cubic-bezier(1.000, -0.530, 0.405, 1.425);
            -moz-transition: all 4s cubic-bezier(1.000, -0.530, 0.405, 1.425);
            -o-transition: all 4s cubic-bezier(1.000, -0.530, 0.405, 1.425);
            transition: all 4s cubic-bezier(1.000, -0.530, 0.405, 1.425);
            border: 1px solid #000;
        }
        #steps-start.childbox {
            -webkit-transition: all 4s steps(4, start);
            -moz-transition: all 4s steps(4, start);
            -o-transition: all 4s steps(4, start);
            transition: all 4s steps(4, start);
            border: 1px solid #ff0;
        }
        #steps-end.childbox {
            -webkit-transition: all 4s steps(4, end);
            -moz-transition: all 4s steps(4, end);
            -o-transition: all 4s steps(4, end);
            transition: all 4s steps(4, end);
            border: 1px solid #0f0;
        }
        #example:hover .childbox, #example.hover_effect .childbox {
            -webkit-border-radius: 30px;
            -moz-border-radius: 30px;
            border-radius: 30px;
            -webkit-transform: rotate(720deg);
            -moz-transform: rotate(720deg);
            -o-transform: rotate(720deg);
            -ms-transform: rotate(720deg);
            transform: rotate(720deg);
            margin-left: 420px;
            background-color: #fff;
        }
    </style>

</head>
<body>
<p>鼠标移动到 div 元素上,查看过渡效果。</p>

<p><b>注意:</b> 过渡效果需要等待两秒后才开始。</p>

<div class="example"></div>

<p>Hover on object to see it in action</p>

<div id="example">
    <div id="ease" class="childbox"><p>CSS3</p></div>
    <div id="ease_in" class="childbox"><p>CSS3</p></div>
    <div id="ease_out" class="childbox"><p>CSS3</p></div>
    <div id="ease_in_out" class="childbox"><p>CSS3</p></div>
    <div id="linear" class="childbox"><p>CSS3</p></div>
    <div id="custom" class="childbox"><p>CSS3</p></div>
    <div id="negative" class="childbox"><p>CSS3</p></div>
    <div id="steps-start" class="childbox"><p>CSS3</p></div>
    <div id="steps-end" class="childbox"><p>CSS3</p></div>
</div>

</body>
</html>
CSS 3D transition
https://codepen.io/AlexZ33/pen/VwYMOBR
[Animation(动画)]()
CSS3,我们可以创建动画,它可以取代许多网页动画图像,Flash 动画,和 Javascripts。
CSS3 @keyframes 规则
要创建CSS3动画,你将不得不了解@keyframes规则。@keyframes规则是用来创建动画。 @keyframes规则内指定一个 CSS样式和动画将逐步从目前的样式更改为新的样式。
注意:Internet Explorer 10、Firefox 以及 Opera 支持 @keyframes 规则和 animation 属性。 Chrome 和 Safari 需要前缀 -webkit-。
CSS3 动画
当在@keyframe创建动画,把它绑定到一个选择器,否则动画不会有任何效果。
指定至少这两个 CSS3 的动画属性绑定向一个选择器:
- 规定动画的名称
- 规定动画的时长
例子:
#animated_div {
    animation: animated_div 5s infinite;
    -moz-animation: animated_div 5s infinite;
    -webkit-animation: animated_div 5s infinite;
}
CSS3动画是什么?
- 动画是使元素从一种样式逐渐变化为另一种样式的效果。
- 您可以改变任意多的样式任意多的次数。
- 请用百分比来规定变化发生的时间,或用关键词 "from" 和 "to",等同于 0% 和 100%。
- 0% 是动画的开始,100% 是动画的完成。
- 为了得到最佳的浏览器支持,您应该始终定义 0% 和 100% 选择器。
例子:
@keyframes animated_div {
    0% {
        left: 0px;
    }
    20% {
        left: 50px;
        background-color: green;
    }
    40% {
        left: 140px;
        background-color: red;
    }
    60% {
        left: 280px;
        background-color: yellow;
    }
    80% {
        left: 425px;
        background-color: blue;
    }
    100% {
        left: 0px;
        background-color: pink;
    }
}
常用属性
| 属性 | 描述 | CSS | Demo |
|---|---|---|---|
| @keyframes | 规定动画。 | 3 | |
| animation | 所有动画属性的简写属性,除了 animation-play-state 属性。 | 3 | |
| animation-name | 规定 @keyframes 动画的名称。 | 3 | |
| animation-duration | 规定动画完成一个周期所花费的秒或毫秒。默认是 0。 单位s或ms | 3 | |
| animation-timing-function | 规定动画的速度曲线。默认是 "ease"。 其他还有: - linear - ease-in - ease-out - ease-in-out - step-start - step-end - steps(int, start/end) - cubic-bezier(n,n,n,n): 三次贝塞尔 |
3 | |
| animation-delay | 规定动画何时开始。默认是 0。 | 3 |
negative-animation-delay 负值 animation-delay —— 进阶 |
| animation-iteration-count | 规定动画被播放的次数。默认是 1。 | 3 | |
| animation-direction | 规定动画是否在下一周期逆向地播放。默认是 "normal"。 | 3 | |
| animation-play-state | 规定动画是否正在运行或暂停。默认是 "running"。 | 3 |
源码
示例01:
https://gitee.com/turingitclub/css-learning/blob/dev/base/animation.html
示例02:
https://gitee.com/turingitclub/css-learning/blob/dev/base/animation_2.html
示例03 running hourse:
https://gitee.com/turingitclub/css-learning/blob/dev/base/animation_3.html
steps(int, start|end) 算是 step-start 和 step-end 的进化型,
-
step等同于steps(1, start) -
step-end等同于steps(1, end)
因为只走了 一步 ,如果我们把int步数增加,就会看到每个关键影格之间多了一些演算出来的影格,当然如果步数设定越多,看到的动画也会越流畅。 (但需要这样,不用step就好了)
比如: 如果把上面的 step-start 改成 steps(3, start) , step-end 改成 steps(3,end) 会得到下面的结果
https://codepen.io/AlexZ33/pen/PowpKLb

如果熟练 steps 的用法,就能够很简单的使用 sprite 图片来做动画,什麽是 sprite 图片 呢?就是将许多图案集合成一张图,接著透过 CSS 的语法使这些图案分别呈现在网页裡,这样就能大幅减少多张图片载入的 request 数量。

上图是一张经典的 sprite 图片 ( Leland Stanford 所拍摄 ),只要透过 CSS 动画的 steps,我们也能很简单的让图片中的马儿跑起来。
<!DOCTYPE html>
<html lang="en">

<head>
  <meta charset="UTF-8">
  <meta name="viewport" content="width=device-width, initial-scale=1.0">
  <meta http-equiv="X-UA-Compatible" content="ie=edge">
  <title>css动画 示例3 running hourse | https://alexz33.github.io/</title>
  <style>
    html,
    body {
      height: 100%;
      width: 100%;
      margin: 0;
      padding: 0;
    }

    div {
      display: block;
    }


    #hourse {
      width: 186px;
      height: 141px;
      position: absolute;
      background-image: url("image/hourse.jpg");
      animation-name: run;
      animation-duration: 1s;
      animation-iteration-count: infinite;
      animation-timing-function: step-start;
    }

    @keyframes run {
      0% {
        background-position: -15px -13px;
      }

      6.25% {
        background-position: -210px -13px;
      }

      12.5% {
        background-position: -403px -13px;
      }

      18.75% {
        background-position: -592px -13px;
      }

      25% {
        background-position: -15px -165px;
      }

      31.25% {
        background-position: -210px -165px;
      }

      37.5% {
        background-position: -403px -165px;
      }

      43.75% {
        background-position: -592px -165px;
      }

      50% {
        background-position: -15px -320px;
      }

      56.25% {
        background-position: -210px -320px;
      }

      62.5% {
        background-position: -403px -320px;
      }

      68.75% {
        background-position: -592px -320px;
      }

      75% {
        background-position: -15px -470px;
      }

      81.25% {
        background-position: -210px -470px;
      }

      87.5% {
        background-position: -403px -470px;
      }

      93.75% {
        background-position: -592px -470px;
      }

      100% {
        background-position: -592px -470px;
      }
    }
  </style>
</head>

<body>
  <div id="hourse">
  </div>
</body>

</html>
示例04: marriage-proposal:
僵尸行走
- 注意: 与
running house动画的区别, 用js (jquery)的animate函数来做帧动画的控制

源码: https://gitee.com/turingitclub/css-learning/tree/dev/task04/zoombieWalking
酷炫3D动画 (旋转的正方体)
源码: https://codepen.io/AlexZ33/pen/yLyzWwo
炫酷页面开发(轮播图)
酷炫页面开发(3D 视频展示区)

代码 : https://codepen.io/AlexZ33/pen/zYxNVzw
css-only-dropdown-menu

源码 : https://gitee.com/turingitclub/css-learning/blob/dev/task04/css-only-dropdown/index.html
CSS-only-tooltip

源码 : https://gitee.com/turingitclub/css-learning/blob/dev/task04/CSS-only-Tooltip/index.html
漂亮ToolTips效果
CSS响应式设计
Viewport
什么是 Viewport?
viewport 是用户网页的可视区域。
viewport 翻译为中文可以叫做"视区"。
手机浏览器是把页面放在一个虚拟的"窗口"(viewport)中,通常这个虚拟的"窗口"(viewport)比屏幕宽,这样就不用把每个网页挤到很小的窗口中(这样会破坏没有针对手机浏览器优化的网页的布局),用户可以通过平移和缩放来看网页的不同部分。
设置 Viewport
一个常用的针对移动网页优化过的页面的 viewport meta 标签大致如下:
- width:控制 viewport 的大小,可以指定的一个值,如果 600,或者特殊的值,如 device-width 为设备的宽度(单位为缩放为 100% 时的 CSS 的像素)。
- height:和 width 相对应,指定高度。
- initial-scale:初始缩放比例,也即是当页面第一次 load 的时候缩放比例。
- maximum-scale:允许用户缩放到的最大比例。
- minimum-scale:允许用户缩放到的最小比例。
- user-scalable:用户是否可以手动缩放。
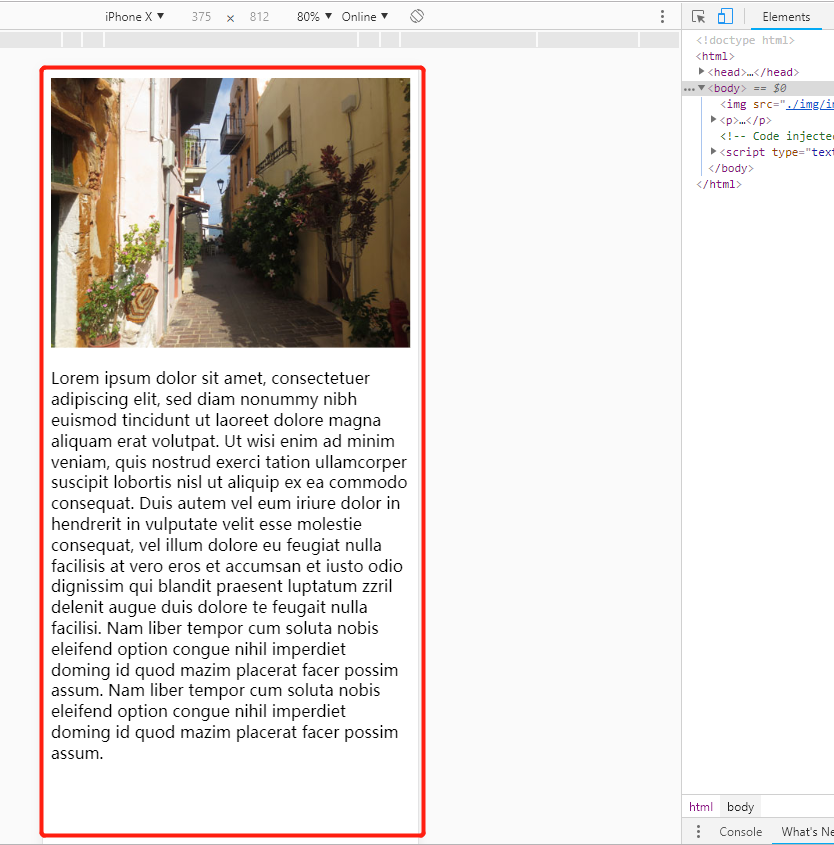
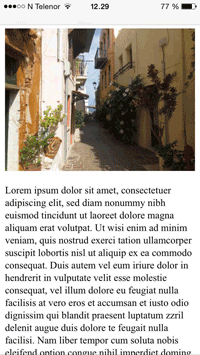
以下实例演示了使用viewport和没使用viewport在移动端上的效果:
实例1、没有添加 viewport:点击查看
实例2、添加 viewport:点击查看

如果你在平板电脑或手机上访问,可以直接点击查看效果。
viewport视口
布局视口(layout viewport)
可视视口(visual viewport) //用户的缩放可以改变可视视口
理想视口(ideal viewport) //指布局视口在一个设备上的最佳尺寸
理想视口是为构建手机浏览器优化的页面而添加的
<meta name="viewport" content="width=device-width"/>上面这句告诉设备要使用理想视口 ,理想视口的宽度作为布局视口的宽度(width定义布局视口的宽度 如果不指定 布局视口的宽度就是厂商的默认值)
<meta name="viewport" content="width=device-width,minimum-scale=1.0,maximum-scale=1.0,user-scalable=no"/>最小缩放比例 最大缩放比例都为1 禁用了用户缩放
Media Query(媒体查询)
媒体(media)查询在W3CH CSS3 上有介绍:CSS3 @media 查询。
使用 @media 查询,你可以针对不同的媒体类型定义不同的样式。
基础可以戳W3CH教程 响应式 Web 设计 – 媒体查询
Media Type
<link rel="stylesheet" media="screen and (max-width: 600px)" href="small.css" />上面的media语句表示的是:当页页宽度小于或等于600px,调用small.css样式表来渲染你的Web页面。首先来看media()的语句中包含的内容:
1、screen:这个不用说大家都知道,指的是一种媒体类型 --> 详情戳MDN文档;
2、and:被称为关键词,与其相似的还有not,only,稍后会介绍;
3、(max-width:600px):这个就是媒体特性,说得通俗一点就是媒体条件。
前面这个简单的实例引出两个概念性的东西,一个就是媒体类型(Media Type)和 媒体特性(Media Query)
@media all and (min-width:800px) and (origentation:landscape) {
  ...
}
all 可以是 screen ,print.这是媒体类型可以通过媒体类型对不同的设备指定不同的样式,在css2中我们常碰到的就是all(全部),screen(屏幕),print(页面打印或打邱预览模式),其实在媒体类型不止这三种,w3c总共列出了10种媒体类型。
页面中引入媒体类型方法也有多种:
1、link方法引入
<link rel="stylesheet" type="text/css" href="../css/print.css" media="print" />2、xml方式引入
<?xml-stylesheet rel="stylesheet" media="screen" href="css/style.css" ?>3、@import方式引入
@import引入有两种方式,一种是在样式文件中通过@import调用别一个样式文件;另一种方法是在>/head>中的中引入,单这种使用方法在ie6-7都不被支持 如
样式文件中调用另一个样式文件:
@import url("css/reset.css") screen;
@import url("css/print.css") print;
在>/head>中的中调用:以上几种方法都有其各自的利弊,在实际应用中建议使用第一种和第四种,因为这两下面我们对教程未详细提到的内容做个补充
<head>
 <style type="text/css">
 @import url("css/style.css") all;
 </style>
 </head>
4、@media引入
这种引入方式和@import是一样的,也有两种方式:
样式文件中使用:
@media screen{
     选择器{

        属性:属性值;
     }
   }
在>/head>中的中调用:
 <head>
    <style type="text/css">
 @media screen{
           选择器{
      属性:属性值;
    }
 }
    </style>
  </head>
以上几种方法都有其各自的利弊,在实际应用中建议使用第一种和第四种,因为这两下面我们对教程未详细提到的内容做个补充种方法是在项目制作中是常用的方法,对于他们的具体区别
Media Query
前面有简单的提到,Media Query是CSS3 对Media Type的增强版,其实可以将Media Query看成Media Type(判断条件)+CSS(符合条件的样式规则),常用的特性w3c共列出来13种。具体的可以参阅:Media features。为了更能理解Media Query,我们在次回到前面的实例上:
<link rel="stylesheet" media="screen and (max-width: 600px)" href="small.css" />转换成css中的写法为:
@media screen and (max-width: 600px) {
    选择器 {
      属性:属性值;
    }
}其实就是把small.css文件中的样式放在了@media srceen and (max-width;600px){…}的大括号之中。在语句上面的语句结构中,可以看出Media query和css的属性集合很相似,主要区别在:
1、Media query只接受单个的逻辑表达式作为其值,或者没有值;
2、css属性用于声明如何表现页页的信息;而Media Query是一个用于判断输出设备是否满足某种条件的表达式;
3、Media Query其中的大部分接受min/max前缀,用来表示其逻辑关系,表示应用于大于等于或者小于等于某个值的情况
4、CSS属性要求必须有属性值,Media Query可以没有值,因为其表达式返回的只有真或假两种
- not
- and
- or 也可以用逗号分隔
@media not screen and (color),print and (color)

@media not screen and (color) or print and (color)

@media (not(screen and (color))), print and (color)

//上面三个等价
//加了not有效范围只到逗号- only 防止老旧的浏览器不支持带媒体属性的查询,而应用到给定的样式
第一个,如果是老浏览器不支持媒体查询,只解析到only,老浏览器是不会应用后面的样式的 因为没有叫only的设备
第二个,不管后面的媒体查询样式怎么写,对于老的浏览器来说,都会应用这样一段样式,因为它已经把后面的逻辑表达式忽略掉了,它的值永远为真。
注意: 一般我们在对某个设备需要用媒体查询时候最好带上only 除非不需要兼容老浏览器
css3主要的媒体属性
响应式设计的断点
/*-----------iphone 4 and 4s -------------*/

/*  Portrait and Landscape */
@media only screen
  and (min-device-width: 320px)
  and (max-device-width: 480px)
  and (-webkit-min-device-pixel-ratio:2){}
/*--------------iphone5 and 5s --------------*/
/* Portrait and Landscape */
@media only screen
and (min-device-width:320px)
and (max-device-width:568px)
and (-webkit-min-device-pixel-ratio:2){
}以上这种 针对特定设备来做样式选择* 做法不推荐,除非特例
要对屏幕类型
- 小屏幕 0-480
- 中屏幕 481-800
- 大屏 801-1400
- 巨屏 1400+
- 这种划分结构

以上是常用的Media Query
这篇文章有对标准的各个标准设备总结Media Queries for Standard Devices
图片(Responsive Images)
视频
框架
- Media Query 不得单独编排,必须与相关的规则一起定义
- Media Query 如果有多个逗号分隔的条件时,应将每个条件放在单独一行
精灵图
响应式网站设计原则
- 渐进增强(pregressive enhancement)
- 优雅降级 (grace degradation)
整站项目示例(自学能力强的同学亲启)
注意: 我知道这不部分内容对同学们来说有点像天书,但是如果你觉得自己学习能力不错,直接看这部分代码,并对照文档和有效使用搜索引擎。基本上把它学透,你就可以找工作了。

项目内有文档
移动端媒体查询适配方案
html {
 font-size: 100px; /\* no \*/
 font-size: 27.777777vw;
}
@media screen and (max-width: 320px) {
 html {
 font-size: 88.888888px; /\* no \*/
 font-size: 27.777777vw;
 }
}
@media screen and (min-width: 321px) and (max-width: 360px) {
 html {
 font-size: 100px; /\* no \*/
 font-size: 27.777777vw;
 }
}
@media screen and (min-width: 361px) and (max-width: 375px) {
 html {
 font-size: 104.166666px; /\* no \*/
 font-size: 27.777777vw;
 }
}
@media screen and (min-width: 376px) and (max-width: 393px) {
 html {
 font-size: 109.166666px; /\* no \*/
 font-size: 27.777777vw;
 }
}
@media screen and (min-width: 394px) and (max-width: 412px) {
 html {
 font-size: 114.444444px; /\* no \*/
 font-size: 27.777777vw;
 }
}
@media screen and (min-width: 413px) and (max-width: 414px) {
 html {
 font-size: 114.999999px; /\* no \*/
 font-size: 27.777777vw;
 }
}
@media screen and (min-width: 415px) and (max-width: 480px) {
 html {
 font-size: 133.333333px; /\* no \*/
 font-size: 27.777777vw;
 }
}
@media screen and (min-width: 481px) and (max-width: 540px) {
 html {
 font-size: 149.999999px; /\* no \*/
 font-size: 27.777777vw;
 }
}
@media screen and (min-width: 541px) and (max-width: 640px) {
 html {
 font-size: 177.777777px; /\* no \*/
 font-size: 27.777777vw;
 }
}
@media screen and (min-width: 641px) and (max-width: 720px) {
 html {
 font-size: 199.999999px; /\* no \*/
 font-size: 27.777777vw;
 }
}
@media screen and (min-width: 721px) and (max-width: 768px) {
 html {
 font-size: 213.333333px; /\* no \*/
 font-size: 27.777777vw;
 }
}
@media screen and (min-width: 769px) {
 html {
 font-size: 213.333333px; /\* no \*/
 }
 html {
 width: 768px;  /\* no \*/
 margin: 0 auto;
 }
}
【拓展】CSS标准学习
CSS标准列表:http://www.w3.org/Style/CSS/current-work
学习目标:8周完成以下CSS标准的学习
- [[CSS-2010]](http://www.w3.org/TR/css-2010/) [Cascading Style Sheets (CSS) Snapshot 2010]
- [[CSS-STYLE-ATTR]](http://www.w3.org/TR/css-styl... [CSS Style Attributes]
-
[[CSS21]](http://www.w3.org/TR/CSS2/) CSS Level 2 Revision 1
- [[CSS21] S1](http://www.w3.org/TR/CSS2/abo... [About the CSS 2.1 Specification]
- [[CSS21] S2](http://www.w3.org/TR/CSS21/in... [Introduction to CSS 2.1]
- [[CSS21] S3](http://www.w3.org/TR/CSS21/co... [Conformance: Requirements and Recommendations]
- [[CSS21] S4](http://www.w3.org/TR/CSS21/sy... [Syntax and basic data types]
- [[CSS21] S5](http://www.w3.org/TR/CSS2/sel... [Selectors]
- [[CSS21]](http://www.w3.org/TR/CSS2/cas... S6 [Assigning property values, Cascading, and Inheritance]
- [[CSS21] S7](http://www.w3.org/TR/CSS2/med... [Media types]
- [[CSS21] S8](http://www.w3.org/TR/CSS2/box... [Box model]
- [[CSS21] S9](http://www.w3.org/TR/CSS2/vis... [Visual formatting model]
- [[CSS21] S10](http://www.w3.org/TR/CSS2/vis... [Visual formatting model details]
- [[CSS21] S11](http://www.w3.org/TR/CSS2/vis... Visual effects
- [[CSS21] S12](http://www.w3.org/TR/CSS2/gen... Generated content, automatic numbering, and lists
- [[CSS21] S13](http://www.w3.org/TR/CSS2/pag... Paged media
- [[CSS21] S14](http://www.w3.org/TR/CSS2/col... Colors and Backgrounds
- [[CSS21] S15](http://www.w3.org/TR/CSS2/fon... Fonts
- [[CSS21] S16](http://www.w3.org/TR/CSS2/tex... Text
- [[CSS21] S17](http://www.w3.org/TR/CSS2/tab... Tables
- [[CSS21] S18](http://www.w3.org/TR/CSS2/ui.... User interface
-
CSS Level 3 Modules
- [[CSS3-COLOR]](http://www.w3.org/TR/css3-col... [CSS Color Module Level 3]
- [[CSS-NAMESPACES-3]](http://www.w3.org/TR/css3-nam... [CSS Namespaces Module Level 3]
- [[CSS3-SELECTORS]](http://www.w3.org/TR/selectors/) [Selectors Level 3]
- [[CSS3-MEDIAQUERIES]](http://www.w3.org/TR/css3-med... [Media Queries]
- [[CSS3-BACKGROUND]](http://www.w3.org/TR/css3-bac... CSS Backgrounds and Borders Module Level 3
- [[CSS3-CONDITIONAL]](http://www.w3.org/TR/css3-con... [CSS Conditional Rules Module Level 3]
- [[CSS3-IMAGES]](http://www.w3.org/TR/css3-ima... CSS Image Values and Replaced Content Module Level 3
- [[CSS3-MULTICOL]](http://www.w3.org/TR/css3-mul... CSS Multi-column Layout Module
- [[CSS3-VALUES]](http://www.w3.org/TR/css3-val... [CSS Values and Units Module Level 3]
- [[CSS-FLEXBOX]](http://www.w3.org/TR/css3-fle... CSS Flexible Box Layout Module Level 1
- [[CSS-TEXT-DECOR-3]](http://www.w3.org/TR/css-text... CSS Text Decoration Module Level 3
- [[CSS-CASCADE]](http://www.w3.org/TR/css3-cas... [CSS Cascading and Inheritance Level 3]
- [[CSS3-FONTS]](http://www.w3.org/TR/css3-fon... CSS Fonts Module Level 3
- [[CSS3-ANIMATIONS]](http://www.w3.org/TR/css3-ani... CSS Animations
- [[CSS-COUNTER-STYLES]](http://www.w3.org/TR/css-coun... [CSS Counter Styles Level 3]
- [[CSS-TEXT]](http://www.w3.org/TR/css3-text/) CSS Text Module Level 3
- [[CSS-TRANSFORMS]](http://www.w3.org/TR/css3-tra... CSS Transforms Module Level 1
- [[CSS3-TRANSITIONS]](http://www.w3.org/TR/css3-tra... CSS Transitions
- [[CSS-SYNTAX-3]](http://www.w3.org/TR/css3-syn... [CSS Syntax Module Level 3]
- [[CSS-WILL-CHANGE]](http://www.w3.org/TR/css-will... CSS Will Change Module Level 1
- [[CSS-UI]](http://www.w3.org/TR/css3-ui/) CSS Basic User Interface Module Level 3 (CSS3 UI)
- [CSSOM-VIEW] CSSOM View Module
- [[SELECTORS4]](http://www.w3.org/TR/selector... [Selectors Level 4]
学习进度:
-
第1周
- [[CSS-2010]](http://www.w3.org/TR/css-2010/) [Cascading Style Sheets (CSS) Snapshot 2010]
- [[CSS-STYLE-ATTR]](http://www.w3.org/TR/css-styl... [CSS Style Attributes]
- [[CSS21] S1](http://www.w3.org/TR/CSS2/abo... [About the CSS 2.1 Specification]
- [[CSS21] S2](http://www.w3.org/TR/CSS21/in... [Introduction to CSS 2.1]
- [[CSS21] S3](http://www.w3.org/TR/CSS21/co... [Conformance: Requirements and Recommendations]
-
第2周
- [[CSS21] S4](http://www.w3.org/TR/CSS21/sy... [Syntax and basic data types]
- [[CSS-SYNTAX-3]](http://www.w3.org/TR/css3-syn... [CSS Syntax Module Level 3]
- [[CSS3-VALUES]](http://www.w3.org/TR/css3-val... [CSS Values and Units Module Level 3]
- [[CSS-COUNTER-STYLES]](http://www.w3.org/TR/css-coun... [CSS Counter Styles Level 3]
- [[CSS3-COLOR]](http://www.w3.org/TR/css3-col... [CSS Color Module Level 3]
- [[CSS21] S5](http://www.w3.org/TR/CSS2/sel... [Selectors]
- [[CSS3-SELECTORS]](http://www.w3.org/TR/selectors/) [Selectors Level 3]
- [[SELECTORS4]](http://www.w3.org/TR/selector... [Selectors Level 4]
- [[CSS-NAMESPACES-3]](http://www.w3.org/TR/css3-nam... [CSS Namespaces Module Level 3]
-
第3周
- [[CSS21] Assigning property values, Cascading, and Inheritance](http://www.w3.org/TR/CSS2/cas... S6
- CSS-CASCADE Casca 这篇文章有对标准的各个标准设备总结https://css-tricks.com/snippe...://css-tricks.com/snippets/css/media-queries-for-standard-devices/这篇文章有对标准的各个标准设备总结https://css-tricks.com/snippe...://css-tricks.com/snippets/css/media-queries-for-standard-devices/
- CSS21 S7 Media types
- CSS3-MEDIAQUERIES Media Queries
- CSS3-CONDITIONAL CSS Conditional Rules Module Level 3
- CSS21 S8 Box model
-
第4周
-
第5周
-
第6周
-
第7周
-
第8周
- CSS3-ANIMATIONS CSS Animations
- CSS-TRANSFORMS
- CSS3-TRANSITIONS
- CSS-WILL-CHANGE
拓展阅读
- CSS媒体查询
- Media Queries for Standard Devices
- REM vs EM – The Great Debate
- 在 @media 中,px、em、rem 用哪个比较好?
- 不使用 Media Queries 的自适应 CSS
- 根据各种不同的 media 属性,调试 CSS 效果
- css transition
- transition in css-trick
- 完整解析 CSS 動畫 ( CSS Animation )
- CSS-TRICKS animation
- CSS Animation Tricks: State Jumping, Negative Delays, Animating Origin, and More
- linear-gradient()
- W3C教程CSS教程


**粗体** _斜体_ [链接](http://example.com) `代码` - 列表 > 引用。你还可以使用@来通知其他用户。