        img[0, :, :] /=0.229
        img[1, :, :] /=0.224
        img[2, :, :] /=0.225
        img = img[np.newaxis, :]
        return origin, img, resized_img

    def infer(self,image_path):
        """
        预测,将结果保存到一副新的图片中
        :param image_path:
        :return:
        """
        origin, tensor_img, resized_img = self.read_image(image_path)
        input_w, input_h = origin.size[0], origin.size[1]
        image_shape = np.array([input_h, input_w], dtype='int32')
        t1 = time.time()
        batch_outputs = exe.run(inference_program,
                                feed={feed_target_names[0]: tensor_img,
                                      feed_target_names[1]: image_shape[np.newaxis, :]},备注:此时送入网络进行预测的图像大小是原图的尺寸大小。                                fetch_list=fetch_targets,
                                return_numpy=False)

        period = time.time() - t1
        print("predict cost time:{0}".format("%2.2f sec" % period))
        bboxes = np.array(batch_outputs[0])

        if bboxes.shape[1] != 6:
            print("No object found in {}".format(image_path))
            return
        labels = bboxes[:, 0].astype('int32')
        scores = bboxes[:, 1].astype('float32')
        boxes = bboxes[:, 2:].astype('float32')

        last_dot_index = image_path.rfind('.')
        out_path = image_path[:last_dot_index]
        out_path += '-result.jpg'
        self.draw_bbox_image(origin, boxes, labels,scores, out_path)

if __name__ == '__main__':
    image_path= "C:\\Users\\zhili\\Desktop\\123\\2.jpg"
    a=inference()
    a.infer(image_path)
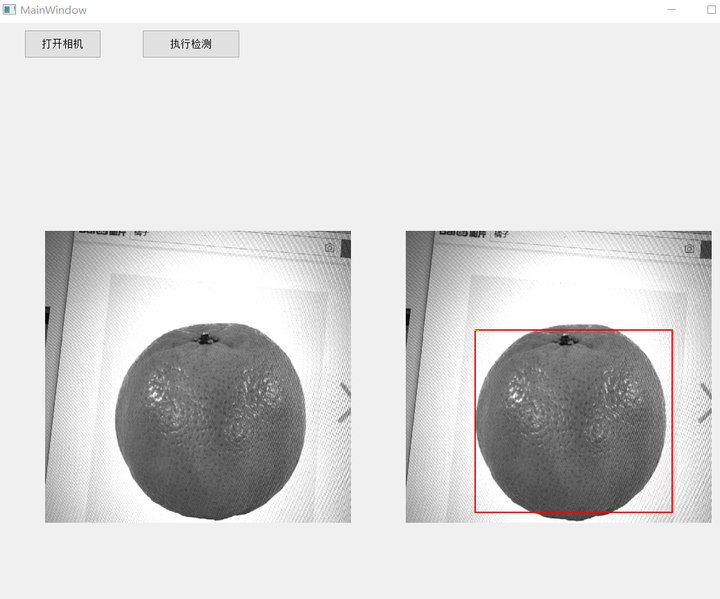
PyQt5检测效果
1. 首先通过步骤1配置好的PyQt中QT Designer,创建两个Button对象,分别为“打开相机”、“开始检测”,然后创建两个Label对象,分别用于显示相机原图和显示检测后图像。
2. 创建多线程检测机制,分别给两个Button设置不同的槽函数,分别用于触发相机拍照和调用检测函数。运行infe_video.py可得到如下结果。由于作者使用的是黑白相机拍摄电脑屏幕上百度搜索出来的橘子照片,检测效果质量不高。

特别说明:该文章受到了高松鹤同学和百度飞桨团队的大力支持,表示感谢。
**粗体** _斜体_ [链接](http://example.com) `代码` - 列表 > 引用。你还可以使用@来通知其他用户。