前言
最近趁着国庆假期一直在捣鼓Nuxt.js项目开发,由于项目中需要多个地方使用到弹窗功能,鉴于网上的一些组件可能不能很好满足项目需求,于是就自己动手开发了个自定义对话框组件Vpopup。
介绍
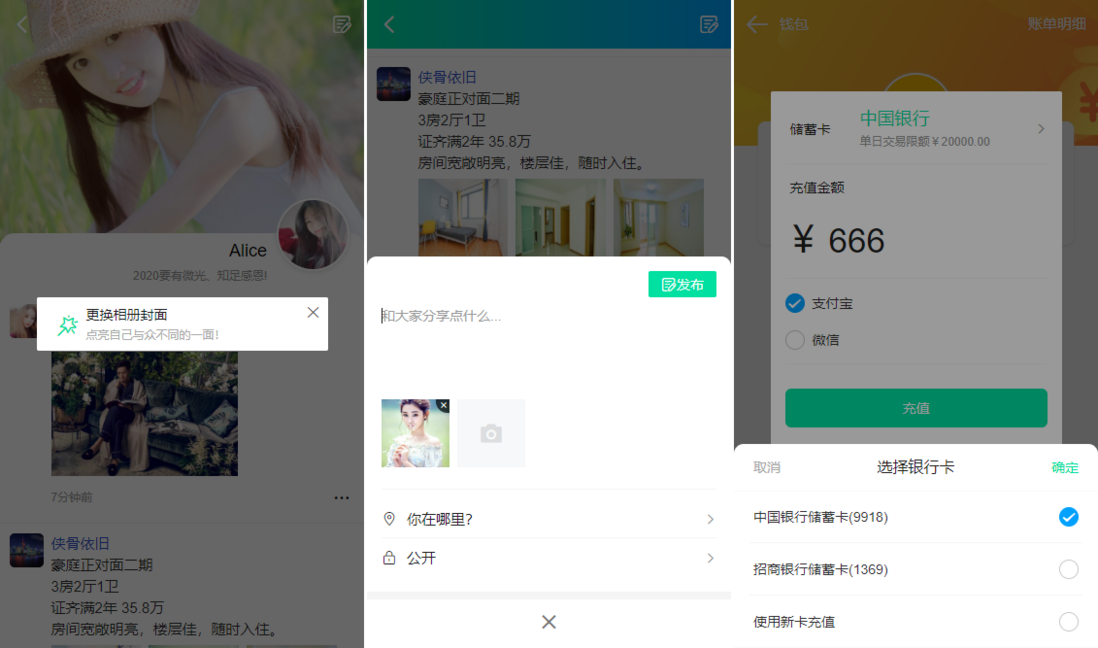
VPopup 轻量级移动端Vue弹窗组件。集中融合了有赞Vant、京东NutUI等Vue组件库中的 Msg信息框、Popup弹层、Dialog对话框、Toast提示框、ActionSheet动作面板框、Notify通知框 等功能。
用法
在main.js中引入组件
import Popup from './components/popup'
Vue.use(Popup)
支持标签式和函数式两种方式调用组件。
<!-- 标签式调用 -->
<template>
    <view id="root">
        ...

        <!-- VPopup模板 -->
        <v-popup
            v-model="showDialog"
            anim="scaleIn"
            title="标题内容"
            content="弹窗内容,告知当前状态、信息和解决方法,描述文字尽量控制在三行内!"
            shadeClose="false"
            xclose
            :btns="[
                {...},
                {...},
            ]"
        />
    </view>
</template>
<!-- 函数式调用 -->
<script>
export default {
...
methods: {
handleShowDialog() {
let $el = this.$vpopup({
title: '标题内容',
content: '弹窗内容,告知当前状态、信息和解决方法,描述文字尽量控制在三行内!',
anim: 'scaleIn',
shadeClose: false,
xclose: true,
onClose: () => {
console.log('vpopup is closed!')
},
btns: [
{text: '关闭'},
{
text: '确定',
style: 'color:#00e0a1',
click: () => {
$el.close()
}
}
]
});
}
}
}
</script>这里可以根据项目需求,自行选择调用方式即可。
- Msg信息框
<!-- msg提示框 -->
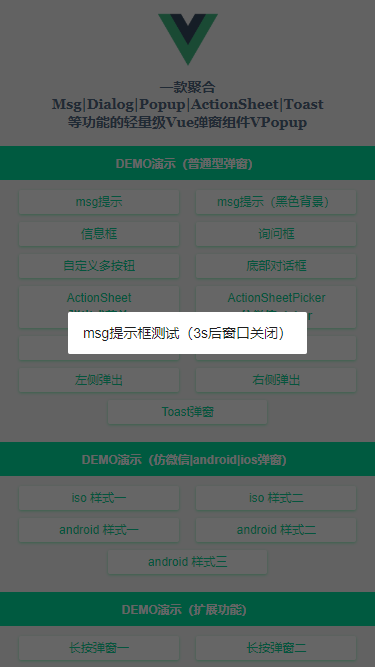
<v-popup v-model="showMsg" anim="fadeIn" content="msg提示框测试(3s后窗口关闭)" shadeClose="false" time="3" />
<v-popup v-model="showMsgBg" anim="footer" content="自定义背景颜色" shade="false" time="2"
    popup-style="background:rgba(0,0,0,.6);color:#fff;"
/>

<!-- 询问框 -->
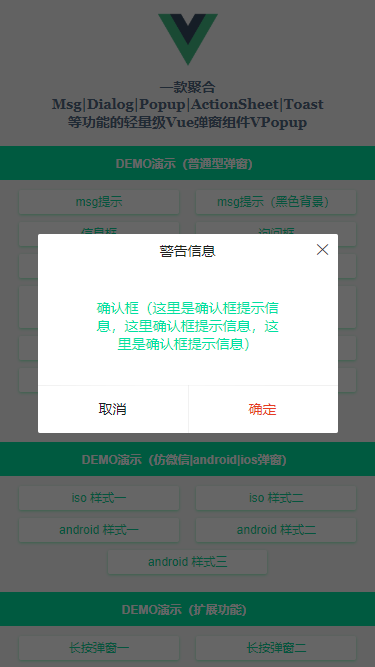
<v-popup v-model="showConfirm" shadeClose="false" title="警告信息" xclose z-index="2001"
    content="<div style='color:#00e0a1;padding:20px 40px;'>确认框(这里是确认框提示信息)</div>"
    :btns="[
        {text: '取消', click: () => showConfirm=false},
        {text: '确定', style: 'color:#e63d23;', click: handleInfo},
    ]"
/>- Toast轻提示框
<!-- Toast轻提示弹窗 -->
<v-popup v-model="showToast" type="toast" icon="loading" time="2" content="加载中..." />
<v-popup v-model="showToast" type="toast" icon="success" shade="false" time="2" content="成功提示" />
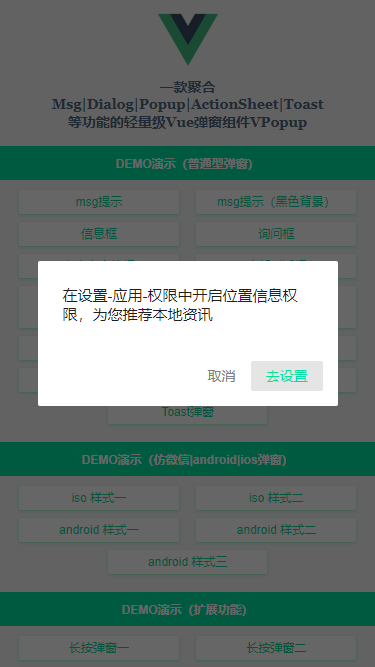
<v-popup v-model="showToast" type="toast" icon="fail" shade="false" time="2" content="失败提示" />- 微信/android风格弹窗
<!-- Android风格弹窗 -->
<v-popup v-model="showAndroid1" type="android" shadeClose="false" xclose title="标题内容" z-index="2001"
    content="弹窗内容,告知当前状态、信息和解决方法,描述文字尽量控制在三行内"
    :btns="[
        {text: '知道了', click: () => showAndroid1=false},
        {text: '确定', style: 'color:#00e0a1;', click: handleInfo},
    ]"
>
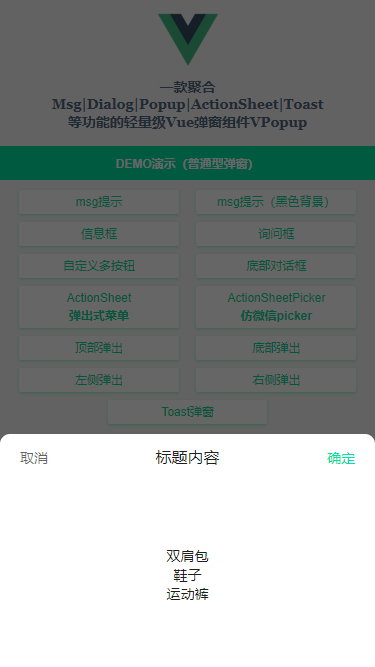
</v-popup>- ActionSheet动作面板弹窗
<!-- ActionSheet底部菜单 -->
<v-popup v-model="showActionSheet" anim="footer" type="actionsheet" :z-index="1011"
    content="弹窗内容,告知当前状态、信息和解决方法,描述文字尽量控制在三行内"
    :btns="[
        {text: '拍照', style: 'color:#09f;', disabled: true, click: handleInfo},
        {text: '从手机相册选择', style: 'color:#00e0a1;', click: handleInfo},
        {text: '保存图片', style: 'color:#e63d23;', click: () => null},
        {text: '取消', click: () => showActionSheet=false},
    ]"
/>
soga,这里就不一一贴上示例代码了。如果觉得还不错,那就往下看实现过程吧。
实现方式
参数配置
弹窗支持如下参数自定义配置,大家根据需要自行搭配使用。
@@Props
------------------------------------------
v-model     当前组件是否显示
title       标题
content     内容(支持自定义插槽内容)
type        弹窗类型(toast | footer | actionsheet | actionsheetPicker | android/ios)
popupStyle  自定义弹窗样式
icon        toast图标(loading | success | fail)
shade       是否显示遮罩层
shadeClose  是否点击遮罩时关闭弹窗
opacity     遮罩层透明度
round       是否显示圆角
xclose      是否显示关闭图标
xposition   关闭图标位置(left | right | top | bottom)
xcolor      关闭图标颜色
anim        弹窗动画(scaleIn | fadeIn | footer | fadeInUp | fadeInDown)
position    弹出位置(top | right | bottom | left)
follow      长按/右键弹窗(坐标点)
time        弹窗自动关闭秒数(1、2、3)
zIndex      弹窗层叠(默认8080)
btns        弹窗按钮(参数:text|style|disabled|click)

@@$emit
------------------------------------------
open        打开弹出层时触发(@open="xxx")
close       关闭弹出层时触发(@close="xxx")

@@Event
------------------------------------------
onOpen      打开弹窗回调
onClose     关闭弹窗回调
弹窗模板popup.vue
<template>
  <div v-show="opened" class="nuxt__popup" :class="{'nuxt__popup-closed': closeCls}" :id="id">
    <div v-if="JSON.parse(shade)" class="nuxt__overlay" @click="shadeClicked" :style="{opacity}"></div>
    <div class="nuxt__wrap">
      <div class="nuxt__wrap-section">
        <div class="nuxt__wrap-child" :class="['anim-'+anim, type&&'popui__'+type, round&&'round', position]" :style="popupStyle">
          <div v-if="title" class="nuxt__wrap-tit" v-html="title"></div>
          <div v-if="type=='toast'&&icon" class="nuxt__toast-icon" :class="['nuxt__toast-'+icon]" v-html="toastIcon[icon]"></div>
          <template v-if="$slots.content"><div class="nuxt__wrap-cnt"><slot name="content" /></div></template>
          <template v-else><div v-if="content" class="nuxt__wrap-cnt" v-html="content"></div></template>
          <slot />
          <div v-if="btns" class="nuxt__wrap-btns">
            <span v-for="(btn,index) in btns" :key="index" class="btn" :style="btn.style" v-html="btn.text"></span>
          </div>
          <span v-if="xclose" class="nuxt__xclose" :class="xposition" :style="{'color': xcolor}" @click="close"></span>
        </div>
      </div>
    </div>
  </div>
</template>
/**
* @Desc VueJs自定义弹窗组件VPopup
* @Time andy by 2020-10-06
* @About Q:282310962 wx:xy190310
*/
<script>
let $index = 0, $lockCount = 0, $timer = {};
export default {
props: {
...
},
data() {
return {
opened: false,
closeCls: '',
toastIcon: {
...
}
}
},
watch: {
    value(val) {
        const type = val ? 'open' : 'close';
        this[type]();
    },
},
methods: {
// 打开弹窗
open() {
if(this.opened) return;
this.opened = true;
this.$emit('open');
typeof this.onOpen === 'function' && this.onOpen();
if(JSON.parse(this.shade)) {
if(!$lockCount) {
document.body.classList.add('nt-overflow-hidden');
}
$lockCount++;
}
// 倒计时关闭
if(this.time) {
$index++;
if($timer[$index] !== null) clearTimeout($timer[$index])
$timer[$index] = setTimeout(() => {
this.close();
}, parseInt(this.time) * 1000);
}
if(this.follow) {
this.$nextTick(() => {
let obj = this.$el.querySelector('.nuxt__wrap-child');
let oW, oH, winW, winH, pos;
oW = obj.clientWidth;
oH = obj.clientHeight;
winW = window.innerWidth;
winH = window.innerHeight;
pos = this.getPos(this.follow[0], this.follow[1], oW, oH, winW, winH);
obj.style.left = pos[0] + 'px';
obj.style.top = pos[1] + 'px';
});
}
},
// 关闭弹窗
close() {
if(!this.opened) return;
this.closeCls = true;
setTimeout(() => {
this.opened = false;
this.closeCls = false;
if(JSON.parse(this.shade)) {
$lockCount--;
if(!$lockCount) {
document.body.classList.remove('nt-overflow-hidden');
}
}
if(this.time) {
$index--;
}
this.$emit('input', false);
this.$emit('close');
typeof this.onClose === 'function' && this.onClose();
}, 200);
},
shadeClicked() {
if(JSON.parse(this.shadeClose)) {
this.close();
}
},
btnClicked(e, index) {
let btn = this.btns[index];
if(!btn.disabled) {
typeof btn.click === 'function' && btn.click(e)
}
},
getZIndex() {
for(var $idx = parseInt(this.zIndex), $el = document.getElementsByTagName('*'), i = 0, len = $el.length; i < len; i++)
$idx = Math.max($idx, $el[i].style.zIndex)
return $idx;
},
// 获取弹窗坐标点
getPos(x, y, ow, oh, winW, winH) {
let l = (x + ow) > winW ? x - ow : x;
let t = (y + oh) > winH ? y - oh : y;
return [l, t];
}
},
}
</script>通过组件传过来的v-model来调用open()和close()方法。
watch: {
value(val) {
const type = val ? 'open' : 'close';
this[type]();
},
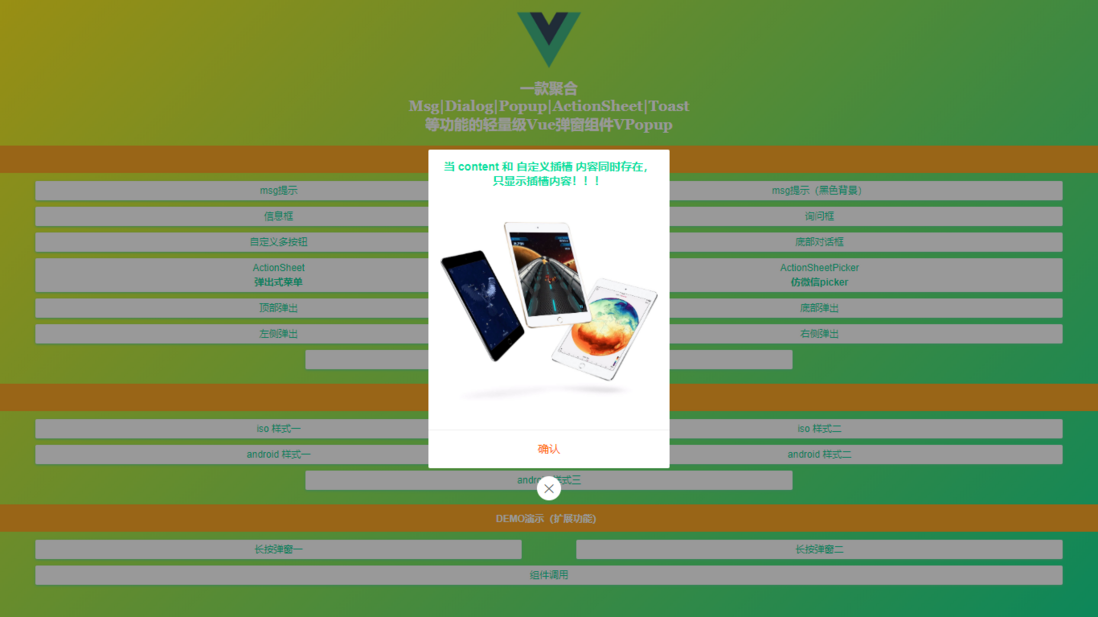
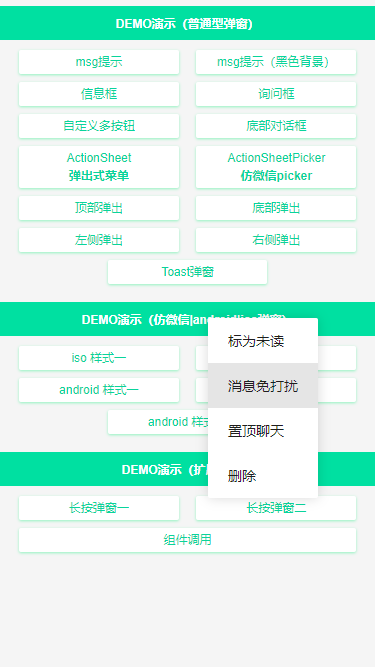
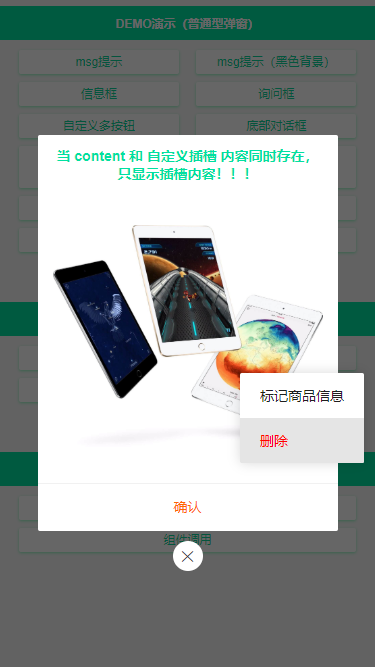
},组件还支持右键弹窗/长按弹窗及自定义插槽内容。
<v-popup v-model="showComponent" xclose xposition="bottom" :shadeClose="false" content="这里是内容信息"
    :btns="[
        {text: '确认', style: 'color:#f60;', click: () => showComponent=false},
    ]"
    @open="handleOpen" @close="handleClose"
>
    <template #content><b style="color:#00e0a1;">当 content 和 自定义插槽 内容同时存在,只显示插槽内容!!!</b></template>
    <!-- <div slot="content">显示自定义插槽内容!</div> -->
    <div style="padding:30px 15px;">
        <img src="https://img.yzcdn.cn/vant/apple-3.jpg" style="width:100%;" @click="handleContextPopup" />
    </div>
</v-popup>
通过Vue.extend扩展构造器来实现函数式调用this.$vpopup({...})
import Vue from 'vue';
import VuePopup from './popup.vue';

let PopupConstructor = Vue.extend(VuePopup);

let $instance;

let VPopup = function(options = {}) {
    // 同一个页面中,id相同的Popup的DOM只会存在一个
    options.id = options.id || 'nuxt-popup-id';
    $instance = new PopupConstructor({
        propsData: options
    });
    $instance.vm = $instance.$mount();

    let popupDom = document.querySelector('#' + options.id);
    if(options.id && popupDom) {
        popupDom.parentNode.replaceChild($instance.$el, popupDom);
    } else {
        document.body.appendChild($instance.$el);
    }

    Vue.nextTick(() => {
        $instance.value = true;
    })

    return $instance;
}

VPopup.install = () => {
    Vue.prototype['$vpopup'] = VPopup;
    Vue.component('v-popup', VuePopup);
}

export default VPopup;
如上就实现了在Vue的 prototype 上挂载 $vpopup 方法及注册 v-popup 组件。
好了,基于Vue+Nuxt自定义弹窗组件就介绍到这里。目前该组件正在Nuxt项目中使用,到时也会分享出来。希望对大家有所帮助!!💪💪
最后附上基于Uniapp+Vue跨端仿抖音|聊天实例项目
https://segmentfault.com/a/1190000020972307







**粗体** _斜体_ [链接](http://example.com) `代码` - 列表 > 引用。你还可以使用@来通知其他用户。