前言
大家好,我是webfansplz.继将 Vue 渲染到嵌入式液晶屏后,今天要跟大家分享的是如何将Vue渲染到命令行工具 :).关于命令行工具,大家应该都比较熟悉了,比如vue-cli、Vite等.我们在编写前端应用面向用户时,通常会非常关注用户体验,作为开发者,我们在使用工具时,它给予我们的开发者体验(DX)我们也会十分关注. 现代前端工程化离不开CLI的开发与使用、那么是否能有较低成本的方案能让前端小伙伴快速开发CLI,大家可以像编写前端应用一样搞定它.因此,Temir应运而生.
Temir
介绍
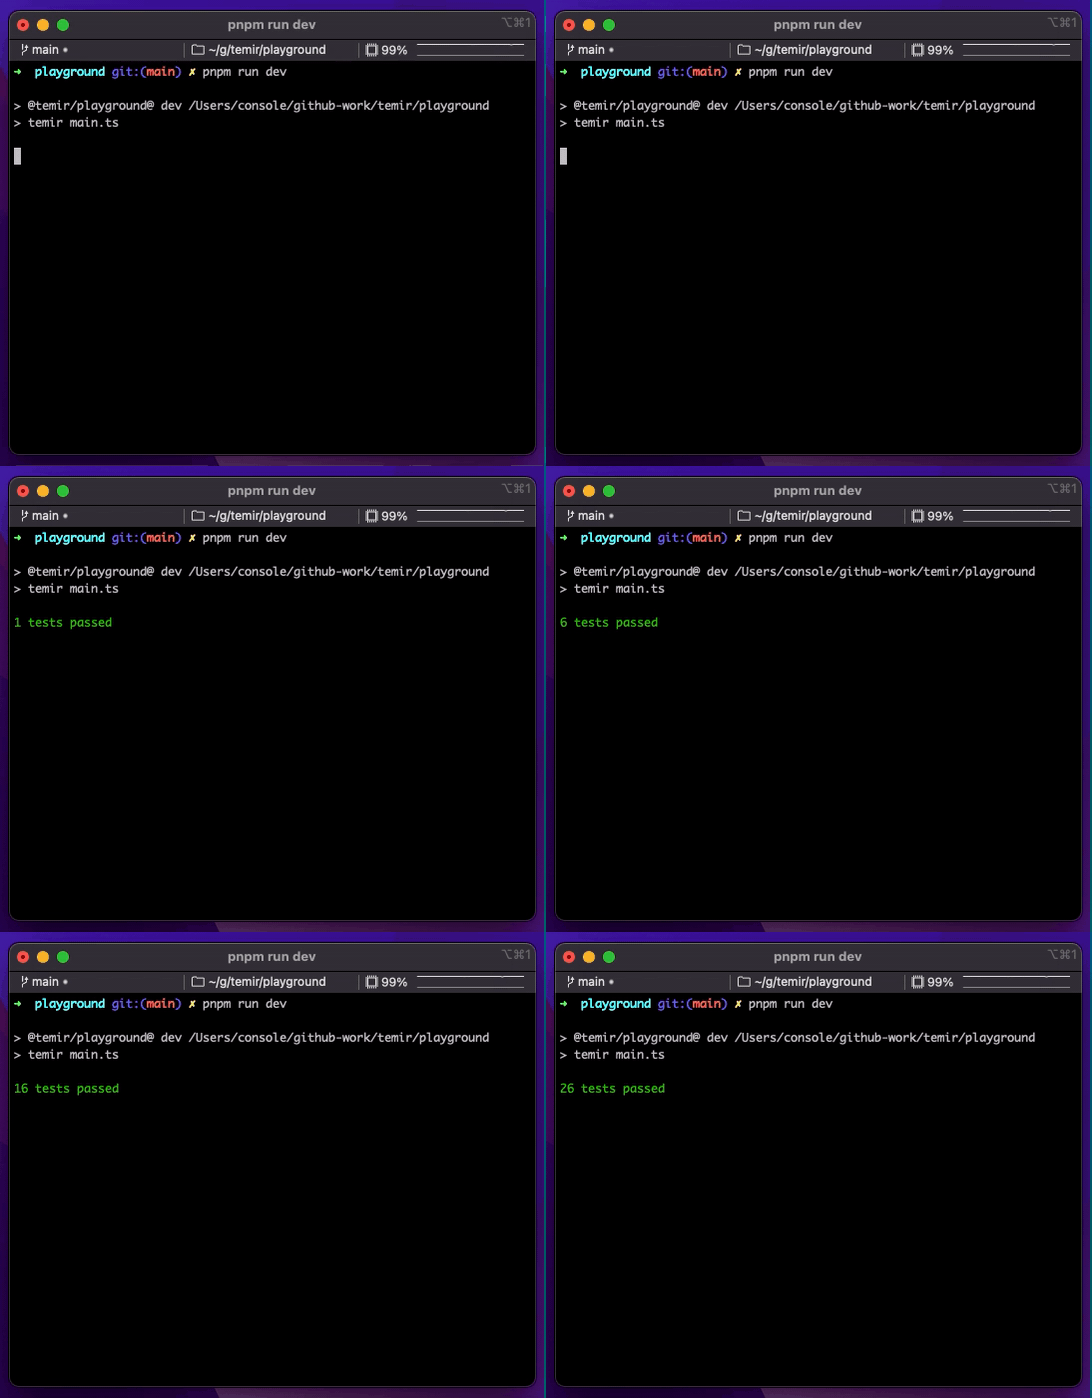
Temir,一个用Vue组件来编写命令行界面应用的工具.开发者只需要使用Vue就可以编写命令行应用,不需要任何额外的学习成本.
<script lang="ts" setup>
import { ref } from '@vue/runtime-core'
import { TBox, TText } from '@temir/core'
const counter = ref(0)
setInterval(() => {
  counter.value++
}, 100)
</script>

<template>
  <TBox>
    <TText color="green">
      {{ counter }} tests passed
    </TText>
  </TBox>
</template>
组件
Temir提供了一些基础组件帮助开发者编写与扩展命令行工具:
文本组件 (Text)
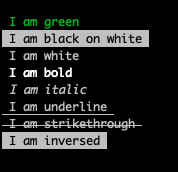
文本组件可以显示文本,将其样式更改为粗体、下划线、斜体或删除线.
<TText color="green">
  I am green
</TText>

<TText color="black" background-color="white">
  I am black on white
</TText>

<TText color="white">
  I am white
</TText>

<TText :bold="true">
  I am bold
</TText>

<TText :italic="true">
  I am italic
</TText>

<TText :underline="true">
  I am underline
</TText>

<TText :strikethrough="true">
  I am strikethrough
</TText>

<TText :inverse="true">
  I am inversed
</TText>
盒子组件 (Box)
<Box>是构建布局必不可少的Temir组件.就像在浏览器中<div style='display: flex'>.它提供了一些构建布局的常用属性,比如尺寸、内外边距、对齐方式等.
<template>
  <TBox justify-content="flex-start">
    <TText>X</TText>
  </TBox>
  // [X      ]

  <TBox justify-content="center">
    <TText>X</TText>
  </TBox>
  // [   X   ]

  <TBox justify-content="flex-end">
    <TText>X</TText>
  </TBox>
  // [      X]

  <TBox justify-content="space-between">
    <TText>X</TText>
    <TText>Y</TText>
  </TBox>
  // [X      Y]

  <TBox justify-content="space-around">
    <TText>X</TText>
    <TText>Y</TText>
  </TBox>
  // [  X   Y  ]
</template>
换行组件 (Newline)
添加一个或多个换行符(\n)。 必须在<Text>组件中使用。
<script>
import { TBox, TNewline, TText } from '@temir/core'
</script>

<template>
  <TBox>
    <TText>
      <TText color="green">
        Hello
      </TText>
      <TNewline />
      <TText color="red">
        World
      </TText>
    </TText>
  </TBox>
</template>
填充组件 (Spacer)
沿其包含布局的主轴展开的灵活空间。 作为填充元素之间所有可用空间的快捷方式,它非常有用。
例如,在具有默认伸缩方向(row)的<Box>中使用<Spacer>将把"Left"定位到左边,并将"Right"推到右边。
<script lang="ts" setup>
import { TBox, TSpacer, TText } from '@temir/core'
</script>

<template>
  <TBox>
    <TText>Left</TText>
    <TSpacer />
    <TText>Right</TText>
  </TBox>
</template>
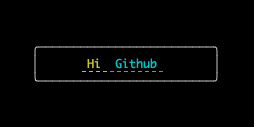
超链接组件 (Link)
<script lang="ts" setup>
import { TBox, TText } from '@temir/core'
import TLink from '@temir/link'
</script>

<template>
  <TBox
    :margin="5"
    width="20"
    border-style="round"
    justify-content="center"
  >
    <TLink url="https://github.com">
      <TText color="yellow">
        Hi
      </TText>
      <TText color="cyan">
        Github
      </TText>
    </TLink>
  </TBox>
</template>
加载中组件 (Spinner)
<script lang="ts" setup>
import { TBox, TText } from '@temir/core'
import TSpinner from '@temir/spinner'
</script>

<template>
  <TBox
    :margin="5"
    width="20"
    border-style="round"
    justify-content="center"
  >
    <TText>
      <TText color="yellow">
        <TSpinner />
      </TText>
      Loading
    </TText>
  </TBox>
</template>
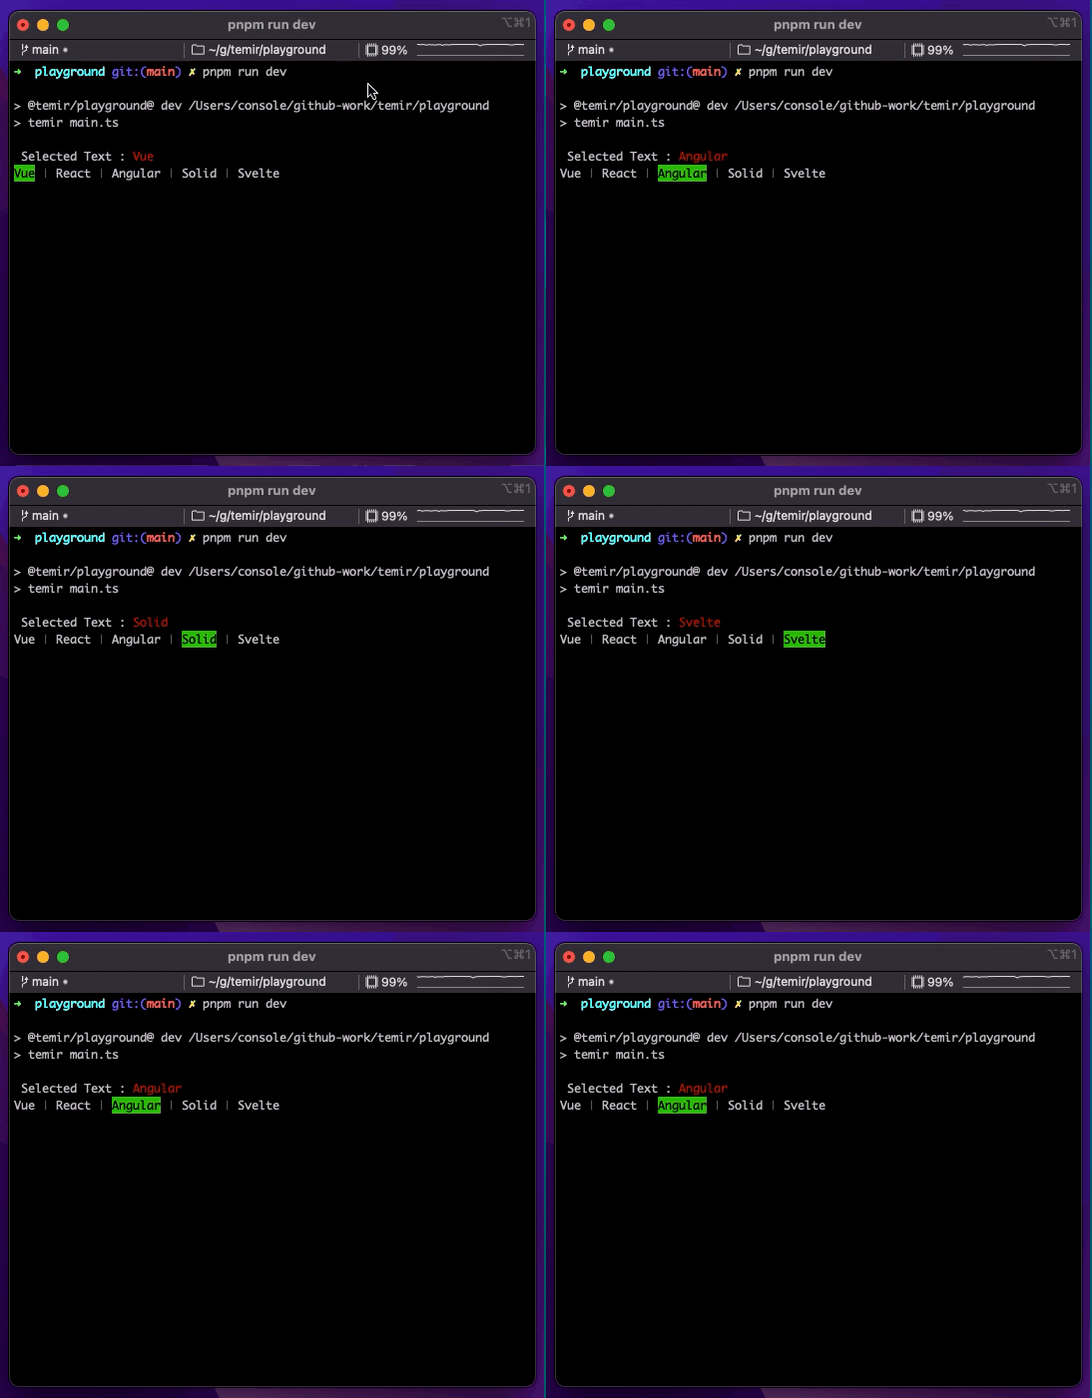
标签页组件 (Tab)
<script lang="ts" setup>
import { computed, ref } from '@vue/runtime-core'
import { TBox, TText } from '@temir/core'
import { TTab, TTabs } from '@temir/tab'

const tabs = ['Vue', 'React', 'Angular', 'Solid', 'Svelte']
const activeIndex = ref(0)
const selectedText = computed(() => tabs[activeIndex.value])
</script>

<template>
  <TBox>
    <TText>
      Selected Text :
      <TText color="red">
        {{ selectedText }}
      </TText>
    </TText>
  </TBox>

  <TBox>
    <TTabs :on-change="(index) => activeIndex = +index">
      <TTab v-for="item in tabs" :key="item">
        {{ item }}
      </TTab>
    </TTabs>
  </TBox>
</template>
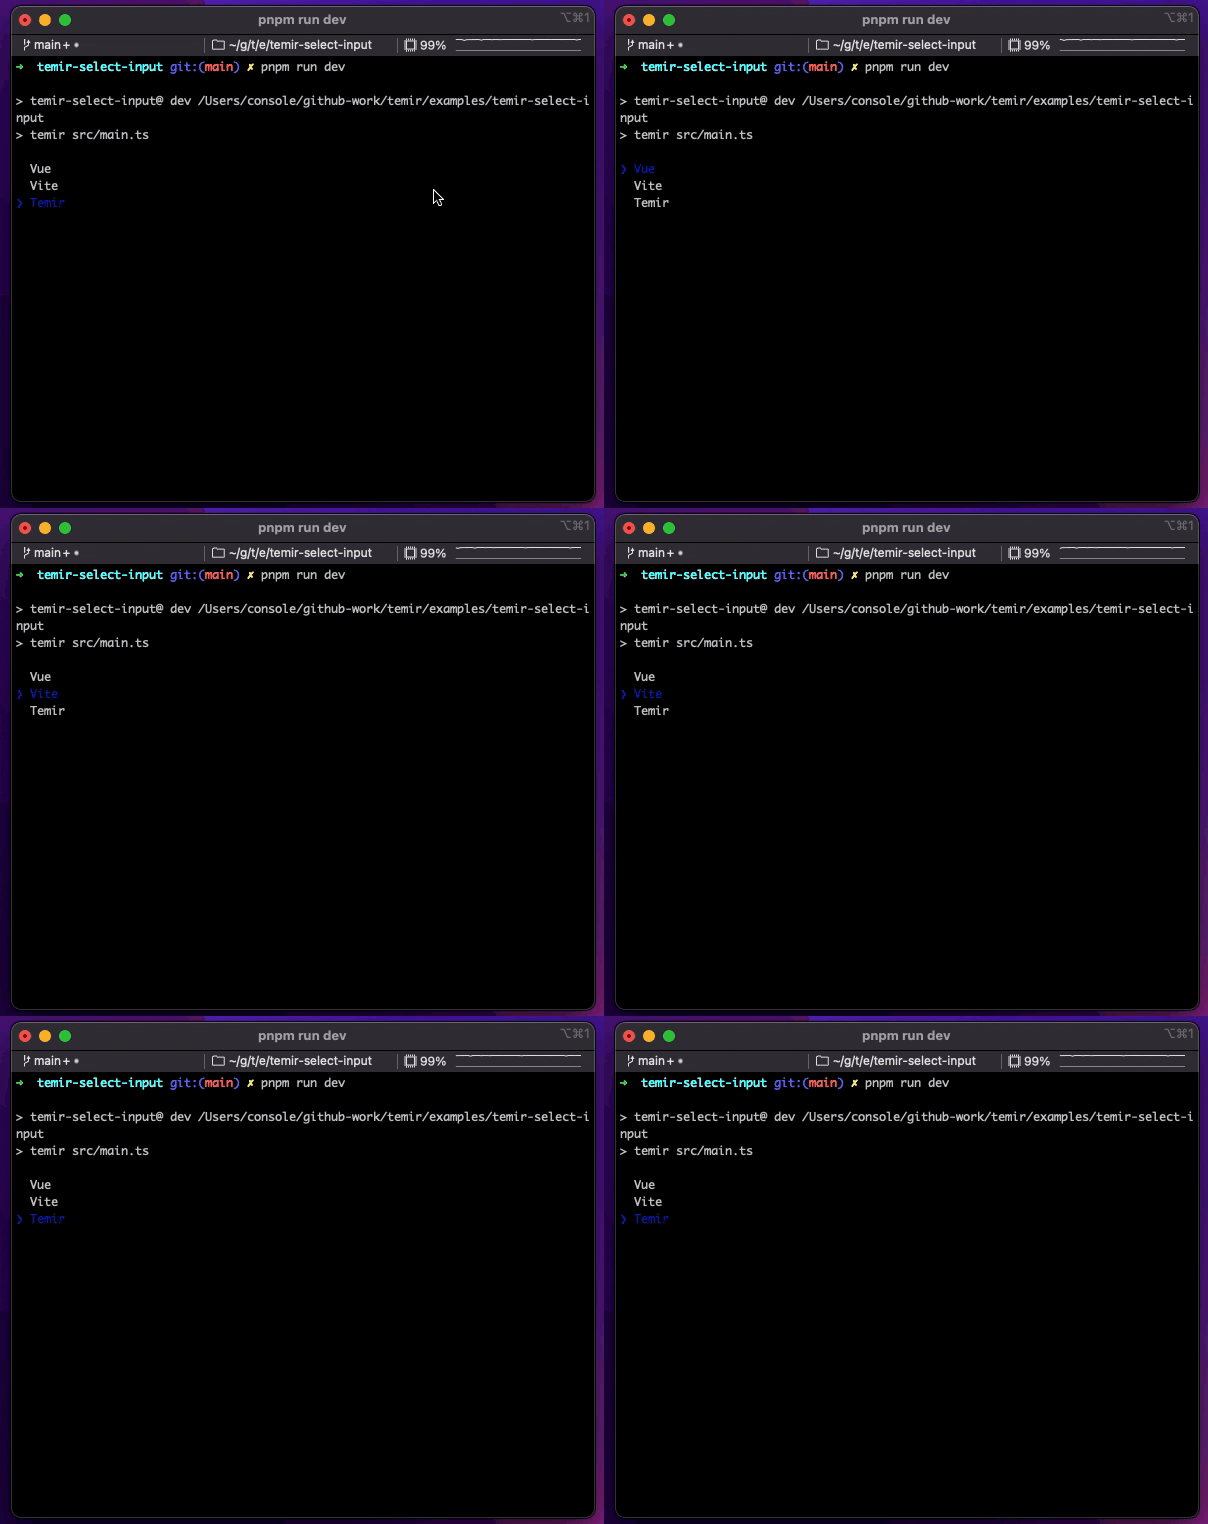
选择组件
<script lang="ts" setup>
import TSelectInput from '@temir/select-input'

const items = [
  {
    label: 'Vue',
    value: 'Vue',
  },
  {
    label: 'Vite',
    value: 'Vite',
  },
  {
    label: 'Temir',
    value: 'Temir',
  },
]
function onSelect(value) {
  console.log('selected', value)
}
</script>

<template>
  <TSelectInput :items="items" :on-select="onSelect" />
</template>
安装
npm install @temir/core使用
<script lang="ts" setup>
import { ref } from '@vue/runtime-core'
import { TBox, TText } from '@temir/core'
const counter = ref(0)
setInterval(() => {
  counter.value++
}, 100)
</script>

<template>
  <TBox>
    <TText color="green">
      {{ counter }} tests passed
    </TText>
  </TBox>
</template>
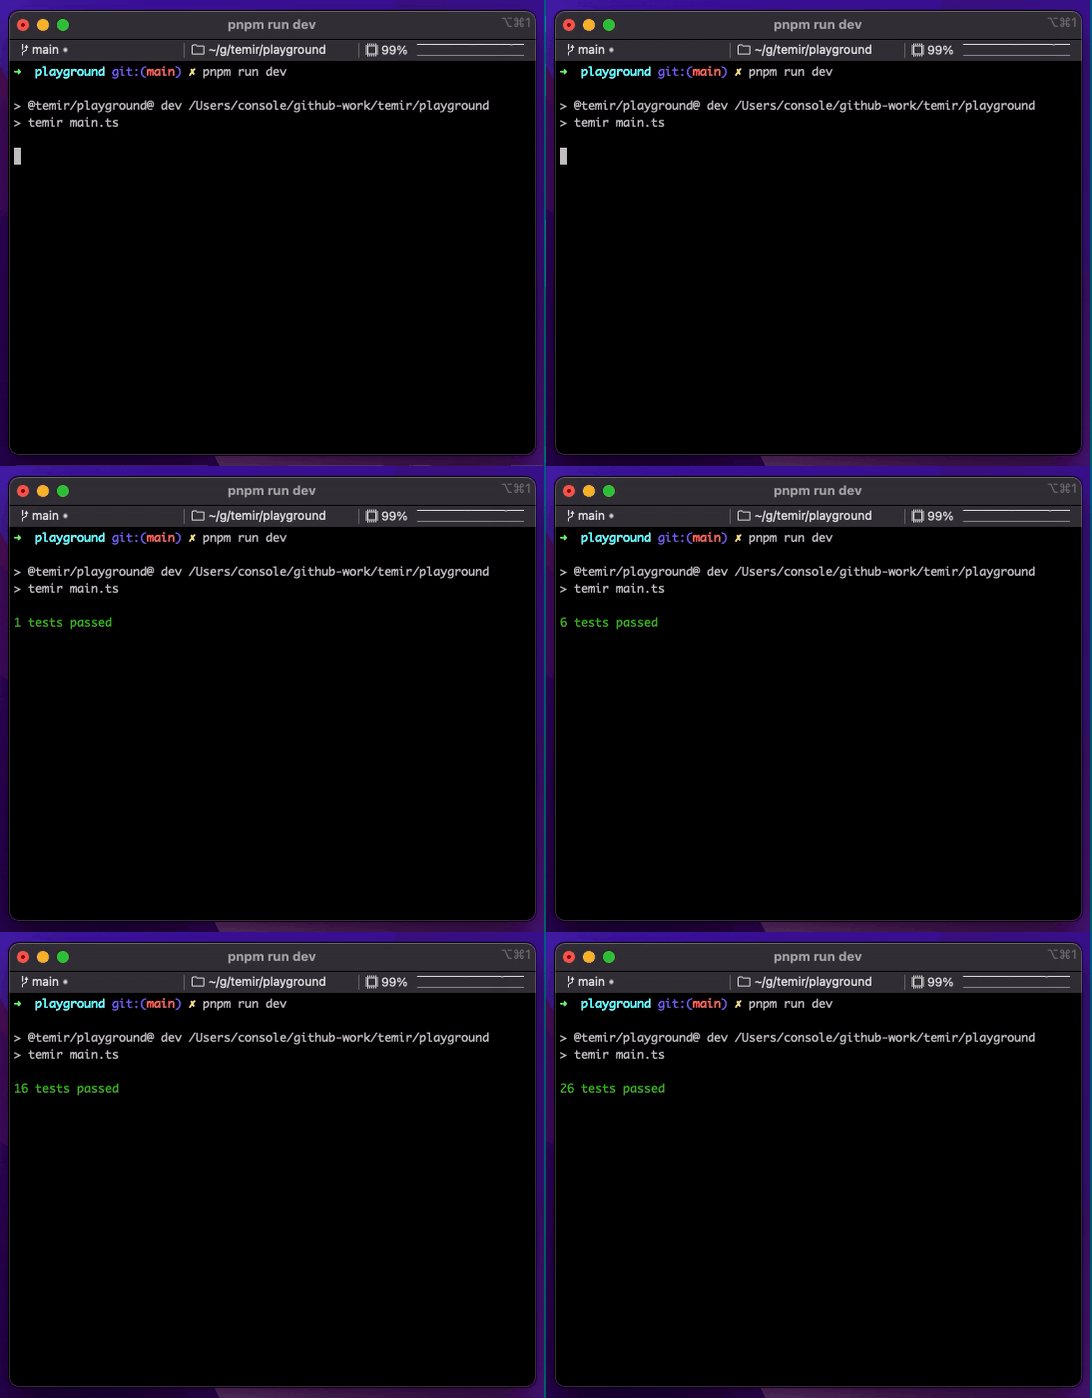
HMR支持
前面我们提到了开发者体验(DX),在现在的前端工程中,对开发者很有帮助且提效的就是HMR,这么香的东西Temir没有理由不拥有它,话不多说,直接展示:
开箱即用
使用Temir定制化CLI非常简单,我们提供了@temir/cli帮助你快速构建一个基于Temir的CLI.
mkdir my-temir-cli

cd my-temir-cli

touch main.ts

npm install @temir/cl

# Dev (开发)

temir main.ts

# Build (打包)

temir build main.ts
你可以通过下载这个 例子 来快速开始,你也可以打开 repl.it sandbox来在线体验和尝试它。
演示
Hi Temir
Borders
Table
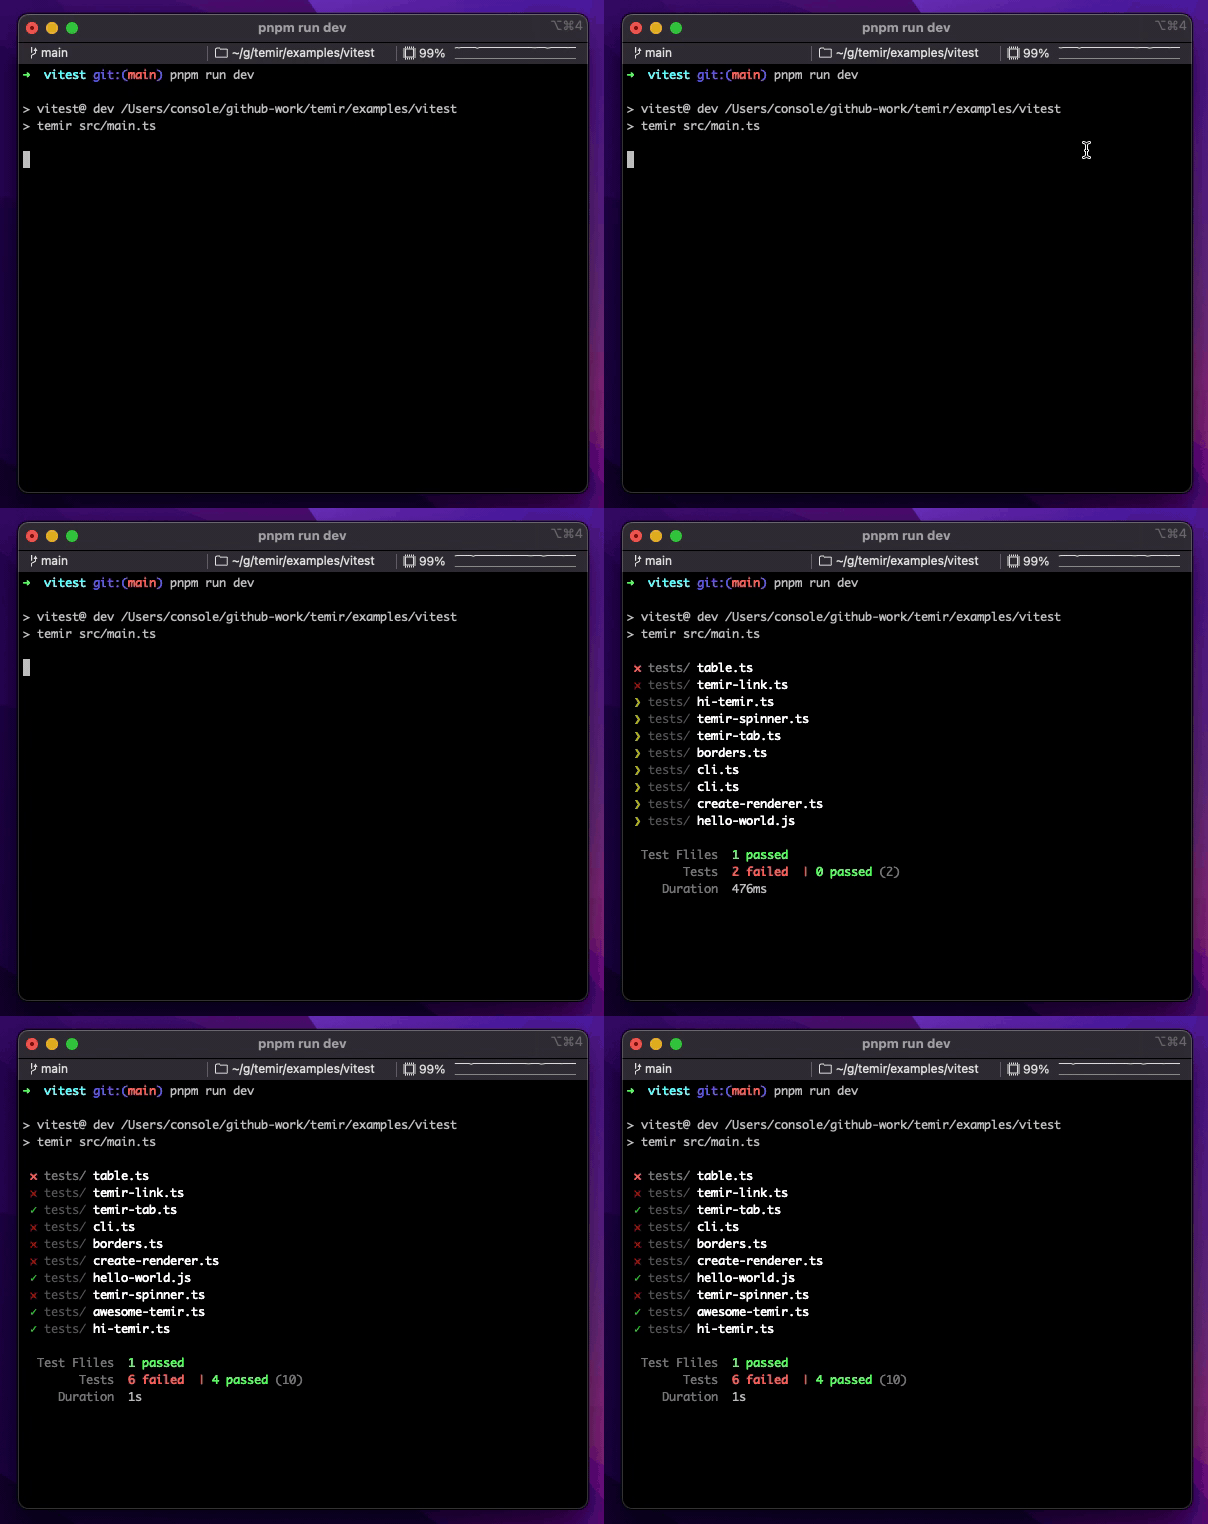
Vitest
实现
- createRenderer
Temir的实现主要得益于Vue3出色的跨平台能力,我们可以通过createRenderer API创建一个自定义渲染器,通过创建宿主环境中对应的Node和Element,并对元素进行增删改查操作.
- Yoga
Vue提供了跑在命令行界面的接口,那我们就还缺少一个布局引擎就能把Vue
跑在命令行工具了.Temir使用了Yoga,一款Flexbox布局引擎.使用你在构建浏览器应用时使用过的类似CSS的属性,为你的CLI构建出色的用户界面。
致谢
结语
文章到这里就结束了,如果我的文章和项目对你有所启发和帮助,请给一个star支持作者 ✌





**粗体** _斜体_ [链接](http://example.com) `代码` - 列表 > 引用。你还可以使用@来通知其他用户。